
Lemon cheesecake yoghurt bars bring together everything that makes a classic lemon cheesecake so appealing, in a form that is easier to bake, easier to chill, easier to slice, and easier to serve. Each bar has a crisp, buttery biscuit base, a thick layer of creamy lemon filling, and a clean, bright finish that tastes fresh rather than heavy. The lemon flavour runs right through the filling, from the zest folded into the batter to the juice that gives the bars their gentle tang, while the yoghurt lightens the texture so every bite feels smooth, cool, and balanced. These lemon cheesecake yoghurt bars work beautifully as a make-ahead dessert, a contribution to a shared table, or a quiet treat with a cup of tea, because the bar format removes the pressure of slicing a whole round cheesecake at the table. You can cut neat squares, arrange them on a plate, and let guests help themselves, and the bars hold their shape well once chilled.
The appeal of lemon cheesecake yoghurt bars lies in the contrast between the parts. The base is firm and slightly crumbly, with a toasted butter flavour that grounds the brighter filling. The filling itself is soft without being loose, rich without being cloying, and lemony without being sharp. When the bars are served cold, the filling firms up into a dense, creamy slice that still melts softly on the tongue, and the lemon aroma is at its most inviting. A few fresh berries, a spoonful of softly whipped cream, or a dusting of finely grated lemon zest can turn a simple square into a polished dessert plate, yet the bars need no decoration at all to taste complete. That flexibility is part of their charm: lemon cheesecake yoghurt bars are simple enough for a weekday bake and refined enough for a celebration table.
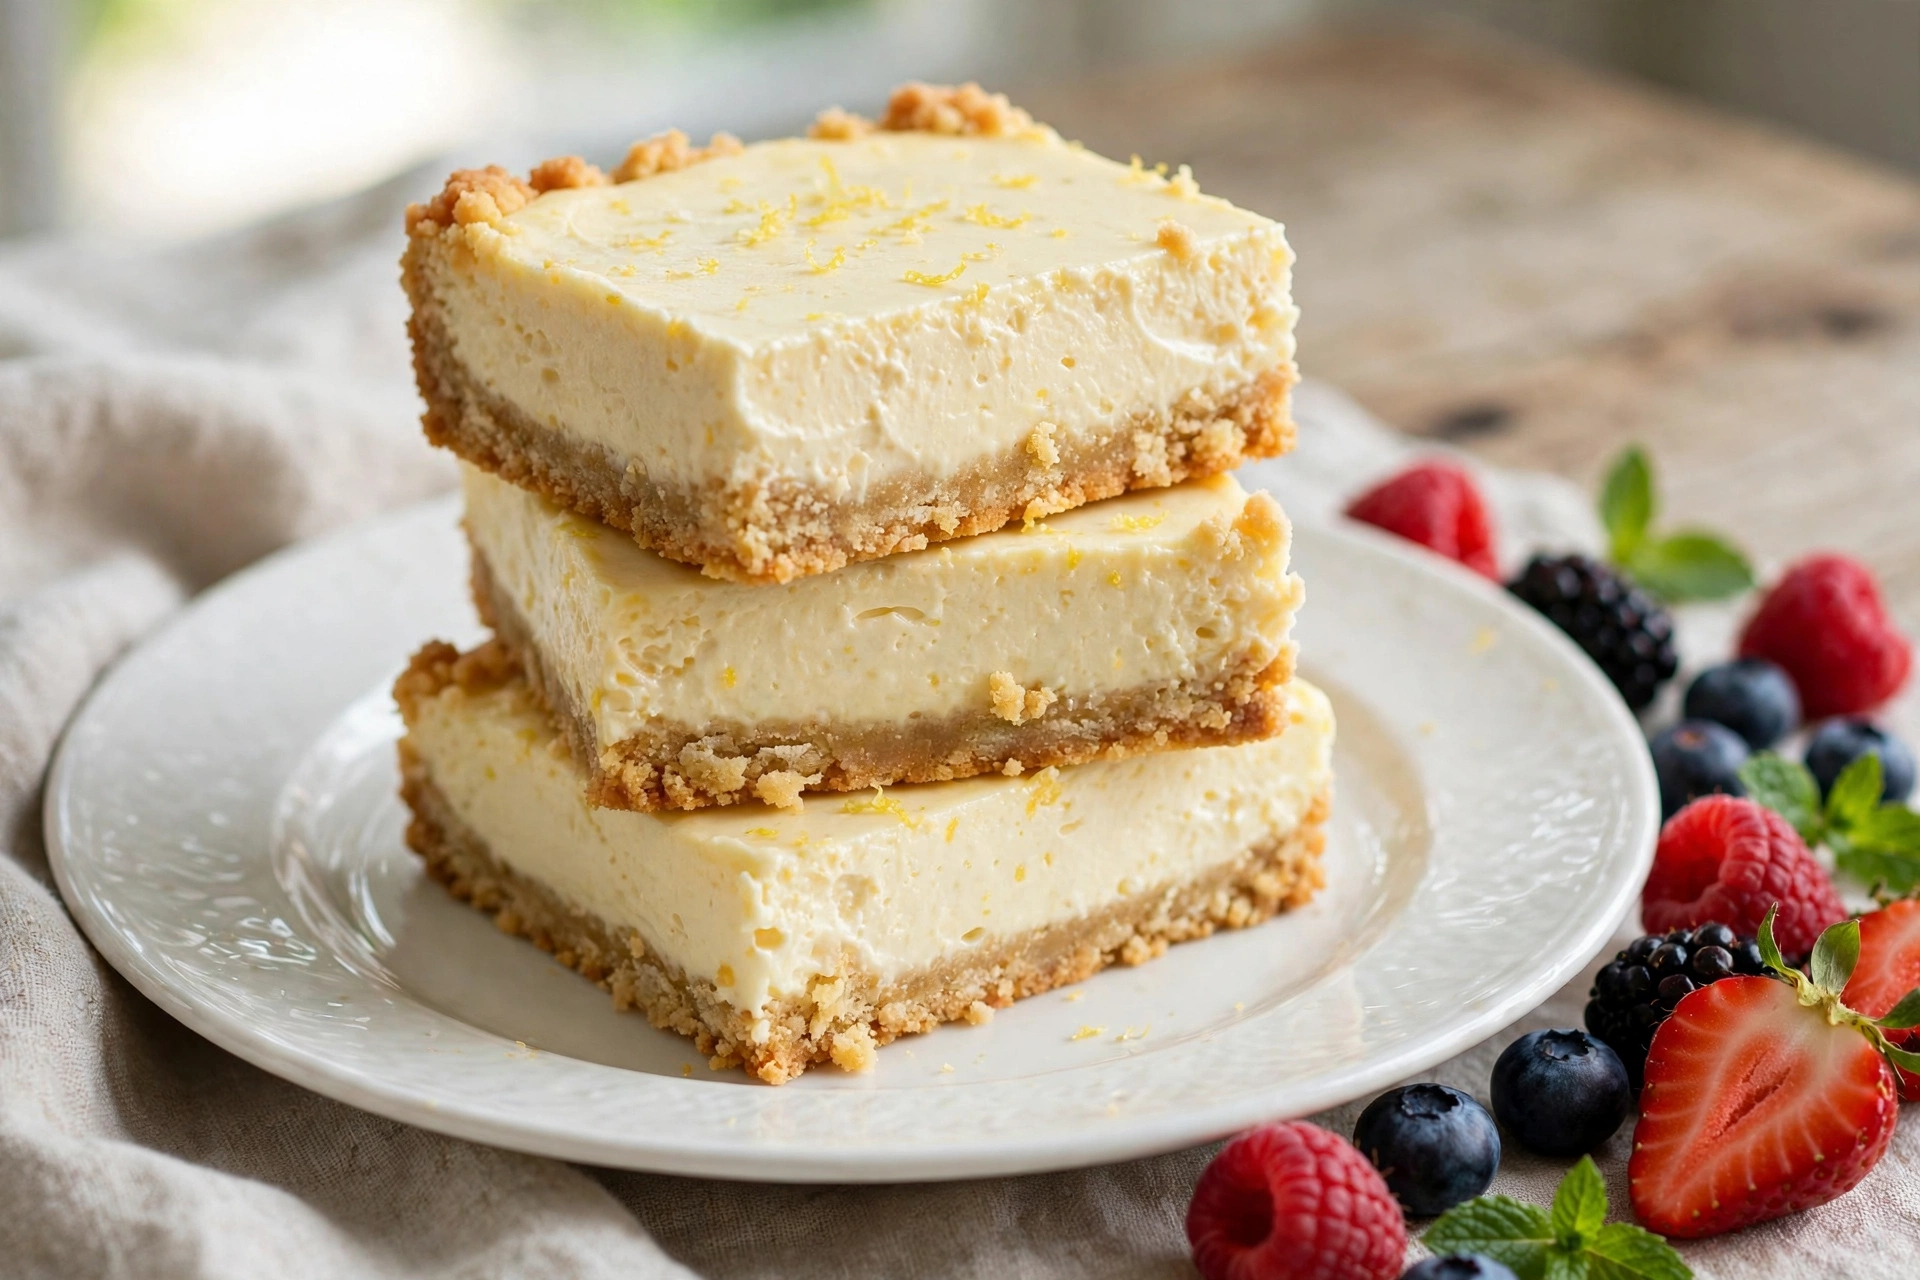
For home bakers, lemon cheesecake yoghurt bars also solve several common cheesecake worries. There is no springform tin to leak, no water bath to manage, and no large cake to crack across the top. Baking in a square tin gives the filling a shallower depth, so it cooks more evenly and cools more predictably. Chilling in the tin keeps the bars supported while they set, and lifting the whole slab out on its lining paper makes slicing straightforward. Even if the top is not perfectly smooth, the bars still look beautiful once cut, because the pale golden filling and the darker biscuit base create a clean, two-layer look. With a little care over temperatures, mixing, and chilling time, you can expect reliable results every time.
Also Read : Light Jello Dessert Recipe (Low-Calorie Berry Treat)
This guide explains lemon cheesecake yoghurt bars in full detail, from choosing the right cream cheese and yoghurt to pressing the base, mixing the filling, judging when the bake is done, cooling and chilling, and cutting clean squares. You will find selection tips for every ingredient, a step-by-step method with temperatures and visual cues, troubleshooting advice for cracks and soggy bases, six variations including a no-bake note and a gluten-free base, serving ideas for afternoon tea and picnics, and storage and freezing guidance. The recipe card at the end gathers the quantities, timings, and instructions in one place for easy reference in the kitchen, and the answers to twelve frequently asked questions cover the choices that most often cause uncertainty. Read through the whole method once before starting, gather the ingredients at room temperature where noted, and allow the full four hours of chilling time so the bars can set properly.
Why This Recipe Works
Lemon cheesecake yoghurt bars work because the filling balances richness, tang, structure, and moisture in proportions that suit a shallow bar bake. Full-fat cream cheese provides the body and the classic cheesecake flavour, while Greek yoghurt adds a fresh tang and a lighter, silkier texture. Used on its own, cream cheese can taste very rich in a bar, especially when served cold, and the filling can feel dense after a few bites. Greek yoghurt loosens that richness just enough, without thinning the batter so much that it fails to set. The result is a filling that slices cleanly, holds its shape on a plate, and still feels creamy rather than heavy. The yoghurt also reinforces the lemon tang, so the citrus flavour tastes layered and natural instead of one-dimensional.
Lemon juice and lemon zest play different roles, and both matter for lemon cheesecake yoghurt bars. Juice supplies the bright acidity that cuts through the cream cheese and sugar, giving the bars their refreshing character. Zest supplies the aromatic lemon oils that sit in the skin of the fruit, and those oils carry the perfume that makes lemon desserts smell so appealing before the first bite. Using juice alone can leave the flavour sharp but flat, while using zest alone can leave the filling fragrant but lacking in tang. Together, they create a full lemon profile that is present in the aroma, the first taste, and the clean finish. Fresh lemons are essential here, because bottled juice lacks the same fresh aroma and can taste harsh in a delicate filling.
The baked texture of lemon cheesecake yoghurt bars is another reason this recipe works so well. Baking gently sets the eggs and cornflour into a soft, stable structure, so the bars firm up without needing gelatine. A baked filling also develops a subtle depth that a purely set filling does not have, with a very light golden colour at the edges and a smooth, even interior. At the same time, the yoghurt and the moderate baking temperature protect the filling from becoming dry or rubbery, provided the bars are not over-baked. The centre should still have a slight wobble when the tin comes out of the oven, because it will continue to set as it cools. That residual heat is part of the design, not a sign that the bars are underdone, and understanding that wobble is the key to a creamy rather than cracked result.
The base stays crisp because it is pressed firmly, baked briefly before the filling goes on, and protected from excess moisture during the main bake. Digestive biscuits crushed to fine crumbs and bound with melted butter form a compact layer that can support a wet filling without turning soft. Pre-baking the base for a short time drives off moisture and helps the butter set the crumbs into a coherent slab. Once the filling is added, the moderate oven temperature and the relatively short bake mean the base is not steamed for long, and cooling the bars in the tin, then chilling them uncovered only after they reach room temperature, avoids trapping steam against the biscuit layer. Slicing with a hot, dry knife also helps, because a clean cut does not drag filling down into the base or compress the crumbs.
Finally, the bar format itself helps lemon cheesecake yoghurt bars succeed. A square tin spreads the filling thinly and evenly, so the centre and the edges bake at a more similar rate than they would in a deep round cake. Portioning is built into the shape, which makes the bars ideal for serving a crowd, packing for a picnic, or freezing in individual portions. Leftovers keep well because each bar is a self-contained serving, and the chilled texture actually improves after a few hours in the fridge as the flavours settle and the filling firms fully. For bakers who love cheesecake but want a more forgiving, practical bake, lemon cheesecake yoghurt bars offer the same creamy satisfaction with far less fuss.
Ingredients Explained
Every ingredient in lemon cheesecake yoghurt bars has a clear job, and choosing well at this stage makes the rest of the bake much easier. The list is short, which means the quality of each ingredient shows, so take a moment to check freshness, fat content, and temperature before mixing. The quantities below yield twelve bars from a twenty centimetre square tin, and the same quantities appear in the recipe card at the end of this article.
Digestive biscuits, two hundred grams, form the base. Digestive biscuits give a lightly sweet, wheaty, slightly salty crumb that pairs naturally with lemon, and they crush into crumbs that bind well with butter. Graham crackers are a good substitute where digestive biscuits are not available, and they give a slightly sweeter, more honeyed base. Choose plain digestive biscuits rather than chocolate-coated or filled varieties, because coatings change the crumb texture and add sweetness that can unbalance the lemon filling. Crush the biscuits finely and evenly, with no large pieces remaining, so the base presses into a smooth, even layer. A food processor makes this quick, while a sealed bag and a rolling pin give more control and work perfectly well if you crush in stages and shake the bag between passes.
Butter, one hundred grams, melted, binds the biscuit crumbs and gives the base its rich flavour and crisp set. Unsalted butter is the best choice, because it lets you control the salt level and avoids a base that tastes noticeably salty against the tangy filling. Melt the butter gently until just liquid, without browning it, and mix it thoroughly through the crumbs so every crumb is lightly coated. Too little butter leaves a base that crumbles when sliced, while too much butter leaves a greasy layer that can soften under the filling. One hundred grams for two hundred grams of biscuits is a reliable ratio for a firm base that still cuts cleanly. Allow the melted butter to cool slightly before mixing, so it coats the crumbs without making them steamy or clumpy.
Cream cheese, four hundred and fifty grams, full-fat, is the backbone of the filling. Full-fat cream cheese gives the dense, creamy body that defines cheesecake, and it sets more reliably than low-fat versions, which contain more water and can leave the filling soft or grainy. Choose plain cream cheese in block form where possible, rather than a spreadable tub version, because block cream cheese is firmer and lower in added water, which helps the bars set cleanly. Bring the cream cheese to room temperature before mixing, which usually takes about thirty to forty-five minutes out of the fridge depending on kitchen warmth. Room-temperature cream cheese beats smooth with far less effort, blends evenly with the yoghurt and sugar, and greatly reduces the risk of lumps in the finished bars. Cold cream cheese, by contrast, resists mixing and can leave small white flecks that never fully disappear during baking.
Greek yoghurt, two hundred grams, full-fat, lightens the filling and adds tang. Greek yoghurt is strained, so it is thicker than plain yoghurt and carries less whey, which means it enriches the filling without making it watery. Full-fat Greek yoghurt is strongly recommended, because low-fat yoghurt is thinner and more acidic in a way that can weaken the set and sharpen the flavour unevenly. Use plain, unsweetened Greek yoghurt with no added flavourings, and check that it is fresh and not close to its use-by date, since yoghurt that is overly sour will dominate the lemon flavour. Stir the yoghurt briefly before measuring, so any liquid on the surface is recombined, and add it at room temperature alongside the cream cheese for the smoothest blend. The yoghurt is what makes lemon cheesecake yoghurt bars taste lighter than a traditional cheesecake, so its quality matters more than its quantity might suggest.
Eggs, two large, provide structure and help the filling set during baking. Eggs bind the cream cheese and yoghurt into a stable, sliceable filling, and their proteins firm up gently in the oven to give the bars their characteristic soft set. Use large eggs at room temperature, because cold eggs can stiffen the batter and mix unevenly, and room-temperature eggs incorporate more smoothly into the cream cheese mixture. Add the eggs one at a time, beating just until each one disappears, rather than beating vigorously for a long time, because excess air in the batter can cause the filling to rise and then sink or crack as it cools. Check that the eggs are fresh, and crack each one into a small bowl first if you want to avoid any shell in the batter. Two eggs are enough for this quantity of filling; adding a third would make the bars firmer and more cake-like, which would lose some of the creamy quality that makes these bars appealing.
Sugar, one hundred and fifty grams of caster sugar, sweetens the filling and balances the lemon acidity. Caster sugar dissolves quickly into the cream cheese mixture, which helps avoid a grainy texture, and its fine crystals blend smoothly without needing long beating. Granulated sugar can be used if caster sugar is unavailable, but beat a little longer to help it dissolve, and expect a very slightly less smooth batter. The sugar level here is calibrated for two lemons worth of juice and zest: enough to round off the sharpness, but not so much that the bars taste overly sweet or lose their refreshing edge. Do not reduce the sugar dramatically in an attempt to make the bars lighter, because sugar also contributes to the filling texture and helps it set softly rather than rubbery. If you prefer a tangier bar, adjust by adding a little extra zest rather than cutting the sugar.
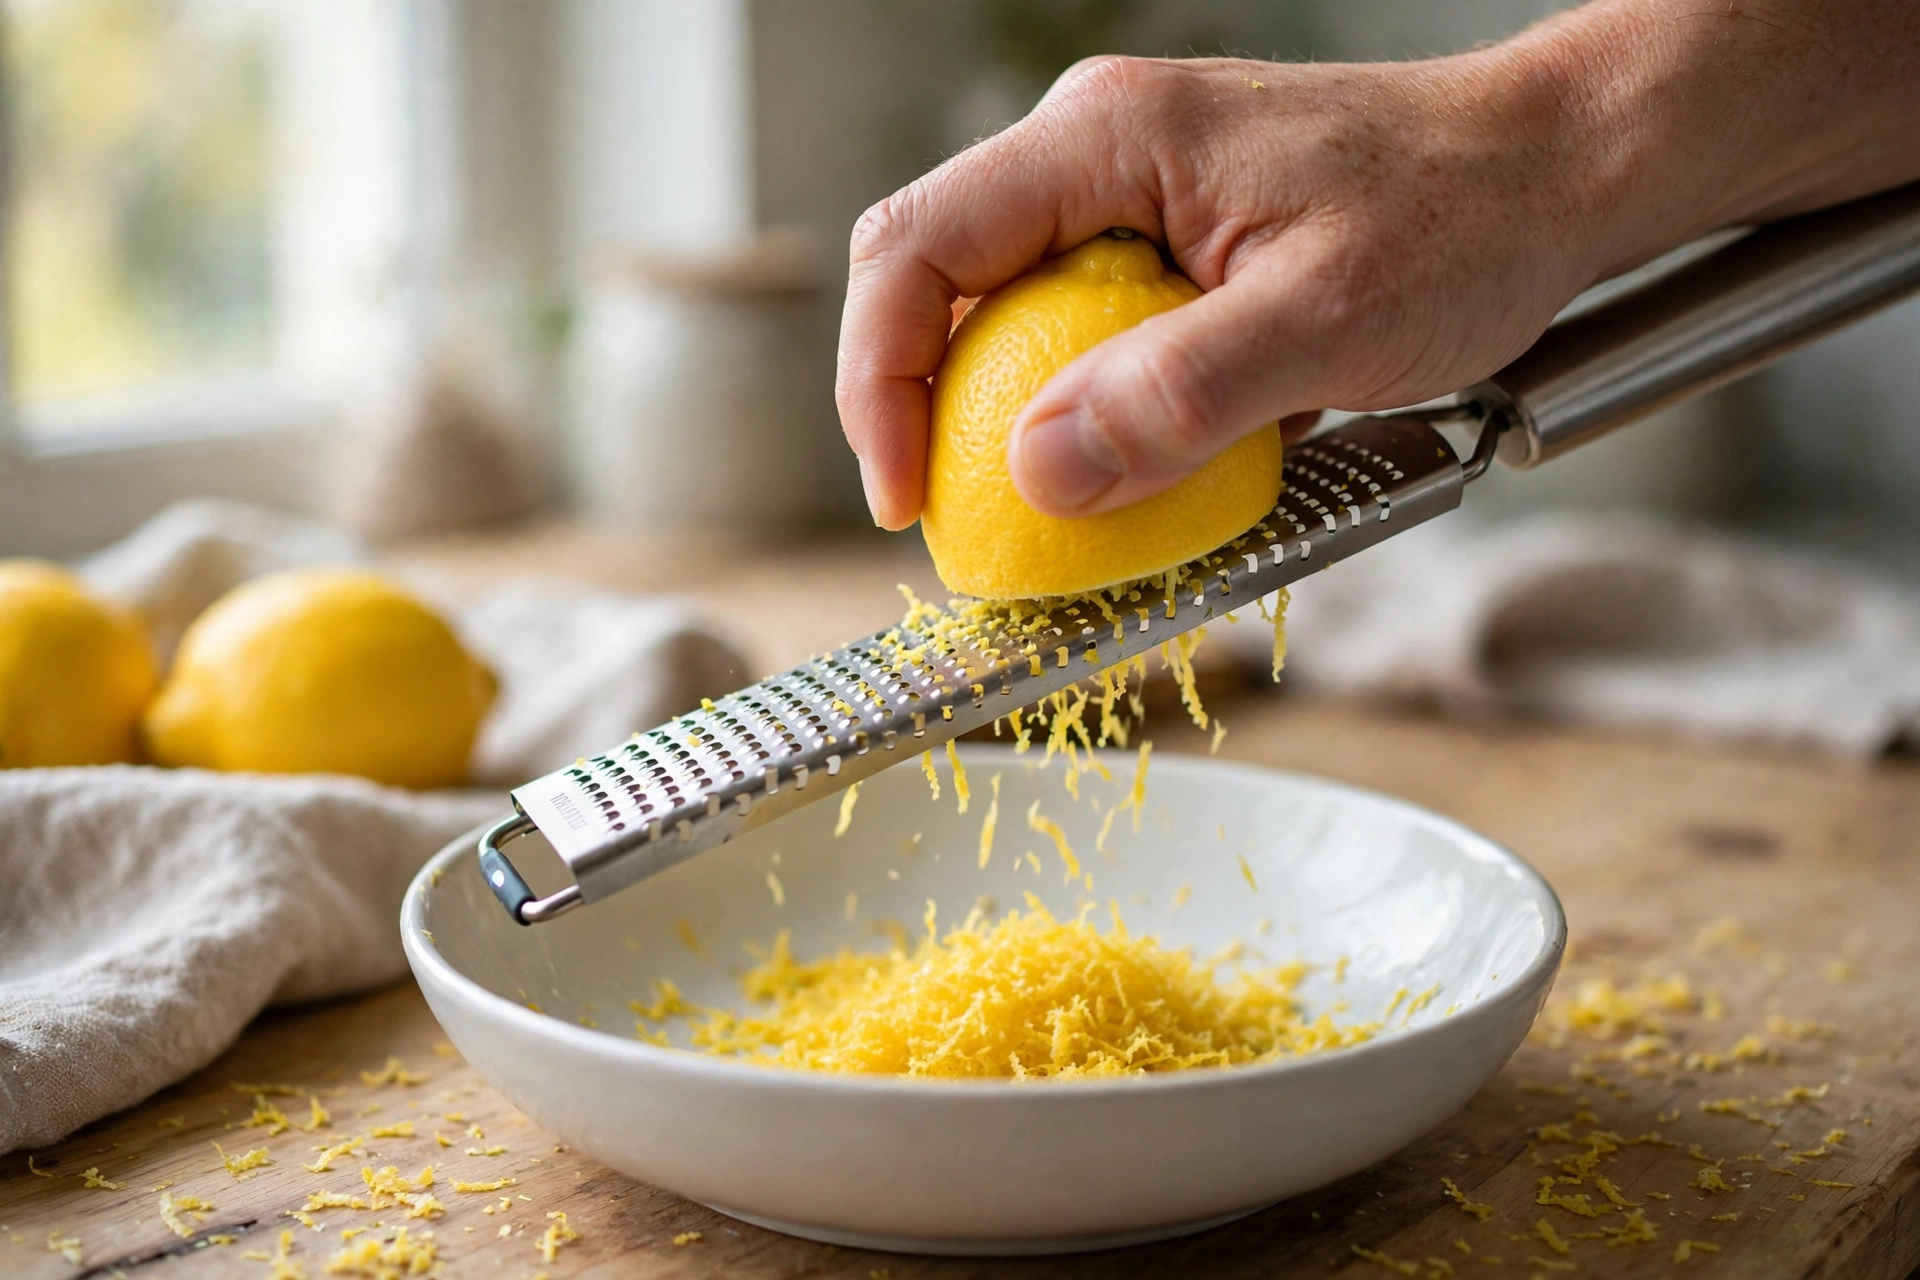
Lemons, two large, unwaxed if possible, supply both juice and zest. For lemon cheesecake yoghurt bars, fresh lemons are non-negotiable, because the zest carries the aromatic oils that define the flavour. Choose lemons that feel heavy for their size, with bright, firm skin and no soft spots, since heavy lemons tend to be juicier. Roll each lemon firmly on the work surface before juicing to help release more juice, and zest before cutting and juicing, because a whole lemon is far easier to zest than a squeezed half. Use only the bright yellow outer layer of the skin, stopping before the white pith underneath, which tastes bitter and can spoil an otherwise clean lemon flavour. Two large lemons should give roughly eighty millilitres of juice and about two tablespoons of finely grated zest, which is the right amount for a bright but balanced filling. Taste awareness matters: lemons vary in sharpness, so if your lemons are especially tart, the zest still provides aroma without adding extra acidity.
Vanilla, one teaspoon of vanilla extract, rounds out the flavour and softens the sharp edges of the lemon. Vanilla does not compete with lemon when used in this small amount; instead, it adds warmth and depth in the background, making the filling taste more complete and less one-note. Use real vanilla extract rather than imitation essence where possible, because extract gives a cleaner, more natural flavour that suits a delicate dairy filling. Add the vanilla with the yoghurt and lemon, so it disperses evenly through the batter. A vanilla bean, split and scraped, can replace the extract if preferred, using the seeds from half a bean, but extract is simpler and entirely reliable here. Avoid adding more vanilla than stated, because a strong vanilla flavour can mute the lemon brightness that is the point of the bars.
Cornflour, one tablespoon, helps the filling set smoothly and guards against cracking. Cornflour, also known as cornstarch in some regions, absorbs a small amount of moisture and gives the baked filling a slightly more stable structure, without making it starchy or heavy when used in this modest quantity. Sift the cornflour before adding it, or whisk it into the sugar first, so it disperses evenly and does not form lumps in the batter. The cornflour works alongside the eggs, so the filling sets with a gentle firmness rather than relying on eggs alone, which can sometimes give a more rubbery texture if over-baked. Do not increase the cornflour substantially, because too much will make the filling chalky and dull the creamy mouthfeel. One tablespoon is the right balance for lemon cheesecake yoghurt bars: enough insurance for a clean slice, not enough to change the texture.
A pinch of fine salt, while not a headline ingredient, is worth including because it sharpens the other flavours. Salt in a sweet filling does not make the bars taste salty; it makes the lemon taste brighter, the butter taste richer, and the sweetness taste more rounded. Add just a small pinch, about an eighth of a teaspoon, with the sugar, and stir it through evenly. If using salted butter for the base, omit any extra salt from the base mixture and keep the pinch only in the filling. This small detail lifts the whole bar and is easy to overlook, so include it deliberately rather than treating it as optional.
Equipment Needed
Lemon cheesecake yoghurt bars need only standard kitchen equipment, and no specialist cheesecake tin is required. A twenty centimetre square baking tin with straight sides gives the twelve-bar yield in the recipe card and the even depth that helps the filling bake uniformly. A loose-based tin makes lifting easier, but a solid tin lined well works just as well. Line the tin with baking paper, leaving an overhang on two opposite sides, so the whole slab can be lifted out for slicing. The overhang acts as handles and prevents the bars from breaking when removed, so do not trim the paper flush with the tin.
You will also need a food processor or a sealed plastic bag and rolling pin for crushing the biscuits, a small saucepan or microwave-safe bowl for melting butter, and a large mixing bowl for the filling. An electric hand mixer or stand mixer makes beating the cream cheese smooth much easier, although a sturdy wooden spoon and some patience can work if the cream cheese is fully at room temperature. A rubber spatula is essential for scraping the bowl and folding the batter evenly, because unmixed cream cheese at the bottom of the bowl is a common cause of lumps. A fine grater or microplane gives the finest lemon zest, which disperses best, while a citrus juicer or reamer helps extract the most juice with the least effort. Measuring scales give the most reliable results for the biscuits, butter, cream cheese, and yoghurt, while measuring spoons cover the vanilla and cornflour. A sharp, long kitchen knife and a jug of hot water are needed later for clean slicing, and a wire rack is needed for cooling. Finally, cling film or a well-fitting lid protects the bars in the fridge without pressing on the surface.
Must Read : Fudgy Brownie Recipe (Crackly Top, Gooey Center)
Detailed Step-by-Step Method
Read the method through once, preheat the oven, and prepare the tin before mixing anything, because the base needs to go into the oven promptly once pressed and the filling mixes best when the ingredients are already at room temperature. Set the oven to one hundred and seventy degrees Celsius for a conventional oven, or one hundred and sixty degrees Celsius for a fan oven, and position a rack in the centre of the oven. Line the twenty centimetre square tin with baking paper, pressing it into the corners and leaving an overhang on two sides. Take the cream cheese, Greek yoghurt, and eggs out of the fridge at least thirty minutes before mixing, so they lose their chill and blend smoothly.
Start with the biscuit base. Crush two hundred grams of digestive biscuits to fine, even crumbs, using a food processor in short pulses or a sealed bag and rolling pin, checking for any larger pieces and crushing them again. Tip the crumbs into a bowl and pour over one hundred grams of melted, slightly cooled butter. Stir with a spoon or spatula until every crumb looks damp and the mixture holds together when pressed between your fingers. If dry patches remain, stir for a little longer rather than adding extra butter, because the crumbs need time to absorb the fat evenly. Tip the mixture into the lined tin and spread it out with the back of a spoon, then press it down firmly and evenly, paying attention to the corners and edges where the base is most likely to be thin. Use the flat base of a measuring cup or a small glass to compact the crumbs into a smooth, level layer about half a centimetre thick. A firmly pressed base is the foundation for clean slicing, so take a full minute over this step rather than rushing it.
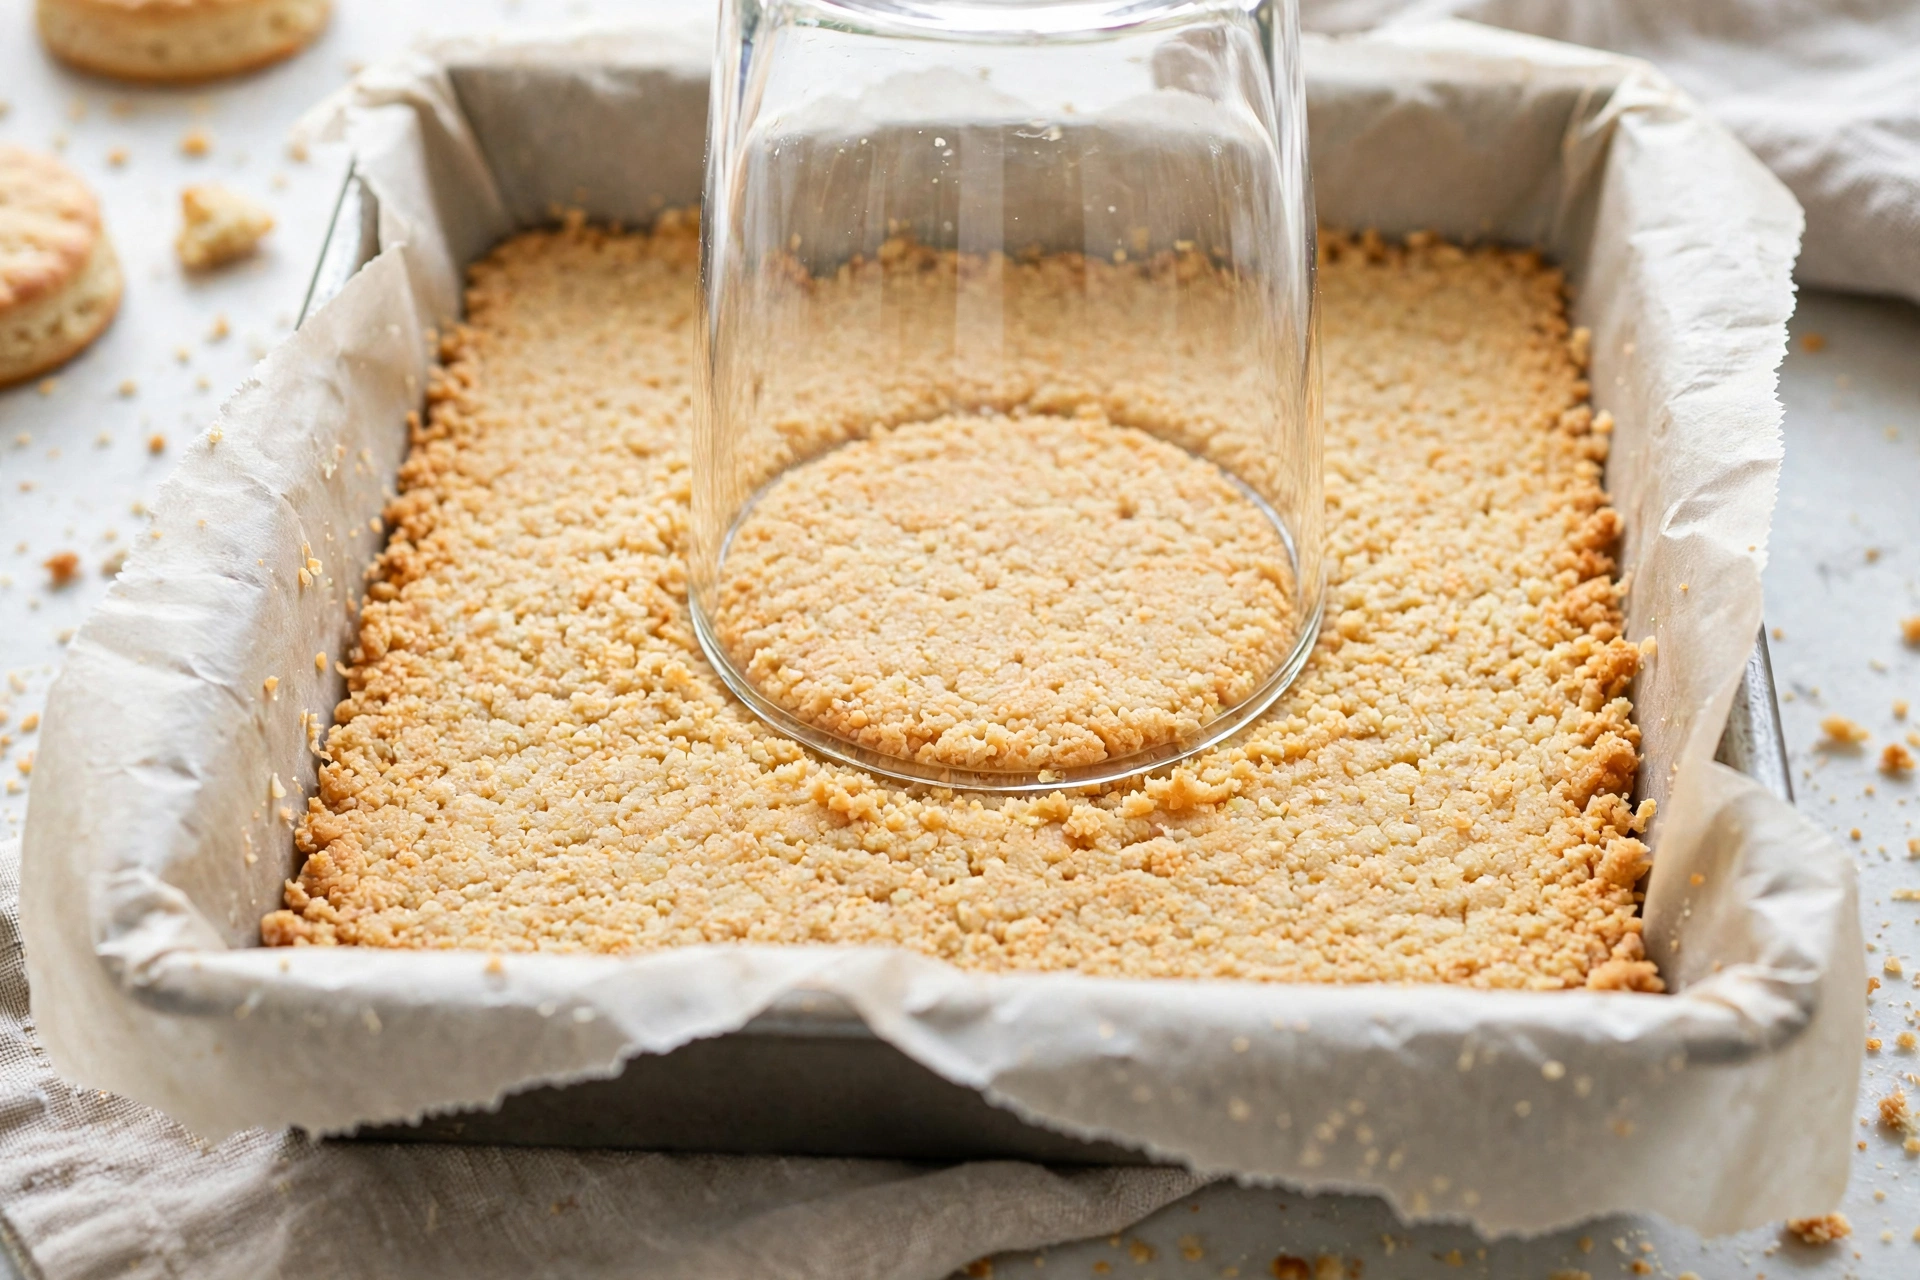
Pre-bake the base for ten minutes in the preheated oven, until it looks slightly darker, feels firm to a gentle touch, and smells toasted and buttery. This short bake sets the butter and drives off surface moisture, which is what keeps the base crisp under the filling. Remove the tin from the oven and leave the base to cool for about ten minutes while you make the filling, keeping the oven on at the same temperature. Do not pour filling onto a piping-hot base, because the heat can start cooking the bottom of the filling unevenly, but do not let the base go completely cold either, since a slightly warm base helps the layers bond. A base that is warm rather than hot, and firm rather than soft, is ready for the filling.
Make the filling by placing four hundred and fifty grams of room-temperature full-fat cream cheese in a large bowl with one hundred and fifty grams of caster sugar and a pinch of fine salt. Beat on a low to medium speed, or stir vigorously by hand, until the mixture is completely smooth, pale, and free of lumps, scraping down the sides and base of the bowl halfway through. This initial beating is the best time to remove lumps, because later additions make lumps harder to work out, so do not rush it. Add two hundred grams of full-fat Greek yoghurt, the finely grated zest of two lemons, eighty millilitres of fresh lemon juice, and one teaspoon of vanilla extract. Beat on low speed just until combined, scraping the bowl again, so the mixture stays smooth without incorporating excess air. Sift one tablespoon of cornflour over the bowl, or whisk it into the mixture thoroughly, and beat briefly until no white streaks remain.
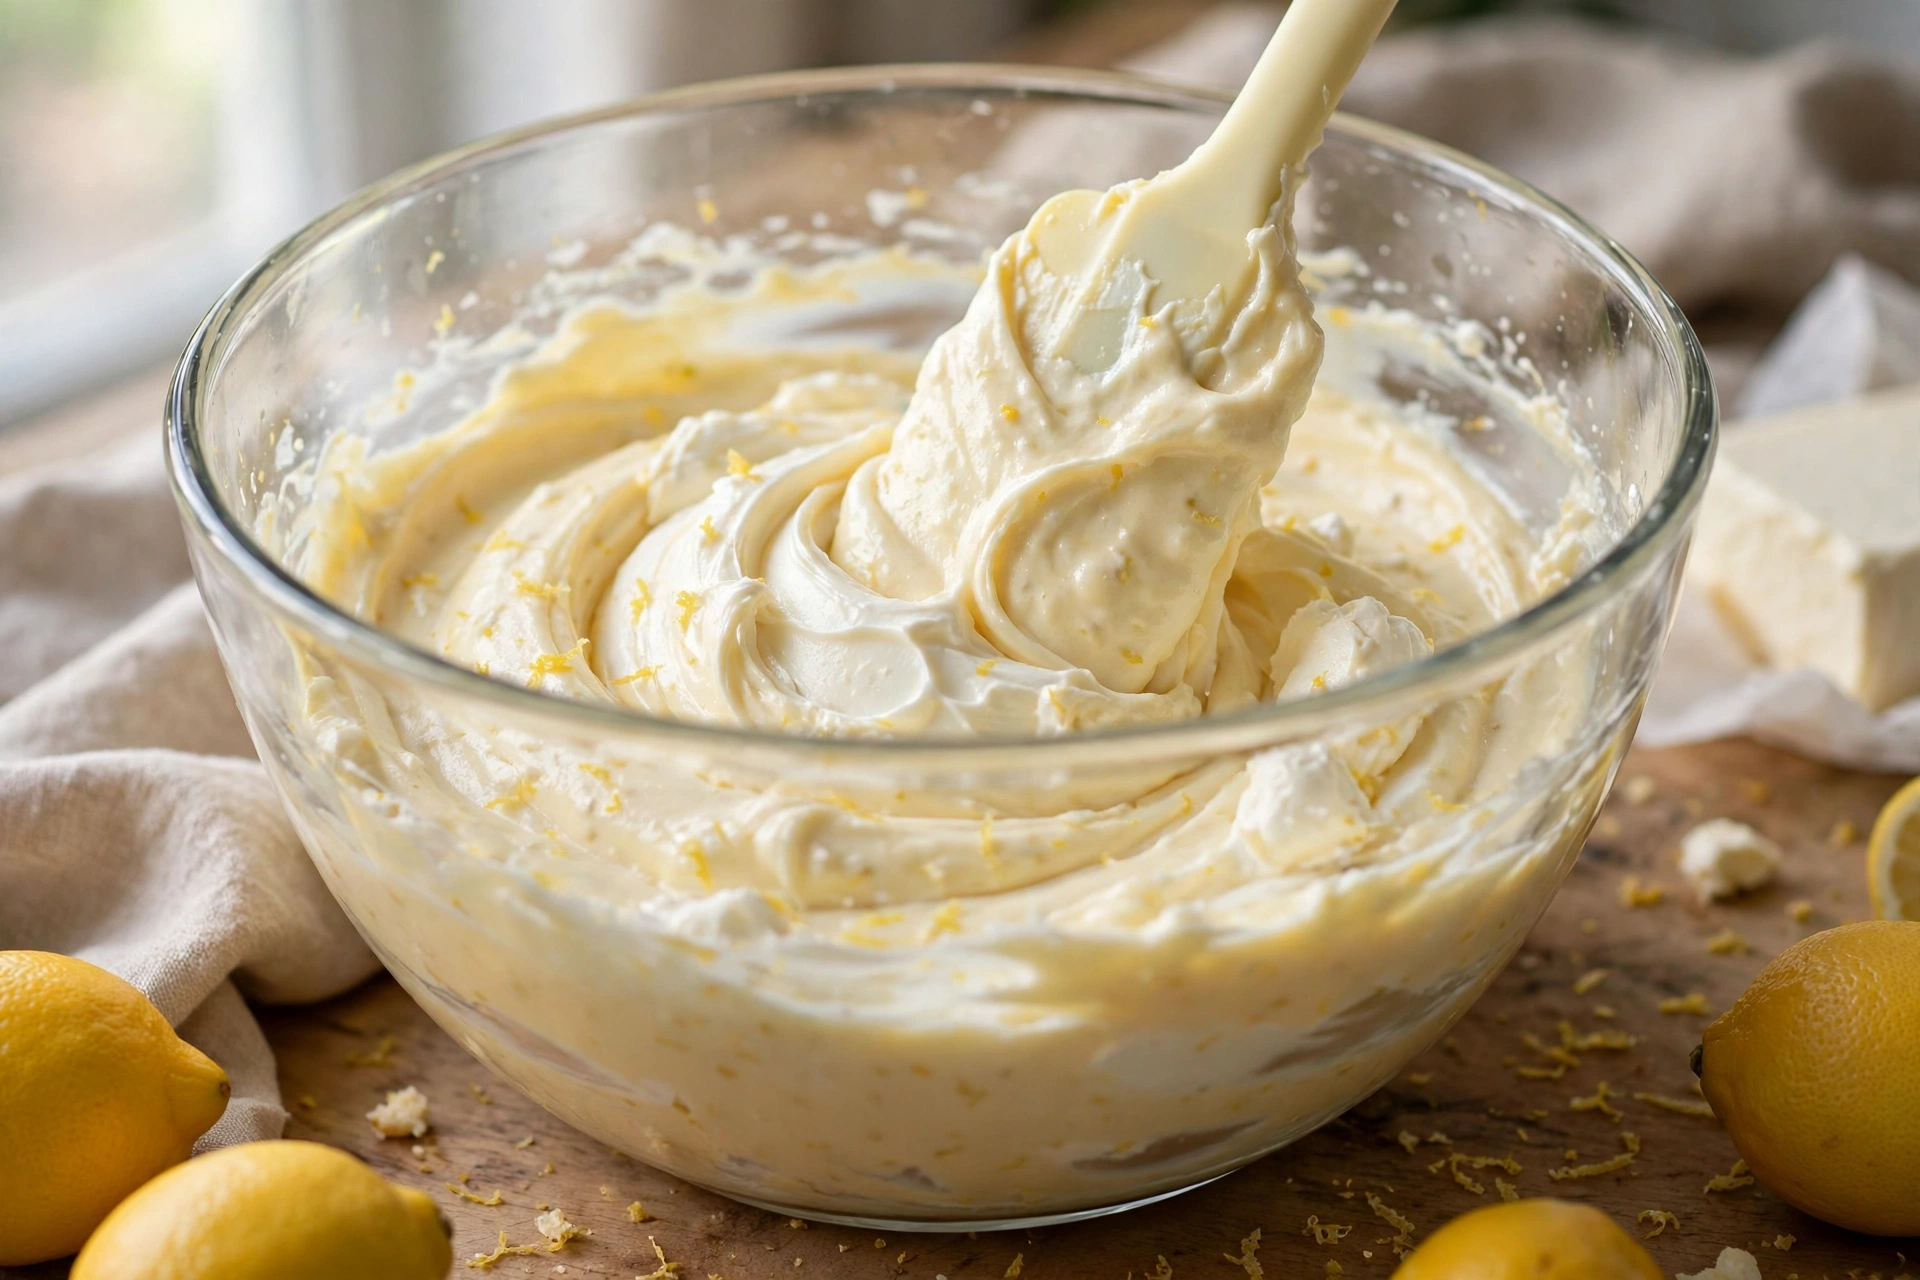
Add the eggs one at a time, beating on low speed just until each egg disappears into the batter before adding the next. The batter should look thick, glossy, smooth, and pale lemon in colour, with a pouring consistency that is thick enough to hold its shape briefly when spooned. Avoid beating on high speed or for a long time at this stage, because vigorous beating whips air into the filling, and trapped air expands in the oven and then contracts as the bars cool, which encourages cracks and a sunken centre. If any lumps remain, press them gently against the side of the bowl with a spatula rather than increasing the mixer speed. Taste is not a reliable check at this stage because the batter contains raw egg, so judge by appearance and texture: smooth, lump-free, and evenly lemon-coloured throughout.
Pour the filling over the pre-baked base and spread it gently with a spatula into the corners, taking care not to disturb the biscuit layer underneath. Tap the tin lightly on the work surface two or three times to release any large air bubbles, and smooth the top with the spatula or the back of a spoon. Pop any visible surface bubbles with the tip of a knife or a cocktail stick, because bubbles that remain can leave small holes in the finished top. Place the tin in the centre of the oven and bake for thirty-five minutes at the same temperature used for the base. During baking, the filling will puff slightly, the edges will set and turn a very pale golden colour, and the centre will remain slightly soft. Do not open the oven door repeatedly to check, because temperature drops can disturb the set, and do not be tempted to extend the bake until the centre looks fully firm.
Judge doneness by the wobble test rather than by colour alone. After thirty-five minutes, gently shake the tin from side to side: the outer two to three centimetres should look set and move only slightly as a whole, while the centre, roughly the size of a small saucer, should wobble softly like set jelly. That soft centre will firm up as the bars cool, and it is the sign of a creamy filling rather than an over-baked one. If the whole surface ripples like liquid, return the tin to the oven for a further five minutes and test again. If the top has already coloured noticeably golden or started to crack, remove the tin promptly, because further baking will only dry the filling. Oven temperatures vary, so note how your oven behaves for future bakes, and trust the wobble more than the clock alone.
Cooling is as important as baking for lemon cheesecake yoghurt bars. Turn the oven off and leave the tin inside with the door slightly ajar for about thirty minutes, if your oven allows this safely, so the temperature falls gradually and the filling settles without a sudden drop that can cause cracking. If leaving the tin in the oven is not practical, place it on a wire rack in a draught-free spot instead, away from cold windows or open doors. After the initial cooling period, leave the bars on the rack at room temperature for a further hour, until the tin feels cool to the touch and the filling has firmed noticeably. Do not cut the bars at this stage, even if they look set, because the interior still needs chilling time to reach a clean slicing texture.
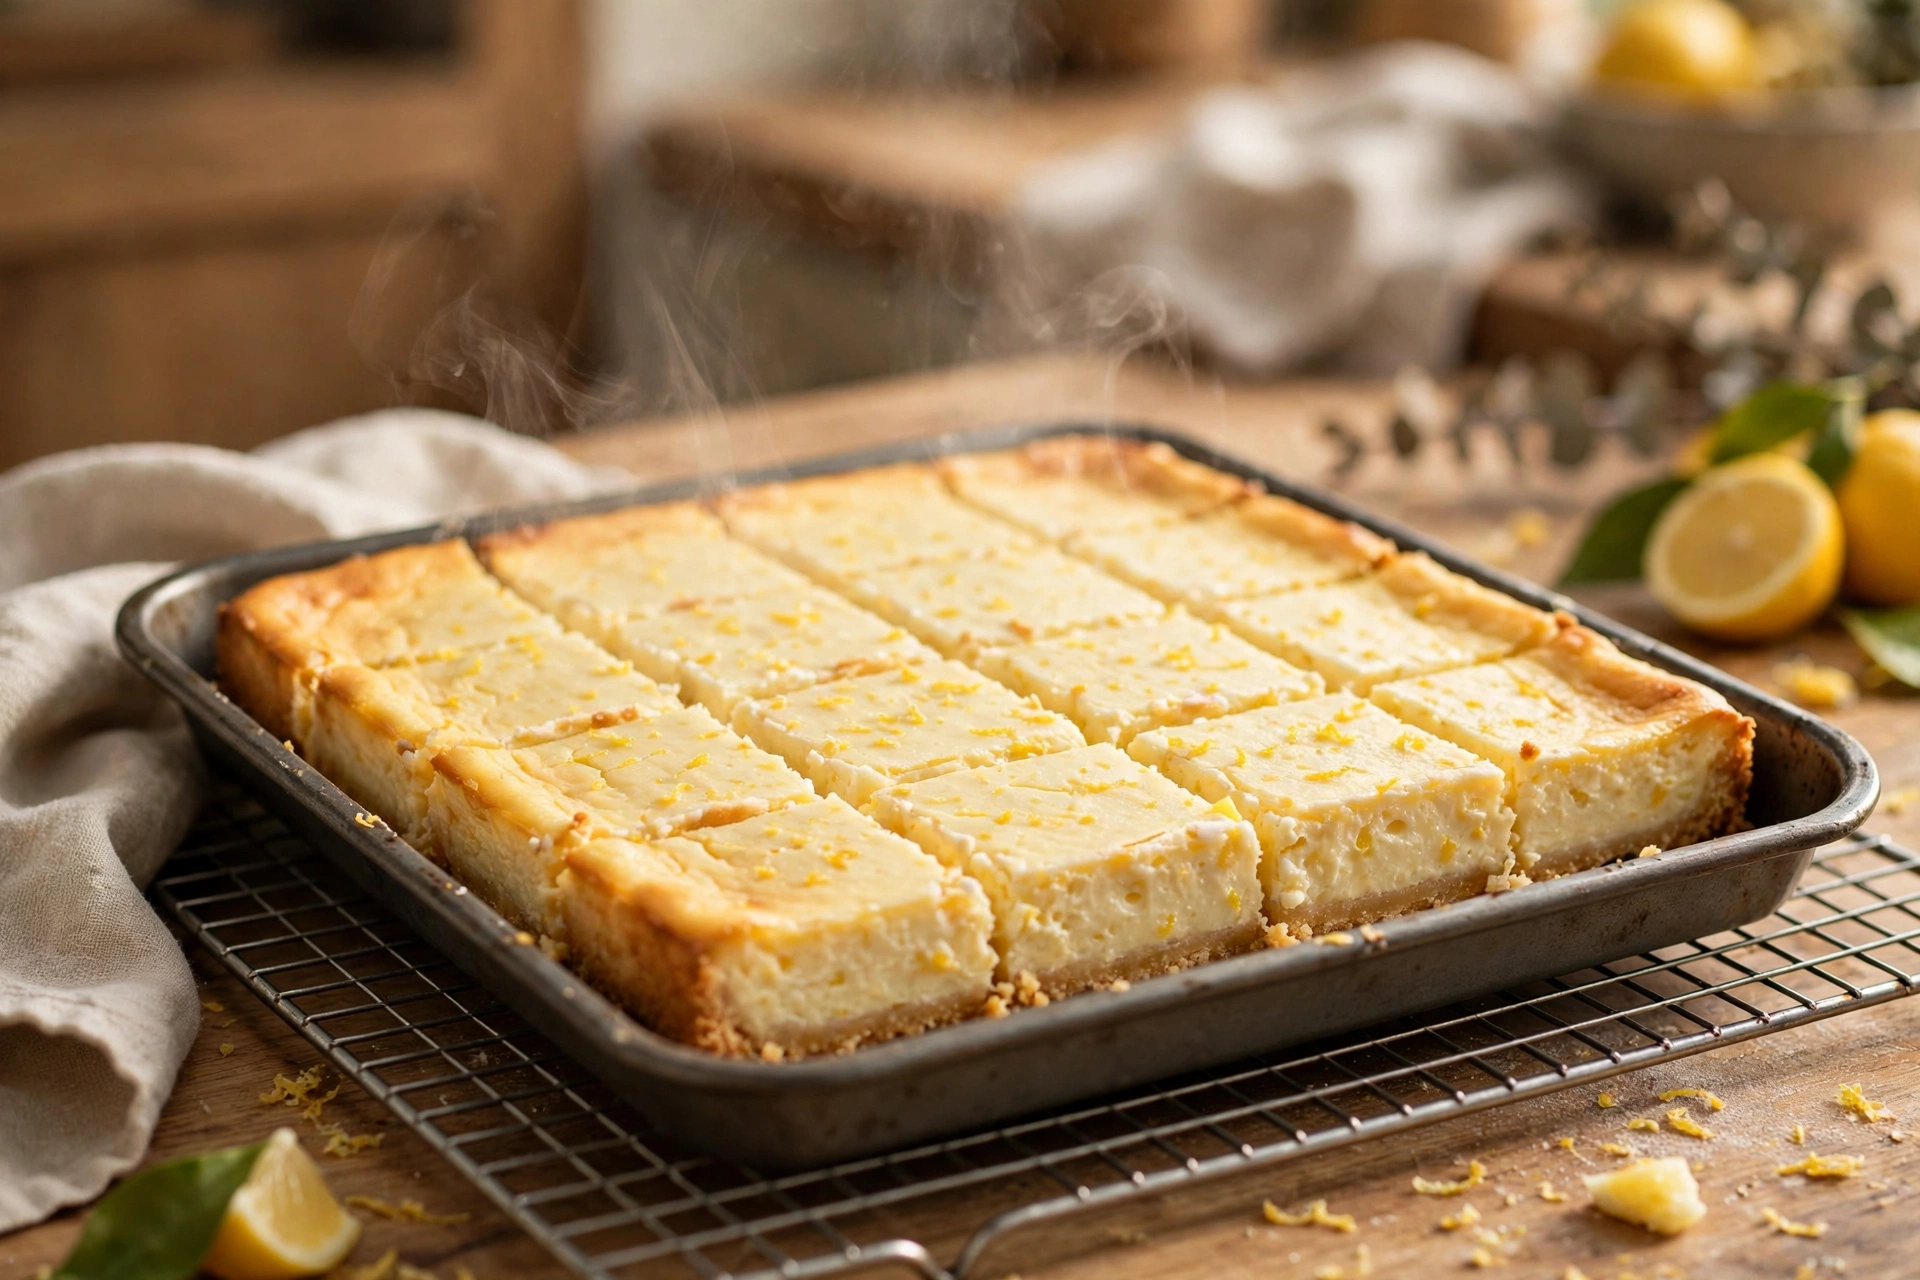
Chill the bars for four hours in the fridge, and preferably overnight if time allows, before slicing. Cover the tin loosely with cling film once the bars are fully at room temperature, taking care that the film does not touch the surface and mark it, or place the tin inside a larger container with a lid. Chilling firms the cream cheese and yoghurt filling, allows the lemon flavour to settle and mellow slightly, and makes the base crisp and stable. Four hours is the minimum for a clean cut; bars chilled for only one or two hours will still be soft in the centre and may smear when sliced. If you need the bars sooner, chilling in the coldest part of the fridge helps, but do not place a warm tin in the fridge, because condensation can make the surface damp and the base soft.
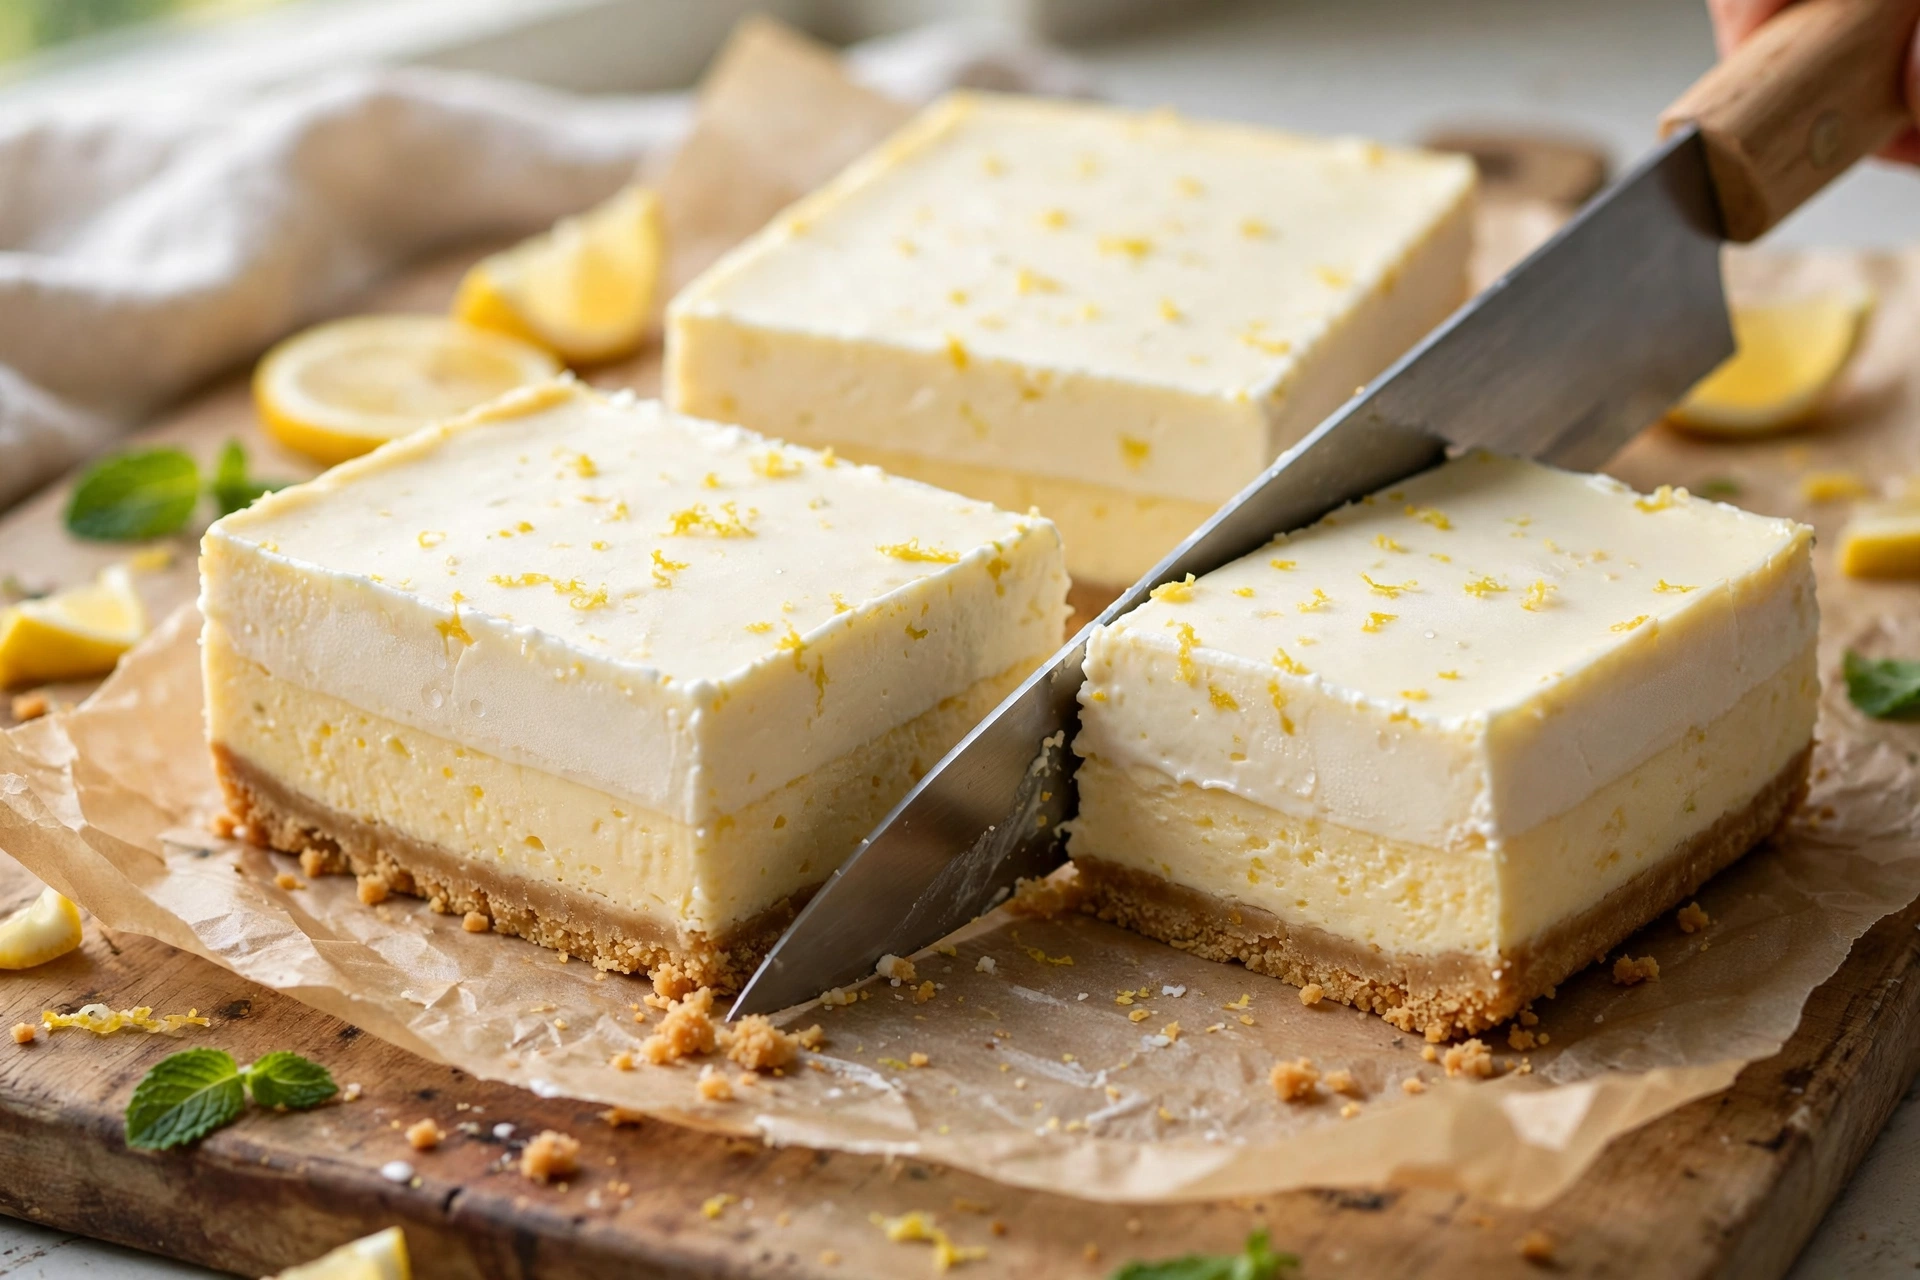
Slice the bars only after the full chilling time, using the baking paper overhang to lift the whole slab onto a chopping board. Use a long, sharp knife, dipped in a jug of hot water and wiped dry between cuts, so each cut is clean and the filling does not drag. Cut the slab into twelve bars by first cutting into three even strips in one direction and then into four even strips in the other direction, which gives twelve neat rectangles, or into a four-by-three grid according to your preference for shape. Press straight down with steady pressure rather than sawing back and forth, and clean and reheat the knife between cuts for the neatest edges. Trim the very outer edges only if they look uneven, and keep those trimmings as a cook’s taste, because they show how the bars will taste once served. Arrange the bars on a plate or in an airtight container, separating layers with baking paper if stacking, and return them to the fridge until serving.
Tips for Success
Success with lemon cheesecake yoghurt bars comes down to a handful of details, and getting them right removes most of the common problems. First, bring the cream cheese, yoghurt, and eggs to room temperature before mixing. Cold cream cheese is the single most common cause of lumps, and cold eggs can cause the batter to seize slightly and mix unevenly. Thirty to forty-five minutes on the work surface is usually enough in a warm kitchen, while a cooler kitchen may need closer to an hour. Do not soften cream cheese in the microwave to save time, because microwaving melts it unevenly and can make the filling greasy or thin. Plan ahead, take the dairy out early, and the mixing stage will be noticeably smoother.
Second, mix gently once the eggs are in, and avoid over-beating at every stage. Beating incorporates air, and air is the enemy of a smooth cheesecake top, because it expands in the heat and collapses as the bars cool, leaving cracks, dips, or a wrinkled surface. Beat the cream cheese and sugar until smooth, then mix the remaining ingredients on low speed and only until combined. If mixing by hand, use a spatula or wooden spoon with steady, thorough strokes and scrape the bowl often, rather than whisking vigorously. A few extra seconds of beating rarely improves smoothness once the batter looks even, but it can easily add unwanted air, so stop as soon as the mixture looks uniform.
Third, do not over-bake the bars. Over-baking is the other main cause of cracks, along with a dry, crumbly, or rubbery filling, and it is easy to do if you wait for the centre to look completely firm. Remember the wobble test: the centre should still move softly when the tin is shaken gently after thirty-five minutes. The residual heat in the tin and the cooling period will finish setting the centre without drying it out. If your oven runs hot, check a few minutes early and consider reducing the temperature slightly on the next bake, noting the adjustment for future batches. A pale top with just a hint of colour at the edges is ideal; deep golden colour across the whole surface usually means the filling has baked too long or too hot.
Fourth, protect the base from sogginess by pressing it firmly, pre-baking it, and cooling the bars properly. A loosely pressed base absorbs filling moisture and falls apart when sliced, while a firmly compacted base resists moisture and cuts cleanly. Pre-baking sets the butter into the crumbs and creates a barrier that helps the base stay crisp, so do not skip that ten-minute bake even when you are short on time. Cooling gradually, rather than moving a hot tin into a cold draught or straight into the fridge, also helps, because sudden temperature changes encourage condensation that can soften the biscuit layer. Once chilled, store the bars in an airtight container with baking paper between layers, and keep them refrigerated until serving, which preserves the crisp contrast between base and filling.
Fifth, slice with a hot, dry knife and clean it between cuts. A cold or dry knife drags filling across the cut, smears the layers, and leaves ragged edges, while a knife dipped in hot water and wiped dry glides through the chilled filling and leaves a sharp, clean line. Keep a jug of freshly boiled water beside the board, dip the blade for a few seconds, wipe it completely dry with a clean cloth or kitchen paper, and cut in one steady downward motion. Repeat the dip and wipe for every cut, even though it feels slow, because the difference in presentation is striking. For the very neatest bars, chill the slab again briefly if it starts to soften during slicing on a warm day, and work quickly once the slab is out of the fridge.
Sixth, measure the lemon juice and zest carefully, and zest only the yellow skin. Lemon strength varies by fruit, size, and season, so using the juice of two large lemons and the zest of the same two lemons gives a consistent balance without needing to adjust by taste in the raw batter. Avoid the white pith, which is bitter and can linger unpleasantly in a delicate filling, and grate the zest finely so it disperses evenly rather than appearing as visible flecks. If the lemons are small, use three instead of two to reach roughly eighty millilitres of juice, but keep the zest proportion similar, because too much zest can make the flavour perfumed rather than fresh. Wash and dry the lemons before zesting, especially if they are waxed, and zest before juicing for the easiest handling.
Seventh, allow the full chilling time and resist cutting early. Four hours in the fridge is the minimum, and overnight chilling often gives even neater slices and a more settled flavour. Bars cut too soon will be soft, may slump slightly, and will lose the clean two-layer look that makes them so appealing. If you are baking for an event, make the bars the day before, chill them overnight, and slice them on the day of serving, which also removes last-minute pressure. Keep the bars refrigerated until shortly before serving, especially in warm weather, and return any uneaten bars to the fridge promptly after serving. Patience at the chilling stage is rewarded with bars that look professional and taste at their best.
Finally, use the right tin size and line it well, because tin size changes the filling depth and therefore the baking time. A twenty centimetre square tin gives the depth and bake time in this recipe, while a larger tin spreads the filling thinner and risks over-baking, and a smaller tin makes the filling deeper and risks an under-baked centre. If you must use a different tin, adjust the bake time cautiously and rely on the wobble test rather than the clock. Lining with an overhang is equally important, because lifting the slab out whole avoids breaking bars by prising them out of the tin one by one. Press the paper neatly into the corners, leave generous overhang on two sides, and lightly grease the tin first if the paper slips, which helps it stay in place while you press the base.
Variations
Once the basic lemon cheesecake yoghurt bars are familiar, the recipe adapts well to different tastes, dietary needs, and occasions, provided the core ratios of cream cheese, yoghurt, eggs, and cornflour stay broadly the same. Each variation below changes one element at a time, so the bake remains reliable while the flavour or format shifts. Note any change in chilling or setting time, and test a variation once before serving it for an important occasion, so you know how it behaves in your oven and fridge.
A no-bake version is possible, although it gives a different texture from the baked bars described in the main method. For a no-bake version, press the same biscuit base into the lined tin and chill it for thirty minutes until firm, instead of pre-baking it. Beat the cream cheese, sugar, yoghurt, lemon juice, zest, and vanilla until smooth, then fold in softly whipped double cream, about two hundred millilitres whipped to soft peaks, to give the filling body without baking. The cornflour and eggs are omitted in a no-bake version, because they are only needed for the baked set, and the mixture is spread over the chilled base and refrigerated for at least six hours, preferably overnight, until firmly set. No-bake bars taste fresher and lighter, with a softer, mousse-like filling, but they are more delicate at room temperature and must be kept chilled until serving. They are a good choice in hot weather when turning on the oven feels unappealing, or when an oven is unavailable, but they should not be frozen and thawed in the same way as baked bars, because the whipped cream texture changes on thawing.
A berry topping transforms lemon cheesecake yoghurt bars into a more festive dessert without changing the filling at all. Fresh raspberries, blueberries, strawberries, or a mixture of all three sit beautifully on the pale lemon surface, and their sweetness and slight acidity complement the lemon tang. Add berries after chilling and slicing, just before serving, so their juices do not soak into the filling during storage, and arrange them generously for colour. A light berry compote, made by warming berries gently with a spoonful of sugar and a squeeze of lemon juice until they just soften, can be spooned over the bars as a sauce, but serve it on the side if the bars need to travel, so the base stays crisp. Frozen berries work for compote, although fresh berries are better for topping whole bars, because frozen berries release more liquid as they thaw. A few mint leaves, if available, add colour, but keep the focus on the berries and lemon.
A lime version follows exactly the same method, with limes replacing lemons. Use the zest and juice of three to four limes to reach roughly eighty millilitres of juice, because limes are smaller and less juicy than lemons, and keep the sugar, cream cheese, yoghurt, eggs, and cornflour quantities unchanged. Lime cheesecake yoghurt bars taste slightly more aromatic and floral than lemon bars, with a greener, sharper tang that pairs especially well with coconut, if a coconut biscuit base is used, or with fresh mango on the side. Take care with lime zest, as with lemon zest, to avoid the bitter white pith, and grate finely for even distribution. This variation is useful when lemons are expensive or unavailable, or when a menu already features lemon elsewhere and a related citrus flavour gives welcome variety without requiring a new technique.
A gluten-free base is straightforward and needs no change to the filling. Replace the digestive biscuits with a gluten-free biscuit of similar style, crushing and binding them with the same one hundred grams of melted butter, and check that the biscuits are certified gluten-free if serving someone with coeliac disease. Gluten-free biscuits vary in sweetness and crumb texture, so taste a biscuit first: very sweet biscuits may need a slightly smaller amount of butter to avoid a greasy base, while very dry biscuits may need the full amount and firm pressing to hold together. Pre-bake the gluten-free base for the same ten minutes, and check that it feels firm before adding the filling, extending the pre-bake by two minutes if it still feels soft. The filling itself contains no gluten ingredients in the quantities given, but check the cornflour and vanilla labels for gluten-free certification when cooking for someone with a strict gluten-free requirement, and avoid cross-contamination from shared utensils and surfaces.
Individual cups offer a practical variation for parties, picnics, and portion control, using the same base and filling in small glasses, jars, or paper cases. Press a spoonful of the buttered biscuit crumbs into the base of each cup and chill briefly, then spoon the filling over the top. For a baked cup version, use oven-safe ramekins, fill them about three-quarters full, and bake at the same temperature for twenty to twenty-five minutes, checking for the same gentle wobble in the centre, then cool and chill as for the bars. For a no-bake cup version, use the whipped cream method described above and chill for at least four hours. Individual cups remove slicing entirely, travel well with lids, and allow toppings to be customised per serving, with berries in some cups and plain lemon in others. They are especially helpful for gatherings where guests have different dietary needs, because a gluten-free base can be used in a clearly marked subset of cups.
An extra tangy version suits bakers who love a sharp lemon flavour. Increase the lemon juice to about one hundred millilitres and add the zest of an extra lemon, keeping the sugar at one hundred and fifty grams so the bars stay balanced rather than becoming sour. The extra juice adds moisture, so bake for a further three to five minutes and judge by the wobble test, allowing the centre to set a little more firmly before removing the tin. Serve extra tangy bars well chilled, with a spoonful of lightly sweetened whipped cream or a few sweet berries to soften the sharpness if desired. This version is particularly good after a rich meal, when a bright, cleansing dessert is welcome, and it also pairs well with a cup of unsweetened tea. Avoid increasing the juice beyond one hundred millilitres without also increasing the cornflour slightly, because too much liquid can prevent a clean set.
Other small variations can refresh lemon cheesecake yoghurt bars without changing the method. A ginger biscuit base, using ginger biscuits instead of digestive biscuits, adds warmth and spice that contrasts beautifully with lemon, and works well in colder months. A thin layer of lemon curd spread over the chilled bars just before serving adds an extra lemon hit and a glossy finish, although it also adds sweetness, so use it sparingly. A dusting of icing sugar just before serving gives a simple, elegant look for afternoon tea, but dust only just before serving, because icing sugar dissolves into the cold filling if left standing. A drizzle of white chocolate, cooled slightly and drizzled thinly over chilled bars, adds sweetness and visual appeal for celebrations, but keep the drizzle light so the lemon flavour remains the star. Each of these finishing touches should be added after chilling and slicing, so the bars store cleanly and the decoration stays fresh.
Serving Ideas
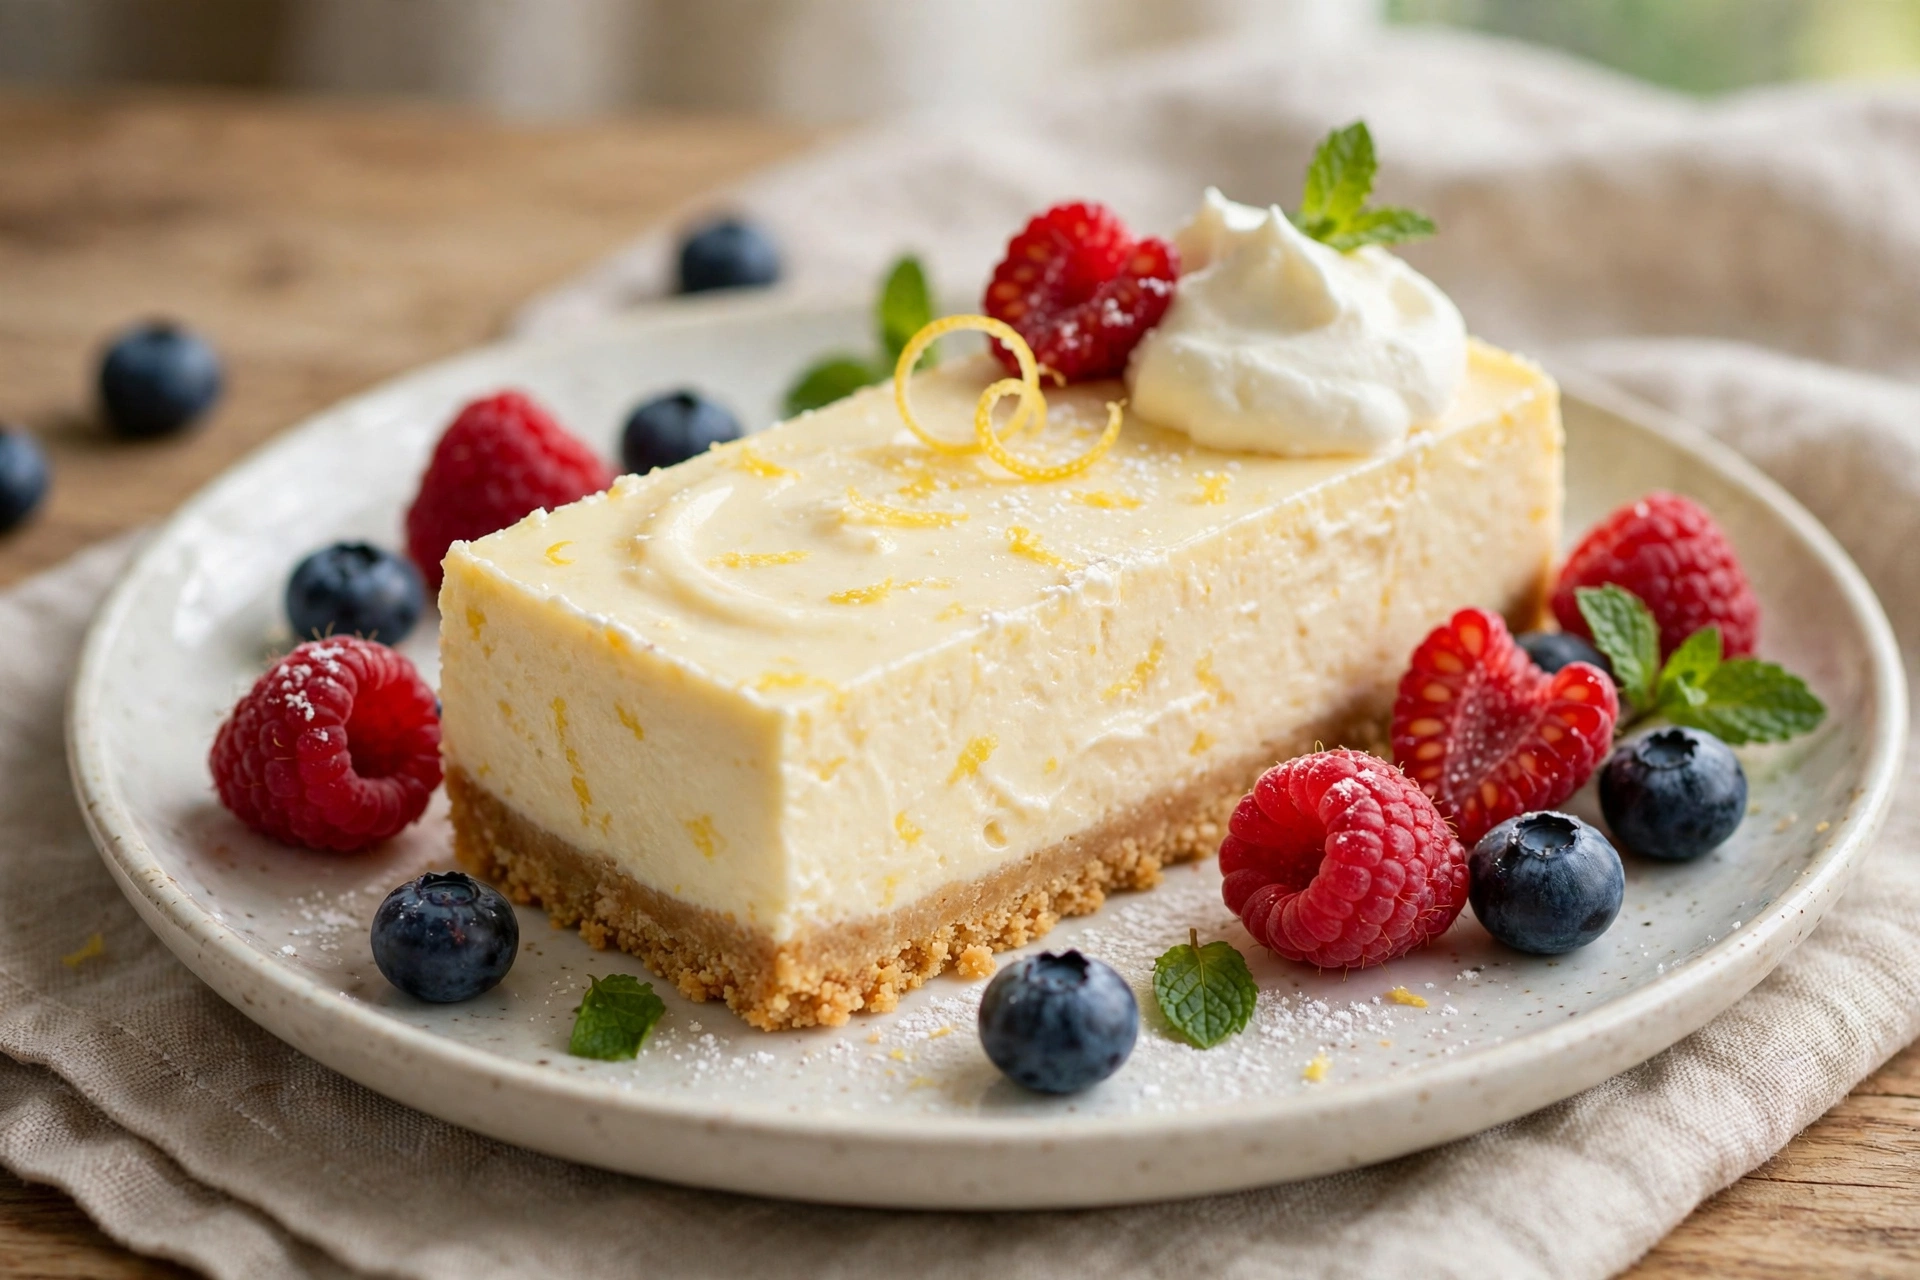
Lemon cheesecake yoghurt bars suit many occasions because they are easy to serve, easy to eat without cutlery complications, and appealing to a wide range of tastes. For afternoon tea, arrange the bars on a tiered stand or a flat plate with a small pile of fresh berries and a few lemon slices for decoration, keeping the bars themselves plain so their pale colour and clean layers show. Serve with tea, coffee, or a light herbal infusion, and offer softly whipped cream on the side for guests who enjoy extra richness. The bars are not overly sweet, so they sit well alongside scones, biscuits, or cakes on a tea table without overwhelming the other items, and their fresh lemon flavour cleanses the palate between richer bites. Cut the bars slightly smaller for afternoon tea if many items are on offer, so guests can sample widely.
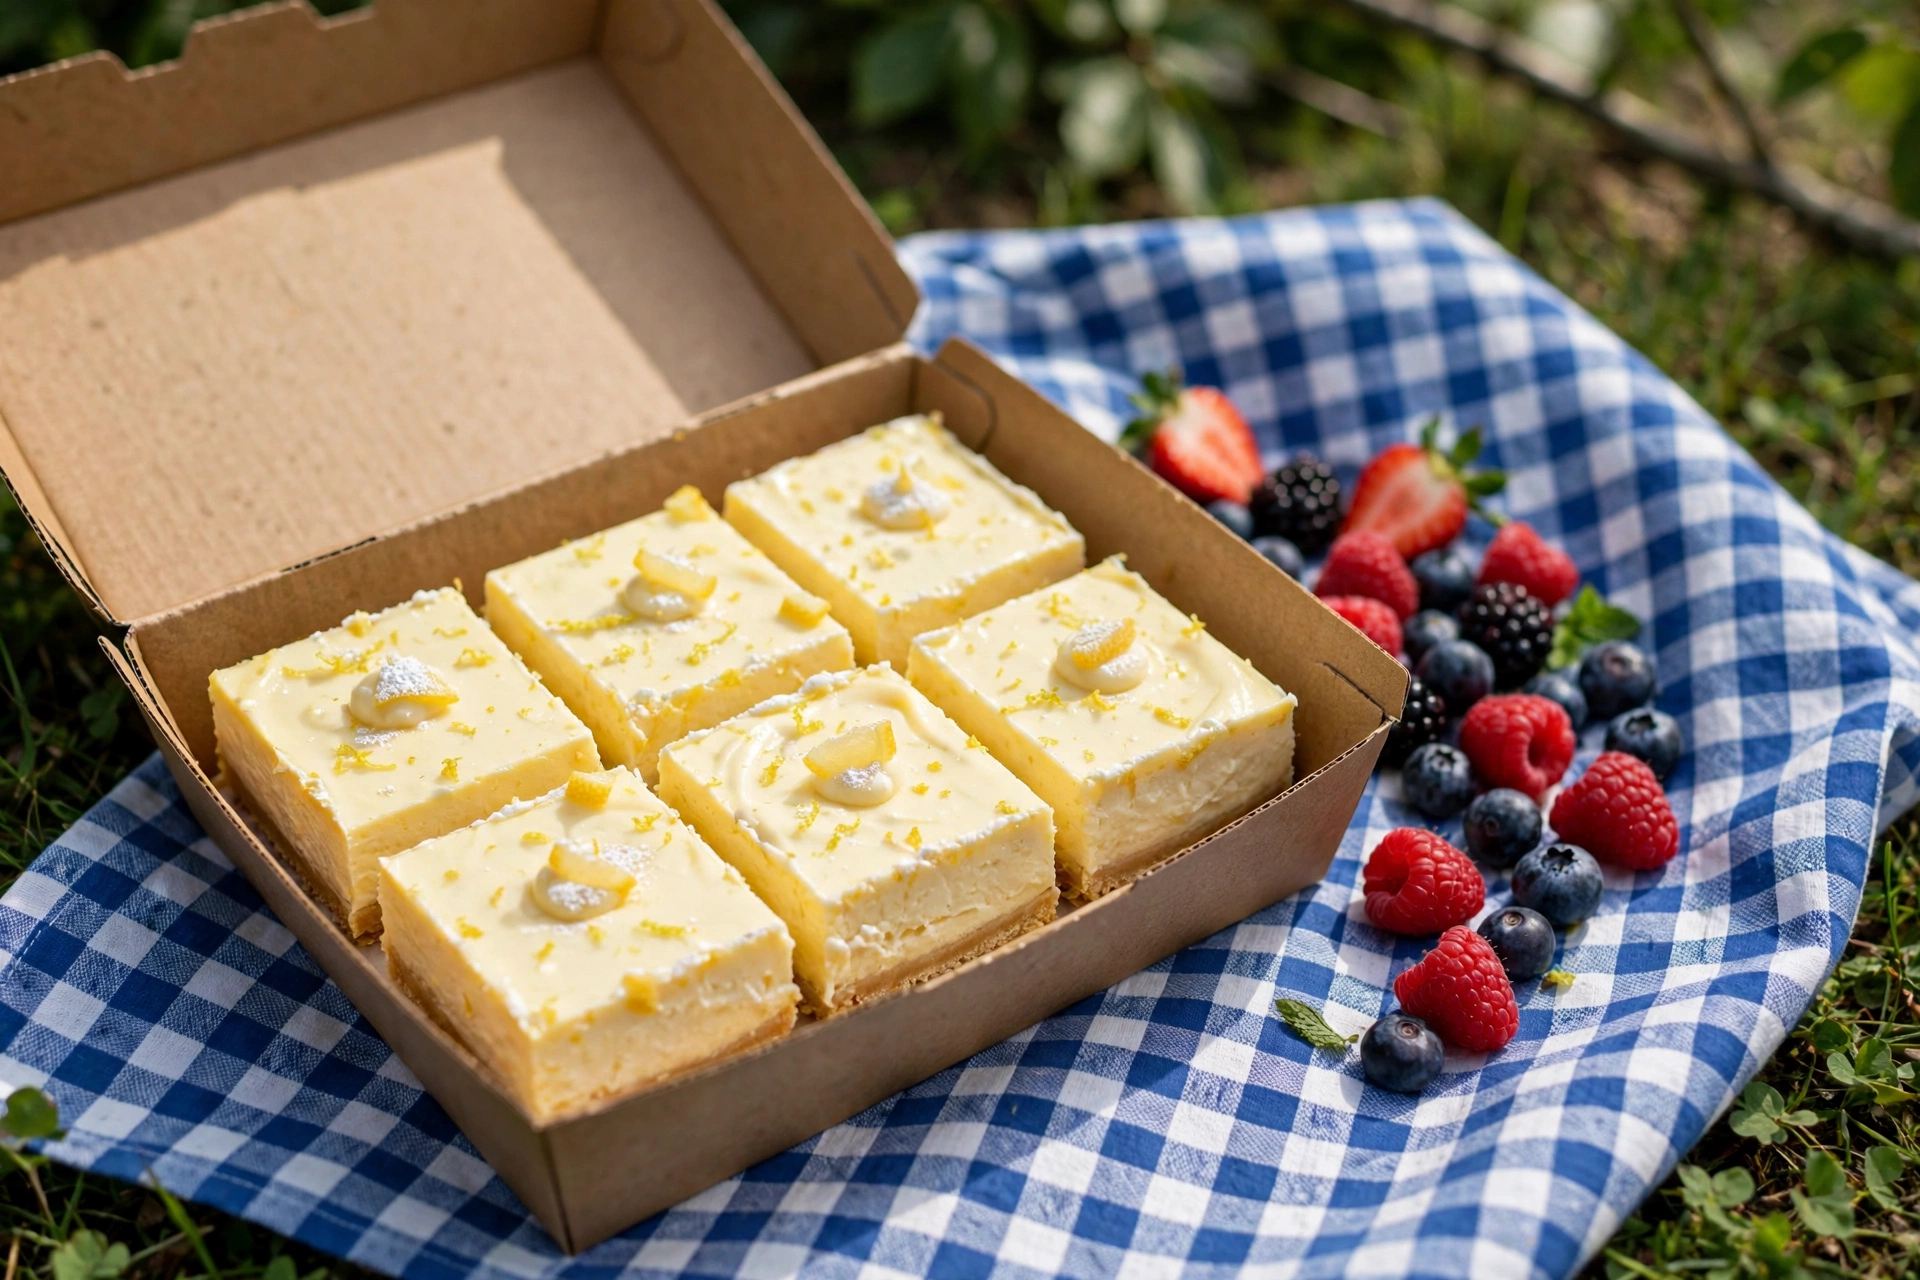
For picnics, lemon cheesecake yoghurt bars are an excellent choice, provided they are transported chilled and kept cool until serving. Pack the bars in a single layer in an airtight container, with baking paper between layers if stacking is unavoidable, and place the container in a cool bag with an ice pack. Transport toppings separately, in a small lidded container, and add berries or cream only at the picnic site, so the bars arrive neat and the base stays crisp. Serve the bars straight from the cool bag on a warm day, and avoid leaving them in direct sun, because the cream cheese filling softens quickly in heat. Their bar shape makes them easy to hand out, easy to eat outdoors, and far less messy than a sliced round cheesecake, which is a practical advantage when plates and cutlery are limited.
Also Read: Easy Peach Cobbler Recipe (Juicy, Golden, Foolproof)
For dessert plates at a dinner or celebration, lemon cheesecake yoghurt bars can be dressed up into a plated dessert with very little extra work. Place one bar slightly off-centre on a dessert plate, add a small quenelle or spoonful of softly whipped cream, a few fresh berries, and a scattering of finely grated lemon zest, and finish with a single mint leaf or a small edible flower if available. A spoonful of raspberry coulis, made by blending raspberries with a little sugar and sieving out the seeds, adds colour and a sweet-tart contrast that looks striking against the pale filling. For a more formal presentation, warm a little lemon curd gently and drizzle it in a thin line across the plate, rather than over the bar, so the bar itself remains clean. The key to plating is restraint: the bar is the centrepiece, and the accompaniments should frame it rather than hide it.
For celebrations, birthdays, and shared tables, lemon cheesecake yoghurt bars offer a refreshing alternative to chocolate cakes and heavy desserts, and they can be made a day ahead, which eases the pressure on the day itself. Make a double batch in two tins if serving a large group, and arrange the bars in neat rows on a large platter, alternating plain bars with berry-topped bars for visual variety. Add a simple handwritten label if the table includes other desserts, so guests with dietary needs can identify the bars, especially for the gluten-free variation. Because the bars are portioned, guests can take one without needing serving help, and leftovers are easy to pack up at the end of the gathering. Their bright flavour also makes them a good choice after a rich main course, when guests may prefer something light and fresh.
Also Read: German Chocolate Cake Recipe (Classic Coconut-Pecan Frosting)
For everyday enjoyment, lemon cheesecake yoghurt bars make a welcome treat with a mid-morning coffee, an after-school snack in a lunchbox, or a light dessert after a simple supper. Pack a bar in a small airtight container for a lunchbox, keeping it cool until eating, and pair it with fruit for a balanced snack. Serve a bar with a cup of tea in the evening as a calm end to the day, without any topping at all, letting the lemon and creamy texture speak for themselves. The bars also freeze well, as described below, so keeping a batch in the freezer means a homemade dessert is always available for unexpected guests or a last-minute contribution to a gathering. However they are served, lemon cheesecake yoghurt bars taste best when served chilled but not ice-cold, so take them out of the fridge about ten to fifteen minutes before serving to let the flavour open up slightly.
Storage and Make-Ahead
Proper storage keeps lemon cheesecake yoghurt bars tasting fresh, looking neat, and staying safe to eat, and the bars are well suited to making ahead because chilling improves both texture and flavour. Once sliced, store the bars in an airtight container in the fridge, with baking paper between layers if stacking, and keep them refrigerated at all times except for the short period when serving. In the fridge, baked lemon cheesecake yoghurt bars keep well for up to five days, although the base is at its crispest in the first two to three days and gradually softens slightly as moisture moves from the filling into the biscuit layer. The flavour remains good throughout the five days, and the bars often taste even better on the second day, once the lemon has settled and the filling has firmed fully. Discard any bars left at room temperature for more than two hours, especially in warm weather, because the dairy filling should not be left unrefrigerated for long.
For make-ahead planning, lemon cheesecake yoghurt bars are ideal for baking the day before serving. Bake, cool, and chill the whole slab overnight, still in the tin and loosely covered once cool, then slice on the day of serving for the neatest edges and the freshest appearance. Slicing on the day also avoids the cut edges drying slightly in the fridge, which can happen if bars are sliced several days in advance and stored uncovered. If you must slice ahead, store the bars in a single layer where possible, or with baking paper between layers, and press cling film gently over the container without squashing the bars. Bring the bars out of the fridge ten to fifteen minutes before serving, so they are chilled but not so cold that the lemon flavour is muted, and add any fresh toppings at the last moment.
Freezing lemon cheesecake yoghurt bars works well for the baked version and is a practical way to keep a batch for future use. Freeze the bars after chilling and slicing, placing them in a single layer on a lined tray in the freezer for one to two hours until firm, then transferring them to an airtight container or freezer bag with baking paper between layers. This initial open freezing prevents the bars from sticking together, so individual bars can be removed as needed. Label the container with the date, and use the frozen bars within one month for the best texture, although they remain safe beyond that period if kept frozen. Thaw frozen bars in the fridge overnight, still in their container, rather than at room temperature, so they thaw evenly and stay food-safe, and do not refreeze bars that have already been thawed. The base may be very slightly softer after freezing and thawing than in a freshly chilled bar, but the filling texture holds up well, and the lemon flavour remains bright.
Transporting lemon cheesecake yoghurt bars needs a little care, especially in warm weather or over a long journey. Transport the bars chilled, in an airtight container, inside a cool bag with an ice pack, and keep the container flat so the bars do not slide or tip. Avoid stacking heavy items on top of the container, and keep the bars out of direct sunlight and away from car heaters or warm boots. If the journey is longer than an hour in warm weather, use two ice packs and keep the cool bag closed until arrival. On arrival, transfer the bars to a fridge promptly and keep them chilled until serving, adding toppings only at the destination. For a picnic, the same cool-bag approach applies, and serving the bars directly from the cool bag keeps them at their best texture. With chilled transport and prompt refrigeration, lemon cheesecake yoghurt bars travel as well as any dairy dessert and arrive looking as neat as when they left the kitchen.
Food safety and quality both benefit from a few simple habits with lemon cheesecake yoghurt bars. Always use clean hands and utensils when handling the bars, especially after slicing, because the dairy filling is perishable. Do not leave the bars beside a hot oven or in a warm kitchen for extended periods while preparing other food, and return leftovers to the fridge as soon as the meal or gathering ends. Check stored bars before serving if they have been in the fridge for several days: they should smell fresh and lemony, with no sour or off aroma beyond the natural tang of yoghurt and lemon, and the surface should look smooth and pale, with no discolouration. If in doubt about freshness, discard the bars rather than serving them, because the ingredients are inexpensive compared with the risk of serving dairy that has been stored too long. These habits keep a simple, homemade dessert both delicious and safe, and they allow the bars to be enjoyed with confidence across the full storage period.
Ingredients
Method
- Preheat the oven to 170 degrees Celsius conventional or 160 degrees Celsius fan, and line a 20 centimetre square tin with baking paper, leaving an overhang on two sides.
- Crush the digestive biscuits to fine crumbs, mix thoroughly with the melted butter, press firmly and evenly into the lined tin, and pre-bake for 10 minutes until slightly darker and firm, then cool for 10 minutes.
- Beat the cream cheese, caster sugar, and salt until completely smooth, scraping the bowl halfway through.
- Add the Greek yoghurt, lemon zest, lemon juice, and vanilla extract, and beat on low speed just until combined, scraping the bowl again.
- Sift in the cornflour and beat briefly until no white streaks remain.
- Add the eggs one at a time, beating on low speed just until each egg disappears into the batter.
- Pour the filling over the pre-baked base, spread gently into the corners, tap the tin lightly to release air bubbles, and smooth the top.
- Bake for 35 minutes until the edges are set and pale golden and the centre wobbles softly like set jelly when the tin is shaken gently.
- Turn the oven off and cool the tin in the oven with the door slightly ajar for 30 minutes, then cool on a wire rack at room temperature for a further hour until the tin feels cool.
- Cover loosely once fully cool and chill in the fridge for 4 hours, preferably overnight, before slicing.
- Lift the chilled slab out using the baking paper overhang, cut into 12 bars with a long sharp knife dipped in hot water and wiped dry between cuts, and serve chilled.
Can Greek yoghurt be replaced with plain yoghurt in lemon cheesecake yoghurt bars?
Greek yoghurt is strongly recommended because it is strained and thick, so it adds tang and lightness without adding excess liquid. Plain yoghurt is thinner and contains more whey, which can make the filling softer, wetter, and less likely to slice cleanly. If plain yoghurt is the only option available, strain it first through a fine sieve lined with muslin or a clean tea towel for at least an hour, or overnight in the fridge, until it thickens noticeably, and then measure two hundred grams of the strained yoghurt. Even strained plain yoghurt may taste slightly sharper than Greek yoghurt, so keep the lemon juice at eighty millilitres and do not add extra juice. For the most reliable result, use full-fat Greek yoghurt as specified in the recipe card.
Can low-fat cream cheese be used instead of full-fat cream cheese?
Low-fat cream cheese is not recommended for lemon cheesecake yoghurt bars, because it contains more water and less fat than full-fat cream cheese, which weakens the set and can leave the filling soft, grainy, or slightly watery after chilling. Full-fat block cream cheese gives the dense, creamy body that allows the bars to slice cleanly and hold their shape. If low-fat cream cheese must be used, expect a softer bar that needs longer chilling, possibly overnight, and a less rich flavour, and consider increasing the cornflour by half a tablespoon to help the set, although this may slightly change the texture. For celebrations or for serving to guests, full-fat cream cheese is worth choosing for a noticeably better result.
Why did the cheesecake filling crack on top?
Cracks usually come from over-baking, over-beating, or cooling too quickly. Over-baking dries the filling and causes it to contract and split as it cools, so judge doneness by the gentle wobble in the centre rather than waiting for full firmness. Over-beating whips air into the batter, which expands in the oven and collapses on cooling, leaving cracks or dips, so mix on low speed and only until combined once the eggs are added. Cooling too quickly, such as moving a hot tin into a cold draught or straight into the fridge, can also cause the surface to crack as the filling contracts suddenly. Cool gradually in the turned-off oven or on a rack in a draught-free spot, then chill fully before slicing. If a crack does appear, it does not affect the taste, and the bars still look good once sliced, especially with berries on top.
How can a soggy biscuit base be avoided?
A soggy base is usually caused by loose pressing, skipping the pre-bake, or trapping steam during cooling. Press the crumbs firmly and evenly into the tin, using the base of a measuring cup to compact them, especially in the corners, so the base forms a coherent slab. Pre-bake the base for ten minutes until firm and lightly toasted, which sets the butter and creates a barrier against the wet filling. Cool the bars gradually at room temperature before covering and chilling, and do not cover a warm tin tightly, because trapped steam softens the biscuit layer. Store sliced bars in an airtight container with baking paper between layers, keep them refrigerated, and add wet toppings such as berries or compote only just before serving, so the base stays as crisp as possible.
Is there a no-bake option for lemon cheesecake yoghurt bars?
Yes, a no-bake version is possible, although the texture is softer and more mousse-like than the baked bars. Press the same biscuit base into the lined tin and chill it for thirty minutes until firm, instead of pre-baking it. Beat the cream cheese, sugar, yoghurt, lemon juice, zest, and vanilla until smooth, omitting the eggs and cornflour, and fold in two hundred millilitres of double cream whipped to soft peaks. Spread the mixture over the chilled base and refrigerate for at least six hours, preferably overnight, until firmly set. No-bake bars must be kept chilled until serving, as they soften more quickly at room temperature than baked bars, and they are not ideal for freezing and thawing, because the whipped cream texture changes on thawing.
Can lemon cheesecake yoghurt bars be frozen?
Yes, the baked bars freeze well and are a practical make-ahead option. Chill and slice the bars first, then open-freeze them in a single layer on a lined tray for one to two hours until firm, so they do not stick together. Transfer the firm bars to an airtight container or freezer bag with baking paper between layers, label the container with the date, and use the bars within one month for the best texture. Thaw frozen bars in the fridge overnight, still in their container, rather than at room temperature, so they thaw evenly and stay food-safe, and do not refreeze bars that have already been thawed. The base may be very slightly softer after freezing than in a freshly chilled bar, but the filling and lemon flavour hold up well.
How much lemon should be used, and can lemon make the bars bitter?
Two large lemons, giving roughly eighty millilitres of juice and about two tablespoons of finely grated zest, give a bright but balanced flavour for twelve bars. Bitterness in lemon desserts almost always comes from the white pith under the yellow skin, rather than from the juice or zest themselves, so zest only the bright yellow outer layer and stop as soon as the white layer shows. Wash and dry the lemons before zesting, zest before juicing, and grate finely so the zest disperses evenly. Bottled lemon juice is not a good substitute, because it lacks fresh aroma and can taste harsh. If the lemons are small, use three to reach roughly eighty millilitres of juice, but keep the zest proportion similar, and for an extra tangy version, increase the juice to one hundred millilitres with the zest of an extra lemon rather than adding juice alone.
How can lemon cheesecake yoghurt bars be made gluten-free?
Make the bars gluten-free by replacing the digestive biscuits with gluten-free biscuits of a similar plain style, keeping the butter at one hundred grams and the filling unchanged. Crush the gluten-free biscuits finely, press them firmly, and pre-bake for ten minutes, extending by two minutes if the base still feels soft, because gluten-free biscuits vary in texture. For coeliac disease, choose biscuits certified gluten-free, check the cornflour and vanilla labels for gluten-free certification, and avoid cross-contamination from shared utensils, boards, and surfaces. The filling ingredients in the recipe card contain no gluten in themselves, but label checking matters when cooking for someone with a strict gluten-free requirement. Mark gluten-free bars clearly if serving them alongside regular bars at a shared table.
How can you tell when lemon cheesecake yoghurt bars are baked?
Judge doneness by the wobble test after thirty-five minutes of baking. Gently shake the tin from side to side: the outer edges should look set and move only slightly as a whole, while the centre should wobble softly like set jelly. That soft centre will firm up during cooling and chilling, and it is the sign of a creamy filling, not an under-baked one. The top should be pale with at most a very light golden colour at the edges, and the filling should not look liquid across the whole surface. If the whole surface ripples like liquid, bake for a further five minutes and test again. If the top is deeply golden or cracking, remove the tin promptly, because further baking will dry the filling. Oven temperatures vary, so note your oven behaviour for future bakes.
How long do lemon cheesecake yoghurt bars need to chill?
Lemon cheesecake yoghurt bars need at least four hours of chilling in the fridge after cooling to room temperature, and overnight chilling often gives even neater slices and a more settled flavour. Chilling firms the cream cheese and yoghurt filling, allows the lemon flavour to mellow slightly, and makes the base crisp and stable. Bars chilled for only one or two hours will still be soft in the centre and may smear when sliced, so resist cutting early even if the bars look set. Cool the bars at room temperature first, for about ninety minutes in total including the initial oven cooling, before covering loosely and refrigerating, because placing a warm tin in the fridge creates condensation that can dampen the surface and soften the base. Slice only after the full chilling time, with a hot, dry knife cleaned between cuts.
How can lemon cheesecake yoghurt bars be cut into clean squares?
Clean squares come from full chilling, a sharp knife, and hot water between cuts. Lift the chilled slab out of the tin using the baking paper overhang and place it on a chopping board. Dip a long, sharp knife in a jug of hot water, wipe it completely dry, and press straight down with steady pressure rather than sawing back and forth. Clean and reheat the knife between every cut, so filling does not drag across the next cut or smear the layers. Cut the slab into three strips in one direction and four strips in the other direction to give twelve neat bars. If the slab starts to soften on a warm day, return it to the fridge briefly before continuing, and work quickly once it is out of the fridge. Neat edges also depend on a firmly pressed base and a fully set filling, so chilling and pressing matter as much as the knife technique.
What biscuits can be used instead of digestive biscuits?
Digestive biscuits are ideal because their lightly sweet, wheaty crumb pairs well with lemon and binds firmly with butter, but several substitutes work well. Graham crackers are the closest substitute and give a slightly sweeter, more honeyed base, using the same two hundred grams and one hundred grams of melted butter. Plain shortbread biscuits, crushed finely, give a richer, more buttery base, although they are sweeter, so the overall bar tastes a little less tangy. Ginger biscuits give a warm, spiced base that contrasts beautifully with lemon, especially in colder months. Gluten-free plain biscuits work for a gluten-free version, as described above. Avoid chocolate-coated, cream-filled, or strongly flavoured biscuits, because coatings and fillings change the crumb texture and add sweetness or flavours that can unbalance the lemon filling. Whatever biscuit is chosen, crush it finely and evenly, mix thoroughly with the butter, and press firmly for a clean slice.

Hi, I’m Angela. I cook the way busy people actually cook — simple, tasty food with ingredients you already have. On CookBookBite I share easy recipes, honest kitchen tips, and dishes my family asks for again and again.