
This puff pastry recipe creates one of the great achievements of baking: hundreds of impossibly thin layers of dough and butter that separate in the heat of the oven and rise into something shatteringly crisp, golden, and light. It is the foundation of croissants’ cousins, from vol-au-vents and palmiers to fruit tarts, savory turnovers, and the golden lid of a pot pie. Store-bought puff pastry is convenient, but homemade puff pastry tastes noticeably better. The butter flavor is richer, the layers are more distinct, and the pastry rises higher, because the butter content is higher and the dough has not been frozen for months. Making it at home takes patience more than skill. The process is mostly waiting: short bursts of rolling followed by rests in the refrigerator, repeated several times. This guide explains every step in detail, so that a first attempt succeeds.
What Puff Pastry Actually Is
Puff pastry is a laminated dough, which means it is built from alternating layers of dough and butter. The classic method starts with two components. The first is the détrempe, a simple dough of flour, water, salt, and a small amount of butter. The second is the beurrage, a flat block of butter, sometimes with a little flour mixed in to make it more pliable. The butter block is enclosed in the dough, and the combined package is rolled out and folded repeatedly. Each fold multiplies the layers. After six single folds, the dough contains over seven hundred layers of dough and butter. In the oven, the water in the butter turns to steam, and the steam pushes the layers apart, while the butter’s fat fries each layer lightly, producing the crisp, flaky texture.
Two things make this work, and both are about temperature. The butter must stay cold and firm enough to remain in distinct layers rather than melting into the dough, but pliable enough to roll without cracking. The dough must stay relaxed enough to roll without springing back, which is why the resting periods between folds are essential. If the butter melts into the dough, the layers disappear and the pastry bakes up dense. If the dough is rolled while tense, it tears and the butter escapes. The entire method is a rhythm of roll, fold, rest, and repeat, with the refrigerator doing much of the work.
Also Read : 3 Ingredient Lemonade Scones: The Fluffiest, Easiest Scones You’ll Ever Bake
Ingredients Explained
Flour is the backbone of the détrempe. All-purpose flour is the standard choice for home puff pastry because it is widely available and produces a dough that is strong enough to contain the butter but tender enough to eat. Bread flour produces a stronger dough that can be harder to roll and slightly tougher in the finished pastry, though some professional bakers prefer it for its strength. A mixture of all-purpose flour with a small proportion of bread flour is a good compromise for cooks who want extra insurance against tearing. The flour should be measured accurately, preferably by weight, because too much flour makes a stiff dough that resists rolling and cracks the butter layer.
Butter is the ingredient that matters most. It should be unsalted, because salted butter varies in salt content and makes it harder to control the seasoning. It should be high in fat. European-style butter, with around 82 to 84 percent fat, produces a better puff and a richer flavor than standard butter at 80 percent fat, because it contains less water and more fat to separate the layers. The butter for the beurrage must be brought to a cool, pliable state: firm enough to hold its shape, soft enough to bend slightly without cracking. Butter straight from the refrigerator is too hard and will crack into pieces during rolling, creating uneven layers. Butter left too long at room temperature becomes greasy and melts into the dough. The ideal state is butter that can be beaten with a rolling pin into a smooth, even block without softening.
Water hydrates the détrempe and controls its consistency. It should be cold, which keeps the dough cool and protects the butter. Ice water is ideal, especially in a warm kitchen. The amount of water should be adjusted to the flour: enough to form a smooth, slightly firm dough that is not sticky. A dough that is too wet sticks to the work surface and makes rolling difficult; a dough that is too dry cracks and tears. Salt seasons the dough and strengthens the gluten. A small amount of butter in the détrempe itself, usually about ten percent of the total butter, makes the dough more pliable and easier to roll around the butter block. A teaspoon of lemon juice or vinegar is sometimes added; the acid relaxes the gluten slightly, making the dough easier to roll, and it is a traditional addition worth including. Also Read: Sourdough Pizza Crust Recipe: Chewy, Blistered and Easy to Make at Home
Equipment for Puff Pastry
A rolling pin is the most important tool. A long, straight French-style rolling pin without handles gives the most control for rolling large sheets evenly, but a standard rolling pin works fine. The work surface should be large, cool, and lightly floured. A marble slab is ideal because it stays cool, but a clean countertop works. A bench scraper helps lift and turn the dough and keeps the edges neat. A sharp knife or a pizza wheel is essential for cutting the pastry; a dull blade compresses the layers at the cut edge and prevents the pastry from rising evenly. A ruler helps keep the dough rectangular and the folds even, which matters more than it might seem: even folds produce even layers, and even layers rise evenly.
A baking sheet lined with parchment paper is needed for baking. The pastry should be baked on the lowest oven rack or on a preheated baking sheet, because strong heat from below helps the layers rise. An oven thermometer is worth using, because puff pastry is sensitive to oven temperature. An oven that runs cool will produce pastry that spreads rather than rises; an oven that runs hot will brown the outside before the inside is cooked. Plastic wrap for covering the dough during rests, and a refrigerator with enough shelf space for a flat package of dough, complete the list.
Making the Détrempe
Begin by whisking together 500 grams (about 4 cups) of all-purpose flour and 2 teaspoons of salt in a large bowl. Add 50 grams (about 3 tablespoons) of cold unsalted butter, cut into small pieces, and rub it into the flour with the fingertips until the mixture resembles coarse crumbs. This small amount of butter shortens the dough slightly and makes it more pliable. Add 1 teaspoon of lemon juice to 300 milliliters (about 1 1/4 cups) of ice-cold water, then pour the water into the flour mixture gradually, stirring with a wooden spoon or a dough scraper until a shaggy dough forms. The dough should come together without being sticky. If it feels dry and will not hold together, add cold water a tablespoon at a time.
Turn the dough out onto a lightly floured surface and knead briefly, just until it becomes smooth, about three to four minutes. Puff pastry dough should not be kneaded as thoroughly as bread dough, because a very strong gluten network resists rolling. The goal is a smooth, slightly firm dough that holds its shape. Shape the dough into a flat rectangle about an inch thick, wrap it tightly in plastic wrap, and refrigerate for at least thirty minutes, or up to overnight. This rest relaxes the gluten and chills the dough, both of which make the next step easier. A rested dough rolls out with less resistance and is less likely to tear around the butter block.
Making the Beurrage
While the détrempe rests, prepare the butter block. Take 400 grams (about 1 3/4 cups, or just under four sticks) of cold unsalted butter and cut it into thick slices. Place the slices between two sheets of parchment paper and beat them with a rolling pin, starting gently, until the butter softens and can be pressed into a flat, even block. The butter should be cool and pliable, like modeling clay: it should bend without cracking and hold its shape when pressed. If the butter becomes greasy or shiny, it has warmed too much and should be refrigerated for ten minutes before continuing.
Shape the butter into a square about seven inches on each side and about half an inch thick, using the parchment and a ruler to keep the edges straight. Square corners matter, because they help the butter distribute evenly when the dough is folded around it. Wrap the butter block in the parchment and refrigerate it while the détrempe finishes resting. The butter and the dough should be at a similar temperature and consistency when they are combined. If the butter is much harder than the dough, it will crack during rolling. If the butter is much softer, it will squeeze out of the edges. Both should feel cool, firm, and pliable.
Locking In the Butter
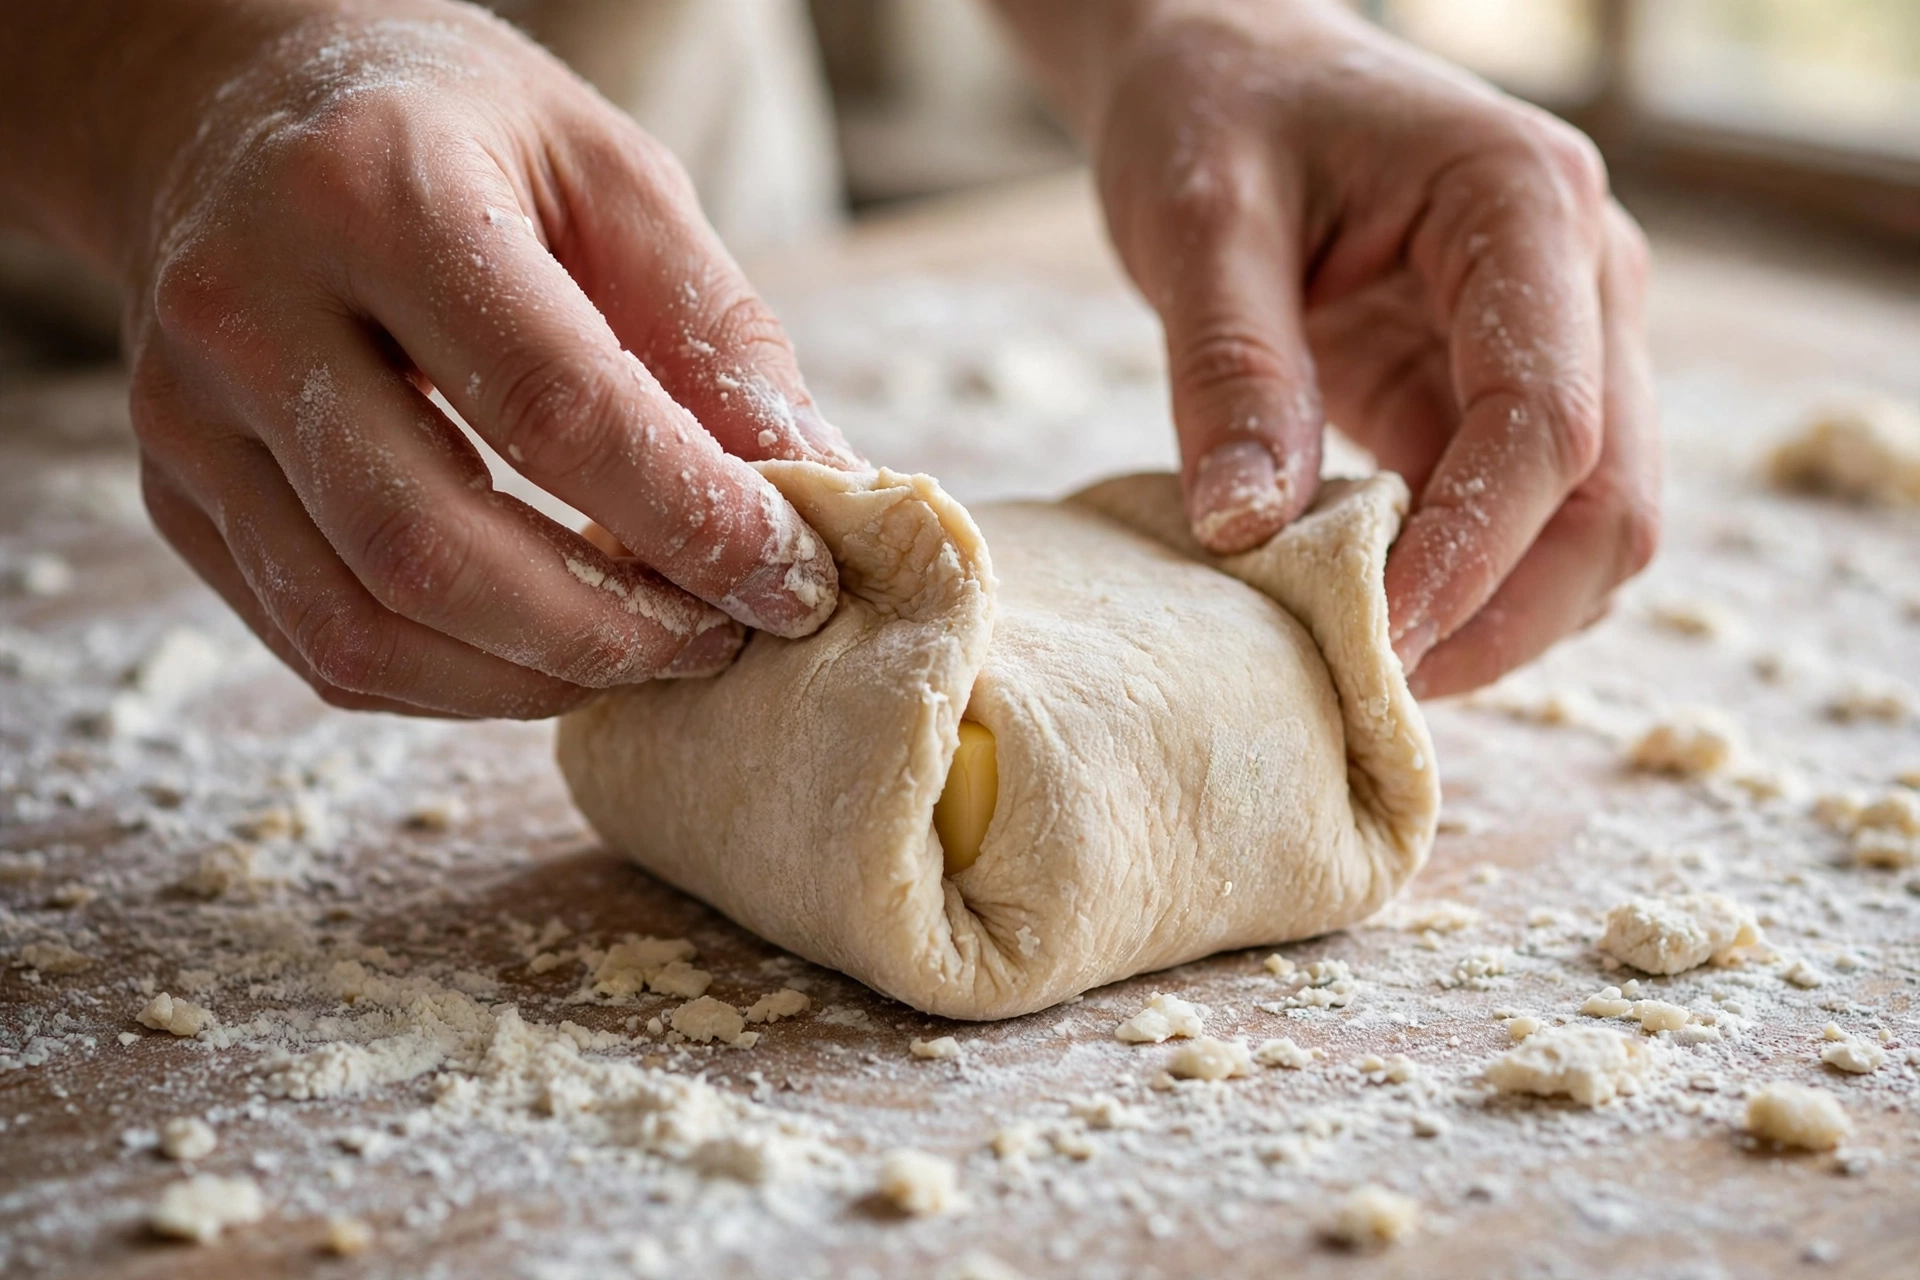
Remove the chilled détrempe from the refrigerator and place it on a lightly floured surface. Roll it into a rectangle roughly twice as long as it is wide, about fourteen inches by eight inches, with the longer side running left to right. The dough should be slightly thicker in the center than at the edges, though this is a refinement rather than a requirement. Place the butter block in the center of the dough so that it covers the middle third. Fold the left third of the dough over the butter, then fold the right third over that, like folding a letter. Pinch the seams closed and press the edges gently to seal the butter inside. The result is a neat package with the butter fully enclosed and no gaps for it to escape.
Turn the package ninety degrees so that the open ends face left and right and the folded seam runs across the middle. This orientation matters for the folding pattern that follows. Press the package gently with the rolling pin to flatten it slightly and to distribute the butter, then begin the first fold.
Must Read : Cream Cheese Wontons Recipe (Crispy, Golden, and Better Than Takeout)
The Folds: Six Single Turns
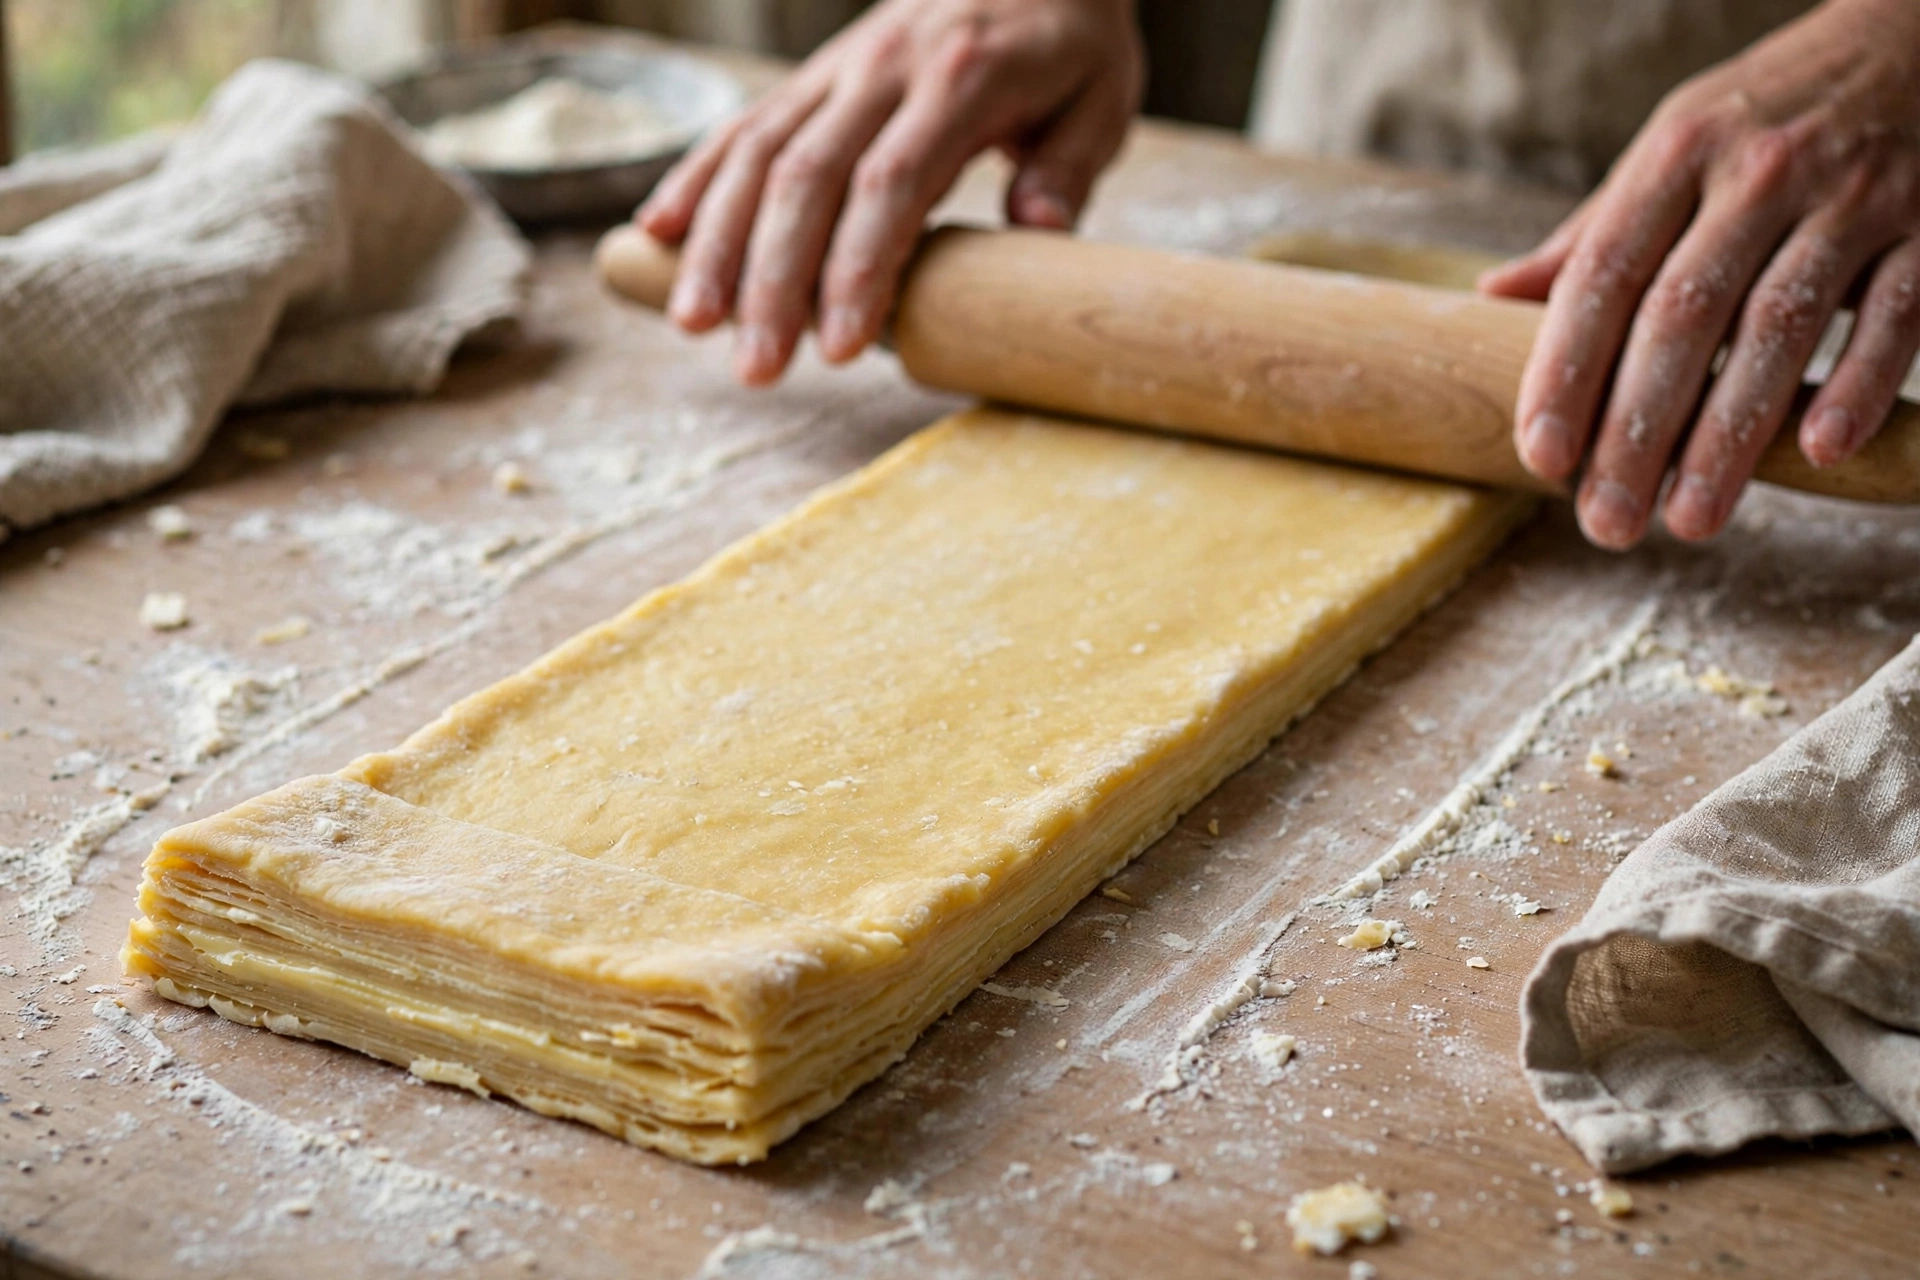
Puff pastry uses a sequence of single turns, also called letter folds. Roll the package out into a rectangle about twenty inches long and eight inches wide, keeping the edges as straight as possible and the thickness even. Work from the center outward, rolling in both directions, and turn the dough occasionally to keep it rectangular. If the dough resists and springs back, stop and rest it in the refrigerator for fifteen minutes rather than forcing it. Forcing tense dough tears it and breaks the butter layers.
Once the rectangle is rolled, brush off any excess flour from the surface with a dry pastry brush. Excess flour between the layers prevents them from bonding and creates a dusty texture. Fold the bottom third of the rectangle up over the middle third, then fold the top third down over that, again like a letter. This completes one single turn. The dough now has three times as many layers as before. Use a finger to mark the dough with one indentation, as a reminder that one turn is complete, wrap it in plastic wrap, and refrigerate for thirty minutes.
Repeat this process five more times, for a total of six single turns. Each time, roll the dough out with the folded seam facing the same direction, keep the rectangle even, brush off excess flour, fold in thirds, mark the number of turns, and rest for thirty minutes. After the sixth turn, the dough contains 729 layers. The final rest should be at least one hour, or overnight, before the pastry is rolled out for use. An overnight rest is ideal, because it fully relaxes the gluten and firms the butter, making the final rolling easier and the rise more even.
Keeping the dough cool during folding is the central discipline of the whole process. If the kitchen is warm, the dough may need to rest for longer between turns, or be returned to the refrigerator partway through a turn. If butter starts to break through the surface, dust the spot lightly with flour, press it back gently, and refrigerate the dough immediately for thirty minutes. A small breakthrough is not a disaster; it can be repaired and the pastry will still rise, though the layers near the break will be less distinct. If the dough tears badly, it should be chilled, patched with a small piece of dough, and rolled more gently. Also Read: Soft Whole Wheat Bread Recipe
Rolling Out and Cutting
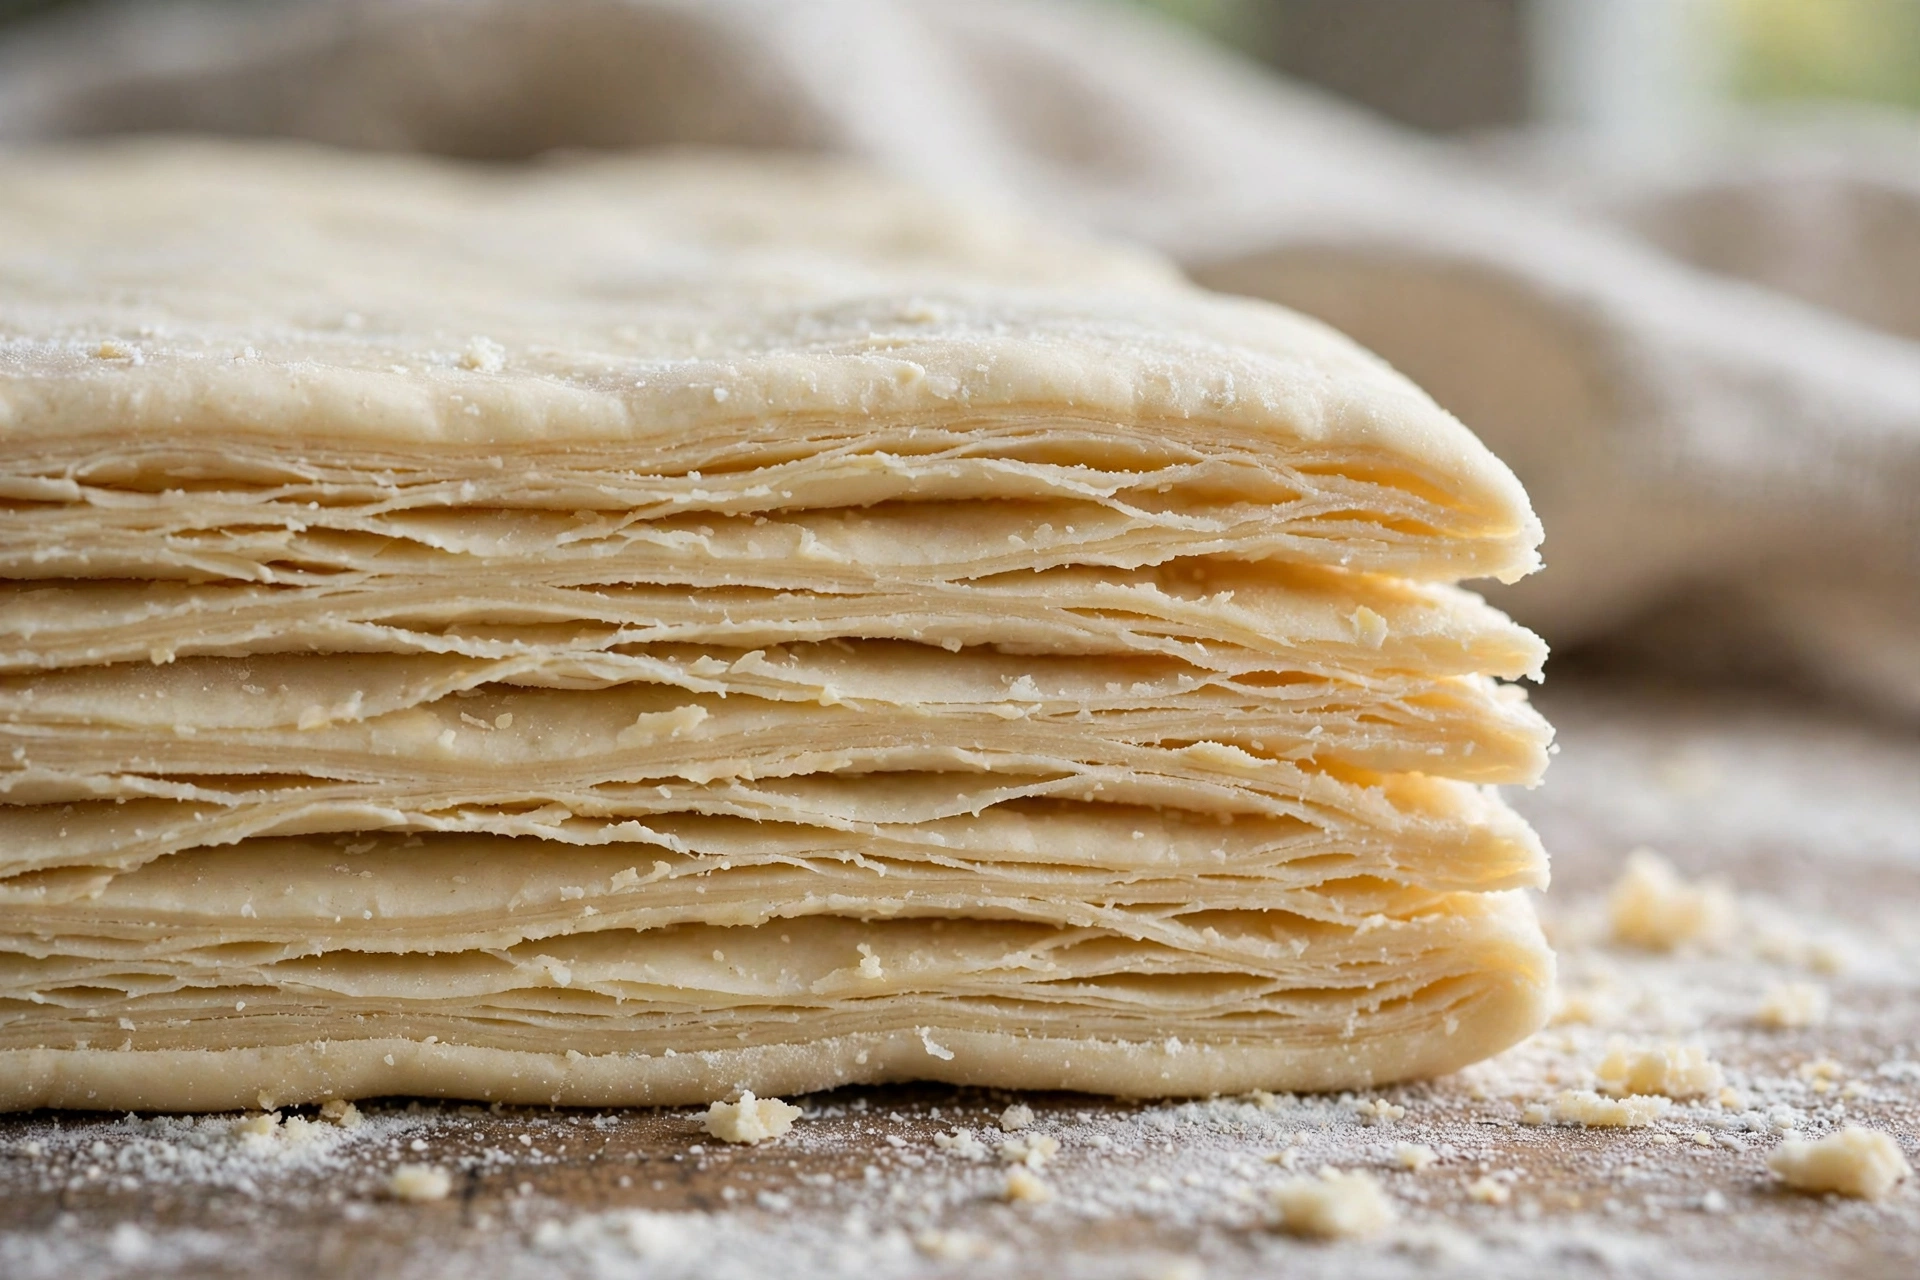
When the dough is ready to use, roll it out on a lightly floured surface to the thickness the recipe requires, usually about one eighth to one quarter of an inch depending on the use. Thinner pastry rises higher and crisps more; thicker pastry is sturdier and better for holding fillings. For most tarts and turnovers, one eighth of an inch is right. For vol-au-vents and pie lids, one quarter of an inch gives more structure.
Cutting must be done with a sharp knife or pizza wheel in a single, decisive motion. Sawing back and forth compresses the layers at the edge and seals them together, which prevents the pastry from rising at the cut. For the same reason, the cut edges should not be brushed with egg wash, because the wash glues the layers together. Egg wash belongs only on the top surface, where it promotes browning. If a border is wanted on a tart, it should be made from a separate strip of pastry laid on top, not by scoring the edge, because scoring cuts through the layers.
After cutting, the shaped pastry should be chilled for at least twenty to thirty minutes before baking. This final chill firms the butter one last time and helps the pastry hold its shape in the oven. While the pastry chills, the oven should be preheated to 400 degrees Fahrenheit (200 degrees Celsius). Puff pastry needs a hot oven to generate steam quickly; a cool oven lets the butter melt out before the steam can lift the layers, producing flat, greasy pastry.
Baking
Bake puff pastry on a parchment-lined baking sheet, on the lowest oven rack, where the heat from below is strongest. Baking time depends on the size and thickness of the pieces, but most puff pastry bakes in twenty to twenty-five minutes. The pastry should rise dramatically, turn a deep golden brown, and feel crisp and light when lifted. Pale pastry is underbaked, even if it looks risen, and it will be doughy inside. Deep golden brown is the correct color, and it should not be feared. If the pastry browns too quickly on top, a loose sheet of foil can be placed over it for the last few minutes, but the oven temperature should not be lowered, because the layers need sustained heat to finish cooking through.
After baking, the pastry should be transferred to a wire rack to cool slightly. It is at its crispest within the first hour, and it softens gradually as it absorbs moisture from the air and from any filling. For the crispest result, fillings should be added as close to serving as possible, and wet fillings should be kept to a thin layer. A thin dusting of sugar or a light glaze can be added after baking for sweet versions.
Also Read: Light Jello Dessert Recipe (Low-Calorie Berry Treat)
Tips for Success
Temperature control is the single most important factor. Keep everything cool: cold water, chilled dough, cool butter, and a cool work surface. If the kitchen is hot, work in shorter bursts and chill the dough more often. If the butter softens, stop and refrigerate. Rushing the rests is the most common cause of failure, and it is entirely avoidable, because the rests require no work at all, only patience.
Accuracy in folding pays off. Keeping the rectangle even, brushing off excess flour, and folding in true thirds produces even layers, and even layers rise evenly. Uneven folds produce pastry that rises higher on one side than the other. Marking the number of turns with a fingertip indentation prevents losing count, which is easy to do across a long afternoon of folding.
Flour should be used sparingly on the work surface. Too much flour gets trapped between the layers and makes the pastry taste dusty. A light dusting, replenished as needed, is enough. If the dough sticks, it is usually because it has warmed up, not because there is too little flour, and chilling is the better fix.
A final tip concerns expectations. The first batch of homemade puff pastry may not be perfect. The layers may be slightly uneven, or the rise may be a little lower than a professional bakery’s. It will still taste far better than frozen pastry, and the technique improves quickly with practice. The second batch is almost always noticeably better than the first, because the rhythm of rolling, folding, and resting becomes familiar.
One more habit worth building is keeping notes. Recording the flour used, the butter brand, the kitchen temperature, the number of turns, and the baking time for each batch makes it possible to repeat a good result and to diagnose a poor one. Puff pastry has enough variables that memory alone is unreliable across weeks or months, and a few lines in a notebook turn each batch into a small experiment with a clear record. Over several batches, patterns emerge: a particular butter that rolls more easily, a resting time that suits a warm kitchen, or an oven rack position that browns the base more evenly. Those notes are what turn a recipe into a personal technique.
Also Read: Banana Nut Muffin Recipe: Bakery-Style, Moist and Fluffy in 40 Minutes
Ways to Use Homemade Puff Pastry
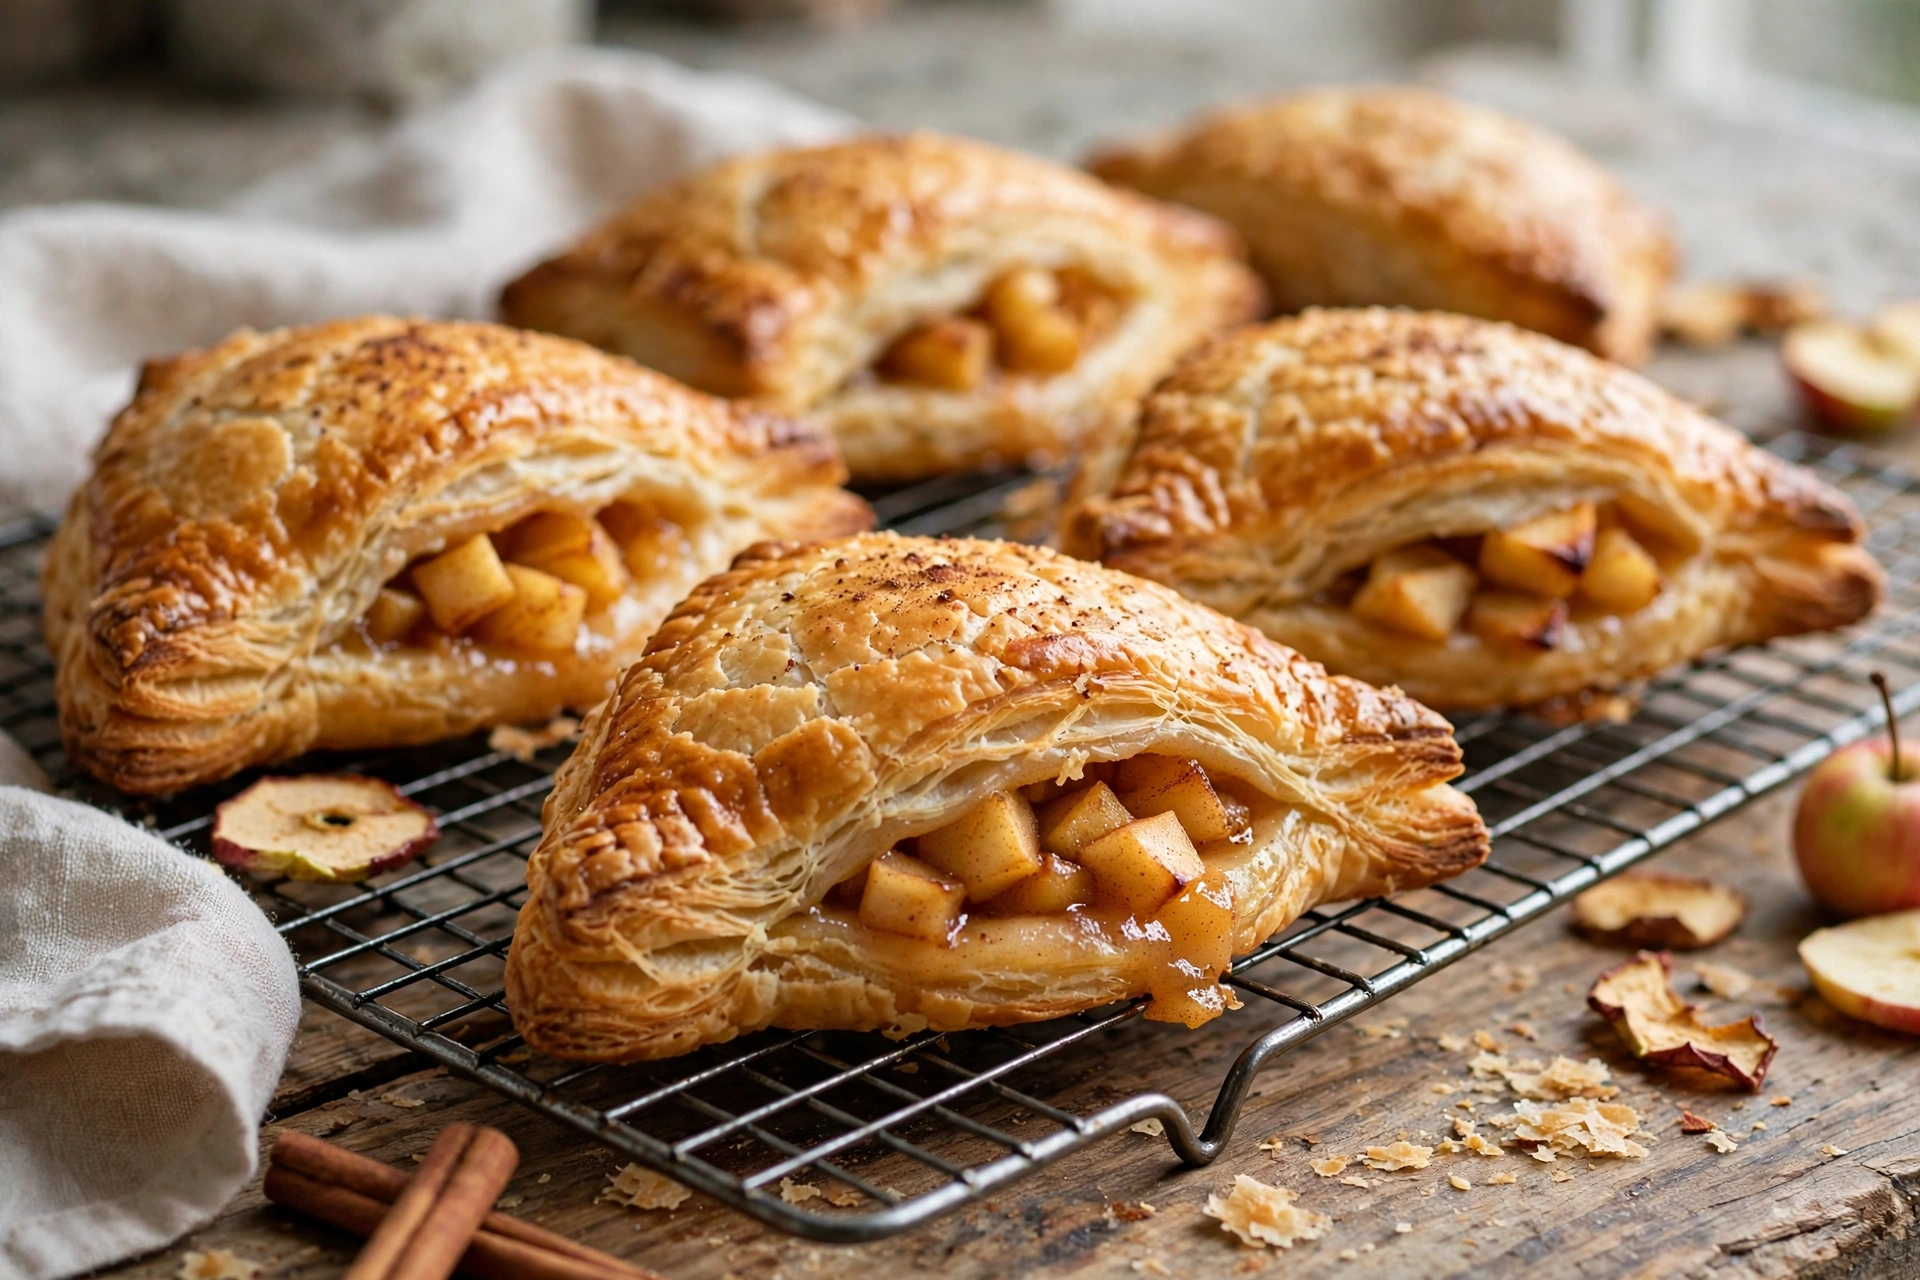
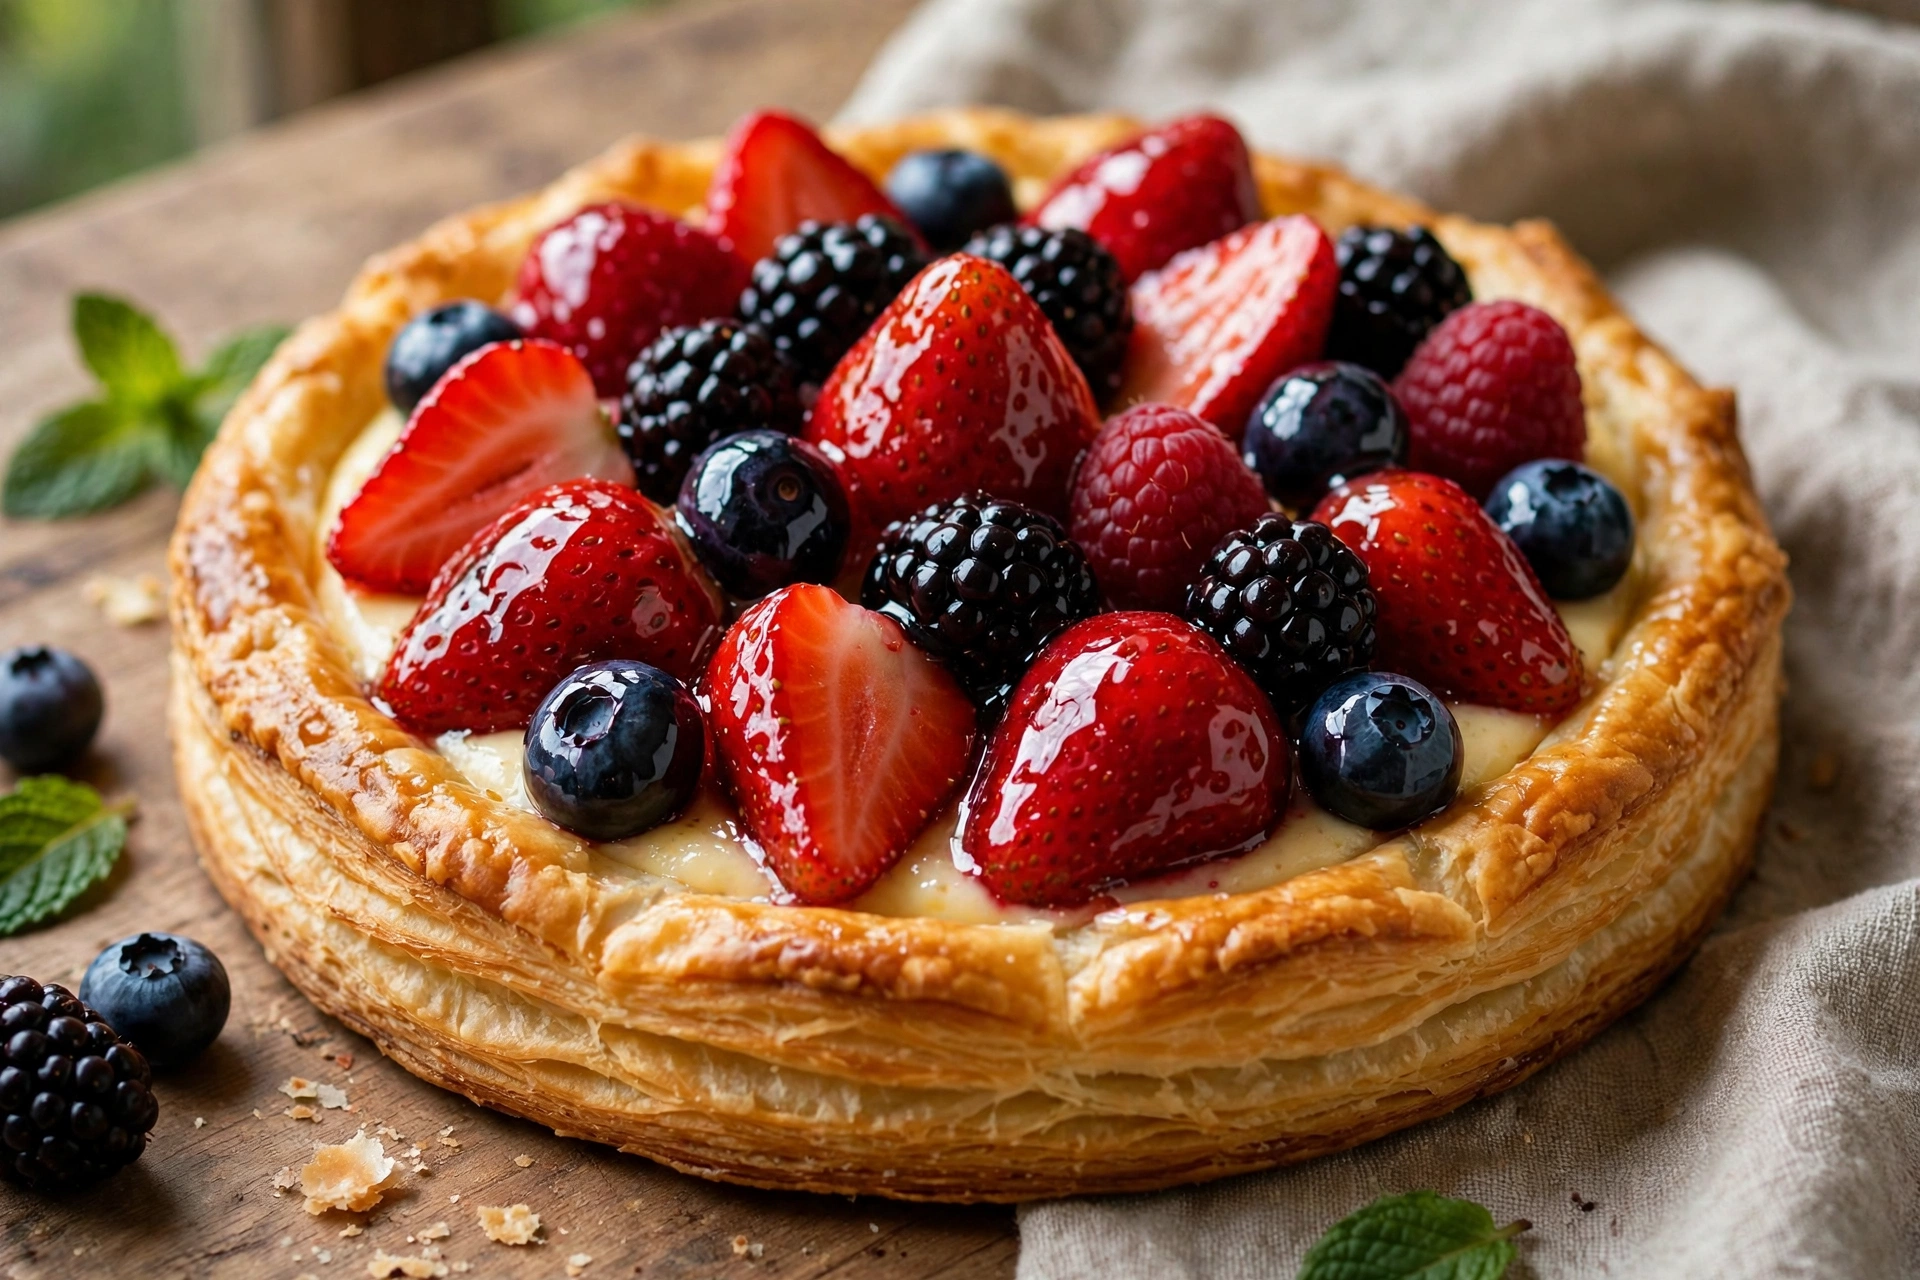
The range of dishes that this puff pastry recipe makes possible is one of the reasons it is worth the effort. For sweet uses, the simplest is the palmier: roll the dough out, sprinkle it generously with sugar, fold it from both sides toward the center, slice it into pieces, and bake until caramelized and crisp. Fruit tarts are made by cutting the dough into rounds or rectangles, adding a thin layer of frangipane or pastry cream, arranging sliced fruit on top, and baking until golden. Apple turnovers enclose spiced cooked apples in folded triangles of dough, sealed at the edges with a fork and brushed with egg wash. A tarte Tatin inverts the usual order, caramelizing fruit in a skillet and covering it with a round of pastry before baking and turning out.
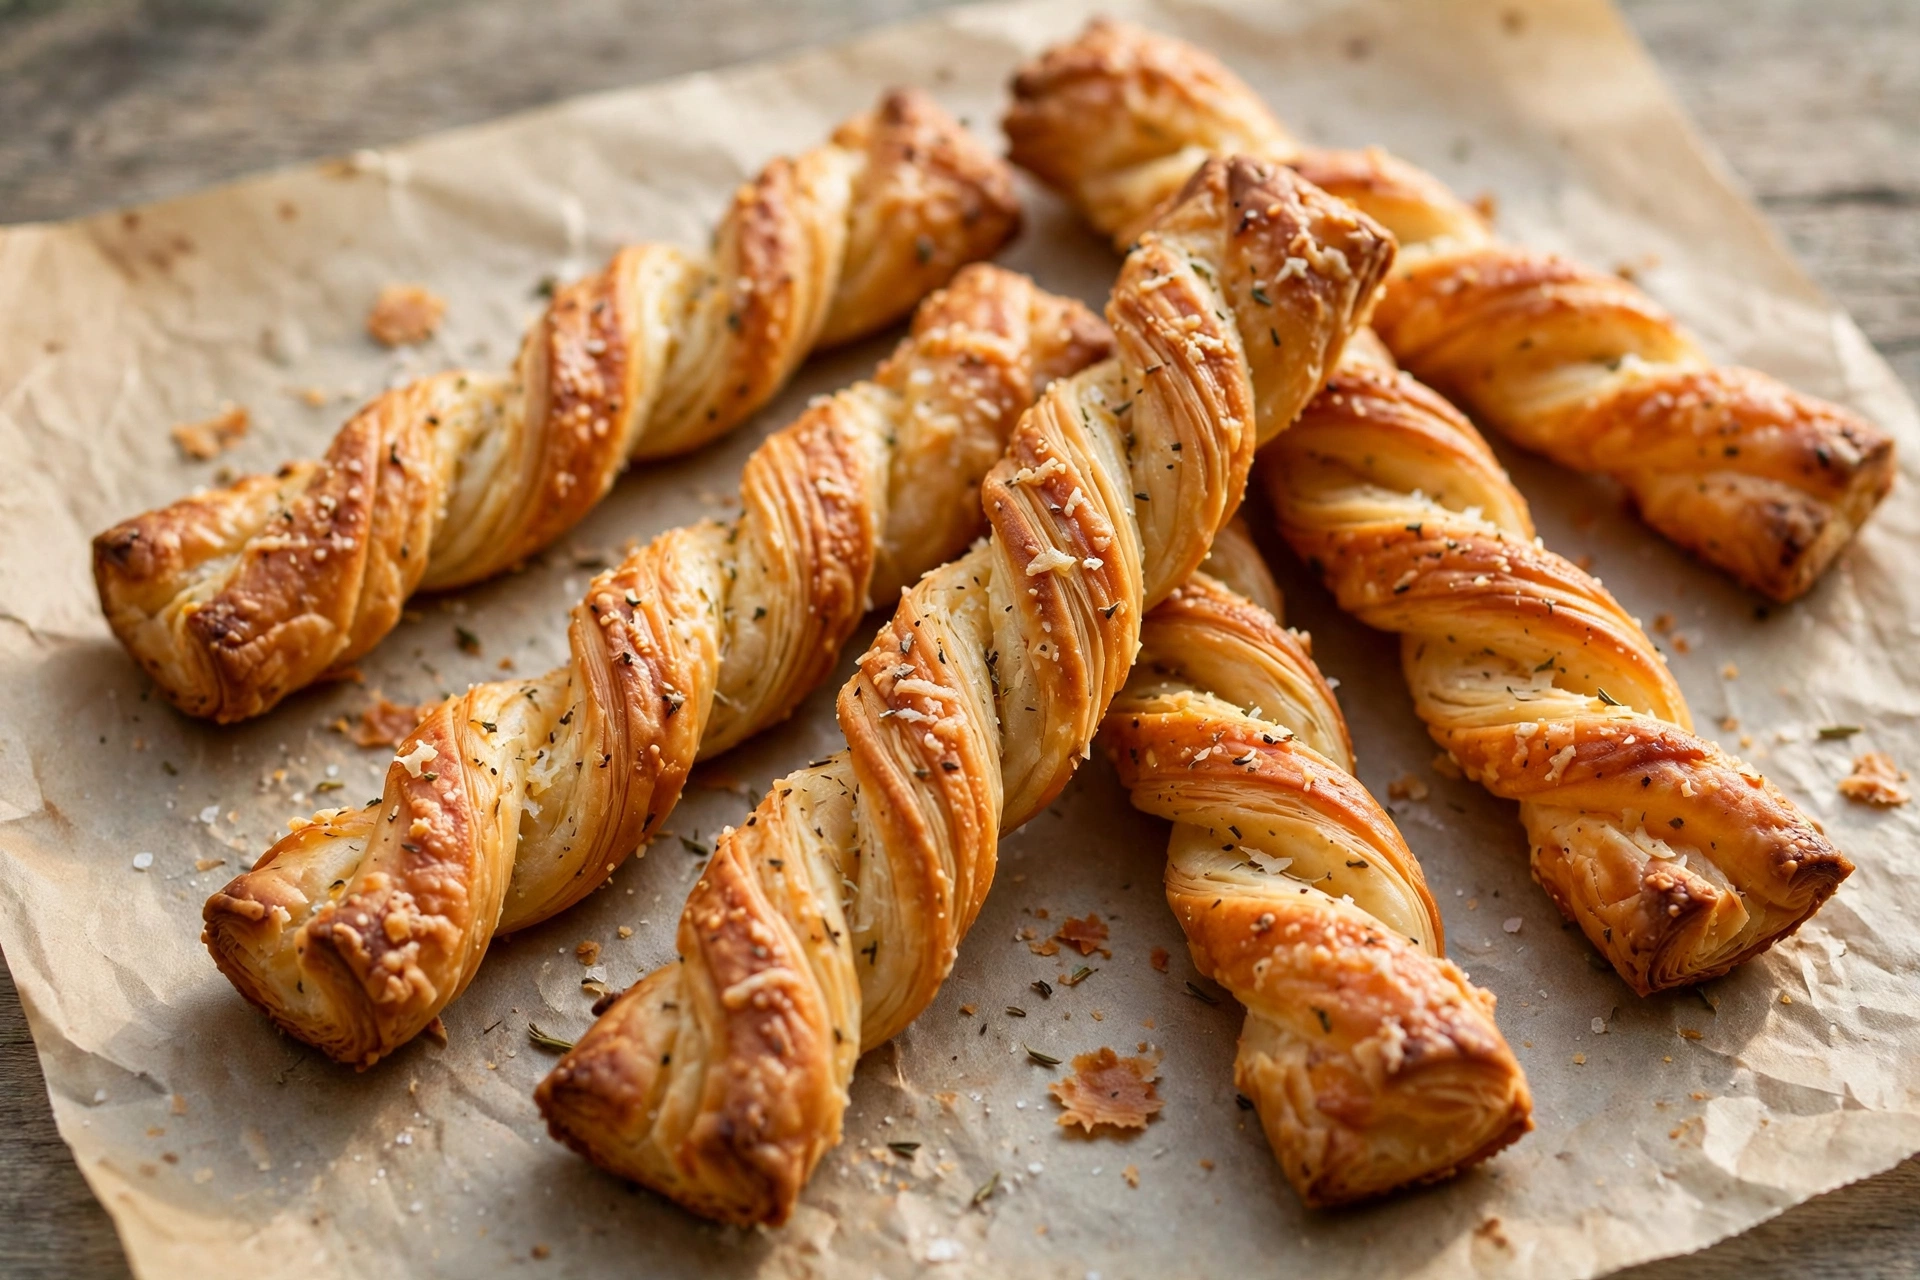
For savory uses, puff pastry makes excellent cheese straws: roll the dough out, sprinkle with grated hard cheese and a pinch of cayenne, cut into strips, twist, and bake until crisp. Sausage rolls wrap seasoned sausage meat in pastry and bake until golden. Vol-au-vents are small, hollow cases made from stacked rings of pastry, baked until risen and then filled with creamed mushrooms, chicken, or seafood. A pot pie lid is a round of pastry laid over a filled dish and baked until puffed and brown, which is simpler than a full double-crust pie and just as satisfying. Beef Wellington, in which a beef tenderloin is wrapped in mushroom duxelles and pastry, is the most ambitious savory use, and it rewards careful pastry work with a dramatic result.

For both sweet and savory uses, the same principles apply: keep the pastry cold until baking, cut with a sharp blade, avoid egg wash on cut edges, and bake in a hot oven until deeply golden. Fillings should be cooked and cooled before they are enclosed, because raw fillings release water during baking and make the pastry soggy from the inside. Wet fillings should be used sparingly, and a thin layer of breadcrumbs, ground almonds, or grated cheese between the pastry and a wet filling absorbs moisture and protects the crispness.
Rough Puff Pastry: The Faster Alternative
For cooks who want most of the result with less of the time, rough puff pastry, also called blitz puff, is a respected shortcut. Instead of enclosing a separate butter block, the butter is cut into large cubes and mixed into the flour with minimal handling, so that visible pieces of butter remain throughout the dough. The dough is then rolled and folded in the same letter-fold pattern, but only three or four times, with shorter rests. The butter pieces flatten into layers during rolling, producing a pastry that rises well and flakes nicely, though with fewer and less even layers than classic puff pastry.
Rough puff takes about two hours including rests, compared with five or more for classic puff, and it is an excellent choice for sausage rolls, cheese straws, and simple tarts, where the pastry is a supporting player rather than the star. For vol-au-vents and other dishes where a dramatic, even rise matters most, classic puff pastry is worth the extra time. Many experienced bakers keep both methods in their repertoire and choose based on the dish. The recipe card at the end of this guide gives the classic method, because it is the foundation, and the rough puff method follows the same folding pattern with the butter mixed in rather than enclosed.
Also Read: German Chocolate Cake Recipe (Classic Coconut-Pecan Frosting)
Storage and Freezing
Unbaked puff pastry keeps well. Wrapped tightly in plastic wrap, it can be refrigerated for up to three days. For longer storage, it should be wrapped in plastic wrap, placed in a freezer bag with the air pressed out, and frozen for up to three months. Frozen pastry should be thawed overnight in the refrigerator, not at room temperature, because slow thawing keeps the butter firm and the layers distinct. Once thawed, it should be used within a day and should not be refrozen.
Baked puff pastry is best eaten the day it is made, while it is still crisp. It can be kept in an airtight container at room temperature for one day, but it softens gradually. Crispness can be partly restored by reheating in a hot oven, at 375 degrees Fahrenheit, for five to eight minutes, though it will not be quite as crisp as when freshly baked. Filled pastries should be refrigerated if they contain perishable fillings and eaten within two days. Unfilled baked shells can be frozen for up to one month and recrisped in the oven after thawing. Also Read: Easy Peach Cobbler Recipe (Juicy, Golden, Foolproof)
Troubleshooting in Detail
Even careful bakers run into problems with puff pastry, and most of them have clear causes. If the butter breaks through the dough during rolling, the usual cause is butter that is too hard relative to the dough, or rolling that is too aggressive at the start of a turn. The fix is to stop, dust the breakthrough lightly with flour, press it gently back into place, and refrigerate the dough for thirty minutes. On the next turn, start rolling from the center outward with lighter pressure, and let the pin do the work gradually rather than forcing the dough flat in a few passes. If breakthroughs keep happening in the same spot, the dough may be too thin there; folding the dough so that the thin area sits in the middle of the package, where it is supported by more dough, helps.
If the pastry rises unevenly, with one side higher than the other, the folds were probably uneven. A rectangle that is wider at one end than the other produces layers of different thickness, and the thicker side rises more. Using a ruler to check the rectangle before each fold, and trimming the edges straight with a sharp knife before folding, prevents this. Trimming also removes the folded edges where layers are compressed, which can restrict rising at the sides. Trimmings should not be discarded; they can be stacked, rolled gently, and baked as cheese straws or palmiers, though they will rise less evenly than the main dough because their layers are jumbled.
If the pastry leaks butter during baking, the oven was probably not hot enough at the start, or the pastry was not chilled before baking. Butter that melts before steam forms runs out onto the baking sheet instead of lifting the layers. A fully preheated oven, a final chill of twenty to thirty minutes for shaped pieces, and a baking sheet that is not overcrowded all help. Overcrowding lowers the temperature around each piece and traps steam, which makes the pastry soggy. Pieces should have at least an inch of space on all sides.
If the pastry is golden on top but doughy inside, it was removed from the oven too early. Puff pastry should be baked until it is a deep golden brown all over, not just on the top. The center of a thick piece takes longer than the edges, and the color is a better guide than the timer. If the top browns before the inside is done, a loose sheet of foil over the top allows the inside to catch up without further browning. Lowering the oven temperature is not recommended, because the layers need sustained heat to finish cooking through.
If the pastry tastes of raw flour, excess flour was trapped between the layers during folding. Brushing the surface of the dough with a dry pastry brush before each fold removes the loose flour that would otherwise be folded in. The work surface should be dusted lightly and no more, and any flour that accumulates on the dough during rolling should be brushed off before folding. This small habit makes a noticeable difference to the finished flavor, and it is one of the details that separates good puff pastry from excellent puff pastry.
Ingredients
Method
- For the détrempe, whisk the flour and salt in a large bowl. Rub in the 50 g butter until coarse crumbs form. Stir the lemon juice into the ice water, then add gradually, mixing until a shaggy dough forms. Add water a tablespoon at a time only if needed.
- Knead briefly on a lightly floured surface, 3 to 4 minutes, until smooth. Shape into a flat rectangle, wrap tightly, and refrigerate at least 30 minutes.
- For the beurrage, beat the cold butter between parchment sheets with a rolling pin until pliable, then shape into a 7 inch square, about 1/2 inch thick. Refrigerate while the dough rests.
- Roll the détrempe into a rectangle about 14 by 8 inches. Place the butter block in the center, fold the left third over it, then the right third over that, and pinch the seams closed.
- Turn the package 90 degrees. Roll into a rectangle about 20 by 8 inches, keeping edges straight and thickness even, brushing off excess flour.
- Fold the bottom third up and the top third down (one single turn). Mark one indentation, wrap, and refrigerate 30 minutes.
- Repeat the roll and fold five more times, for six single turns total, resting 30 minutes between turns. Rest the finished dough at least 1 hour, or overnight, before use.
- Roll out to the thickness required (1/8 to 1/4 inch), cut with a sharp knife in single decisive cuts, and chill shaped pieces 20 to 30 minutes.
- Bake in a preheated 400 degree Fahrenheit (200 degree Celsius) oven on the lowest rack, on parchment-lined sheets, for 20 to 25 minutes, until deeply golden, risen, and crisp.
People Also Ask
How is puff pastry different from phyllo pastry?
Puff pastry is a laminated dough in which butter is folded into dough in many layers, and it rises in the oven as steam separates those layers. Phyllo is a paper-thin dough made without butter folded in; it is brushed with butter layer by layer during assembly and becomes crisp rather than puffed. Puff pastry is thicker, richer, and rises dramatically, while phyllo is lighter, thinner, and shatters when cut.
Can I make puff pastry with salted butter?
It is possible, but unsalted butter is strongly preferred. Salted butter varies in salt content between brands, which makes it hard to control the seasoning of the dough, and it can make the pastry taste too salty. European-style unsalted butter with a higher fat content gives the best rise and flavor.
Why did my puff pastry not rise?
The most common causes are butter that melted into the dough during folding, an oven that was not hot enough, or cut edges that were sealed by a dull blade or egg wash. Keeping everything cold, preheating the oven fully to 400 degrees Fahrenheit, cutting with a sharp blade in one motion, and keeping egg wash off the cut edges solve most rising problems.
How many layers does puff pastry actually have?
After six single folds, the dough has 729 layers of dough and butter, calculated as three to the power of six. In practice, some layers merge during rolling, so the effective number is lower, but the order of magnitude is correct. The exact number matters less than the principle: repeated folding multiplies layers, and those layers are what create the flaky texture.
Can I use a food processor to make the détrempe?
Yes, with care. Pulse the flour, salt, and butter together briefly, then add the cold water gradually and pulse just until the dough comes together. Over-processing develops too much gluten and makes the dough hard to roll. Mixing by hand gives more control and is preferred for a first attempt.
What is the difference between classic puff pastry and rough puff pastry?
Classic puff pastry encloses a separate block of butter in the dough and folds it six times, producing the highest, most even rise. Rough puff pastry mixes cubed butter directly into the dough and folds it three or four times, producing a very good pastry in about half the time, with slightly less even layers. Rough puff is ideal for everyday baking; classic puff is worth the effort for showpiece dishes.
Can I freeze homemade puff pastry?
Yes, for up to three months. Wrap it tightly in plastic wrap, place it in a freezer bag with the air pressed out, and freeze flat. Thaw overnight in the refrigerator, not at room temperature, so the butter stays firm and the layers remain distinct. Do not refreeze pastry once it has been thawed.
Why do I need to rest the dough between folds?
Resting does two things. It chills the butter so it stays in distinct layers instead of melting into the dough, and it relaxes the gluten in the dough so it can be rolled out again without springing back or tearing. Skipping rests is the most common cause of torn dough and poor rising.
How thick should I roll puff pastry for different uses?
For tarts and turnovers, about one eighth of an inch is standard. For vol-au-vents, pie lids, and Wellington, about one quarter of an inch gives more structure and a higher rise. Thinner pastry rises higher and crisps more; thicker pastry is sturdier and better for holding heavy fillings.
Should I dock puff pastry before baking?
Docking, or pricking the dough with a fork, prevents rising in the docked area and is used when a flat base is wanted, such as for a tart shell that will hold a filling. For items that should puff fully, like vol-au-vents or turnovers, the dough should not be docked. Whether to dock depends entirely on the finished shape desired.
Can I make puff pastry in a warm kitchen?
Yes, but with extra care. Work in shorter bursts, chill the dough more often and for longer between folds, and use ice water in the détrempe. If the butter starts to feel greasy or to break through the dough, stop immediately and refrigerate for thirty minutes. A cool work surface, such as a marble slab, also helps considerably.
Is homemade puff pastry worth the effort compared with store-bought?
For flavor and rise, yes. Homemade pastry made with good butter tastes richer, rises higher, and has more distinct layers than most frozen commercial pastry, which is often made with cheaper fats. For everyday dishes where the pastry is a minor element, store-bought pastry is perfectly acceptable, and rough puff pastry offers a middle ground with much of the quality at a fraction of the time.

Hi, I’m Angela. I cook the way busy people actually cook — simple, tasty food with ingredients you already have. On CookBookBite I share easy recipes, honest kitchen tips, and dishes my family asks for again and again.
Pingback: Chicken Noodle Soup Recipe (Classic & Comforting)