
This whole wheat bread recipe solves whole wheat bread’s image problem. Too many of us grew up with the dense, dry, doorstop loaves that gave “healthy bread” a bad name — the kind that crumbled when you looked at it and tasted like punishment. I believed whole wheat bread was supposed to be heavy and sad for years. Then I learned the truth: it doesn’t have to be. At all.

The secret is that 100% whole wheat flour needs special handling extra hydration, a little help from vital wheat gluten (or a touch of bread flour), honey for tenderness, and proper kneading. Get those right and you get a loaf that’s soft, sliceable, lightly sweet, and nutty in the best way — the kind of bread that makes toast worth waking up for.
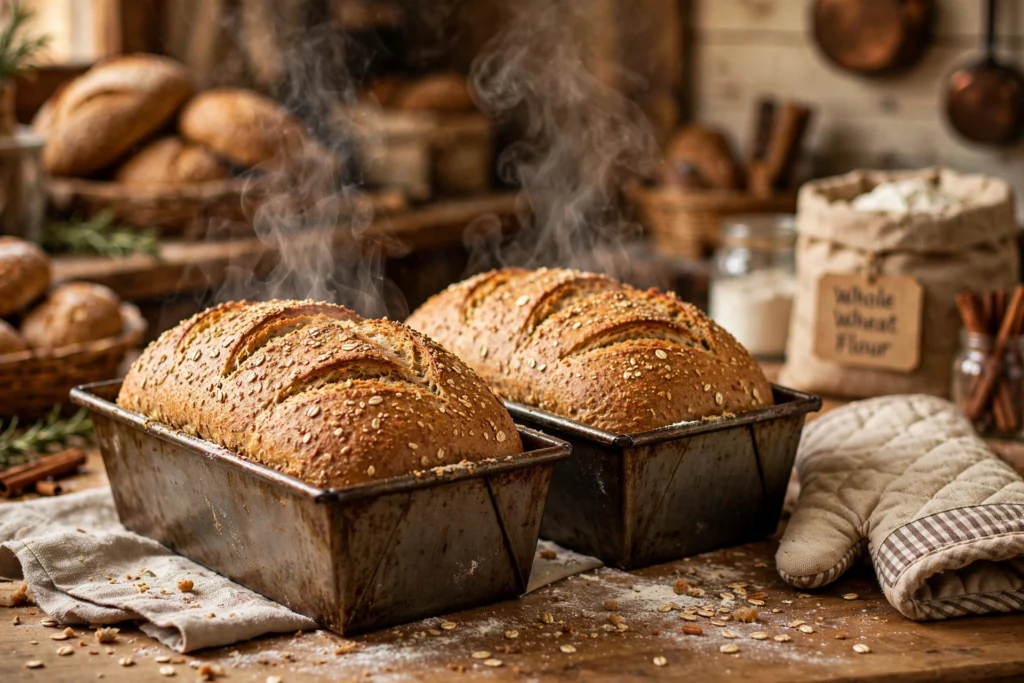
This recipe makes two beautiful sandwich loaves with a soft crumb and golden crust. It’s the everyday bread my family actually asks for and it happens to be whole grain. That’s the best kind of healthy eating: the kind you don’t notice.
Also Read : Sourdough Pizza Crust Recipe: Chewy, Blistered and Easy to Make at Home
But before we get to the recipe, let me explain why whole wheat bread so often goes wrong — because understanding the “why” is what separates bakers who follow recipes from bakers who can fix them. Whole wheat flour contains the entire wheat berry: the starchy endosperm, the nutritious germ, and the fibrous bran. That bran is the troublemaker. Its sharp little flakes act like tiny knives, slicing through the gluten strands you’re trying to develop. Less intact gluten means less structure, less rise, and that characteristic dense, crumbly texture.
White flour doesn’t have this problem because the bran and germ are milled away — which is also why it’s less nutritious. So the challenge of whole wheat baking is real: how do you keep all that nutrition and flavor while still getting a loaf that’s soft and sliceable? The answer is a combination of techniques, each addressing a different part of the problem. More water compensates for the bran’s thirst. Extra kneading builds more gluten to survive the bran’s cutting. A touch of bread flour or vital wheat gluten reinforces the structure. Honey and fat tenderize the crumb. And patience — proper rising times — lets the yeast do its full work.
None of these is complicated on its own. Together, they’re transformative. This isn’t a compromise loaf or a “good enough for healthy” loaf. It’s genuinely excellent bread that happens to be whole grain.
Table of Contents
Why You’ll Love This Whole Wheat Bread
First, it’s genuinely soft. Not “soft for whole wheat” — actually soft. The crumb is tender, the slices hold together for sandwiches, and it toasts beautifully. The doorstop days are over. I’ve served this to committed white-bread eaters who had no idea it was whole wheat until I told them — and then they didn’t believe me.
Second, it’s 100% whole grain (with just a cup of bread flour for structure, which you can swap out if you want it fully whole wheat). All the fiber, nutrients, and nutty flavor of whole wheat, in a loaf your family will eat without complaint. White-bread converts, take note.
Third, it makes two loaves. One for now, one for the freezer (or a neighbor — you’ll make friends). The effort is barely more than making one, and having a backup loaf in the freezer means you’re never more than a thaw away from homemade bread.
Fourth, the smell. Baking bread fills your home with a warmth that no candle can replicate. Whole wheat has an especially cozy, nutty aroma — deeper and more complex than white bread. Your kitchen will smell like a bakery, and you’ll feel like a hero.
Fifth, it’s economical. Two large loaves of genuinely good whole wheat bread for the cost of a bag of flour and a few pantry staples. Compare that to the $5–6 per loaf you’d pay for decent bakery whole wheat bread, and the savings add up fast — especially if your household goes through bread like mine does.
Sixth, it’s endlessly adaptable. The base recipe is a blank canvas — add oats, seeds, raisins, herbs, or cheese. Make dinner rolls, pizza dough, or cinnamon bread. Once you master the basic loaf, a whole world of variations opens up.
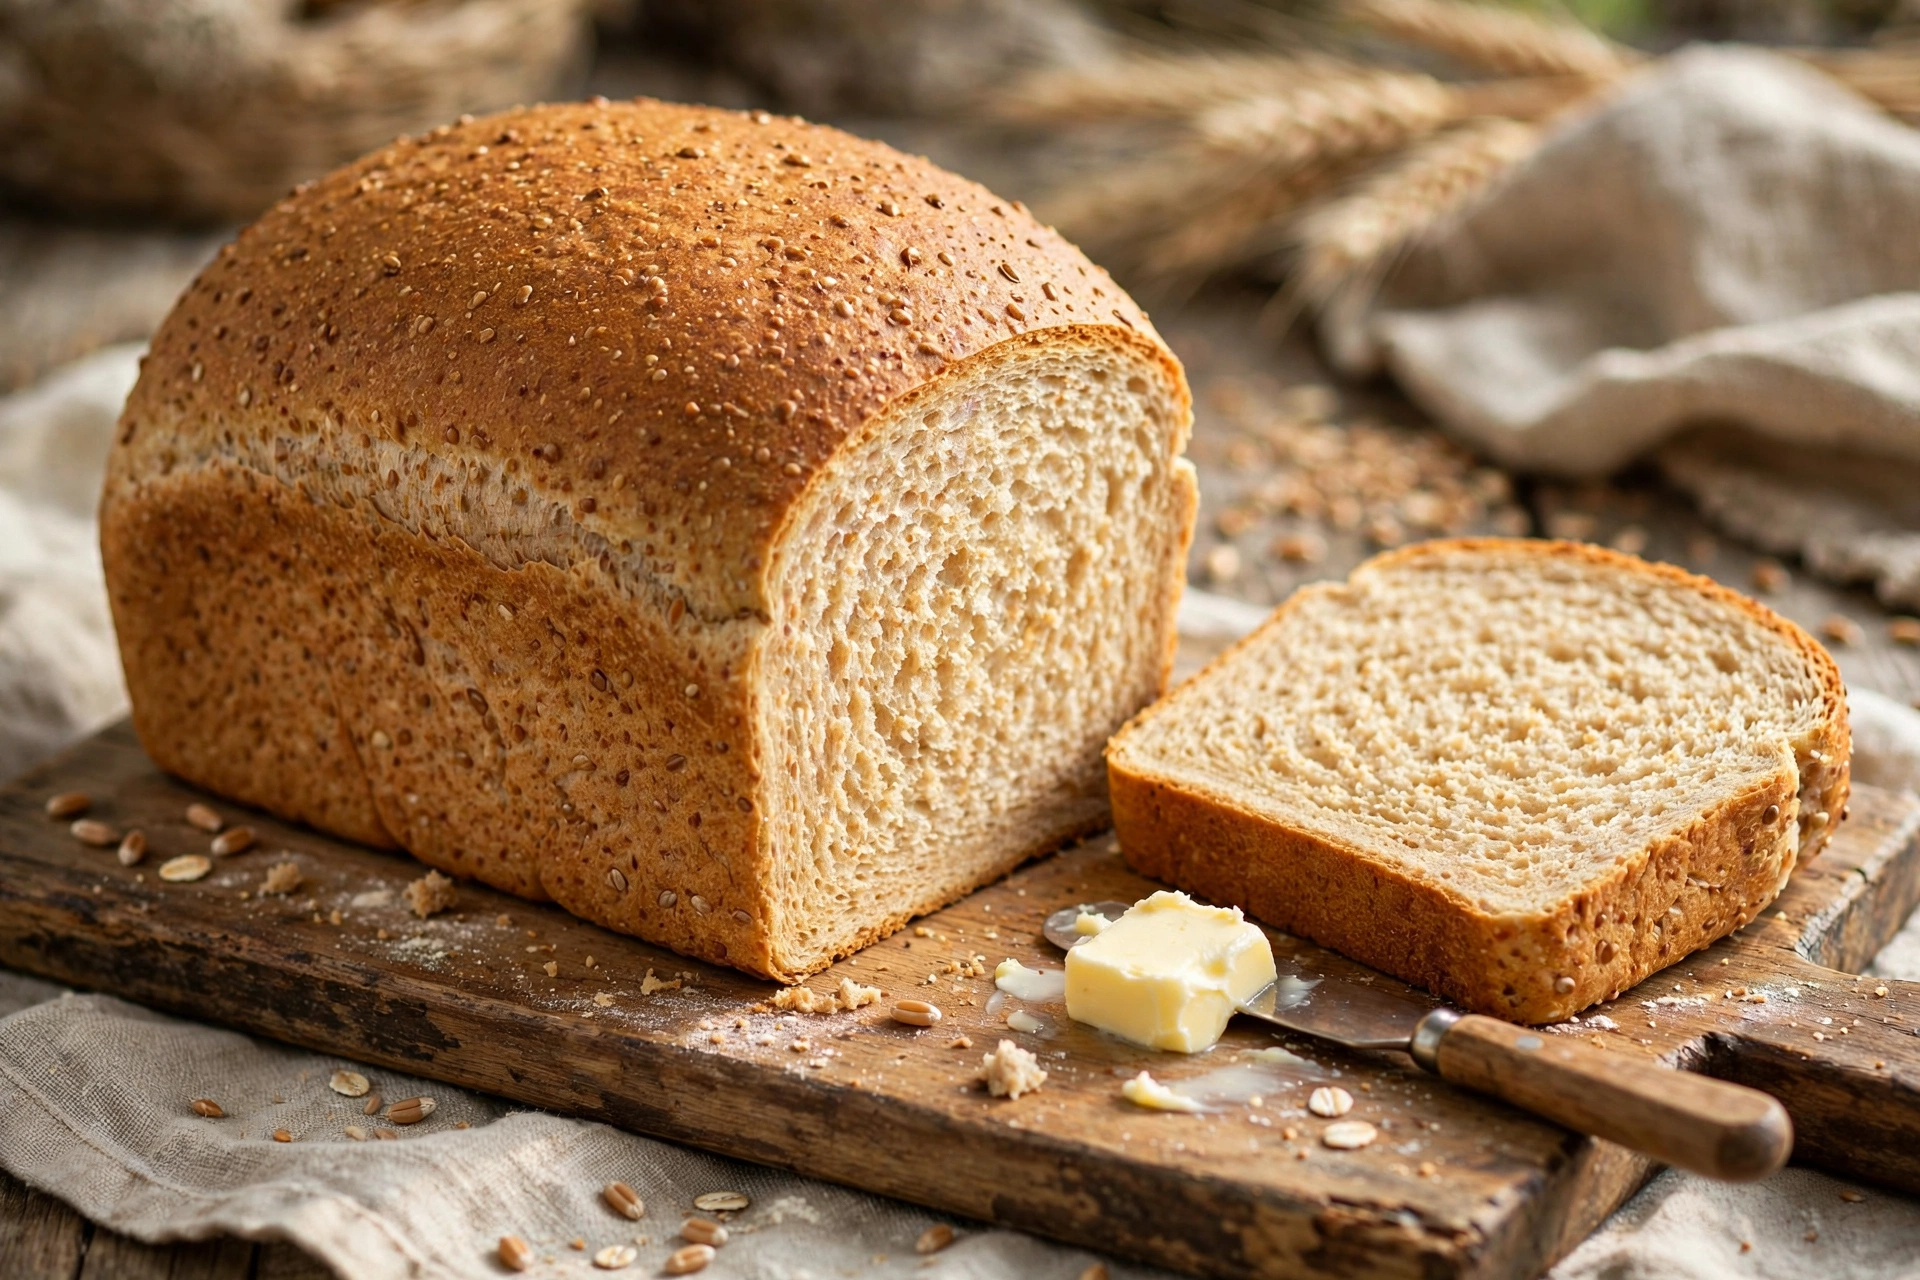
Finally, there’s the satisfaction factor. There’s something deeply grounding about making bread from scratch — the kneading, the waiting, the watching it rise. In a world of instant everything, bread demands patience and rewards it. That first slice of still-warm homemade bread, with butter melting into the crumb? That’s not just food. That’s an experience.
Ingredients for Whole Wheat Bread — And Why Each One Matters
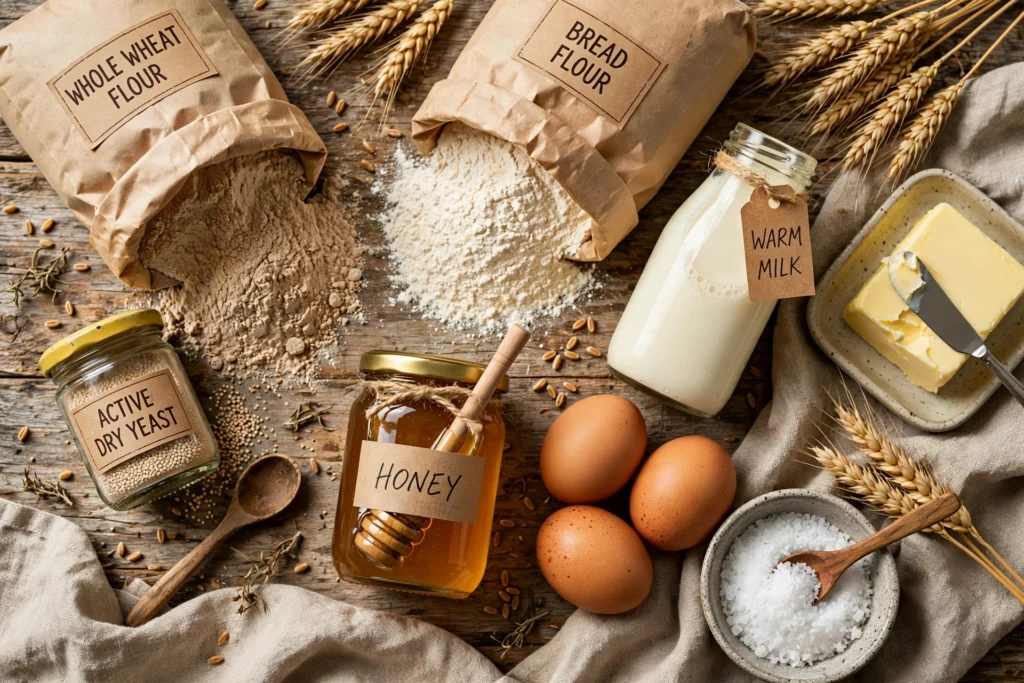
Whole wheat flour (6 cups, white whole wheat preferred) — White whole wheat (milled from white wheat berries) is milder and lighter than traditional red whole wheat — the key to non-dense bread. King Arthur is widely available and consistent. Regular whole wheat works too, giving a slightly heartier, more robust loaf. If you’re new to whole wheat baking, start with white whole wheat — the learning curve is gentler. Store whole wheat flour in the freezer if you don’t bake often; the natural oils in the germ can go rancid at room temperature after a few months.
Bread flour (1 cup) — Just a cup, to boost the gluten and guarantee a good rise. This is the insurance policy against density. Bread flour has a higher protein content (12–14%) than all-purpose, which means more gluten development. (For 100% whole wheat, replace with whole wheat flour + 2 tablespoons vital wheat gluten.) If you only have all-purpose flour, it’ll work — the loaf will be marginally less lofty, but still good.
Active dry yeast (2¼ teaspoons / 1 packet) — Or instant yeast (same amount, skip the proofing step). Make sure it’s fresh — dead yeast is the #1 bread failure, and there’s no way to rescue a loaf made with dead yeast. Check the expiration date, and if your yeast has been open for more than a few months, proof it before committing your flour. Store opened yeast in the freezer; it’ll last a year or more.
Warm water (1 cup, 105–115°F) — For proofing the yeast. Too hot kills it (above 140°F is lethal); too cold won’t wake it up. The wrist test works: it should feel comfortably warm, like a baby’s bath, not hot. If you don’t have a thermometer, err on the cooler side — yeast is more forgiving of cool than hot.
Warm milk (1 cup) — Adds tenderness and richness that water alone can’t provide. The milk proteins and sugars contribute to a softer crust and a richer crumb color. Whole milk gives the best result, but 2% works fine. In a pinch, you can use all water — the bread will be slightly less tender but still good.
Honey (⅓ cup) — Sweetens gently, feeds the yeast (giving it a head start), and keeps the crumb soft for days. Don’t skip it — honey does structural work here, not just flavor. It also helps with browning, giving you that gorgeous golden crust. Maple syrup works as a substitute; granulated sugar works too but doesn’t contribute the same moisture retention.
Butter (¼ cup, melted) — For a tender crumb and rich flavor. Fat shortens gluten strands (that’s why it’s called “shortening”), creating tenderness. Oil works, but butter tastes better and contributes to browning. If you’re dairy-free, a neutral oil or vegan butter substitute works.
Egg (1 large) — Adds richness, helps with structure, and promotes beautiful browning. The egg proteins strengthen the crumb just enough to make it sliceable without toughness. For an egg-free version, you can omit it — the bread will be slightly less rich but still perfectly good.
Salt (1 tablespoon) — Essential for flavor and for controlling the yeast (salt regulates fermentation — without it, the yeast goes wild and the bread tastes flat AND has poor texture). Don’t reduce it — unsalted bread tastes remarkably bland. Use fine sea salt or table salt; if using coarse kosher salt, add an extra half teaspoon.
Vital wheat gluten (2 tablespoons, optional but recommended) — The professional’s secret for whole wheat bread. It supplements the flour’s gluten for better rise and lighter texture. If you bake whole wheat bread regularly, this is the single best investment you can make — a bag lasts forever and the difference is noticeable. Highly recommended if you can find it (Bob’s Red Mill makes a good one, available in most supermarkets).
Also Read : Easy No-Yeast Flatbread Recipe (Soft, Fluffy & 30 Minutes)
Equipment You’ll Need
A stand mixer with dough hook (or strong arms and 10 minutes — hand-kneading works perfectly, it’s just a workout), two 9×5-inch loaf pans (metal is best; glass works but browns differently), a large bowl for rising, plastic wrap or a damp towel for covering, and a wire cooling rack. An instant-read thermometer is extremely helpful for nailing doneness — bread is done at 190°F internal temperature, and guessing leads to either gummy or dry loaves. A bench scraper is handy for dividing dough but not essential.
How to Make This Whole Wheat Bread Recipe (Step by Step)
Step 1 — Proof the yeast. In a large bowl (or your stand mixer bowl), combine the warm water, honey, and yeast. Stir gently and let sit 5–10 minutes until foamy and fragrant. You’re looking for a thick layer of foam — like the head on a poured beer. No foam = dead yeast = start over with fresh yeast. This test takes 10 minutes and saves you from wasting 3 hours and 7 cups of flour on a loaf that will never rise. Don’t skip it, even if your yeast is new.
Step 2 — Mix the dough. Add the warm milk, melted butter (cooled slightly so it doesn’t cook the egg), egg, and salt to the yeast mixture. Stir to combine. Add 3 cups of the whole wheat flour along with the bread flour and vital wheat gluten (if using). Mix until you have a shaggy, rough dough. Then add the remaining whole wheat flour gradually — half a cup at a time — until a soft, slightly tacky dough forms.
You may not need every last bit of flour; humidity, flour brand, and measuring method all affect this. The dough should be soft and pliable, tacky enough to stick slightly to your fingers but not so sticky you can’t handle it. When in doubt, use less flour — you can always add more, but you can’t take it away.
Step 3 — Knead 8–10 minutes. Knead with the dough hook on medium-low speed (or by hand on a lightly floured surface) until the dough is smooth, elastic, and pulls away from the bowl. You’re developing gluten — the protein network that traps gas and gives bread its structure. The dough should pass the windowpane test: pinch off a small piece and stretch it gently between your fingers. If you can stretch it thin enough to see light through without it tearing, the gluten is developed.
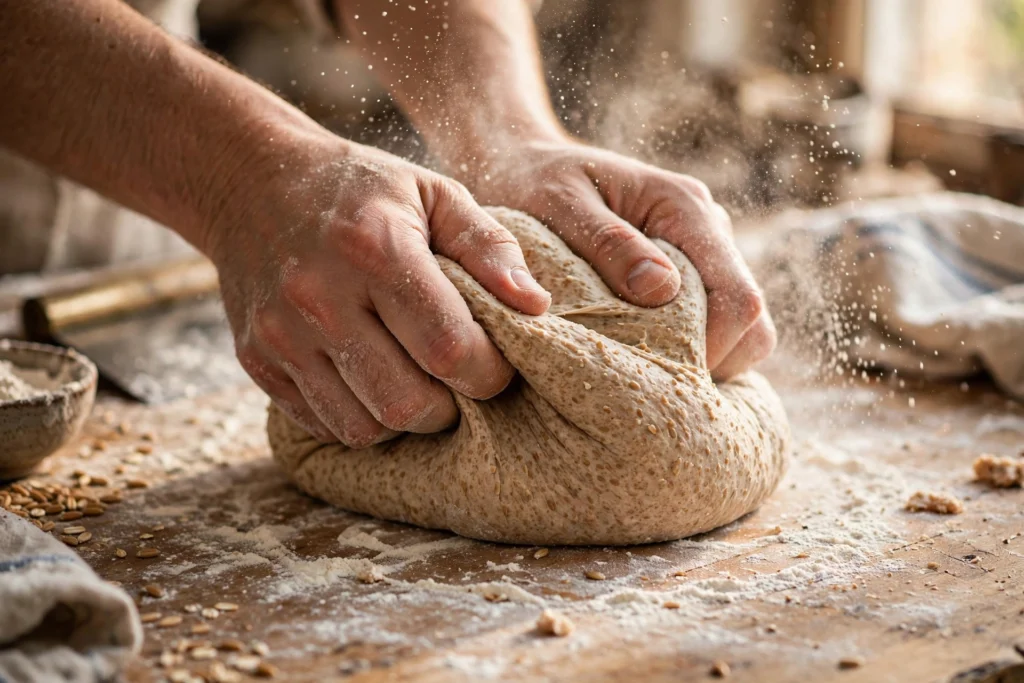
Whole wheat needs thorough kneading to develop enough gluten to compensate for the bran’s cutting action. Don’t under-knead — this is where light texture comes from. If kneading by hand, use the heel of your hand to push the dough away, fold it back, give it a quarter turn, and repeat. It’s rhythmic and meditative once you find your pace.
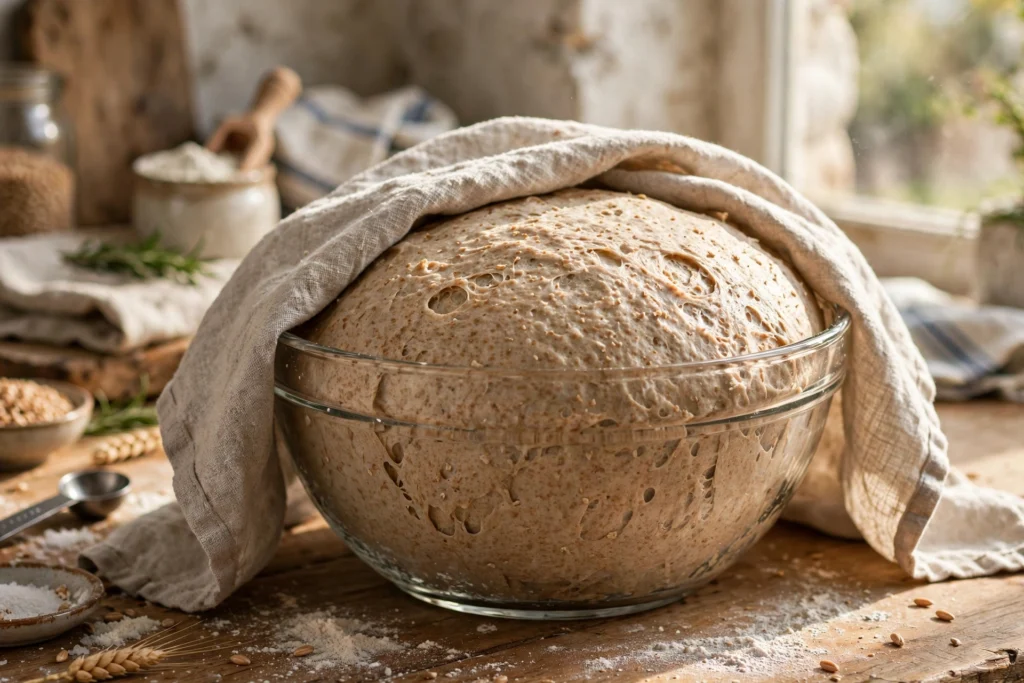
Step 4 — First rise. Shape the dough into a ball and place it in a large oiled bowl, turning once to coat. Cover with plastic wrap or a damp towel and let rise in a warm, draft-free spot for 1–1½ hours, until doubled in size. (Whole wheat rises a bit slower than white — be patient. The bran weighs the dough down slightly.) Good rising spots: inside the oven with just the light on, on top of the refrigerator, or near (not on) a heating vent. To test if it’s ready, poke it with a floured finger — if the indent stays, it’s ready; if it springs back immediately, give it more time.
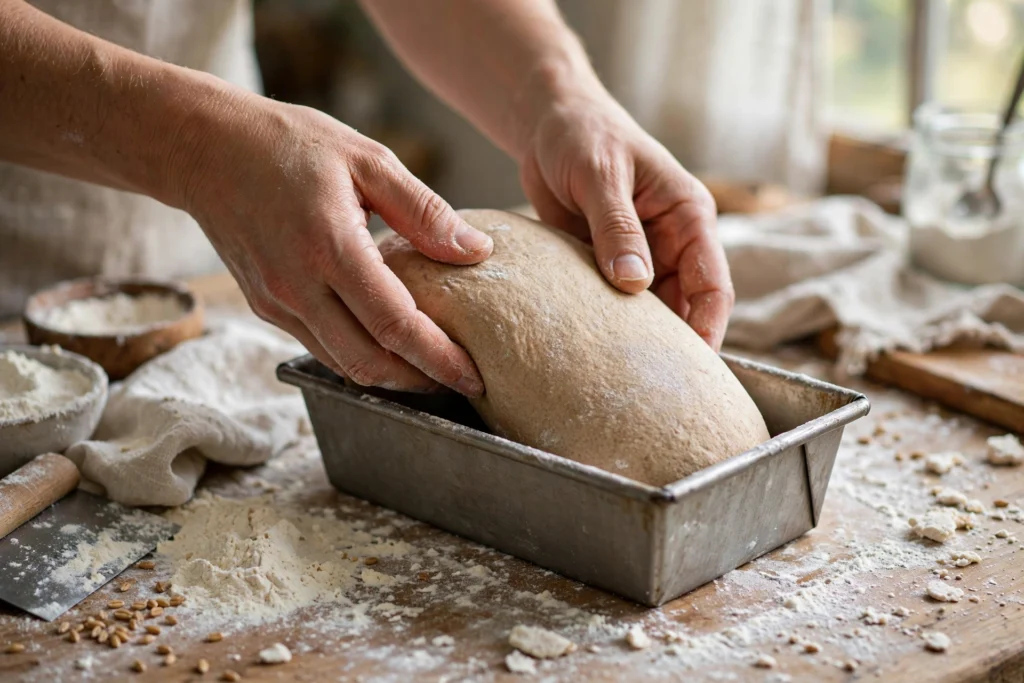
Step 5 — Shape the loaves. Gently punch down the dough to release large air bubbles (don’t pulverize it — you’re degassing, not destroying). Turn it out onto a lightly floured surface and divide in half. For each half: pat or roll into a rectangle roughly 9 inches wide, then roll it up tightly like a jelly roll, pinching the seam closed with your fingers. Tuck the ends under and place seam-side down in a greased 9×5-inch loaf pan. A tight roll with a well-sealed seam gives you even slices without giant air holes.
Step 6 — Second rise. Cover the pans loosely with plastic wrap or a towel and let rise 45–60 minutes, until the dough crowns about 1 inch above the pan rim. Don’t let it over-rise — if it goes too far, it’ll collapse in the oven. Meanwhile, position a rack in the center of the oven and heat to 350°F. The timing works out perfectly: by the time the oven is hot, the loaves are ready.
Step 7 — Bake. Bake 30–35 minutes until deep golden brown. The most reliable doneness test is internal temperature: 190°F on an instant-read thermometer inserted into the center. No thermometer? Tap the bottom of the loaf — it should sound hollow, like knocking on a door. If the top is browning too fast (common with whole wheat — the bran sugars caramelize quickly), tent loosely with aluminum foil for the remaining time. Don’t open the oven door in the first 20 minutes — the blast of cool air can cause the loaf to fall.
Step 8 — Cool properly. Turn the loaves out onto a wire rack immediately — leaving bread in the hot pan steams the crust soggy from trapped moisture. Cool for at least 1 hour before slicing. I know it’s agonizing. The smell, the warmth, the temptation. But cutting hot bread compresses the still-setting crumb into gummy, doughy slices. The interior is literally still cooking as it cools — starches are setting, moisture is redistributing. One full hour. Set a timer and go for a walk.
My Best Tips for Soft Whole Wheat Bread
White whole wheat flour is the game-changer. If your whole wheat bread has always been dense, this is probably why. White whole wheat is milder, lighter-colored, and rises better than traditional red whole wheat — while still being 100% whole grain. It’s the single easiest upgrade you can make.
Hydrate generously. Whole wheat flour absorbs significantly more water than white flour — the bran and germ are thirsty. The dough should be soft and slightly tacky, not stiff and firm. A wetter dough = a softer, more open crumb. Resist the urge to add too much flour during kneading; a slightly sticky dough is correct.
Don’t skimp on kneading. Whole wheat’s bran cuts gluten strands as they form, so you need to develop MORE gluten than you would for white bread to end up with enough intact structure. Eight to ten minutes minimum with a mixer; 12+ by hand. The windowpane test doesn’t lie — if the dough tears, keep kneading.
Warm (not hot) rising spot. Around 75–80°F is ideal — the top of the fridge, inside the oven with just the light on, or a sunny countertop. Too cold and the rise is sluggish (though it’ll get there eventually); too hot and the yeast dies or produces off-flavors. Consistency matters more than exact temperature.
Tent with foil if browning too fast. Whole wheat browns faster than white bread because the natural sugars in the bran caramelize readily. If the top is dark golden at 20 minutes but the inside isn’t done, tent loosely with aluminum foil. This isn’t a flaw — it’s just whole wheat being whole wheat.
Cool completely before slicing. Hot bread is still cooking inside — the crumb structure is setting, moisture is evening out. Slicing early gives you gummy, compressed slices that seem underbaked even when they weren’t. One full hour on a wire rack. Set a timer and walk away from the kitchen if you have to.
Weigh your flour for consistency. A cup of whole wheat flour can weigh anywhere from 110 to 160 grams depending on how you scoop. That’s a massive variation. If you bake bread regularly, a kitchen scale is the best $15 you’ll spend — 1 cup of whole wheat flour is approximately 113 grams. Consistent measurements mean consistent results.
Don’t rush the rises. Under-proofed bread is dense; over-proofed bread collapses. Learn the poke test and trust it over the clock — every kitchen is different. The dough is ready when it’s ready, not when the timer says so.
Slash the top (optional). A single confident slash down the center with a sharp knife or lame just before baking gives the loaf a place to expand and creates an attractive split. It’s not required, but it looks professional and prevents random cracking.
Brush with butter for a soft crust. As soon as the loaves come out of the oven, brush the tops with melted butter. It keeps the crust soft and adds a beautiful sheen. For a chewier, rustic crust, skip this and let the crust set naturally.
Rotate the pans halfway. Most ovens have hot spots. Rotating the pans 180 degrees halfway through baking ensures even browning. Just do it quickly to minimize heat loss.
Keep notes. Seriously — jot down your flour brand, rise times, oven temp, and results. Bread baking has variables, and notes help you replicate successes and diagnose failures. After 3–4 bakes, you’ll have your process dialed in.
Also Read : Crispy Potato Skins Recipe (Better Than the Restaurant)
Troubleshooting: When Bread Goes Wrong
Even with a great recipe, things sometimes go sideways. Here’s how to diagnose and fix the most common whole wheat bread problems:
Dense, heavy loaf: The most common complaint. Causes: too much flour (measure carefully!), under-kneading (do the windowpane test), old/dead yeast (proof it first), or under-proofing (use the poke test). Also — if you used traditional red whole wheat without the bread flour or vital wheat gluten, that alone can cause density. Fix the variable, try again.
Loaf sank in the middle: Over-proofed (the yeast exhausted itself before baking) or underbaked (the structure wasn’t set). Watch the second rise carefully — 1 inch above the pan, no more. And verify doneness with a thermometer, not just color.
Giant air holes in the crumb: Under-shaped (air pockets trapped during rolling) or over-proofed. Roll the dough tightly when shaping, pinching out air bubbles as you go. Pop any large bubbles you see with a pin before the second rise.
Crust too thick or hard: Overbaked, or oven too hot. Verify your oven temperature with an oven thermometer (most ovens are off by 25°F or more). Tent with foil if browning too fast. Brush with butter after baking for softness.
Bread tastes yeasty or sour: Over-proofed (too long in a too-warm spot) or too much yeast. Stick to the recipe amount and watch the dough, not the clock. A slightly sour tang can also come from very old flour — check your flour’s freshness.
Bottom is soggy: Didn’t turn out of the pan immediately, or sliced too soon. Both trap steam. Wire rack + full cooling time solves this every time.
Delicious Variations to Try
Honey-oat: Add ½ cup of old-fashioned rolled oats to the dough and sprinkle additional oats on top before baking (mist the top with water first so they stick). Hearty, beautiful, and extra nutritious.
Cinnamon-raisin: Knead in 1 cup of raisins with the flour. After shaping into rectangles, spread with a mixture of ¼ cup sugar + 2 teaspoons cinnamon before rolling up. Breakfast bread royalty — incredible toasted.
Seeded harvest: Add ¼ cup each of sunflower seeds, flaxseeds, and sesame seeds to the dough. Press additional seeds into the top before the second rise. Crunchy, nutritious, gorgeous — the kind of loaf that looks like it came from an artisan bakery.
Molasses: Swap the honey for dark molasses for a darker, richer, slightly bitter-sweet loaf (very New England). Reduce to ¼ cup — molasses is stronger than honey.
Dinner rolls: Divide the dough into 16 equal pieces, shape into smooth balls, and arrange in a greased 9×13 pan. Bake at 350°F for 20–25 minutes. Perfect for holidays — soft, pull-apart, irresistible.
One loaf + pizza dough: Use half the dough for one sandwich loaf; stretch the other half into two pizza crusts. Par-bake the crusts 8 minutes at 450°F, then top and finish. Two meals, one dough, minimal extra effort.
Herb and cheese: Knead in 1 cup of shredded sharp cheddar and 2 tablespoons of fresh chopped rosemary (or 2 teaspoons dried). Savory, aromatic — amazing for sandwiches or alongside soup.
Cracked wheat: Add ½ cup of cracked wheat (bulgur) soaked in ½ cup of hot water for 30 minutes (drained) to the dough. Adds wonderful texture and a nutty chew.
Maple-walnut: Swap honey for maple syrup, add 1 cup of chopped toasted walnuts. The maple-walnut combination with whole wheat is sublime — especially as toast.
Sandwich thins: Divide into 12 pieces, flatten into 4-inch rounds, and bake on sheet pans at 375°F for 15–18 minutes. Lower-calorie sandwich option with all the flavor.
Storing, Freezing & Reviving
Room temperature: 4–5 days in a bread bag, wrapped in a clean kitchen towel, or in a paper bag inside a plastic bag (the double-wrap keeps the crust from getting leathery while the crumb stays soft). Don’t refrigerate — cold temperatures accelerate staling (retrogradation of starches happens fastest at fridge temps).
Freezer: 3 months, tightly wrapped in plastic wrap then foil (or a freezer bag with the air pressed out). Freeze as whole loaves or pre-sliced — sliced is more convenient because you can pull out exactly what you need. Thaw at room temperature, still wrapped (this lets the moisture redistribute evenly).
Refreshing day-old bread: Spritz lightly with water and warm in a 300°F oven for 10 minutes. The crust re-crisps and the crumb softens — tastes remarkably close to freshly baked. This works for bread up to 3–4 days old.
Reviving frozen slices: Toast directly from frozen — no need to thaw. The toaster handles it perfectly, and you get crispy-edged, soft-centered toast.
Stale bread is an ingredient: French toast (the best use — stale bread absorbs custard better), bread pudding, homemade croutons (cube, toss with olive oil and seasonings, bake at 375°F for 15 minutes), fresh breadcrumbs (pulse in a food processor), panzanella salad, or strata. Stale homemade bread is an opportunity, not a failure.

What to Serve with Whole Wheat Bread
Toast with butter and honey (the simple perfection — let the bread be the star), avocado toast with everything bagel seasoning, sandwiches of all kinds (it holds up beautifully to hearty fillings without falling apart), alongside soups and stews for dunking (tomato soup + grilled cheese on this bread is elite), or as French toast on slow weekend mornings — a classic paloma makes the perfect brunch partner. My favorite: thick slices, toasted dark, with natural peanut butter and banana coins. For dinner: serve warm slices alongside a big salad like our authentic Greek salad, or use for paninis — try a chicken tinga panini (the sturdy crumb presses beautifully). For a sweeter bake altogether, try our simple banana bread.

The Science Behind Soft Whole Wheat Bread
Understanding the “why” behind each technique makes you a better baker — not just for this recipe, but for all bread. Let’s break down what’s actually happening in your dough.
Hydration and bran: Whole wheat flour absorbs 5–10% more water than white flour because the bran particles are hydrophilic — they soak up water like tiny sponges. But here’s the catch: bran absorbs water slowly. That’s why an autolyse (resting flour and water together for 20–30 minutes before kneading) is so effective for whole wheat — it gives the bran time to fully hydrate, so it doesn’t steal moisture from the gluten during kneading. If you ever try the autolyse method, you’ll notice the dough feels noticeably softer and more extensible afterward. The bran, once hydrated, is also less sharp — it’s less likely to cut gluten strands when it’s plump with water rather than dry and jagged.
Gluten development vs. bran damage: Think of gluten as a network of tiny balloons, and bran flakes as pins. Every time you knead, you’re inflating more balloons — but the pins are popping some of them. The goal isn’t to eliminate the pins (they’re the fiber and nutrition you want); it’s to inflate so many balloons that enough survive. That’s why whole wheat needs longer kneading than white bread — you’re compensating for ongoing damage by building extra structure. Vital wheat gluten is like adding pre-inflated balloons to the mix — instant reinforcement.
Fermentation and flavor: The longer, slower rise that whole wheat prefers isn’t just about volume — it’s about flavor. During fermentation, yeast produces not just CO2 (for rise) but also organic acids, alcohols, and esters that create complex flavor. Whole wheat’s natural sugars and the enzymes in the bran give yeast more to work with, which is why well-fermented whole wheat bread tastes nuttier and more complex than a rushed loaf. If you have time, a cold overnight retard in the refrigerator (after shaping, before baking) develops remarkable depth — the cold slows yeast activity but allows enzyme activity to continue, breaking down starches into sugars that caramelize beautifully in the oven.
Starch retrogradation and staling: Bread goes stale not primarily from moisture loss (though that contributes) but from starch retrogradation — the recrystallization of starch molecules after baking. This process happens fastest at refrigerator temperatures (which is why you should never refrigerate bread) and slowest at freezer temperatures or room temperature. The honey and fat in this recipe slow retrogradation by interfering with starch crystallization — another reason they’re structural, not just flavor, ingredients.
Also Read : Simple Banana Bread Recipe (Moist, Tender & One Bowl)
Batch Baking Strategy: Never Buy Bread Again
If your household goes through a lot of bread, consider making this a weekly ritual. The hands-on time is only about 30 minutes spread across 3 hours — most of that is waiting while the dough rises and bakes. Here’s how to fit it into a busy schedule:
The Sunday bake: Start the dough at 9 AM. By 9:15, it’s kneaded and rising. Go about your morning. At 10:30, shape the loaves (10 minutes). While they do their second rise, preheat the oven. By 11:30, bread is baking. By noon, you have two fresh loaves and your kitchen smells incredible. That’s it — one morning, bread for the week.
Double-batch for the freezer: This recipe already makes two loaves. If you have a stand mixer with a 5-quart or larger bowl, you can double it to make four loaves — the kneading time stays the same, you just need more rising space (use two large bowls or a very large one). Bake in batches if your oven can’t fit four pans at once. Four loaves sounds like a lot, but two go straight to the freezer and you’re set for two weeks.
The slice-and-freeze method: For maximum convenience, slice one entire loaf before freezing. Place parchment or wax paper between slices (or just freeze the whole sliced loaf — the slices separate easily when frozen if you don’t compress them). Then you can pull out exactly 2 slices for toast without thawing the whole loaf. This is a game-changer for small households or anyone who only eats a few slices at a time.
Stagger for freshness: Keep one loaf at room temperature for immediate use (4–5 days), freeze the second. When the first is gone, move the frozen loaf to the counter the night before — it’ll be thawed and ready by morning. You get fresh-tasting bread all week with one baking session.
More Troubleshooting: Advanced Issues
Crust separates from crumb (flying crust): This happens when the crust sets before the interior finishes expanding — usually from an oven that’s too hot or from under-proofing. The loaf looks fine outside but there’s a gap between crust and crumb when you slice it. Fix: verify oven temperature, make sure the second rise is complete (dough crowned 1 inch above pan), and don’t slash too deeply.
Uneven crumb — dense at bottom, airy at top: The dough wasn’t degassed evenly after the first rise, or the shaping trapped a large air pocket at the top. When punching down, be thorough but gentle — you want to expel large bubbles while keeping the dough’s overall structure. When shaping, roll tightly and pinch the seam very well.
Bread tastes bitter or soapy: Beyond old flour (covered above), this can come from too much yeast or from baking soda/powder contamination (if you scooped flour with a spoon that had leavening residue). Use fresh flour, measure yeast precisely, and keep your flour scoop clean.
Loaf is pale despite full bake time: Oven running cool, or not enough sugar for browning. Whole wheat should be deep golden — if yours is pale after 35 minutes at 350°F, your oven is likely 25°F cool. Get an oven thermometer. You can also brush with milk before baking for deeper color (the milk sugars promote Maillard browning).
Final Thoughts
Making whole wheat bread that people actually love feels like a small act of rebellion against the idea that healthy has to mean joyless. This bread is proof — soft, nutty, golden, delicious. Nobody eats it out of obligation. Nobody needs to be convinced. It just happens to be whole grain, and that’s the best kind of healthy eating: the kind you don’t even notice.
There’s also the rhythm of bread-making: the kneading, the waiting, the watching it rise. It’s meditative in a way few kitchen tasks are — your hands are busy, your mind can wander, and time slows down just a little. And the payoff — that moment you pull two perfect, golden loaves from the oven and your whole house smells like a bakery — never gets old, no matter how many times you do it.
So get that flour (white whole wheat if you can find it), warm that water, and make bread. Your kitchen, your family, and your morning toast will all be better for it. And the next time someone tells you whole wheat bread is supposed to be dense and sad, you’ll just smile — because you know better now.
Soft Whole Wheat Sandwich Bread
Ingredients
Equipment
Method
- Proof the yeast: In a large bowl (or the bowl of your stand mixer), combine the warm water, honey and yeast. Stir gently and leave for 5–10 minutes until foamy. If it doesn’t foam, your yeast is dead — start again with fresh yeast.
- Mix the dough: Add the warm milk, melted butter (cooled slightly so it doesn’t cook the egg), egg and salt to the yeast mixture. Stir in the white whole wheat flour, bread flour and vital wheat gluten until a shaggy dough forms.
- Knead 8–10 minutes: Knead with the dough hook on medium-low speed (or by hand on a lightly floured surface) until the dough is smooth, elastic and passes the windowpane test — a small stretched piece should form a thin membrane without tearing.
- First rise: Shape the dough into a ball and place it in a large oiled bowl, turning once to coat. Cover with cling film or a damp tea towel and leave in a warm spot (about 24–27°C) for 1 hour, or until doubled in size.
- Shape the loaves: Gently punch down the dough to release large air bubbles. Divide in half, then shape each piece into a tight log, pinching the seams closed. Place seam-side down in two greased 9×5-inch loaf pans.
- Second rise: Cover the pans loosely and leave to rise for 45–60 minutes, until the dough crowns about 2.5cm above the rims. Meanwhile, heat the oven to 180°C (350°F).
- Bake: Bake for 30–35 minutes until deep golden brown. The loaves are done when they sound hollow when tapped on the base, or register 88–93°C (190–200°F) on an instant-read thermometer. Tent with foil if browning too quickly.
- Cool properly: Turn the loaves out onto a wire rack immediately — leaving bread in the hot pan steams the crust soggy. Brush the tops with a little melted butter for a soft crust, then cool completely (at least 1 hour) before slicing.
Frequently Asked Questions
Why is my whole wheat bread dense?
Dense whole wheat bread is usually caused by too much flour, under-kneading or under-proofing. The bran in whole wheat flour cuts through gluten strands, so hydrate the dough generously, knead for a full 8–10 minutes, weigh your flour rather than scooping, and don’t rush the rises.
Can I use all whole wheat flour instead of adding bread flour?
Yes – simply swap the cup of bread flour for white whole wheat flour. Vital wheat gluten becomes more important for structure when you go 100% whole wheat.
What is white whole wheat flour?
White whole wheat flour is milled from white wheat berries rather than red. It is still 100% whole grain, but milder in flavour and lighter in colour and texture – ideal for soft sandwich bread.
Can I make this bread without a stand mixer?
Yes. Knead by hand for 10–12 minutes until the dough is smooth and elastic. It is a good workout and works perfectly.
How do I know when the bread is done baking?
The most reliable test is internal temperature: 88–93°C (190–200°F). Alternatively, tap the base of the loaf – it should sound hollow – and look for a deep golden crust.
Can I freeze whole wheat bread?
Yes, for up to 3 months. Wrap tightly in cling film then foil (or a freezer bag), slice first for convenience, and toast slices directly from frozen.
How long does homemade whole wheat bread keep?
4–5 days at room temperature in a bread bag or wrapped in a clean tea towel. Never refrigerate bread – it stales faster in the fridge.
Why did my loaf sink in the middle?
Usually over-proofing or underbaking. For the second rise, let the dough crown about 2.5cm above the pan rim – no more – and make sure the loaf is fully baked through.
What can I use instead of honey?
Maple syrup, golden syrup or granulated sugar in equal amounts. Dark molasses gives a richer, darker loaf.
Do I really need vital wheat gluten?
It is optional but recommended, especially for 100% whole wheat loaves. Skip it and expect a slightly denser crumb.
Can I make dinner rolls with this dough?
Yes. Divide into 16 equal pieces, shape into smooth balls, place in a greased 9×13-inch pan and bake at 190°C (375°F) for 15–18 minutes.
How do I get a soft crust?
Brush the tops with melted butter straight from the oven, and store the cooled loaves in a bread bag or wrapped in a tea towel.

Hi, I’m Angela. I cook the way busy people actually cook — simple, tasty food with ingredients you already have. On CookBookBite I share easy recipes, honest kitchen tips, and dishes my family asks for again and again.
Pingback: Classic Homemade Meatloaf Recipe (Juicy & Easy)