
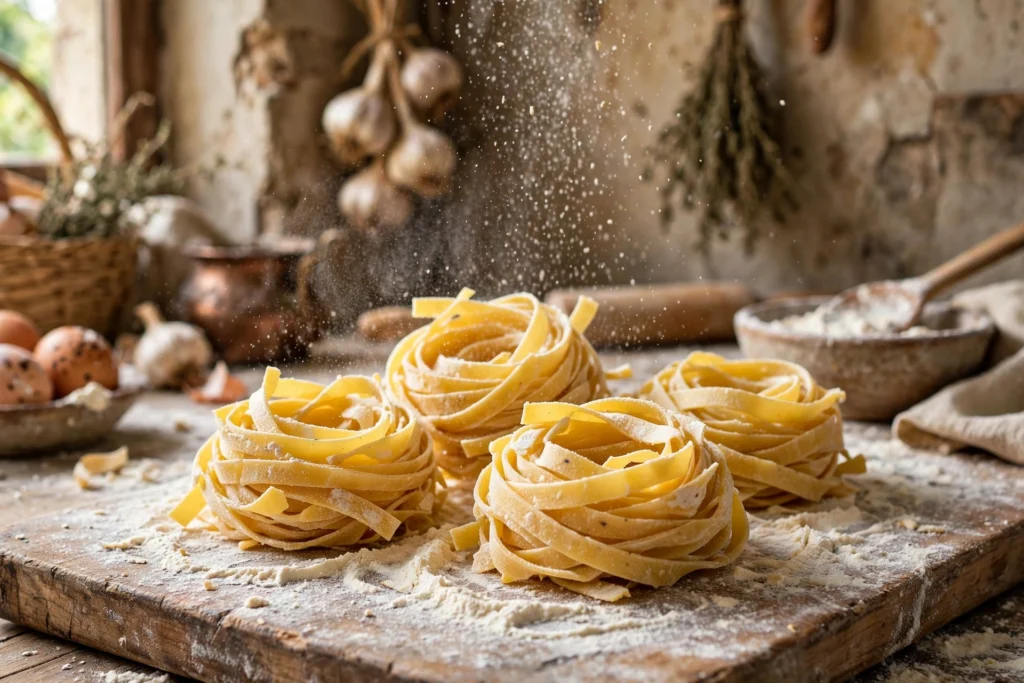
My grandmother’s kitchen always smelled faintly of flour. Not in a dusty, unpleasant way — in the way that told you something good was happening. She’d be at the big wooden table, sleeves pushed up, working a golden mound of dough with the heel of her hand, and the whole room would go quiet except for the soft thump-thump of kneading. I was maybe seven, and I thought she was performing magic. In a way, she was.
It took me twenty years to try it myself. Twenty years of buying the dried stuff, telling myself fresh pasta was a special-occasion project for people with more patience than me. Then one rainy Sunday, with nothing but flour, eggs, and time, I finally did it. And here’s what nobody tells you: homemade pasta is not hard. It’s not even particularly time-consuming. It’s just flour and eggs and your hands — and the result will ruin store-bought pasta for you in the best possible way.
This homemade pasta recipe is a reliable dough refined over many batches. Two ingredients. Thirty minutes of rest. A rolling pin and a knife — no pasta machine required (though I’ll tell you how to use one if you have it). The technique is straightforward — feel the dough, don’t fight it.
Let’s address the elephant in the room: why bother? Dried pasta is cheap, convenient, and perfectly good. The answer is texture and flavor — two things that dried pasta, for all its virtues, cannot replicate. Fresh pasta has a tender, yielding bite with a delicate egg richness. It cooks in 90 seconds. It clings to sauce in a way that dried pasta doesn’t, thanks to its rougher surface and higher starch content. And there’s the intangible factor: the satisfaction of transforming two humble ingredients into something transcendent with nothing but your hands. That never gets old.
Table of Contents
Why You’ll Love This Homemade Pasta Recipe
First, the texture is incomparable. Fresh pasta has a tender, almost silky bite with a delicate chew that dried pasta simply cannot replicate. It cooks in two minutes and tastes alive — eggy, wheaty, substantial. The first time you taste it, you’ll understand why Italians are so particular.
Second, it’s absurdly simple. Flour. Eggs. Salt. A drizzle of olive oil if you’re feeling fancy. That’s the entire ingredient list. No preservatives, no mystery — just the purest version of pasta that exists.
Third, it’s deeply satisfying to make. There’s something meditative about kneading dough, something joyful about rolling it thin and cutting ribbons. It’s cooking as craft, and it slows you down in the best way. Kids love helping too — flour everywhere, giggles guaranteed.
Finally, it’s versatile. This one dough becomes tagliatelle, fettuccine, pappardelle, lasagna sheets, farfalle (with a pinch), ravioli (with a filling), and more. Learn this base and you unlock a whole world.
There’s also an economic argument that’s hard to ignore. A pound of decent dried pasta costs $2-3. This recipe makes about a pound of fresh pasta for roughly $1.50 in ingredients (flour and eggs). But the real comparison isn’t with dried pasta — it’s with store-bought fresh pasta, which costs $5-8 for the same amount and is never as good as what you’ll make. If you eat pasta weekly, the savings are real. More importantly, you control everything: no preservatives, no additives, just flour and eggs.
The History of Fresh Pasta (Briefly)
Pasta has been made in Italy for at least 800 years, and the fresh egg pasta tradition — pasta all’uovo — comes specifically from the Emilia-Romagna region in the north. This is the land of tortellini, tagliatelle, and lasagna, where the local wheat and abundant eggs made fresh pasta the default rather than the exception. The famous sfogline, the women who hand-roll pasta to impossible thinness, are still celebrated in Bologna today. What you’re about to make connects you to that tradition directly — the technique hasn’t fundamentally changed in centuries. There’s something grounding about that.
The southern Italian tradition, by contrast, favors dried pasta made from durum wheat semolina and water (no eggs). Both are legitimate; they’re just different. Northern egg pasta is tender and rich, ideal for butter-based and cream sauces. Southern dried pasta is firm and toothsome, built for robust tomato sauces. Knowing which tradition you’re working in helps you choose the right sauce — and this egg dough wants simple, delicate sauces that let the pasta shine.
Ingredients for Homemade Pasta
“00” flour or all-purpose flour (2 cups / 250g) — Italian “00” flour is the gold standard: finely milled, it makes the silkiest dough. But honestly? Good all-purpose flour works beautifully — it works beautifully in practice. If you want extra bite, swap ¼ cup of the flour for fine semolina. Weigh it if you can (250g); flour compacts, and cups lie. The “00” designation refers to the fineness of the grind, not the protein content — it’s milled finer than AP, which gives a silkier texture. If you’re buying specifically for pasta, look for “00” flour from Caputo or King Arthur. But don’t let lack of 00 stop you; AP flour makes excellent pasta.
Large eggs (3, room temperature) — The classic ratio is 1 egg per 100g of flour, and 3 eggs to 250g is close enough to perfect. Room temperature matters — cold eggs make a stiff, reluctant dough. Farm eggs with deep-orange yolks make visibly golden pasta, but any fresh eggs work. The yolks provide fat and color; the whites provide protein and structure. Some recipes use only yolks for an ultra-rich dough (that’s a different recipe — richer, more delicate, harder to handle). Whole eggs give you the best balance of flavor and workability for everyday pasta.
Fine sea salt (½ teaspoon) — Mixed into the flour. Some purists salt only the cooking water, but I like salt in the dough itself for flavor all the way through. Fine salt distributes more evenly than coarse in a dough. Don’t skip it — unsalted pasta dough tastes noticeably flat.
Extra-virgin olive oil (1 teaspoon, optional) — Not traditional in all regions, but a tiny drizzle makes the dough more pliable and easier to roll, especially for beginners. I include it. The oil coats the flour proteins and slightly inhibits gluten formation, giving you a more tender result. It’s a small amount — you won’t taste it.
Semolina or flour, for dusting — For dusting your work surface and the finished noodles so nothing sticks. Fine semolina is ideal — it acts like tiny ball bearings, preventing sticking without being absorbed into the dough the way flour is. If you use flour for dusting, use it sparingly; excess flour on the noodles makes them gummy when cooked and clouds your pasta water.
Equipment You’ll Need
A large wooden board or clean countertop, a fork, a bench scraper (immensely helpful), plastic wrap, and a rolling pin — a long tapered Italian mattarello is traditional, but a regular rolling pin works. A sharp chef’s knife for cutting. A pasta machine is lovely if you have one (I’ll give machine instructions), but absolutely not required. A large pot for cooking.
The bench scraper deserves a special mention because it’s the tool beginners don’t know they need. It’s invaluable for scooping up escaped egg, cleaning flour off your board, lifting sticky dough, and dividing portions. A $8 bench scraper will improve your pasta-making experience more than any other inexpensive tool. The mattarello (long, tapered, no handles) gives you more even pressure than a handled pin and is the traditional choice, but don’t buy one specially — use what you have.
If you have a pasta machine (the hand-crank kind), it makes the rolling process faster and more uniform. I’ll include machine instructions in the steps below. An electric pasta extruder is a different beast entirely — that’s for shaped pasta like penne, not for this egg dough. And a stand mixer with pasta attachments works beautifully if you have one; use the flat beater for mixing and the roller attachment for sheeting.
How to Make Homemade Pasta (Step by Step)
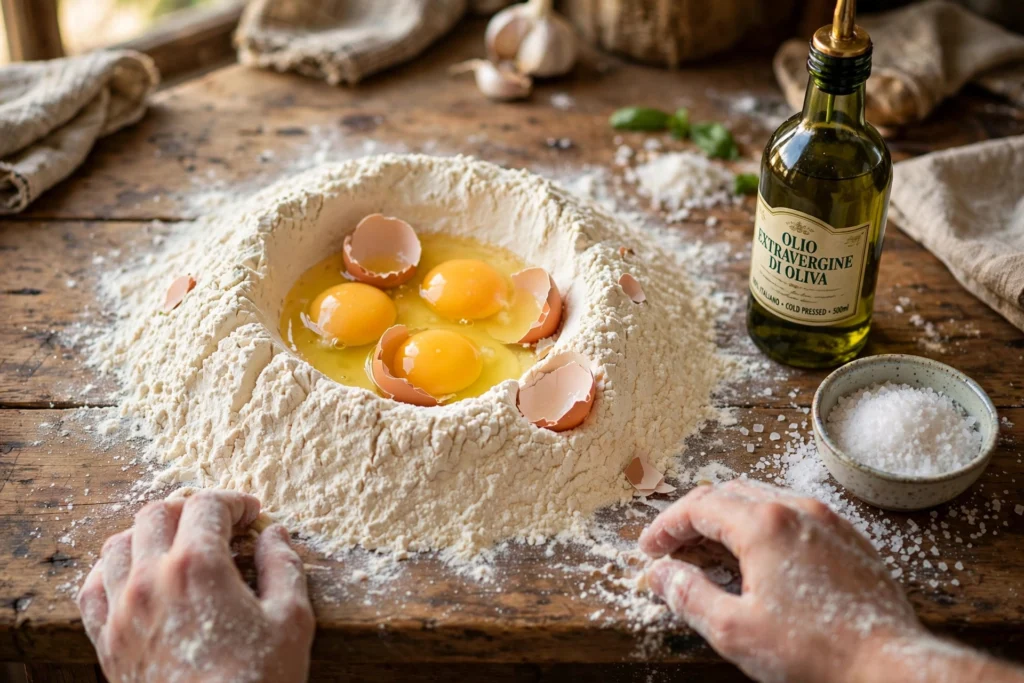
Step 1 — Make the flour well. Mound the flour on your board and add the salt. With your fingers, make a wide well in the center — like a volcano crater, with sturdy walls. Crack the eggs into the well and add the olive oil. This is the moment of faith. The walls need to be thick enough to contain the eggs; make the well wider than you think necessary. If you’re nervous about breaches, you can do this step in a large bowl instead — it’s less traditional but completely functional. The board method is more fun and gives you more working space.
Step 2 — Incorporate the eggs. With a fork, beat the eggs gently, then begin pulling in flour from the inner walls a little at a time. Keep the walls intact as long as you can — if the egg breaches (it happens to everyone), just scoop it back with the bench scraper and carry on. When it gets too thick for the fork, switch to your hands. This gradual incorporation prevents lumps. Take your time here — rushing creates pockets of dry flour that are hard to hydrate later. The mixture will go from soupy to shaggy to cohesive over about 3-4 minutes.
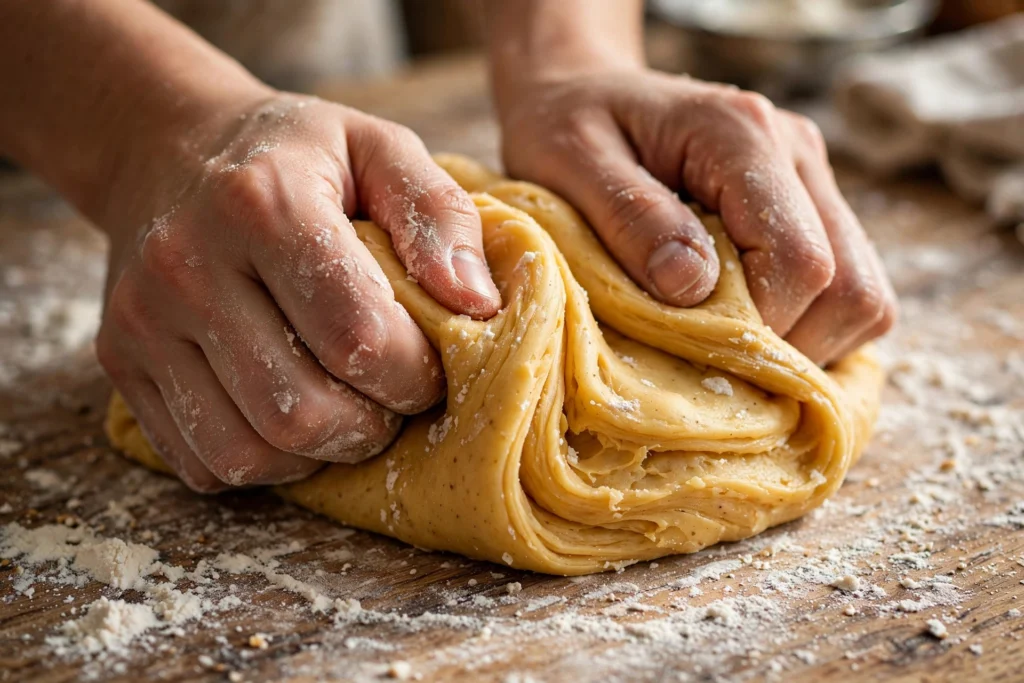
Step 3 — Knead for 10 minutes. Now the satisfying part. Knead the shaggy mass with the heel of your hand: push, fold, turn, repeat. It’ll be rough and ugly for the first 3 minutes — normal. Around minute 5 it starts coming together; by minute 10 it should be smooth, satiny, and spring back slowly when poked. If it’s sticky, dust lightly with flour. If it’s dry and cracking, wet your hands and keep kneading. Trust the process. The kneading develops gluten, which gives the pasta its characteristic chew and prevents it from falling apart in boiling water. Under-kneaded pasta is fragile and tears; properly kneaded pasta is silky and strong. Set a timer — most beginners stop too early. Ten minutes feels long, but it’s correct.
Step 4 — Rest 30 minutes. Wrap the dough tightly in plastic wrap and rest at room temperature for at least 30 minutes (up to 2 hours). This relaxes the gluten — skip it and the dough will fight you, springing back every time you roll. Use this time to make your sauce. The rest is non-negotiable. Gluten is elastic; kneading tightens it like a rubber band. Resting lets it relax so the dough rolls out smoothly instead of snapping back. You’ll feel the difference immediately — rested dough is cooperative; unrested dough is combative.
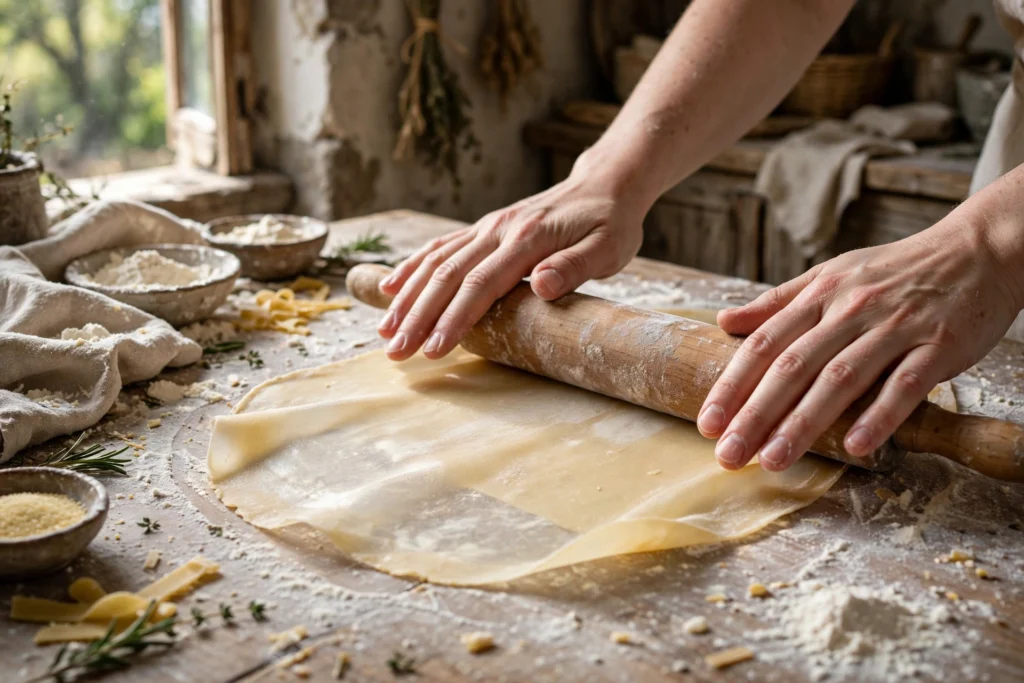
Step 5 — Divide and roll. Cut the dough into 4 pieces (keep the rest wrapped so it doesn’t dry). Flatten one piece with your palm. With a rolling pin, roll from the center outward, rotating frequently, until the sheet is nearly translucent — you should be able to see your hand through it. That’s about 1mm. It takes longer than you think; keep going. Pasta machine method: Flatten the dough piece to fit the rollers. Start at the widest setting and pass through, folding in thirds and re-rolling twice at each setting to smooth. Then progress through the settings one at a time (don’t skip) until you reach the second-thinnest setting. Lightly flour the sheet if it sticks.
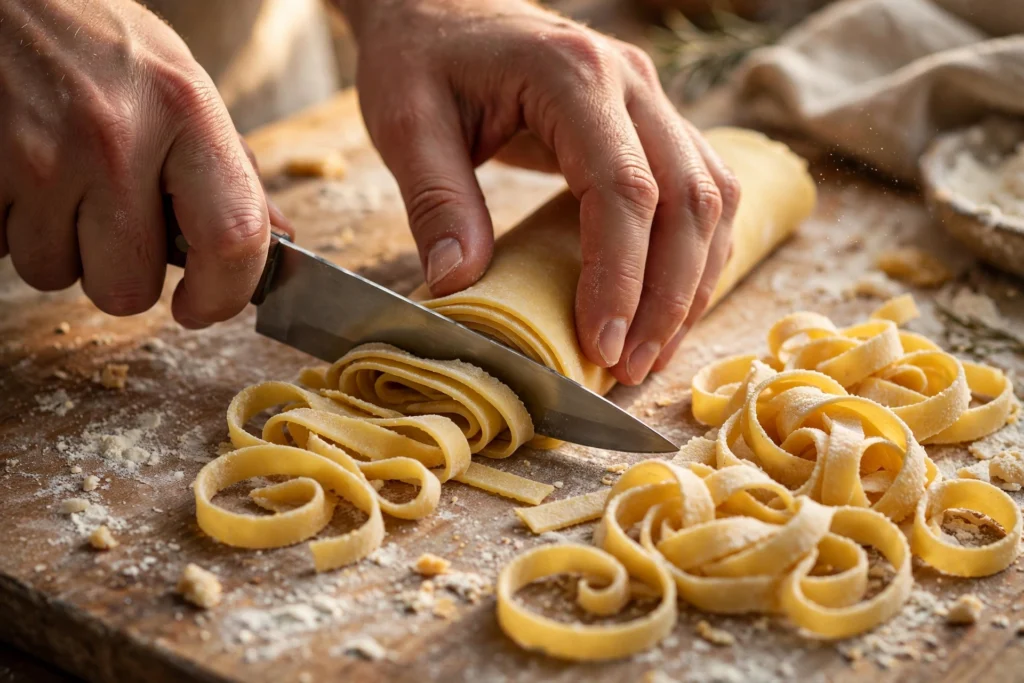
Step 6 — Cut your shape. For tagliatelle: loosely roll the sheet into a cylinder and slice into ¼-inch ribbons, then unfurl. For pappardelle: slice 1-inch wide. For lasagna: cut into sheets. For farfalle: cut small rectangles and pinch the centers. Dust cut noodles generously with semolina. The rolling-then-slicing method for tagliatelle is efficient and gives you uniform ribbons. Unfurl them gently and toss with semolina immediately — fresh-cut noodles stick to each other with alarming speed. For lasagna sheets, cut to fit your baking dish; they’ll overlap slightly, which is fine.
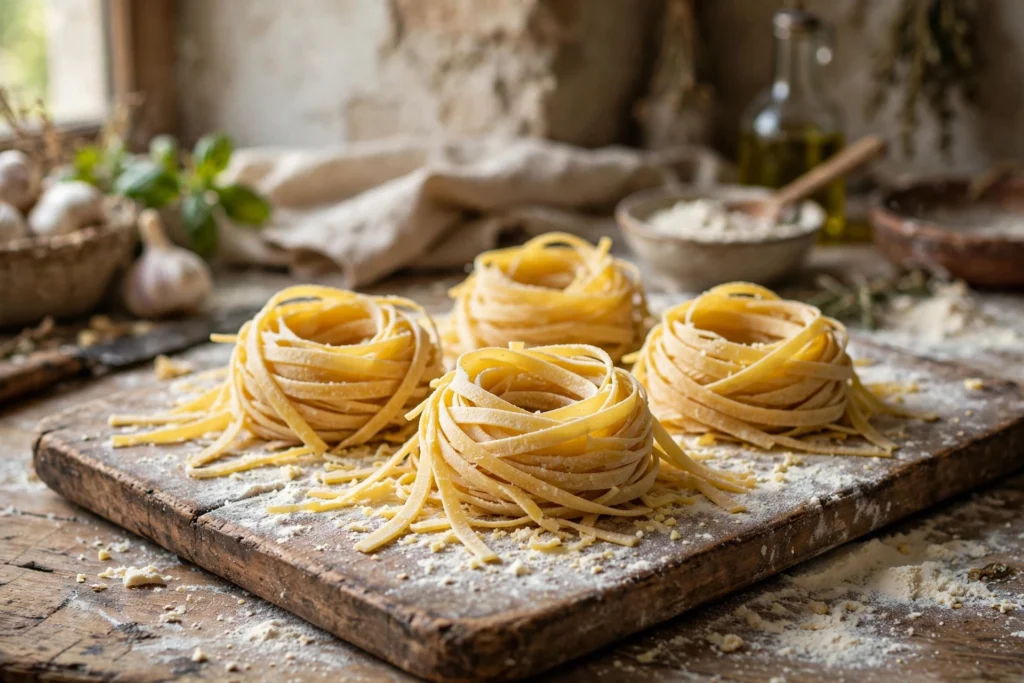
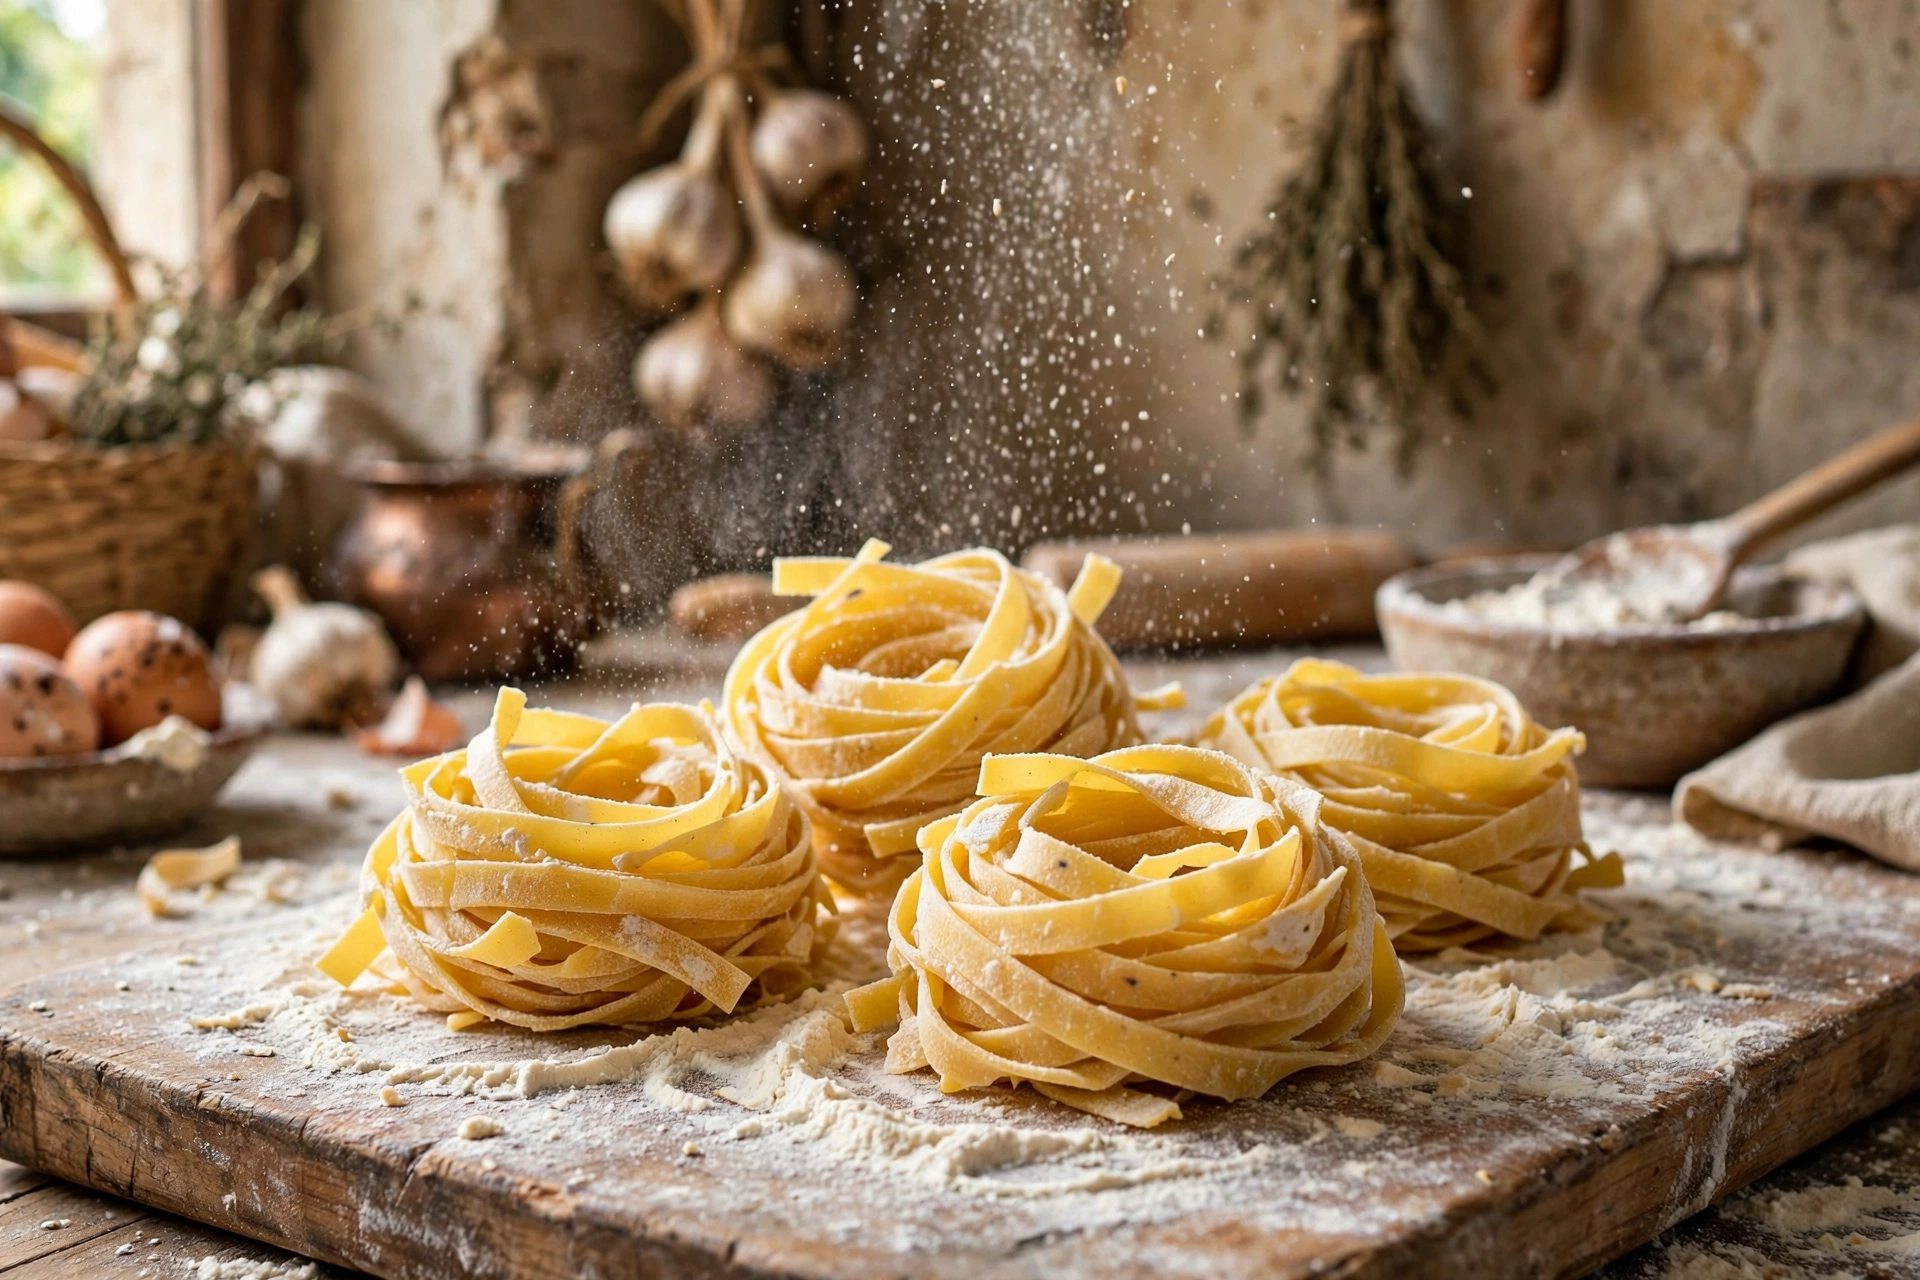
Step 7 — Nest and rest. Twirl small portions into loose nests on a floured tray. Let them rest 15–30 minutes while your water comes to a boil — slightly dried pasta holds its shape better. The nests should be loose, not tight — tight nests stick together. A light dusting of semolina between the strands prevents sticking. This resting period also lets the surface dry slightly, which helps the noodles maintain their shape in boiling water rather than clumping.
Step 8 — Cook (2 minutes!). Boil in aggressively salted water — it should taste like the sea. Fresh pasta cooks in 90 seconds to 2 minutes. Taste at 90 seconds; you want tender with the faintest bite. Drain (save a cup of pasta water!) and toss immediately with your sauce. The pasta water is liquid gold — the starch in it helps sauce cling to noodles and creates a glossy, cohesive finish. Never rinse fresh pasta; you’ll wash away the surface starch that helps sauce adhere.
Troubleshooting Common Pasta Problems
Dough too dry and crumbly: Under-measured eggs or over-measured flour. Wet your hands and knead — the moisture transfers gradually. Or add water ½ teaspoon at a time. Don’t add too much at once; it’s easier to add than to fix an overly wet dough. Dough too sticky: Dust lightly with flour and keep kneading. But go easy — you can always add flour, you can’t take it away. Sticky dough often just needs more kneading time; the flour continues hydrating. Tears when rolling: The dough wasn’t rested long enough, or it’s too dry. Let it rest 15 more minutes wrapped, or knead in a few drops of water. Noodles stick together: Insufficient semolina dusting, nests too tight, or they sat too long before cooking. Dust generously, keep nests loose, and don’t make noodles too far in advance. Pasta falls apart in water: Under-kneaded (gluten not developed) or rolled too thin in spots. Knead the full 10 minutes and aim for even thickness. Gummy texture: Overcooked, overcrowded pot, or insufficient water. Use at least 4 quarts for a pound of pasta, keep the boil vigorous, and taste early.
My Best Tips for Perfect Homemade Pasta
Weigh your flour. Cups of flour vary wildly depending on how you scoop. 250g is 250g. A $10 kitchen scale eliminates the most common dough problem (wrong hydration) entirely.
The poke test tells you when kneading is done. Poke the dough; if the indent springs back slowly, the gluten is developed. If it stays dented, knead 2 more minutes. If it snaps back instantly, it’s overworked — rest it longer.
Roll thinner than feels right. Every beginner under-rolls. Pasta swells when cooked, so what looks paper-thin raw becomes perfect al dente. When you think it’s thin enough, give it three more passes.
Keep unused dough wrapped. Exposed dough forms a dry skin in minutes, which cracks when rolled. Plastic wrap is your friend; work with one piece at a time.
Salt the water like the sea. This is your only chance to season the pasta itself. A tablespoon of salt per 4 quarts of water. It seems like a lot. It’s correct.
Sauce the pasta, don’t pasta the sauce. Fresh pasta wants a light coating, not a drowning. Toss the drained noodles IN the pan with the sauce and a splash of pasta water for the final minute — the starch in the water makes everything glossy and cohesive.
Work efficiently once you start rolling. Cut noodles dry out quickly. Have your water coming to a boil before you finish cutting, so there’s minimal waiting time between cutting and cooking.
Save your pasta water before draining. This is the step everyone forgets. Put a measuring cup in the sink as a reminder, or ladle out a cup before you even pick up the colander. You’ll need it for the sauce.
Delicious Variations to Try
Spinach pasta: Blanch 5 oz spinach, squeeze very dry, and blend with the eggs before adding to flour. Gorgeous green noodles. The spinach must be squeezed extremely dry or it throws off the hydration. This is beautiful with cream sauces.
Squid ink pasta: Add 2 teaspoons of squid ink to the eggs. Dramatic black pasta, briny and stunning with seafood. A little goes a long way — too much and it tastes metallic.
Herb pasta: Knead 2 tablespoons of finely chopped herbs (basil, parsley) into the dough during the last 2 minutes of kneading — beautiful speckled noodles. The herbs should be very finely chopped to distribute evenly.
Whole wheat pasta: Replace half the flour with whole wheat flour and add an extra half egg. Nuttier, heartier, wonderful with mushroom sauces. The bran in whole wheat cuts gluten strands, so the texture is slightly more delicate — handle gently.
Gluten-free: Use a 1:1 gluten-free flour blend plus 1 teaspoon xanthan gum. The texture is different but genuinely good — and still miles better than dried GF pasta. Roll slightly thicker than wheat pasta; GF dough is more fragile.
Ravioli: Roll sheets, dot with filling (ricotta-spinach is classic), fold, seal with water, cut. The same dough, a fancier destiny. Seal well — air pockets cause ravioli to burst in boiling water. Press out air as you seal.
Beet pasta: Roast a small beet, puree it smooth, and replace one egg with 3 tablespoons of beet puree. Stunning magenta noodles. Reduce the flour slightly to compensate for the added moisture.
Black pepper pasta: Add 2 teaspoons of coarsely cracked black pepper to the flour. Simple, beautiful, perfect with cacio e pepe or brown butter.
Storing & Make-Ahead
Fresh (uncooked): Nests keep 2 hours at room temperature on a floured tray. Refrigerated in an airtight container, 2 days (dust well with semolina to prevent sticking). The refrigerator will slightly darken the pasta due to oxidation — it’s harmless.
Freezer: Freeze nests on a tray until solid, then bag them — keeps 1 month. Cook straight from frozen, adding 1 minute to the time. Don’t thaw first; they get gummy.
Dried: Hang noodles on a pasta rack or clean hangers until brittle (12–24 hours), then store in bags for 2 weeks. It won’t be as tender as fresh, but it’s still better than store-bought. Make sure they’re completely dry before bagging or they’ll mold.
Make-ahead dough: The wrapped dough ball refrigerates 2 days. Let it come to room temperature 30 minutes before rolling. You can also freeze the dough ball for up to a month; thaw overnight in the fridge.
What to Serve with Homemade Pasta

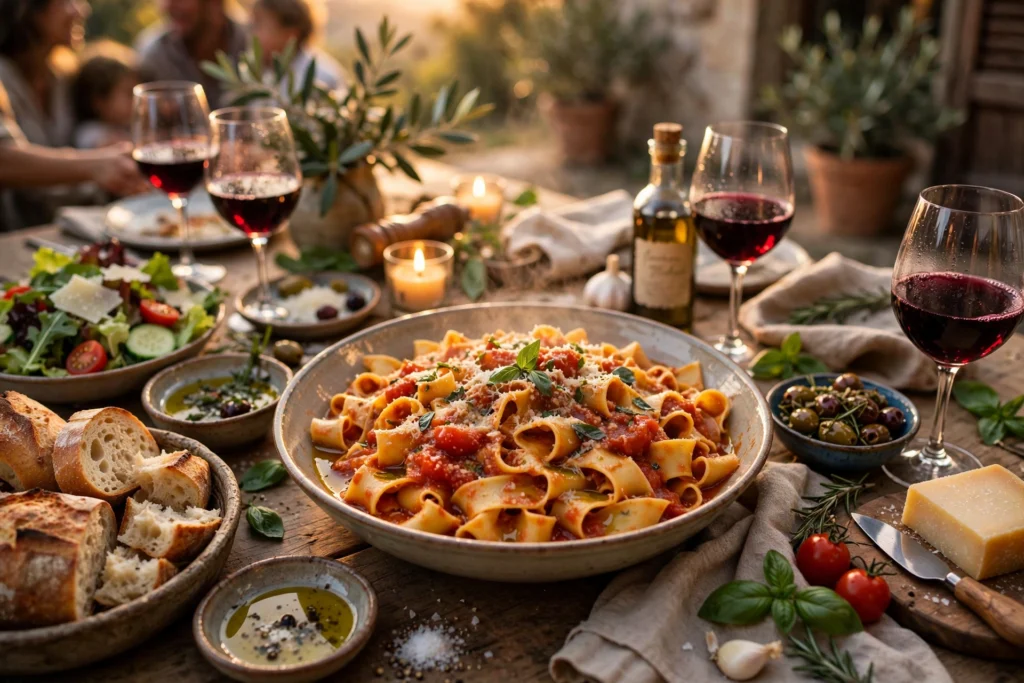
Fresh pasta shines with simple sauces that let the noodle star: brown butter and sage, fresh tomato-basil, cacio e pepe, carbonara, or just good olive oil, garlic, and parmesan. Avoid heavy jarred sauces — they’d bury what you worked for.
The sauce pairing principle: delicate pasta wants delicate sauce. This egg dough is tender and rich — it pairs best with butter-based sauces, light cream sauces, fresh tomato, or simple olive oil preparations. Hearty ragùs and heavy meat sauces are better suited to sturdy dried pasta or whole wheat fresh pasta. That said, rules are meant to be bent — a light Bolognese on fresh tagliatelle is a classic for a reason.
A green salad, crusty bread, and red wine complete the picture. For a dinner party, make the dough ahead and roll while guests watch — it’s theater and dinner in one. There’s no better conversation starter than hand-rolled pasta. For a heartier plate, pair your fresh pasta with my Easy Meatball Recipe — juicy, tender meatballs that make spaghetti night effortless.
The Science of Pasta Dough (Why It Works)
Understanding what’s happening inside your dough makes you a better pasta maker, because you’ll know how to fix problems instead of just hoping they don’t happen. Three things are at work: gluten development, hydration, and egg protein structure.
Gluten development: When flour meets water (from the eggs), two proteins — glutenin and gliadin — link up to form gluten, an elastic network that gives pasta its characteristic chew. Kneading aligns these proteins into organized sheets; that’s why the dough transforms from shaggy to silky. Under-kneaded dough has a disorganized gluten network — it’s weak, tears easily, and falls apart in boiling water. The 10-minute knead isn’t arbitrary; it’s the time needed for full gluten organization in a dough this stiff. You’ll feel the change happen: around minute 7, the dough suddenly becomes cooperative. That’s gluten alignment completing.
Hydration: The classic ratio — 100g flour to 1 large egg (roughly 50g) — gives about 55-57% hydration, which is stiff by bread standards but correct for pasta. This low hydration is why pasta dough feels firm rather than soft. It also explains why humidity matters: on a humid day, flour absorbs ambient moisture, effectively increasing hydration, and you may need a dusting more flour. On a dry winter day, the reverse. Experienced pasta makers adjust by feel, adding a few drops of water or a sprinkle of flour. The dough should feel firm and smooth, like modeling clay — not sticky, not crumbly.
Egg proteins: Eggs do triple duty. The water in eggs (about 75% of an egg’s weight) hydrates the flour. The proteins in egg whites coagulate when heated, giving cooked pasta its structure and preventing it from dissolving. The fats in yolks tenderize the dough and add richness and color. This is why yolk-only pasta (used for ultra-delicate ravioli) is richer but more fragile — it has less of the structural protein from whites. Whole-egg pasta is the best all-rounder: flavorful, colorful, and sturdy enough to handle rolling and cutting.
Why resting matters (the science): Kneading tightens gluten like a stretched rubber band. If you try to roll immediately, the gluten snaps the dough back — it shrinks, tears, and fights you. Resting allows the gluten network to relax and redistribute moisture evenly through the dough (a process called autolysis-adjacent hydration, though true autolysis refers to the pre-knead rest in bread). Thirty minutes is the minimum; the dough continues improving up to 2 hours at room temperature. You’ll notice rested dough rolls out almost effortlessly compared to unrested dough. This single step separates frustrating pasta sessions from joyful ones.
Pasta Shapes Master Guide
One dough, endless shapes. Here’s how to make the most useful ones, with the details that make each shape work:
Tagliatelle (¼-inch ribbons): The classic. Roll your sheet, then loosely roll it into a cylinder (like a jelly roll, but loose — tight rolling compresses the layers and makes them stick). Slice crosswise into ¼-inch ribbons with a sharp knife. Immediately unfurl each ribbon and toss with semolina. The key is slicing decisively — hesitant sawing drags and distorts. Tagliatelle is the traditional partner for Bolognese; the wide ribbons catch meaty sauces beautifully.
Pappardelle (1-inch wide ribbons): Same technique as tagliatelle, just wider. These are dramatic and luxurious — perfect for rich, hearty sauces like wild mushroom ragù or braised short rib sauce. The width means each bite has substantial chew. Because they’re wide, pappardelle needs slightly longer cooking — taste at 2 minutes.
Fettuccine (slightly narrower than tagliatelle): Essentially the Roman cousin of tagliatelle, about ⅛-inch wide. The classic pairing is Alfredo, but it’s versatile. If you have a pasta machine with a fettuccine cutter attachment, this is the shape to use it for — the attachment gives perfectly uniform noodles.
Lasagna sheets: Cut rolled sheets into rectangles to fit your baking dish. They’ll overlap slightly — that’s fine, even desirable, as it prevents gaps. For no-boil lasagna, roll slightly thinner than usual; the sheets will cook in the oven’s moisture. If pre-boiling, cook for just 60 seconds — they’ll finish in the oven. Fresh lasagna sheets are a revelation compared to dried; they’re tender and meld with the filling.
Farfalle (bow ties): Cut the rolled sheet into 1.5-inch squares, then pinch each square firmly in the center. The pinch should be tight — loose pinches open during cooking. The “wings” should be slightly ruffled for the classic look; you can achieve this by pressing the center with your thumb and forefinger while pushing the edges outward slightly. Farfalle is playful and great for kids, and the pinched center stays slightly chewy while the wings cook tender — a delightful textural contrast.
Pappardelle nests for soup: Cut wide ribbons and use them in brothy soups — they’ll cook directly in the simmering broth in 2-3 minutes. This is a wonderful way to use fresh pasta in winter soups.
Maltagliati (“badly cut”): The rustic, traditional shape — literally means “badly cut.” Roll your sheet and cut it into irregular diamonds and triangles with a knife or pizza wheel. No precision needed; the irregularity is the point. This is the perfect shape for beginners who are nervous about uniform cutting, and it’s traditional in Emilia-Romagna for bean soups. The varied shapes catch broth beautifully.
Garganelli: If you have a gnocchi board or ridged butter paddle, cut small squares, roll each around a pencil or chopstick on the ridged surface to create ridged tubes. The ridges catch sauce magnificently. This is more advanced but deeply satisfying.
10 Beginner Mistakes (And How to Fix Them)
Mistake 1: Adding all the flour at once. Dumping flour into eggs creates lumps that never fully hydrate. The gradual incorporation method (fork, pulling from walls) exists for a reason. Fix: always incorporate gradually.
Mistake 2: Kneading for 3 minutes and calling it done. The dough looks “mixed” but the gluten isn’t developed. Your pasta will be fragile and fall apart. Fix: set a timer for 10 minutes. The transformation at minute 7-8 is unmistakable.
Mistake 3: Skipping the rest. “I don’t have 30 minutes” leads to dough that snaps back, tears, and makes you hate pasta-making. Fix: the rest is non-negotiable. Make your sauce during the rest.
Mistake 4: Rolling too thick. Every beginner does this. The pasta looks thin on the board but swells in water to become doughy and thick. Fix: roll until you can see your hand through the sheet. Then roll a little more.
Mistake 5: Not flouring enough between steps. Fresh pasta is sticky. Cut noodles fuse into a solid mass within minutes without semolina. Fix: be generous with semolina dusting at every stage — on the board, on cut noodles, in the nests.
Mistake 6: Cooking in unsalted or barely salted water. “I’ll salt the sauce” doesn’t work — the pasta itself needs seasoning. Fix: the water should taste like the sea. A full tablespoon per 4 quarts.
Mistake 7: Overcooking. Fresh pasta goes from perfect to mushy in 30 seconds. Fix: start tasting at 90 seconds. Pull it when it still has the faintest bite — it continues cooking from residual heat.
Mistake 8: Rinsing the pasta. Rinsing washes away surface starch that helps sauce cling. Fix: never rinse. Drain and toss immediately with sauce.
Mistake 9: Drowning in sauce. Fresh pasta is the star; sauce is the supporting actor. Fix: use less sauce than you think. Toss noodles in the pan with sauce for the final minute.
Mistake 10: Making noodles too far in advance. Cut noodles left sitting dry out, crack, or stick together. Fix: time your rolling so noodles go into boiling water within 30 minutes of cutting. Or freeze nests immediately.
Hosting a Pasta Night (The Entertaining Playbook)
Homemade pasta is the ultimate dinner party flex, and it’s easier to pull off than you think with the right strategy:
The day before: Make the dough balls, wrap tightly, and refrigerate. Make your sauce (ragù, for example, is better the next day). Set the table. This is 80% of the work, done stress-free.
Two hours before guests arrive: Take dough out of the fridge to come to room temperature (30 minutes). Set up your pasta station: floured board, rolling pin or machine, bench scraper, semolina, tray for nests. Put a large pot of water on to boil (it takes a while).
When guests arrive: This is the theater part. Roll and cut pasta while guests watch with wine in hand. People are fascinated — it’s dinner and a show. Let kids (or willing adults) help cut farfalle or pinch tortellini. The mess is part of the charm.
Cooking: Fresh pasta cooks in 2 minutes, so time it to when everyone’s seated. Have your sauce hot in a large pan. Boil pasta, drain (save that water!), toss in the pan with sauce for 1 minute. Serve immediately in warmed bowls.
Quantity planning: Plan 100g flour + 1 egg per person as a main course, 75g as a first course. For 6 people as a main: 600g flour, 6 eggs. It sounds like a lot of rolling, but with a pasta machine you can sheet enough for 6 in about 20 minutes.
Sauce strategy for crowds: Choose sauces that hold well: Bolognese, mushroom cream, or simple tomato-basil. Avoid carbonara for large groups (it seizes if it sits). Set up a toppings bar: extra parmesan, chili flakes, fresh basil, good olive oil. Let people customize.
Final Thoughts
My grandmother never measured anything. She’d glance at the flour, crack in eggs until it “looked right,” and produce pasta that made the whole family go quiet. I spent years thinking that was talent I’d never have. It wasn’t talent — it was repetition. It was Tuesday after Tuesday of flour on the table.
That’s the real secret of this homemade pasta recipe: it’s not a recipe, it’s a practice. The first batch might be a little thick, a little uneven. The fifth will be beautiful. By the tenth, your hands will know what to do before your brain catches up, and you’ll understand why she never needed measuring cups.
So flour the table. Crack the eggs. And when the dough starts fighting you at minute six, remember: feel it, don’t fight it. She was right about that, like she was right about most things.
Easy Homemade Pasta Dough (2 Ingredients)
Ingredients
Equipment
Method
- Mound the flour on a large wooden board and mix in the salt. Make a wide well in the centre, then crack in the eggs and add the olive oil.
- Beat the eggs with a fork, gradually pulling in flour from the inner walls until a shaggy dough comes together.
- Knead for 10 minutes until smooth and elastic, then wrap tightly in plastic wrap.
- Rest the dough at room temperature for 30 minutes (up to 2 hours).
- Divide into 4 pieces and roll each one paper-thin, about 1mm, keeping the unused dough wrapped.
- Cut into your chosen shape and dust generously with semolina so nothing sticks.
- Twirl small portions into loose nests on a floured tray and rest for 15 to 30 minutes.
- Boil in heavily salted water for 90 seconds to 2 minutes, then drain and toss with your sauce.
Notes
Frequently Asked Questions
Can I make this homemade pasta recipe without a pasta machine?
Absolutely — this homemade pasta recipe works beautifully with just a rolling pin and a sharp knife, which is how pasta was made for centuries. A machine makes rolling faster and more uniform, but hand-rolled pasta has a wonderful rustic texture. Just roll the dough as thin as you can, about 1mm.
Why is my pasta dough dry and crumbly?
Usually under-measured eggs or over-measured flour — weigh your flour (250g) if you can. Fix it by wetting your hands and kneading, which transfers moisture gradually, or add water half a teaspoon at a time. Egg sizes vary too, and large eggs are the standard.
Why is my pasta dough sticky?
Too much egg or humid conditions. Dust lightly with flour and keep kneading — but go easy; you can always add flour, but you can’t take it away.
How thin should I roll homemade pasta?
Aim for nearly translucent, about 1mm thick — thin enough to see your hand through the sheet. Pasta swells as it cooks, so beginners almost always under-roll. When you think it’s done, roll three more times.
Can I make the dough in a food processor?
Yes — this homemade pasta recipe is easy in a food processor. Pulse the flour and salt, add the eggs and oil, and process until the mixture forms a ball. Then knead by hand for 2–3 minutes. It’s faster, though slightly less romantic than the board method.
How long does fresh pasta take to cook?
Just 90 seconds to 2 minutes in a large pot of aggressively boiling salted water — dramatically faster than dried pasta. Start tasting at 90 seconds and pull it when it’s just tender.
Why did my noodles stick together?
Usually insufficient dusting with semolina or flour, nests packed too tightly, or the cut noodles sat too long before cooking. Dust generously, twirl loose nests, and get them into the boiling water promptly.
Can I use plain flour instead of ’00’ flour?
Yes — plain flour (all-purpose) makes excellent homemade pasta; it’s just slightly less silky than ’00’. Use the same 250g to 3 eggs ratio. Many Italian grandmothers used plain flour their whole lives.
How do I stop my pasta from going gummy?
Use plenty of aggressively boiling water, don’t overcrowd the pot, cook briefly, and toss the drained noodles with the sauce immediately rather than letting them sit.
What is the egg-to-flour ratio for pasta?
The classic Italian rule is 100g flour per large egg. For 250g flour that’s 2½ eggs — in practice, 3 eggs works perfectly for this homemade pasta recipe. On humid days you may need a touch more flour.
Can I colour pasta naturally?
Yes. Blend blanched spinach into the eggs for green, roasted beet purée for magenta, squid ink for black, or turmeric for golden. Add the colouring to the eggs before mixing with the flour, and keep the dough’s hydration balanced.
How do I store fresh pasta?
Keep uncooked nests 2 hours at room temperature on a floured tray, refrigerate airtight for up to 2 days, or freeze on a tray then bag for 1 month — cook from frozen, adding a minute. This homemade pasta recipe doubles well, so batch it.

Hi, I’m Angela. I cook the way busy people actually cook — simple, tasty food with ingredients you already have. On CookBookBite I share easy recipes, honest kitchen tips, and dishes my family asks for again and again.