
There is a moment in every home baker’s life when someone says, ‘Can you bring something for morning tea?’ and the only honest answer is that you have forty minutes, a half-empty pantry and zero desire to rub butter into flour. That is exactly the moment these 3 ingredient lemonade scones were made for.
Picture this: a bowl, a spoon, three ingredients you probably already own, and a tray of tall, golden, cloud-soft scones that come out of the oven in about fifteen minutes. No butter to cube. No eggs to crack. No buttermilk to hunt down. Just self-raising flour, cream and lemonade, mixed together until they barely become a dough, patted out, cut and baked.
It sounds like a baking myth. It is not. Lemonade scones are a long-standing favourite across Australia and New Zealand, and they have been quietly spreading around the world because they solve a very real problem: scones have a reputation for being fussy, and these are not fussy at all. If you have ever pulled hard, dry, flat scones out of the oven and decided scones were ‘not your thing’, this recipe is your second chance.
Also Read : Classic And Mouthwatering Homemade Meatloaf Recipe (Quick and Easy )
In this guide you will get the exact recipe, but you will also get everything that usually gets left out of a short recipe card. We will look at why the trick works, how to choose the right flour, cream and lemonade wherever you live, how to measure in cups or grams, what to do when things go wrong, how to bake them in an air fryer or slow cooker, how to freeze them, and a whole list of flavour variations. By the end, you should be able to make these with your eyes half closed.

Quick Recipe Snapshot
| Detail | What you need to know |
|---|---|
| Ingredients | 3 cups (450 g) self-raising flour, 1 cup (250 ml) cream, 1 cup (250 ml) lemonade |
| Oven temperature | 200°C / 390°F (180°C fan) |
| Bake time | 14 to 16 minutes |
| Difficulty | Beginner friendly |
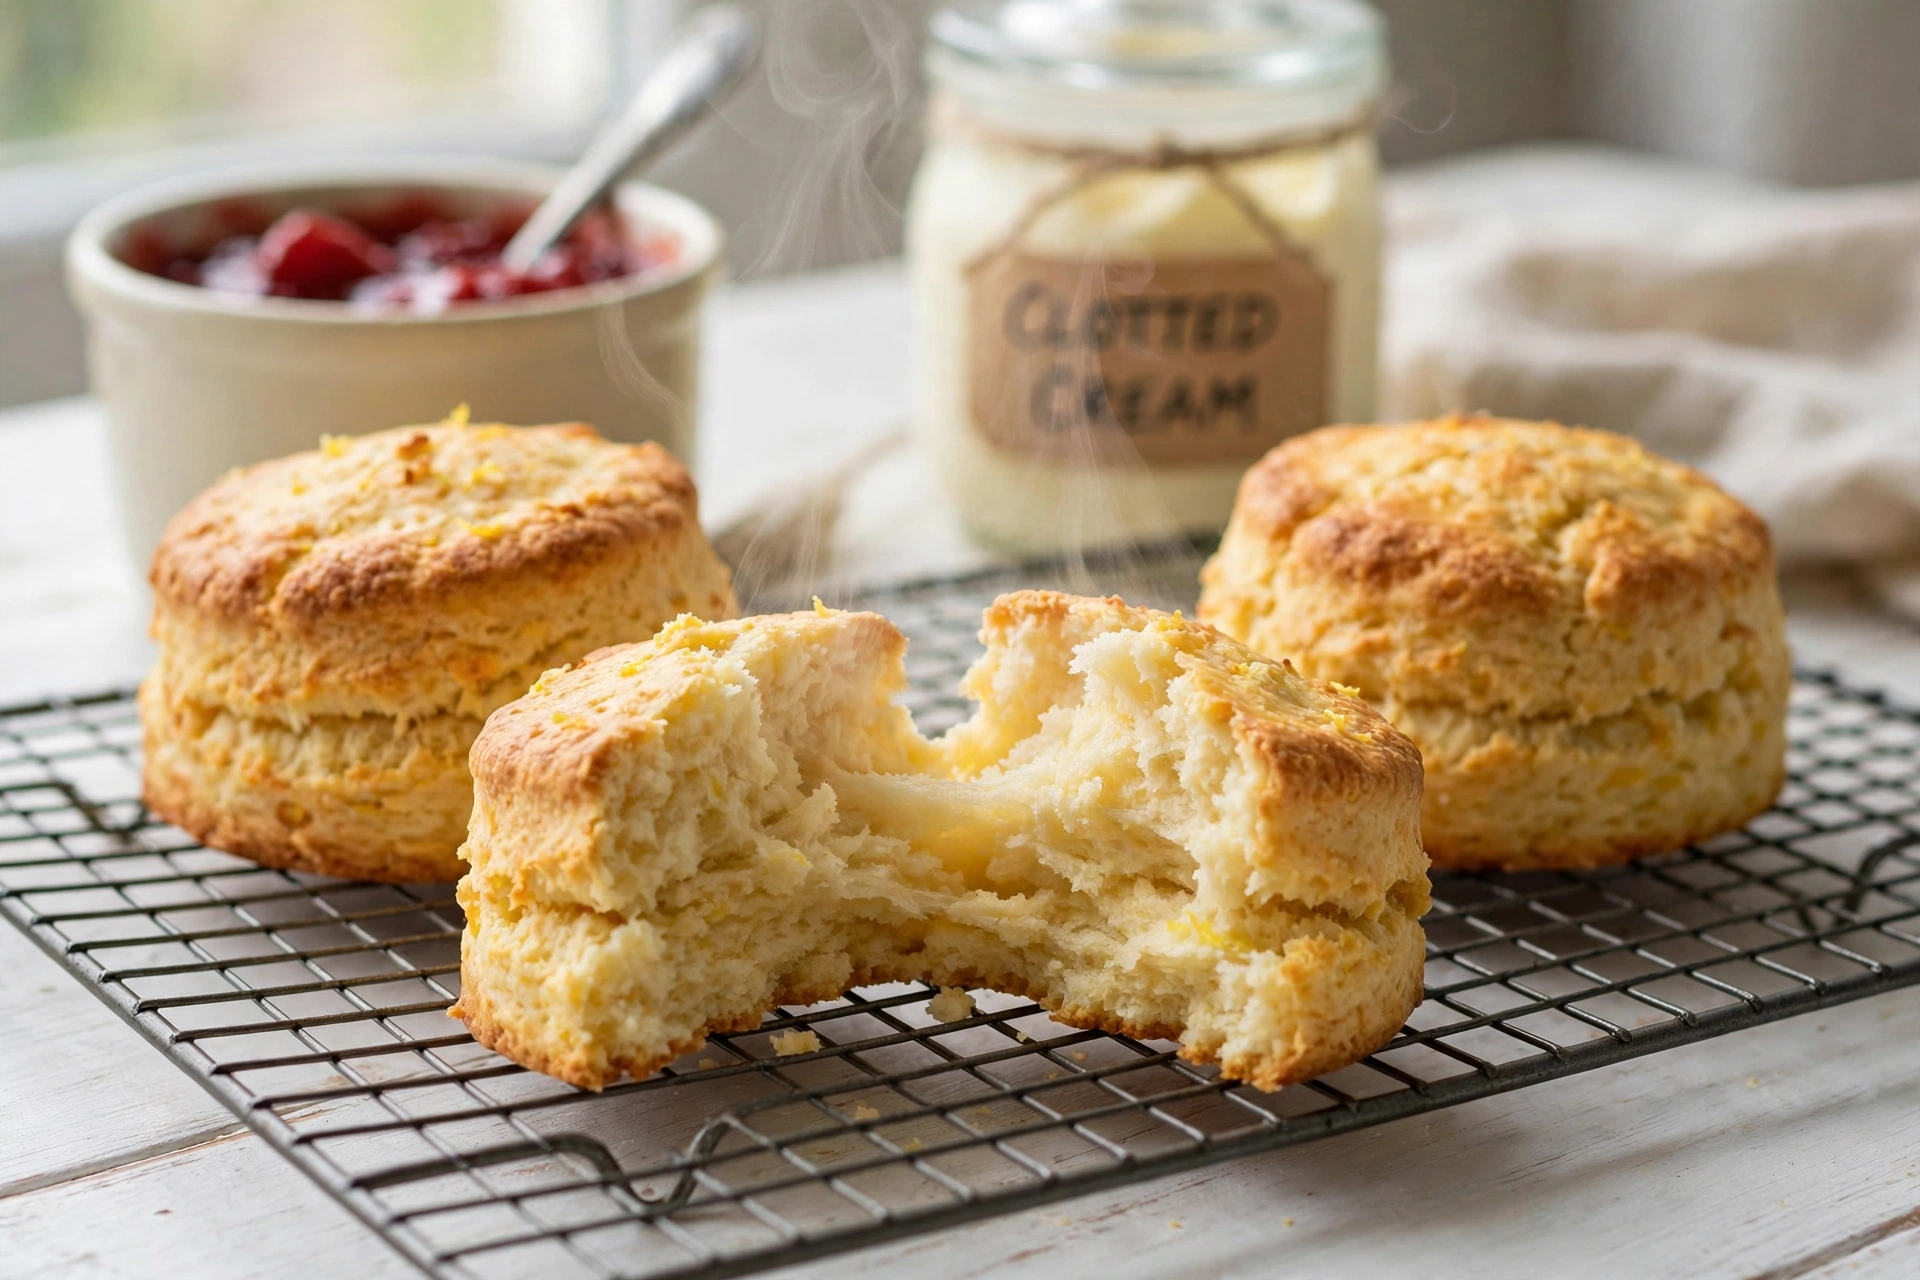
| Texture | Soft, light, tall, tender crumb with a golden top |
| Flavour | Lightly sweet and buttery, with no noticeable lemon taste |
| Best served | Warm, with jam and whipped cream |
What Are Lemonade Scones?
Lemonade scones are a shortcut version of classic scones. A traditional scone relies on plain flour, baking powder, cold butter, sugar, salt and milk, and it asks you to rub the fat into the flour, work the dough gently and cut it cleanly. It is a lovely bake, but it has more steps and more ways to go wrong.
Lemonade scones skip most of that by swapping the usual ingredients for two clever stand-ins:
- Self-raising flour already contains the raising agent (and usually a little salt), so you do not need to measure baking powder separately.
- Cream replaces both the butter and the milk. It brings the fat that makes a scone tender, and the liquid that turns flour into dough.
- Lemonade replaces the sugar and adds fizz. The carbonation helps lighten the dough, and the small amount of sugar gives gentle sweetness and a golden finish.
That is the whole idea. Three ingredients, one bowl, no butter rubbing. The result is a scone that tastes remarkably close to a classic one, only slightly sweeter and a touch more cake-like. Plenty of people who have tried both side by side say they genuinely cannot pick a winner.
If you are wondering about the name, it can be confusing depending on where you live. In Australia, New Zealand and the UK, ‘lemonade’ means a clear, fizzy, lemon-lime soft drink. In the United States, ‘lemonade’ usually means a still drink made from lemon juice, water and sugar. For this recipe you need the fizzy kind. We will cover exactly which bottles to buy in a moment.
Why Do 3 Ingredient Lemonade Scones Work?
It helps to understand the science, because once you know why it works, you will never be afraid of the recipe again.
1. Carbonation adds air
Lemonade is full of dissolved carbon dioxide. When you stir it into the flour and cream, thousands of tiny bubbles are suspended in the dough. In the heat of the oven, those bubbles expand, and so do the gases released by the baking powder inside the self-raising flour. Together, they push the dough upwards, giving you that lofty rise and open, fluffy crumb.
2. Cream brings fat and moisture
Butter does two jobs in scones. It coats the flour proteins so they do not form too much gluten (which would make the scones tough), and it adds richness. Cream does the same job in a different way. The fat in cream is already evenly dispersed, so there is no rubbing in and no risk of warm hands melting the butter into the flour. You simply pour it in and stir.
3. Minimal mixing means minimal gluten
When flour meets liquid and is worked hard, it forms gluten, the stretchy network that makes bread chewy. In scones, you want as little of it as possible. Because this dough comes together in seconds with just a few strokes of a spoon, it never has the chance to become tough. This is the single most important rule of the entire recipe, and we will come back to it several times.
4. A little sugar helps browning
Lemonade contains sugar, and sugar helps baked goods brown. That is why these scones often have a lovely golden top even without an egg wash, and why they taste slightly sweeter than a traditional scone.
5. It is why the lemon flavour disappears
Most people expect lemon scones. In reality, the lemon-lime flavour in the drink is mild, and much of it bakes off. What you taste is a soft, buttery, lightly sweet scone. If you want a real lemon flavour, we will show you how to add it later in the variations section.
The Three Ingredients, Explained in Detail
A three ingredient recipe has nowhere to hide. Each ingredient matters, so it is worth choosing well.
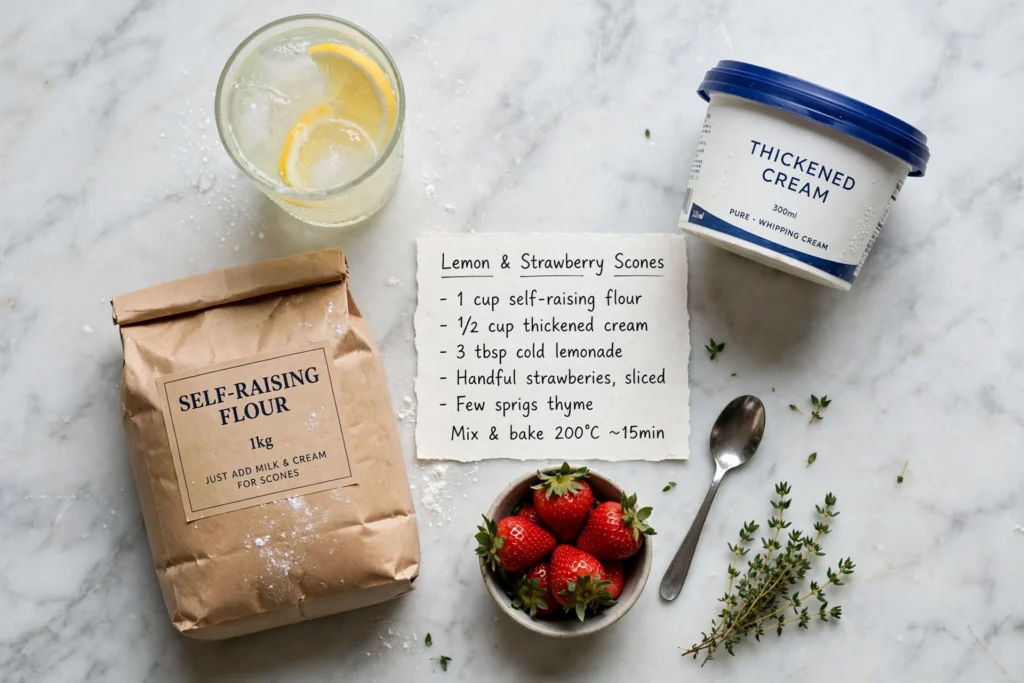
Self-Raising Flour (3 cups / 450 g)
Self-raising flour is plain flour that has had baking powder (and usually a pinch of salt) mixed through it. In Australia and the UK it is sold as ‘self-raising flour’. In the United States, the equivalent is ‘self-rising flour’, and it is stocked next to the regular flour in most supermarkets.
Tips for getting it right:
- Check the date. Raising agents lose strength over time. Old self-raising flour is the most common hidden cause of scones that do not rise.
- Sift it, if you have a sieve. Sifting aerates the flour and removes lumps, which means you need less mixing later.
- Measure carefully. Flour compacts easily. If you are using cups, spoon the flour into the cup and level it off with a knife rather than scooping straight from the bag. Better still, weigh it. Too much flour is the other big cause of dry, heavy scones.
- Keep a little extra for dusting. You will need roughly a quarter cup (30 g) for the bench and for flouring your cutter.
No self-raising flour? You can make your own. For every 1 cup (150 g) of plain or all-purpose flour, whisk in 2 teaspoons of baking powder and a pinch of salt. For this recipe, that means 3 cups (450 g) of plain flour, 2 tablespoons of baking powder and three-quarters of a teaspoon of salt. Whisk it very well, ideally sifting it twice, so the baking powder is evenly distributed.
Cream (1 cup / 250 ml)
Cream is where the richness comes from, and different countries sell very different creams. Here is a simple guide.
| Country | Name on the carton | Does it work? |
|---|---|---|
| Australia and New Zealand | Thickened cream (or pouring cream) | Yes, the classic choice |
| United Kingdom | Double cream (or whipping cream) | Yes, double cream gives the richest result |
| United States and Canada | Heavy cream or heavy whipping cream | Yes, an excellent match |
| Anywhere | Light or single cream | Works, but scones will be slightly less rich |
| Anywhere | Milk | Not recommended, the scones turn out plain and dry |
A few notes:
- Use full-fat cream. Reduced-fat or ‘lite’ cream has less of the fat that makes the crumb tender.
- Thickened cream in Australia contains a little thickener, which does not affect the recipe.
- Cold cream straight from the fridge is fine, although some bakers like to have the cream and lemonade at room temperature so the dough comes together more easily. Either way works.
- For a dairy-free version, thick coconut cream is the usual substitute. We cover that in the variations.
Lemonade (1 cup / 250 ml)
This is the ingredient that makes people nervous, so let us be clear: you need fizzy, carbonated, clear lemonade or lemon-lime soda.
What works well:
- Schweppes lemonade, Kirks, Sprite, 7UP, Solo or any supermarket own-brand lemonade
- Lemon-lime soda in any brand, as long as it is clear and fizzy
- Diet or zero-sugar lemonade also works for the rise, although the scones will brown slightly less and taste a little less sweet
Must Read : Spinach Dip Toast Recipe (Creamy, Cheesy, and Golden from the Oven)
What does not work:
- Homemade or still lemonade. Without carbonation you lose half of the lift, and the dough will be too wet or too heavy.
- Cloudy, juice-style or ‘cloudy lemon’ drinks, which are usually flat and tart
- Flat lemonade from a bottle that has been open for days. Open a fresh bottle or can for the best result.
Freshness matters more than brand. Use a bottle that has only just been opened, and measure out the lemonade right before you mix it. Letting it sit in a jug for twenty minutes means the bubbles escape, and a good part of your rise goes with them.
Measurements, Conversions and Regional Differences
Because scones are loved all over the world, cup sizes and ingredient names can trip people up. Here is a quick reference so you can bake confidently wherever you are.
| Ingredient | Cups | Grams / ml | Notes |
|---|---|---|---|
| Self-raising flour | 3 cups | 450 g | A level cup is about 150 g |
| Cream | 1 cup | 250 ml | Full-fat, thickened or heavy |
| Lemonade | 1 cup | 250 ml | Fresh, fizzy and clear |
| Extra flour for dusting | 1/4 cup | 30 g | For the bench and cutter |
A note on cup sizes. An Australian metric cup is 250 ml, while a US cup is about 240 ml. For this recipe the difference is tiny and will not affect the outcome, provided you measure flour by weight or spoon-and-level.
A note on temperatures.
- 200°C conventional equals 390°F
- 180°C fan-forced equals about 355°F (many US ovens are convection, so use the fan setting and lower by 20°C if yours has one)
Many recipes online disagree on the ratios. Some use 3 cups of flour, some use 3.5 or 4, and some use up to 300 ml of each liquid. That is not a contradiction. Flour absorbs liquid differently depending on the brand, the humidity and how it was measured. The ratio in this article (flour to cream to lemonade at 450 g to 250 ml to 250 ml) gives a soft, slightly sticky dough that is easy to handle with floured hands. If your dough feels too wet, add a spoonful of flour. If it feels dry and crumbly, add a splash of cream.
Equipment You Will Need
This is a low-equipment recipe, but a few simple items make life easier.
- A large mixing bowl. Bigger than you think, so you can mix without flicking flour everywhere.
- A butter knife, wooden spoon or silicone spatula. A butter knife is the traditional choice because it mixes with a cutting motion that does not overwork the dough.
- A baking tray lined with baking paper, or a square cake tin with tall sides if you prefer scones that rise even higher.
- A 5 to 6 cm (2 to 2.5 inch) round cutter. If you do not have one, a drinking glass or even a clean tin can works. A sharp, straight-edged cutter gives a better rise than a blunt or crimped one.
- A pastry brush for the optional milk wash.
- A wire rack and a clean tea towel for cooling and keeping the tops soft.
3 Ingredient Lemonade Scones Recipe
Ingredients
- 3 cups (450 g) self-raising flour, sifted, plus about 1/4 cup (30 g) extra for dusting
- 1 cup (250 ml) thickened or heavy cream
- 1 cup (250 ml) fresh, fizzy lemonade (Sprite, 7UP or any lemon-lime soda also works)
- Optional: a little milk, for brushing the tops
- To serve: strawberry jam and whipped cream
Method
- Preheat the oven to 200°C (390°F), or 180°C fan-forced. Line a large baking tray with baking paper.
- Combine the ingredients. Place the sifted flour in a large bowl. Pour in the cream and the lemonade.
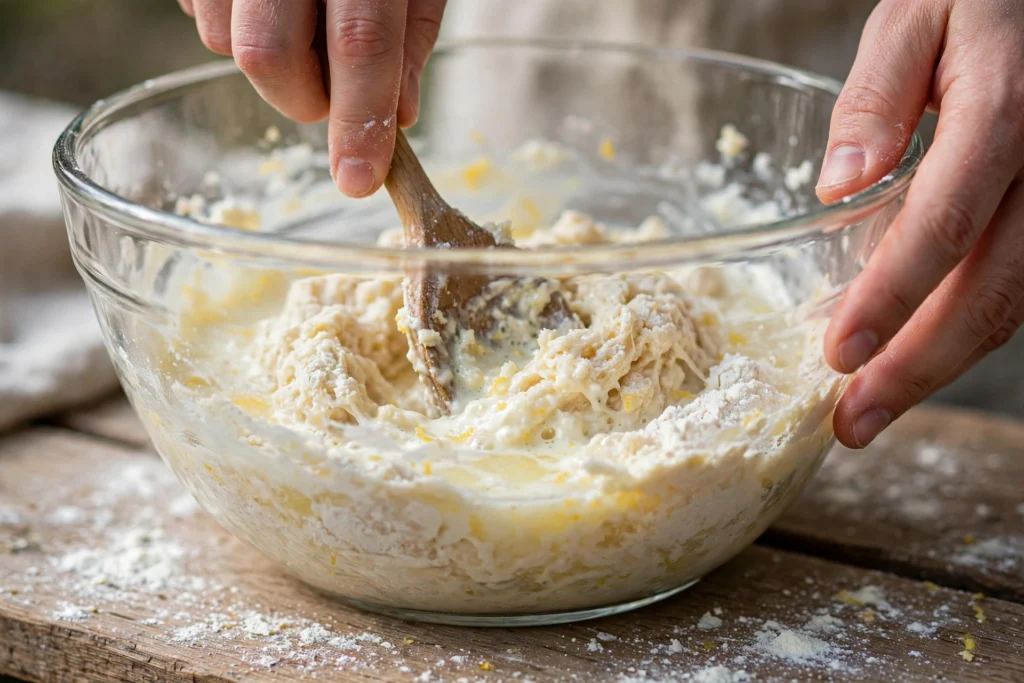
- Mix gently. Use a butter knife or spoon to stir in a cutting motion until the flour is mostly combined and the dough just comes together. It should be soft and slightly sticky. A few dry patches are fine, because the dough will finish coming together on the bench.
- Turn out onto a floured surface. Dust the bench with extra flour and scoop the dough onto it. Knead very gently, only 3 to 5 folds, just to bring it together.
- Pat out the dough. Use floured hands to pat the dough into a round about 2.5 cm (1 inch) thick. Do not use a rolling pin, which presses out the air.
- Cut the scones. Dip your cutter in flour and press straight down, without twisting. Lift the cutter straight up. Cut as many scones as you can from the first round.
- Place on the tray. Arrange the scones so they are just touching each other, which helps them rise upwards rather than outwards.
- Re-use the scraps. Gently bring the offcuts together, pat out again, and cut a few more. These last scones will be a little less tall, but still delicious.
- Brush with milk. Lightly brush the tops (not the sides) with milk for a golden finish. This step is optional.
- Bake. Bake for 14 to 16 minutes, until the tops are golden and the scones sound hollow when tapped on the base.
- Cool briefly. Transfer to a wire rack and cover loosely with a clean tea towel for a few minutes. This traps steam and keeps the tops soft instead of crusty.
- Serve warm with jam and whipped cream, and plenty of tea.
Step-by-Step Guide With Pro Tips
The short method above is enough for confident bakers. If you want a deeper walk-through, here is how to get the best from every stage.
Step 1: Prepare before you mix
Preheat the oven fully. Scones need an immediate blast of heat so they rise before the crust sets, and an oven that is still warming up gives you flatter results. Line the tray, flour your bench, find your cutter and measure the flour. Once the lemonade is poured in, you want to move quickly.
Step 2: Mix just until combined
Pour the cream and lemonade into the flour at the same time, so the fizz is still active. Then stir with a butter knife using short, cutting strokes. Stop as soon as you can no longer see large pockets of dry flour. The dough should look rough and shaggy, not smooth.
If you are a natural over-stirrer, set a rule: ten strokes, then stop and look. You can always do more, but you can never undo overmixing.
Step 3: A light knead on the bench
A scone dough does not need kneading to build structure. The gentle 3 to 5 folds simply gather the loose pieces. Think of it as tidying, not working. Use enough flour on the bench that the dough does not stick, but not so much that you end up folding raw flour into the middle. Any extra flour on the surface can be brushed off the finished scones.
Step 4: Pat, do not roll
Flatten the dough with the palms of your hands to a thickness of 2.5 cm. If you want really tall scones, go up to 3 cm. Thin dough produces flat, biscuit-like scones, so be generous with the height. Keep the thickness even so they bake evenly.
Read Also : Crispy Potato Skins Recipe (Better Than the Restaurant)
Step 5: Cut with a clean, straight press
Press the floured cutter straight down and lift it straight up. Twisting seals the cut edges together and stops the scone from rising evenly, which is why twisted scones often lean to one side. Flour the cutter between cuts so the dough does not cling to it.
Step 6: Place them close together
When scones touch each other, they support one another as they rise, creating soft, pull-apart sides and taller scones. Space them far apart, and they tend to spread outwards instead. If you have a small amount of dough left over, bake it in a smaller dish so the scones still have neighbours.
Step 7: The milk wash
A gentle brush of milk (or a little extra cream) on top gives a golden, slightly glossy finish. Keep it off the sides, because liquid dripping down the edges can glue the scone to the tray and limit the rise.
Step 8: Bake hot, then cover
A hot oven is the secret of a good rise. When the scones come out, cool them on a wire rack under a tea towel. The towel traps just enough steam to keep the crust tender. Leave them uncovered, and the tops will turn firm.


12 Tips for the Fluffiest 3 Ingredient Lemonade Scones
The recipe is simple, but small habits separate good scones from great ones. Keep these in mind every time.
- Mix less than you think you should. A shaggy, slightly messy dough makes a tender scone. A smooth, well-kneaded dough makes a tough one.
- Use fresh, fizzy lemonade. Open the bottle just before you measure. The bubbles are doing real work.
- Add the cream and lemonade together. This way the fizz is still active when the liquid meets the flour.
- Do not use a rolling pin. Pat the dough with your hands to keep the air in.
- Aim for 2.5 to 3 cm thick. Thin dough gives flat scones. Tall dough gives tall scones.
- Press the cutter straight down. No twisting, no wiggling.
- Flour the cutter every few cuts. Sticky dough tears at the edges and rises unevenly.
- Put the scones close together. They lean on each other and rise higher.
- Bake in a properly hot oven. An oven that is too cool bakes scones slowly, and they spread rather than rise.
- Check your oven’s real temperature. A cheap oven thermometer is one of the best baking investments you can make. Many home ovens run 10 to 20 degrees off.
- Cool under a tea towel. It softens the crust and keeps them tender.
- Serve them warm. Scones are at their very best within a couple of hours of baking.
Troubleshooting: Why Did My Lemonade Scones Go Wrong?
Even simple recipes have off days. Here is how to diagnose what happened and fix it next time.
My scones did not rise
- Old flour. Check the use-by date on your self-raising flour. Expired raising agents lose power.
- Flat lemonade. Lemonade that has been sitting open will not give you any lift.
- Oven too cool. If the oven was not fully preheated, the scones had no initial burst of heat.
- Dough rolled too thin. Thin dough has nowhere to go but out.
- Twisting the cutter. It seals the edges and restricts rising.
My scones are dry and crumbly
- Too much flour. Scooping flour straight from the bag packs it into the cup, adding up to 20 percent more flour than you intended. Weigh it, or spoon and level.
- Over-flouring the bench. A heavy dusting of flour gets worked into the dough and dries it out.
- Baked too long. Scones should be golden, not deep brown. Start checking at 13 minutes.
- Low-fat cream. Less fat means a less tender crumb.
My scones are tough or dense
- Overmixing. This is the number one cause. Next time, stop earlier.
- Too much kneading. Three to five folds is enough.
- Re-rolling too many times. Each time the dough is worked, the gluten tightens. The last scones from the scraps will always be a bit firmer, which is normal.
My scones spread out instead of up
- Dough too wet. Add a spoonful of extra flour, or a gentle dusting during patting.
- Scones placed too far apart. Nestle them together.
- Oven not hot enough. Raise the temperature by 10 degrees.
My scones are pale on top
- No milk wash. A light brush of milk or cream helps colour.
- Sugar-free lemonade. Zero-sugar versions contain no sugar to brown, so use a milk wash or a beaten egg for colour.
- Wrong oven position. Bake in the upper-middle part of the oven.
My scones have a floury, raw taste
- The baking powder or flour was not mixed evenly. Sift the flour, and make sure no pockets of dry flour remain.
- Excess dusting flour clinging to the base can taste raw. Brush off any extra before baking.
My scones have a lopsided or leaning shape
- The cutter was twisted, or the dough was uneven in thickness. Pat out the dough evenly and press straight down.
My scones taste too sweet
- Lemonade brands vary in sweetness. Try a less sweet lemon-lime soda, or serve the scones with less sweet toppings such as butter or soft cheese.
Delicious Variations on the 3 Ingredient Lemonade Scone
Once you have mastered the base recipe, it becomes a canvas. Each of these variations keeps the same method. Add the extras to the flour before you pour in the liquids so they are evenly spread.
Also Read : Light Jello Dessert Recipe (Low-Calorie Berry Treat)
Lemon Zest Lemonade Scones
If you want a genuine lemon flavour, add the finely grated zest of one lemon to the flour. Rub it in lightly with your fingertips to release the oils. Brush the baked scones with a simple glaze of 1/2 cup (60 g) icing sugar mixed with 1 to 2 teaspoons of lemon juice.
Vanilla Lemonade Scones
Add 1 teaspoon of vanilla extract to the cream before pouring it in. It gives a gentle, bakery-style aroma and pairs beautifully with strawberry jam.
Sweeter Afternoon Tea Scones
Stir 2 to 3 tablespoons of caster sugar into the flour. This makes a slightly sweeter, dessert-style scone, ideal for special occasions. A little sugar sprinkled on top before baking gives a pretty, crunchy finish.
Date, Sultana or Raisin Scones
Fold in 3/4 cup (100 g) of chopped dates, sultanas or raisins with the flour. Toss them in a spoonful of the flour first so they do not clump. These are classic with butter alone. Please note that this takes the recipe beyond three ingredients, but the extras are optional.
Cheese and Chive Scones (Lightly Savoury)
Lemonade scones are mildly sweet, but a savoury twist can still work if you keep things balanced. Add 1 cup (100 g) of grated tasty or mature cheddar, 2 tablespoons of finely chopped chives and a pinch of cracked black pepper to the flour. The sweetness of the lemonade plays well with salty cheese in the same way honey does with cheddar. Serve warm with butter. If you want a stronger savoury scone, a traditional recipe made with milk and no sugar will taste more savoury.
Chocolate Chip Scones
Fold 1/2 cup (90 g) of dark or milk chocolate chips through the flour. Kids love these, and they travel well in lunch boxes.
Berry Lemonade Scones
Add 3/4 cup (100 g) of frozen blueberries or raspberries straight from the freezer, tossed in a little flour. Handle gently to avoid colouring the dough pink. Fresh berries work too but bleed more easily.
Cinnamon Sugar Scones
Mix 1 teaspoon of cinnamon into the flour. After baking, brush the tops with melted butter and dip lightly in cinnamon sugar for a warm, cosy flavour.
Dairy-Free Lemonade Scones
Swap the cream for the same amount of thick, chilled coconut cream (the solid portion from a can, lightly stirred). The scones will have a gentle coconut flavour and a soft texture. Use a dairy-free milk to brush the tops.
Gluten-Free Lemonade Scones
Use a good-quality gluten-free self-raising flour blend. Gluten-free flours usually absorb more liquid and need even gentler handling, so keep the dough soft and avoid overworking it. Bake them straight away, because gluten-free scones are best the day they are made and tend to dry quickly. Warm them briefly in the oven or microwave to refresh them the next day.
Mini Scones for Parties
Cut the dough with a 3.5 to 4 cm cutter, and bake for 10 to 12 minutes. This makes about 24 mini scones, perfect for baby showers, kids’ parties and bridal teas.
Pumpkin or Spiced Scones
For autumn, add 1 teaspoon of mixed spice and 1/2 teaspoon of ground ginger to the flour. They pair wonderfully with butter and a mug of hot chai.

Other Ways to Cook Lemonade Scones
The oven is the classic method, but it is not the only one. The dough is forgiving and adapts to several appliances.
In the Air Fryer
- Preheat the air fryer to 170°C (340°F).
- Line the basket with baking paper (with a few small holes for airflow) and place the scones close together.
- Cook for 12 to 15 minutes, checking after 10, until golden and hollow-sounding underneath.
- Cook in batches if your basket is small. Do not overcrowd the basket beyond a snug fit, or they will bake unevenly.
Air fryer scones tend to brown quickly on top, so a loose foil tent can help if they colour too early.
In a Slow Cooker
It sounds unusual, but it works. Lemonade scones in a slow cooker have a soft, steamed top and a lightly crisp base.
- Line the base of the slow cooker with baking paper.
- Place the cut scones inside so that they are touching.
- Lay a clean tea towel under the lid to catch condensation, so water does not drip onto the scones.
- Cook on high for about 1 to 1.5 hours, until risen and cooked through.
They will not have the golden top of oven scones, but they are great if your oven is busy or unavailable.
In a Square or Round Cake Tin
For even softer sides, place the scones tightly in a greased and floured square tin with high sides. They will bake into a pull-apart scone loaf. This method also helps with even rising and makes a great way to feed a crowd.
On a Preheated Tray
For a crisper base, slide the baking paper with the scones onto a tray that has been heating in the oven. The hot metal gives an instant burst of heat that encourages rise.
How to Serve Lemonade Scones
Scones are only half the story. Serving them well is what makes them feel like a treat.
The Classic: Jam and Cream
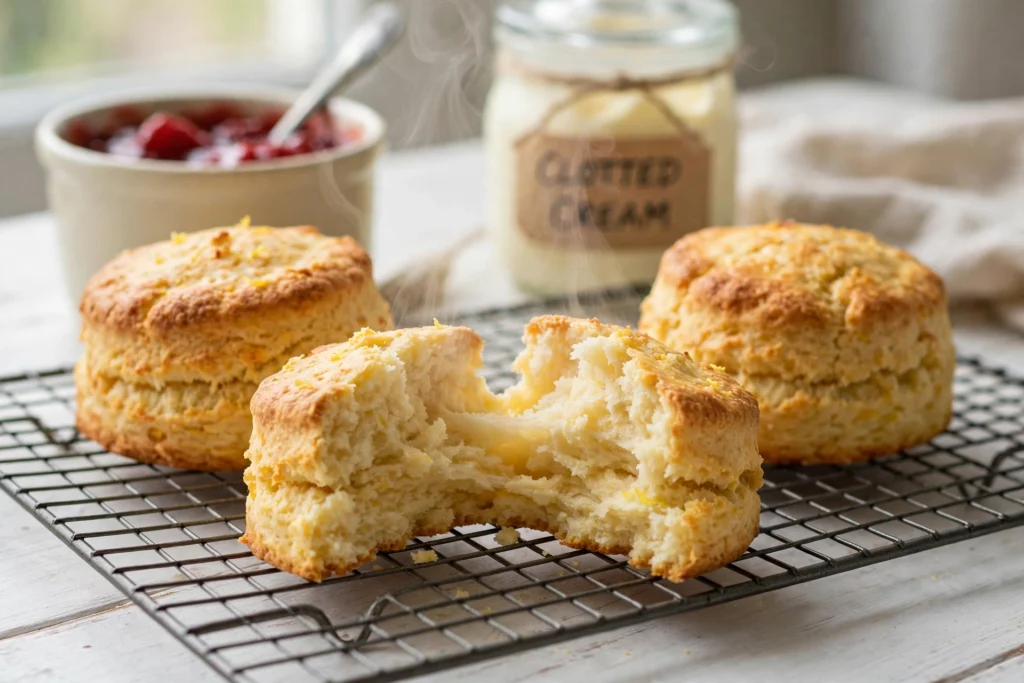
Split the warm scone in half, spread with strawberry or raspberry jam, then add a generous spoonful of whipped cream or clotted cream. Many Australians simply whip a little thickened cream with a touch of icing sugar and a drop of vanilla.
Jam First or Cream First?
There is a friendly rivalry in England. In Cornwall, tradition says jam goes on first, then cream. In Devon, it is cream first, then jam. There is no right answer, only a personal preference. Whichever you choose, you are doing it correctly.
Other Delicious Toppings
- Butter and honey
- Lemon curd and whipped cream
- Berry compote and mascarpone
- Nutella or chocolate hazelnut spread
- Salted butter with a slice of cheddar (especially for cheese scones)
- Apple butter or apricot jam
- Whipped ricotta with a drizzle of maple syrup
What to Drink With Scones
- A pot of Earl Grey, English Breakfast or Darjeeling
- A flat white or cappuccino
- Iced tea or sparkling lemonade in summer
- Hot chocolate for kids
Occasions That Suit Lemonade Scones
- Morning tea at work or at home
- Weekend brunch
- Afternoon tea parties and bridal showers
- Mother’s Day and Father’s Day breakfasts
- School fetes and bake sales
- Picnics and road-trip snacks
- Last-minute guests at the door
- Care packages for new parents, neighbours and friends

How to Store, Freeze and Reheat Lemonade Scones
Scones taste best fresh, but life does not always allow that. Here is how to keep them in good condition.
Room Temperature
Cool completely, then store in an airtight container. They are at their best for the first day, and should be eaten within 2 days. Avoid the fridge, because it dries scones out faster.
Freezing Baked Scones
- Let the scones cool completely.
- Place in a freezer-safe bag or container, with baking paper between layers.
- Freeze for up to 3 months.
- Thaw at room temperature for about an hour, or defrost in the microwave in short bursts.
Freezing Unbaked Scones
You can also freeze the cut, unbaked scones on a tray until firm, then move them to a bag. Bake from frozen at the same temperature, adding 3 to 5 minutes. This is a good trick for batch prepping, although the lemonade fizz loses some of its strength during freezing, so expect a slightly lower rise.
Reheating
- Oven: Wrap in foil and heat at 160°C (320°F) for 5 to 8 minutes.
- Microwave: 10 to 15 seconds for a single scone. Any longer and they turn rubbery.
- Air fryer: 3 to 4 minutes at 150°C (300°F).
Split and toast leftover scones with butter, which is a great way to use up the stale ones.
Can You Make the Dough Ahead of Time?
Not really. As soon as the lemonade meets the flour, the bubbles start to escape and the baking powder begins to react. Dough left sitting for hours will bake up denser. If you need to plan ahead, freeze the cut unbaked scones, or bake them in the morning and reheat them just before serving. The recipe takes less than half an hour in total, so baking on the day is almost always the easiest option.
How to Scale the Recipe Up or Down
| Batch size | Flour | Cream | Lemonade | Makes |
|---|---|---|---|---|
| Small | 1 1/2 cups (225 g) | 1/2 cup (125 ml) | 1/2 cup (125 ml) | 5 to 6 scones |
| Standard | 3 cups (450 g) | 1 cup (250 ml) | 1 cup (250 ml) | 10 to 12 scones |
| Large | 6 cups (900 g) | 2 cups (500 ml) | 2 cups (500 ml) | 20 to 24 scones |
For larger batches, mix in a very big bowl, and bake on two trays on different shelves, swapping them halfway for even colour. If you are baking for a crowd, make two separate batches of dough instead of one enormous one, because large amounts of dough take longer to mix and lose fizz.
Nutrition and Cost
Because the recipe has only three ingredients, it is also very cheap. A batch of 10 to 12 scones typically costs only a few dollars, depending on the price of cream where you live, which makes it one of the most budget-friendly baked treats you can make for a group.
Nutrition varies with the cream you choose, the size of the scones and the extras you add. As a general guide, a medium scone made from this recipe lands somewhere between 190 and 250 calories before jam and cream, with the bulk of that coming from flour and cream. Check the labels on your own ingredients and use an online calculator if you need exact numbers for dietary tracking.
If you want a lighter version, you can use a lower-fat cream, but expect a slightly less tender scone. Using smaller cutters is the easiest way to keep portions modest without compromising texture.
Common Mistakes to Avoid
- Using still, homemade or flat lemonade
- Using expired self-raising flour
- Stirring until smooth
- Rolling the dough thin
- Twisting the cutter
- Brushing milk down the sides of the scones
- Baking at too low a temperature
- Leaving the scones uncovered while cooling
- Re-rolling the offcuts too many times
If you can avoid those nine pitfalls, your success rate will be remarkably high.
Why This Recipe Is Worth Making
There are hundreds of 3 ingredient lemonade scones online, and many of them are very similar. What matters is whether the recipe is reliable, whether it explains the why and not only the how, and whether it helps you when something goes wrong. A good scone recipe should leave you feeling capable, not nervous. These scones are easy enough for a first-time baker, quick enough for a busy weekday, and impressive enough to serve at a proper afternoon tea.
They also remind us that good food does not need to be complicated. Three honest ingredients, a little care and a hot oven can produce something that feels like a gift.
3 Ingredient Lemonade Scones
Ingredients
Equipment
Method
- Preheat the oven to 200°C (390°F), or 180°C fan-forced. Line a large baking tray with baking paper.
- Combine the ingredients. Place the sifted flour in a large bowl. Pour in the cream and the lemonade.
- Mix gently. Use a butter knife or spoon to stir in a cutting motion until the flour is mostly combined and the dough just comes together. It should be soft and slightly sticky. A few dry patches are fine, because the dough will finish coming together on the bench.
- Turn out onto a floured surface. Dust the bench with extra flour and scoop the dough onto it. Knead very gently, only 3 to 5 folds, just to bring it together.
- Pat out the dough. Use floured hands to pat the dough into a round about 2.5 cm (1 inch) thick. Do not use a rolling pin, which presses out the air.
- Cut the scones. Dip your cutter in flour and press straight down, without twisting. Lift the cutter straight up. Cut as many scones as you can from the first round.
- Place on the tray. Arrange the scones so they are just touching each other, which helps them rise upwards rather than outwards.
- Re-use the scraps. Gently bring the offcuts together, pat out again, and cut a few more. These last scones will be a little less tall, but still delicious.
- Brush with milk. Lightly brush the tops (not the sides) with milk for a golden finish. This step is optional.
- Bake. Bake for 14 to 16 minutes, until the tops are golden and the scones sound hollow when tapped on the base.
- Cool briefly. Transfer to a wire rack and cover loosely with a clean tea towel for a few minutes. This traps steam and keeps the tops soft instead of crusty.
- Serve warm with jam and whipped cream, and plenty of tea.
Final Thoughts
The beauty of 3 ingredient lemonade scones is how much they give you for how little they ask. A bowl, a spoon, a handful of pantry staples and fifteen minutes in the oven are all that stand between you and a plate of warm, fluffy, golden scones. Remember the golden rules: fresh fizzy lemonade, full-fat cream, fresh flour, minimal mixing, a thick pat of dough, a straight cutter press and a hot oven.
Bake a batch of 3 ingredient lemonade scones this weekend, serve them with jam and cream while they are still warm, and see how quickly the plate empties. Then try a variation, share the recipe with someone who thinks they cannot bake, and enjoy being known as the person who makes the scones.
If you liked this recipe, leave a comment with how yours turned out, and tell us which variation you tried first.
Frequently Asked Questions
What are the 3 ingredients in lemonade scones?
The three ingredients are self-raising flour, cream and lemonade. A standard batch uses about 3 cups (450 g) of self-raising flour, 1 cup (250 ml) of cream and 1 cup (250 ml) of fizzy lemonade. Extra flour is used for dusting, and milk is optional for brushing the tops.
Do lemonade scones taste like lemon?
No, not noticeably. The lemon-lime flavour of the drink is mild and fades during baking. The scones taste lightly sweet and buttery, similar to a classic scone, only slightly sweeter. If you want a stronger lemon flavour, add grated lemon zest and finish with a lemon glaze.
Can I use Sprite or 7UP instead of lemonade?
Yes. In the United States, Sprite and 7UP are the closest equivalent to Australian, New Zealand and British lemonade. Any clear, fizzy lemon-lime soda will work. Avoid still lemonade, homemade lemonade and cloudy lemon drinks, because they lack the carbonation that helps the scones rise.
Can I use diet or zero-sugar lemonade?
Yes, you can. The carbonation still helps the dough rise, so the scones will still be light. They will be a little less sweet and may brown less, so brushing the tops with milk or a beaten egg is a good idea for colour.
Why didn’t my lemonade scones rise?
The most common causes are old self-raising flour, flat lemonade, an oven that was not hot enough, rolling the dough too thin, or twisting the cutter. Check the date on your flour, use a freshly opened bottle of lemonade, preheat the oven fully, pat the dough to at least 2.5 cm thick and press the cutter straight down.
Can I make lemonade scones without cream?
Cream is what gives these scones their rich, tender crumb, so it is difficult to leave out completely. Good substitutes include thick coconut cream (for a dairy-free version) or, as a last resort, a mixture of milk and melted butter. Using only milk will result in drier, plainer scones.
Can I use plain flour instead of self-raising flour?
Yes, if you add your own raising agent. For every 1 cup (150 g) of plain or all-purpose flour, whisk in 2 teaspoons of baking powder and a pinch of salt. Sift the mixture twice to distribute it evenly. For this recipe, you would use 3 cups (450 g) of plain flour with 2 tablespoons of baking powder and 3/4 teaspoon of salt.
How do I make lemonade scones in an air fryer?
Preheat the air fryer to 170°C (340°F). Place the cut scones in a lined basket, close together, and cook for 12 to 15 minutes until golden. Check after 10 minutes, because air fryers vary. If your basket is small, cook in batches so the scones are not squashed.
How long do lemonade scones last, and can I freeze them?
They are best on the day they are made and keep for up to 2 days in an airtight container at room temperature. To freeze, let them cool completely, then store in a freezer bag for up to 3 months. Thaw at room temperature, and warm briefly in the oven or microwave before serving.
Can I make lemonade scones gluten-free or dairy-free?
Yes to both. For gluten-free scones, use a quality gluten-free self-raising flour blend and handle the dough very gently. For dairy-free scones, swap the cream for thick coconut cream and brush the tops with plant-based milk. Both versions are best eaten fresh, on the day of baking.

Hi, I’m Angela. I cook the way busy people actually cook — simple, tasty food with ingredients you already have. On CookBookBite I share easy recipes, honest kitchen tips, and dishes my family asks for again and again.
Pingback: Puff Pastry Recipe: 729 Layers, Flaky, Buttery & Homemade
Pingback: 5 Ingredient Mango Banana Smoothie: Quick & Creamy