
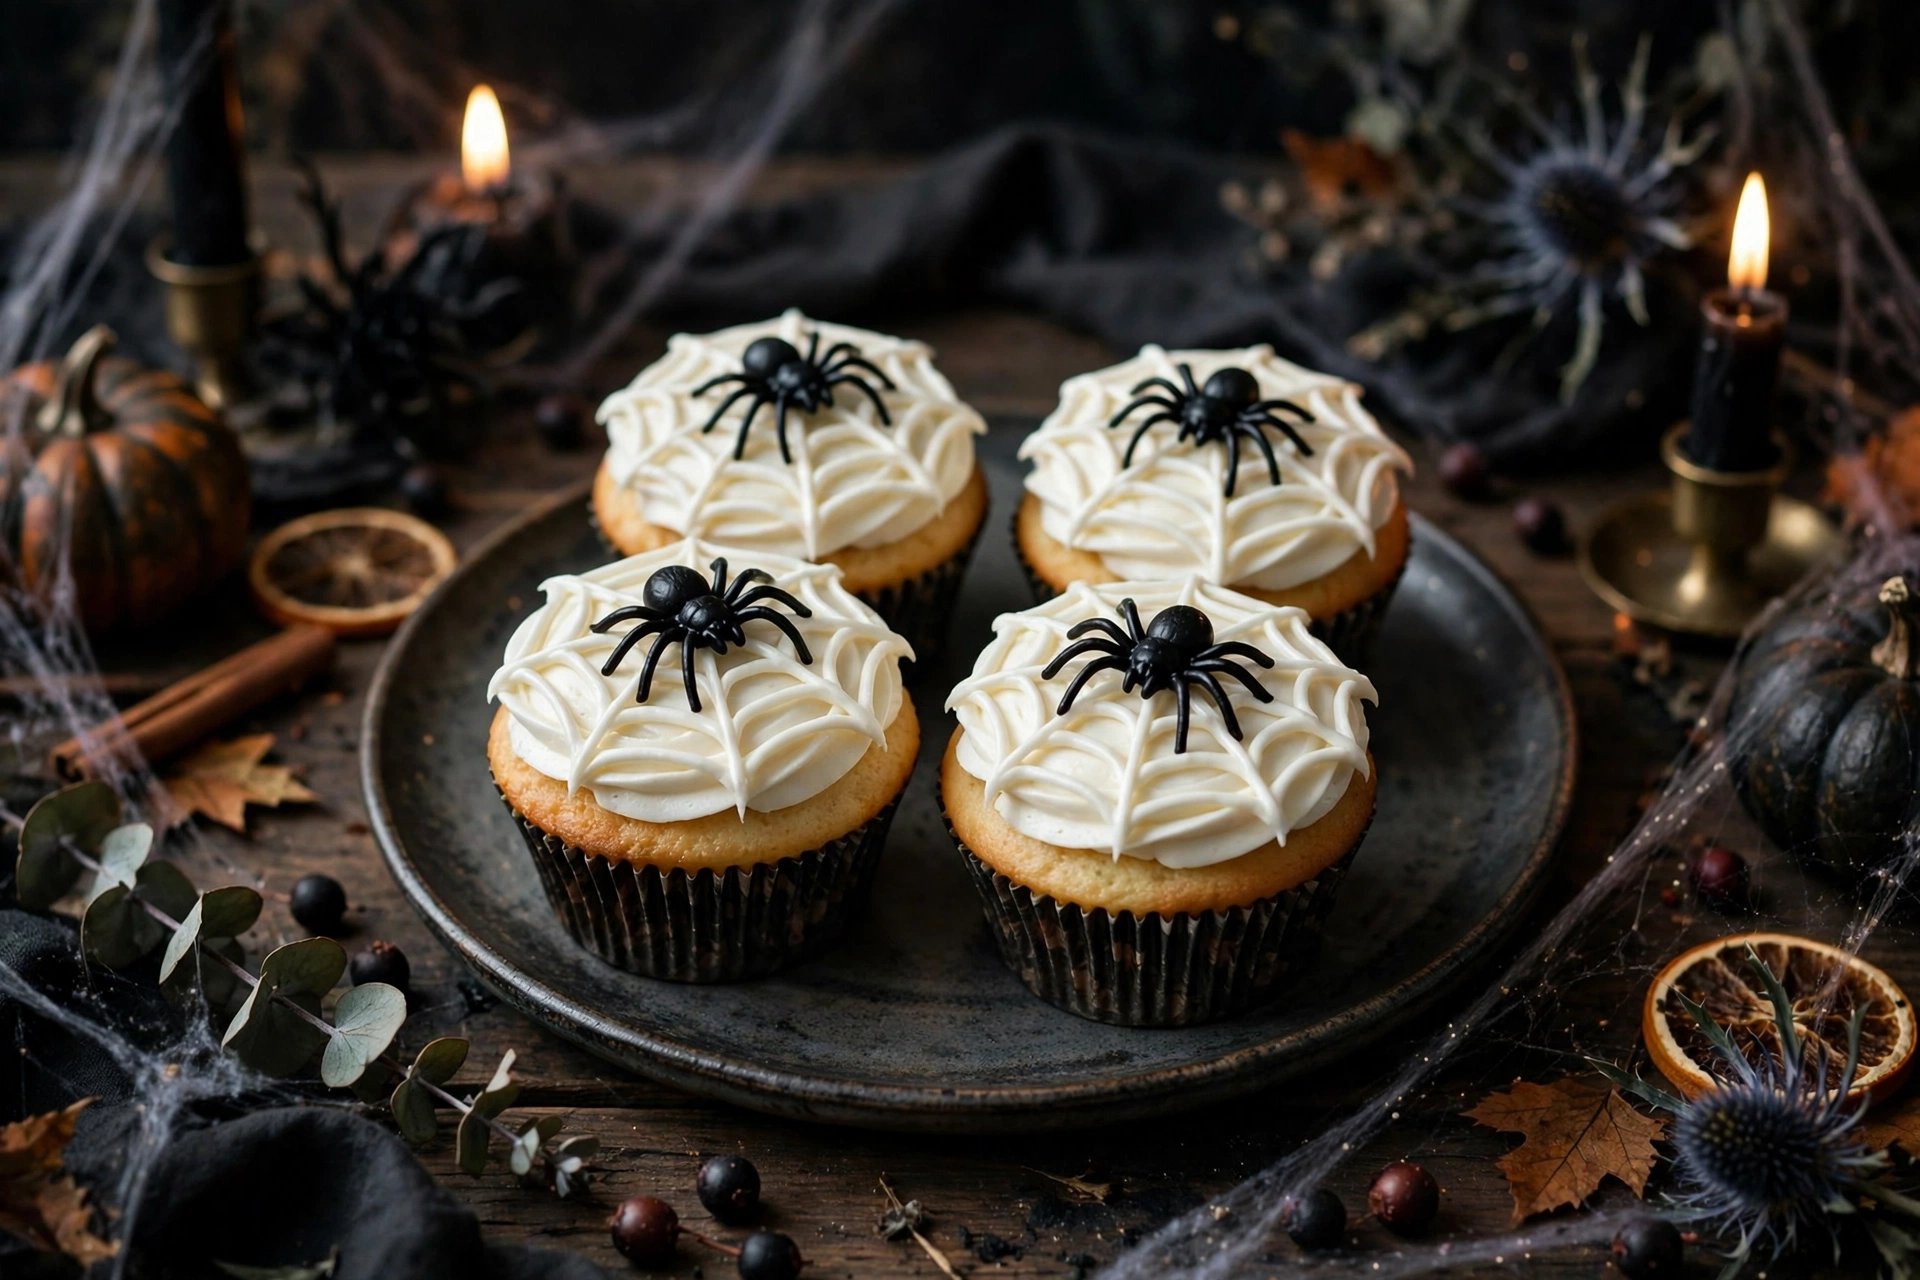
Spiderweb cupcakes are the ultimate Halloween showstopper: deeply chocolatey cupcakes with a hidden raspberry ‘bloody’ filling, crowned with smooth white frosting, hand-piped white chocolate spiderwebs and a candy spider perched on top. They look spectacular on a Halloween dessert table, yet every element is straightforward to make with everyday ingredients and basic equipment.
This complete guide walks through the entire process, from mixing a moist chocolate sponge to piping picture-perfect spiderwebs. Whether you are baking for a Halloween party, a school bake sale or simply to mark the spookiest season of the year, these spiderweb cupcakes deliver drama, flavour and fun in equal measure.
The magic of this recipe lies in its contrasts. A rich, dark chocolate cupcake gives way to a jewel-red raspberry centre that oozes like something from a horror film when bitten. The white frosting provides a blank canvas for the spiderweb design, and the crisp white chocolate web against the dark cake creates the striking visual that makes these cupcakes so memorable.
Must Read : Ghost Meringue Cookies Recipe — Spooky Easy Halloween Treats
Best of all, the technique is far easier than it looks. The spiderweb effect is created with nothing more than piped concentric circles and a cocktail stick dragged through them — a method that takes minutes to master and produces professional-looking results on the very first attempt. The printable recipe card at the end of this post contains the condensed version, while the detailed guide below explains every step, every ingredient choice and every troubleshooting tip.
Why spiderweb cupcakes are the perfect Halloween bake
Halloween baking is all about theatre, and few bakes deliver as much visual drama for as little effort as spiderweb cupcakes. The spiderweb motif is instantly recognisable, universally associated with Halloween, and — crucially — achievable for bakers of all skill levels. Unlike intricate sugar work or fondant modelling, the web design requires no artistic talent, just a piping bag and a cocktail stick.
These cupcakes also solve the classic Halloween party dilemma: how to make something that looks impressive but actually tastes good. Too many spooky bakes sacrifice flavour for appearance, ending up as dry, bland novelties. Spiderweb cupcakes are different. The chocolate sponge is genuinely moist and rich, thanks to the combination of oil, boiling water and both baking powder and bicarbonate of soda. The raspberry filling adds a bright, tart contrast that cuts through the sweetness, and the buttercream frosting is silky rather than cloying.
They are also wonderfully practical for entertaining. The cupcakes can be baked a day ahead, the filling keeps well, and the decorating can be done in stages. A batch of twelve is the ideal quantity for a party — enough to make an impact without leaving you with endless leftovers. For larger gatherings, the recipe doubles easily.
Children love them, adults admire them, and the ‘bloody’ filling provides the perfect talking point. When a guest bites through the web and discovers the red centre, the reaction is always worth the effort. For a Halloween dessert table, pair them with other spooky bakes for a coordinated spread that looks professionally styled.
What to expect from this spiderweb cupcakes recipe
This recipe makes 12 standard cupcakes and is divided into three components: the chocolate cupcakes, the raspberry ‘bloody’ filling and the frosting with spiderweb decoration. The total time is around 1 hour 30 minutes, plus cooling and chilling time.
The chocolate cupcakes use the classic hot-water chocolate cake method, which produces an exceptionally moist crumb. The batter is thin — thinner than you might expect — but this is the secret to its tenderness. Do not be tempted to add extra flour.
The raspberry filling is a quick stovetop compote, thickened with cornflour until glossy and spoonable. It needs to cool completely before use, so make it while the cupcakes are in the oven or cooling.
The decoration has three stages: a smooth dome of vanilla buttercream, piped white chocolate webs, and candy spiders. Each stage needs the previous one to be set or cool, so allow the full chilling times given. Rushing the decoration is the most common cause of disappointing results — patience here pays off in crisp, defined webs.
The detailed step-by-step guide below expands on the condensed recipe card, explaining the ‘why’ behind each instruction so you can bake with confidence, adapt to your kitchen and troubleshoot any issues.
Also Read: Crispy Potato Skins Recipe (Better Than the Restaurant)
Ingredients for the chocolate spiderweb cupcakes
Great spiderweb cupcakes start with a genuinely excellent chocolate sponge. Each ingredient in this recipe has a specific job, and understanding those roles helps you bake with confidence and make sensible substitutions when needed. All ingredients should be at room temperature before you begin, except where stated.
For the chocolate cupcakes
190g plain flour. Plain flour (all-purpose flour) provides the structure of the cupcake. It is important to measure it accurately — spoon the flour into the measuring jug or weigh it on digital scales rather than scooping directly from the bag, which compacts it and can add up to 30g extra. Too much flour is the most common cause of dry, dense cupcakes. There is no need for self-raising flour here, as the recipe uses both baking powder and bicarbonate of soda for lift.
200g caster sugar. Caster sugar dissolves more readily than granulated sugar, giving a finer, more even crumb. It sweetens the batter, helps retain moisture and contributes to the tender texture. Do not reduce the sugar significantly, as it does far more than add sweetness — it is essential to the structure and moistness of the finished cupcake.
75g cocoa powder. Use a good-quality unsweetened cocoa powder, preferably Dutch-processed for the darkest colour and smoothest flavour. The cocoa provides the deep chocolate taste and the dark base that makes the white spiderweb decoration stand out so dramatically. Sift the cocoa with the other dry ingredients to remove lumps, which will not dissolve properly in the batter.
1.5 tsp baking powder and 1.5 tsp bicarbonate of soda. This recipe uses both leaveners deliberately. The bicarbonate of soda (baking soda) reacts with the acidity in the cocoa powder and milk to give an initial lift, while the baking powder provides sustained rising power in the oven’s heat. Using both ensures a good dome and an open, tender crumb. Check that both are in date — old leaveners lose their potency and are a frequent cause of flat cupcakes.
1 tsp fine sea salt. Salt does not make the cupcakes salty; it intensifies the chocolate flavour and balances the sweetness. Fine sea salt distributes more evenly through the batter than coarse crystals. If you only have table salt, use slightly less, as it tastes saltier by volume.
2 large eggs, at room temperature. Eggs bind the batter, add richness and contribute to the structure. Room-temperature eggs emulsify far better with the oil and milk than cold eggs, producing a smoother batter and a more even crumb. If you forget to take them out of the fridge, place them in a bowl of warm (not hot) water for 10 minutes.
240ml whole milk, at room temperature. Whole milk adds moisture, fat and a touch of protein, all of which contribute to a tender, flavourful cupcake. The fat in whole milk makes a noticeable difference to richness compared with skimmed milk. Buttermilk can be substituted for an even more tender crumb and a slight tang that complements the chocolate.
120ml vegetable oil. Oil, rather than butter, is the secret to a moist cupcake that stays soft even when chilled. Oil coats the flour proteins and inhibits gluten development, producing a tender crumb, and because oil is liquid at room temperature, the cupcakes taste moist even straight from the fridge. Use a neutral-flavoured oil such as sunflower or vegetable oil — never olive oil, whose flavour would intrude.
2 tsp vanilla extract. Vanilla rounds out and deepens the chocolate flavour. Use pure vanilla extract rather than artificial vanilla essence for the best taste. It may seem like a small amount, but it makes a real difference to the finished flavour.
240ml boiling water. This is the signature step of the hot-water chocolate cake method. The boiling water blooms the cocoa powder — a process that releases its flavour compounds and intensifies the chocolate taste dramatically. It also creates the characteristically thin batter that bakes into an exceptionally moist crumb. Add the water gradually while stirring, and do not worry when the batter looks alarmingly thin; this is exactly correct.

Once the thin batter is divided between the cupcake cases, the oven’s heat sets the structure quickly, trapping the moisture inside. Resist the urge to open the oven door during the first 15 minutes of baking, as the rush of cool air can cause the delicate rising cupcakes to sink.
For the raspberry ‘bloody’ filling
The filling is what transforms these from pretty cupcakes into proper Halloween showpieces. When a guest bites through the chocolate sponge and the red centre oozes out, the effect is pure theatre. The good news is that it takes barely 10 minutes on the stovetop.
200g fresh or frozen raspberries. Raspberries give the most vivid natural red colour and a tartness that cuts through the sweet chocolate and buttercream beautifully. Frozen raspberries work just as well as fresh — and are often better value outside of summer — because they break down into a compote so readily. There is no need to defrost them first; simply add a minute or two to the simmering time. If raspberries are unavailable, blackberries or a mixed berry blend can be substituted, though the colour will be deeper and less blood-like.
50g caster sugar. The sugar balances the natural tartness of the raspberries and helps the compote thicken to a glossy, spoonable consistency. The amount given produces a filling that is tangy rather than jammy-sweet, which is exactly the contrast these rich cupcakes need. Taste the compote once the berries have broken down and add a little more sugar only if your raspberries are particularly sharp.
1 tbsp lemon juice. Lemon juice brightens the raspberry flavour and helps preserve the vivid red colour, which can dull during cooking. Freshly squeezed is best, but bottled lemon juice works perfectly well here. Do not skip it — without the acidity, the filling tastes flat and looks muddy rather than jewel-like.
1 tbsp cornflour mixed with 2 tbsp cold water. This slurry is the thickener that turns the loose berry juices into a filling that holds its shape inside the cupcake instead of soaking into the crumb. It is essential to mix the cornflour with cold water first — adding cornflour directly to the hot compote creates lumps that will not dissolve. Once stirred in, the mixture needs a full 1–2 minutes at a bubbling simmer to activate the starch and reach its maximum thickness. The filling will thicken further as it cools, so do not worry if it still looks slightly loose in the pan.
For the frosting and spiderweb decoration
225g unsalted butter, softened. Properly softened butter — soft enough to leave an indent when pressed, but not melted or greasy — is the foundation of smooth buttercream. Take it out of the fridge at least an hour before baking, or cut it into cubes to speed things up. Unsalted butter is specified so you can control the salt level precisely; if you only have salted butter, omit the pinch of salt added later.
375g icing sugar, sifted. Icing sugar (powdered sugar) gives buttercream its smooth, melt-in-the-mouth texture. Always sift it, even if it looks lump-free — tiny hard lumps will not beat out and will leave white specks in your frosting. The ratio of butter to sugar here produces a frosting that is firm enough to hold a smooth dome and support the piped web, without being overly sweet.
2 tbsp double cream. A splash of double cream (heavy cream) makes the buttercream noticeably silkier and easier to spread smoothly. It also lightens the texture slightly. Add it gradually — you want a frosting that holds its shape in a firm dome, not one so soft it slumps. Milk can be substituted, but the result will be slightly less luxurious.
1 tsp vanilla extract and 1 pinch fine sea salt. As with the cupcake batter, vanilla and salt round out the flavour and stop the frosting tasting one-dimensionally sweet. The salt is particularly important in buttercream, where it tempers the icing sugar beautifully.
100g white chocolate. This is your spiderweb ‘ink’. White chocolate sets with a satisfying snap and its creamy colour contrasts dramatically with the dark cupcake beneath. Use a proper chocolate bar rather than chocolate chips, which contain stabilisers that make them harder to melt smoothly. Melt it gently — white chocolate scorches easily — and use it while it is fluid but not hot.
12 candy spiders. The crowning glory. Candy spiders are widely available in the run-up to Halloween from supermarkets, cake decorating shops and online retailers. Look for spiders made from liquorice, gummy or chocolate — any will work. If you cannot find them, the variations section below suggests several homemade alternatives, from piped chocolate spiders to olive ‘spiders’ for a savoury-sweet twist.
Read Also: Mummy Brownies : Easy Halloween Brownie Treats with Candy Eyes
Equipment you’ll need
One of the joys of this recipe is that it requires no specialist equipment beyond what most home bakers already own. Before you start, gather the following:
- 12-hole muffin tin and 12 cupcake cases. Standard muffin tins work perfectly. Use sturdy cupcake cases — flimsy ones can buckle under the thin batter. Halloween-themed cases with bats, pumpkins or webs add an extra festive touch and are widely available in October.
- Large mixing bowl and a separate jug. The dry ingredients are whisked in the bowl while the wet ingredients are combined in a jug before being poured together. This two-stage method prevents overmixing.
- Whisk and spatula. A balloon whisk for the dry ingredients and wet mixture, and a flexible spatula for folding everything together and scraping the bowl clean.
- Small saucepan. For simmering the raspberry filling. A small, heavy-based pan gives the most even heat and prevents the sugary compote catching.
- Apple corer, small sharp knife or teaspoon. For hollowing out the centres of the baked cupcakes to make room for the filling. An apple corer is the neatest tool, but a teaspoon works just as well.
- Electric mixer (handheld or stand). Beating the buttercream until pale and fluffy is hard work by hand. An electric mixer makes it effortless and produces a noticeably smoother result.
- Piping bag with a fine round tip. For the spiderwebs. A small round tip (around 2–3mm) gives the best control. In a pinch, a sturdy sandwich bag with a tiny corner snipped off works surprisingly well.
- Cocktail stick or wooden skewer. The essential web-making tool. One per batch is enough, though having a spare is wise in case of breakage.
- Wire cooling rack. Cooling the cupcakes on a rack rather than in the tin prevents soggy bottoms and ensures they cool evenly.
That is genuinely everything. No sugar thermometers, no turntables, no airbrushes — just straightforward baking tools put to spectacular use.
How to make spiderweb cupcakes: step by step
Follow these detailed steps for perfect spiderweb cupcakes. The condensed version is in the printable recipe card below, but the explanations here will help you understand each stage and get it right first time.
Step 1: Prepare the oven and tin
Preheat the oven to 175°C (350°F, gas mark 4). Position a shelf in the centre of the oven, where the heat circulates most evenly. Line a 12-hole muffin tin with cupcake cases, pressing each one firmly into the hole so it sits flat. If your tin is dark-coloured or non-stick, the cupcakes may brown a little faster — check them a minute or two early. An oven thermometer is a worthwhile investment if your bakes are inconsistent, as many domestic ovens run 10–15 degrees hotter or cooler than the dial suggests.
Step 2: Whisk the dry ingredients
In a large mixing bowl, whisk together the flour, caster sugar, cocoa powder, baking powder, bicarbonate of soda and salt. Whisk thoroughly for a good 30 seconds — this does the job of sifting, breaking up any lumps in the cocoa and distributing the leaveners evenly so every cupcake rises uniformly. Pay particular attention to the cocoa powder, which is prone to stubborn little lumps. If any remain after whisking, press them against the side of the bowl with the back of a spoon.
Step 3: Combine the wet ingredients
In a separate jug, whisk the eggs, milk, vegetable oil and vanilla extract until completely smooth and slightly frothy. Combining the wet ingredients separately before adding them to the dry mixture is a small step that makes a real difference: it ensures the eggs are fully broken up and evenly distributed, so you do not need to overmix the final batter to incorporate them. Overmixing develops gluten and leads to tough, dense cupcakes, so every bit of mixing you can do at this stage saves mixing later.
Step 4: Bring the batter together
Pour the wet mixture into the dry ingredients and stir with a spatula or wooden spoon until just combined — a few small lumps are fine and far preferable to an overmixed batter. Then comes the signature step: pour in the boiling water gradually, stirring as you go. The batter will become dramatically thin, almost like chocolate soup. This is correct. The hot water blooms the cocoa, deepening the chocolate flavour, and the extra liquid is what makes the baked crumb so moist. Scrape the bottom of the bowl to make sure no pockets of dry flour remain.
Step 5: Fill the cases and bake
Because the batter is so thin, a jug with a spout or a ladle is the easiest way to divide it between the cases without drips. Fill each case two-thirds full — no more. The cupcakes rise significantly, and overfilled cases will spill over the edges and bake into misshapen discs rather than neat domes. Two-thirds full gives the perfect rise with a gentle dome that is ideal for frosting.
Bake for 18–20 minutes. The cupcakes are done when they have risen with a slight dome, the tops spring back when lightly pressed, and a wooden skewer or cocktail stick inserted into the centre comes out clean or with just a few moist crumbs clinging to it. If the skewer comes out with wet batter, give them another 2 minutes and test again. Cool in the tin for 5 minutes — this lets the structure set so they do not break when moved — then transfer to a wire rack to cool completely. Never frost or fill warm cupcakes; the heat will melt the buttercream and thin the filling.
Read Must : Light Jello Dessert Recipe (Low-Calorie Berry Treat)
Step 6: Make the raspberry ‘bloody’ filling
While the cupcakes bake or cool, make the filling. Place the raspberries, caster sugar and lemon juice in a small saucepan over medium heat. Stir gently as the berries warm up and begin to release their juices, then simmer for about 5 minutes, stirring occasionally, until the berries have completely broken down into a bubbling, deep-red sauce.
Stir the cornflour into the cold water until smooth, then pour the slurry into the simmering berries, stirring constantly. Within a minute or two, the mixture will thicken noticeably and turn glossy — this is the starch activating. Let it bubble for a full 1–2 minutes, stirring, to cook out any starchy taste and reach maximum thickness. Remove from the heat and leave to cool completely. The filling thickens further as it cools, ending up spoonable but not runny: thick enough to stay inside the cupcake, fluid enough to ooze appealingly when bitten.
If you prefer a seedless filling, press the hot compote through a fine sieve before adding the cornflour slurry, then return it to the pan to thicken. This adds a step but gives a silkier result. For the ‘bloody’ effect, though, a slightly rustic texture with tiny seeds reads as more dramatic and is entirely in keeping with the Halloween theme.
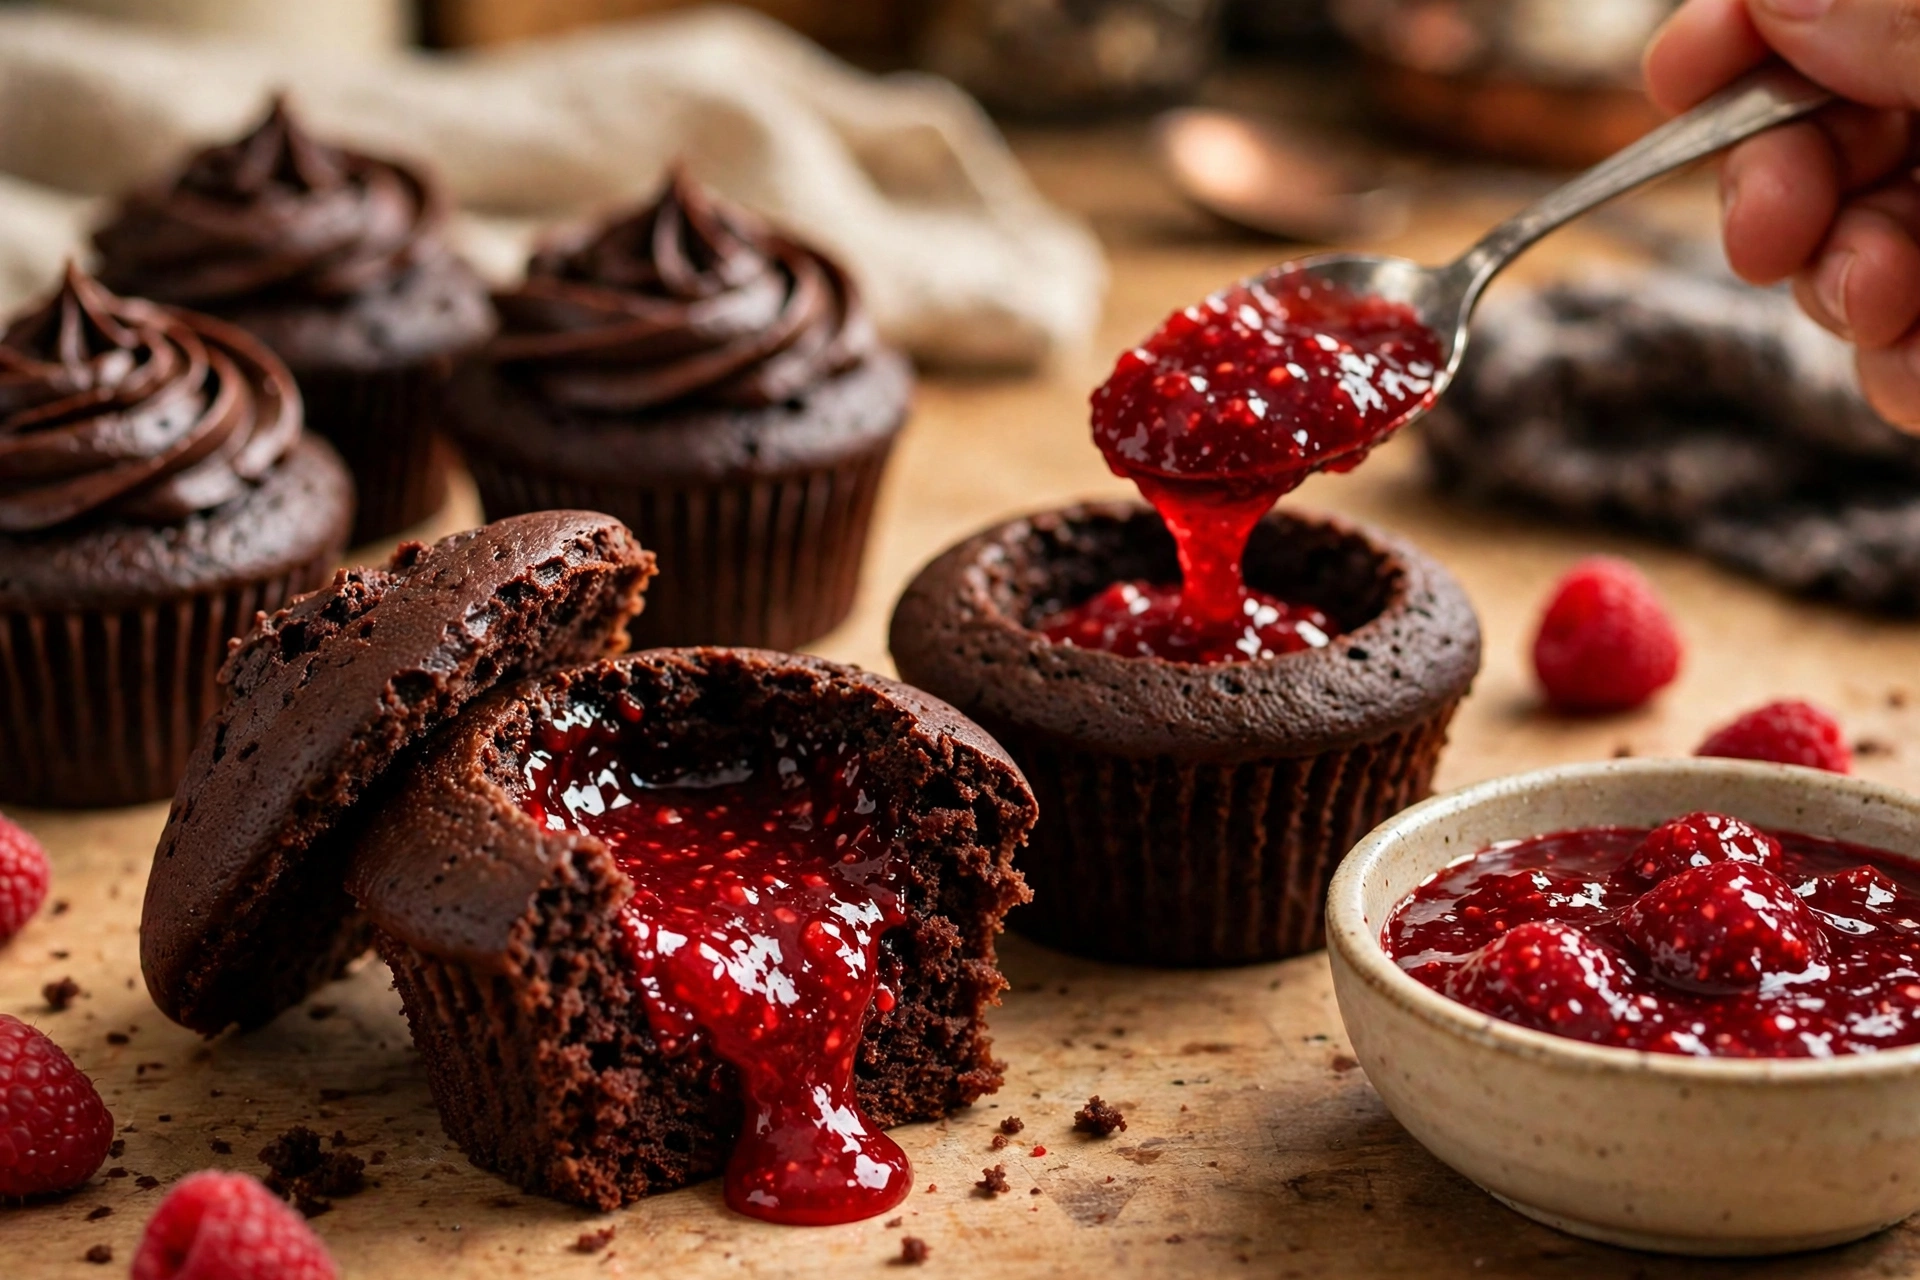
Step 7: Fill the cooled cupcakes
Once the cupcakes are completely cool, cut a small cone from the centre of each one. An apple corer is the ideal tool — push it about two-thirds of the way down and twist — but a small sharp knife or a teaspoon works well too. Aim to remove roughly a tablespoon of crumb from each cupcake, leaving a sturdy base and walls so the cupcake holds its shape. Do not cut all the way through to the case.
Spoon 1–2 teaspoons of the cooled raspberry filling into each hollow. The filling should sit just below the top of the cupcake. If you like, trim the removed cone and replace a thin ‘lid’ of cake over the filling to seal it in — this is optional, as the frosting will cover the top anyway, but it gives a neater cross-section. Do not overfill: the filling expands slightly and too much will seep out under the frosting.
Any leftover filling is delicious spooned over ice cream or porridge, so none goes to waste. It keeps in a sealed jar in the fridge for up to a week.
Step 8: Frost the cupcakes
Beat the softened butter with an electric mixer for 2–3 minutes until pale, fluffy and noticeably lighter in colour. This aeration step is what makes the difference between dense, greasy buttercream and a light, silky frosting, so do not rush it. Add the sifted icing sugar in two or three additions, beating well after each, then beat in the double cream, vanilla extract and salt. The finished buttercream should be smooth, spreadable and able to hold soft peaks.
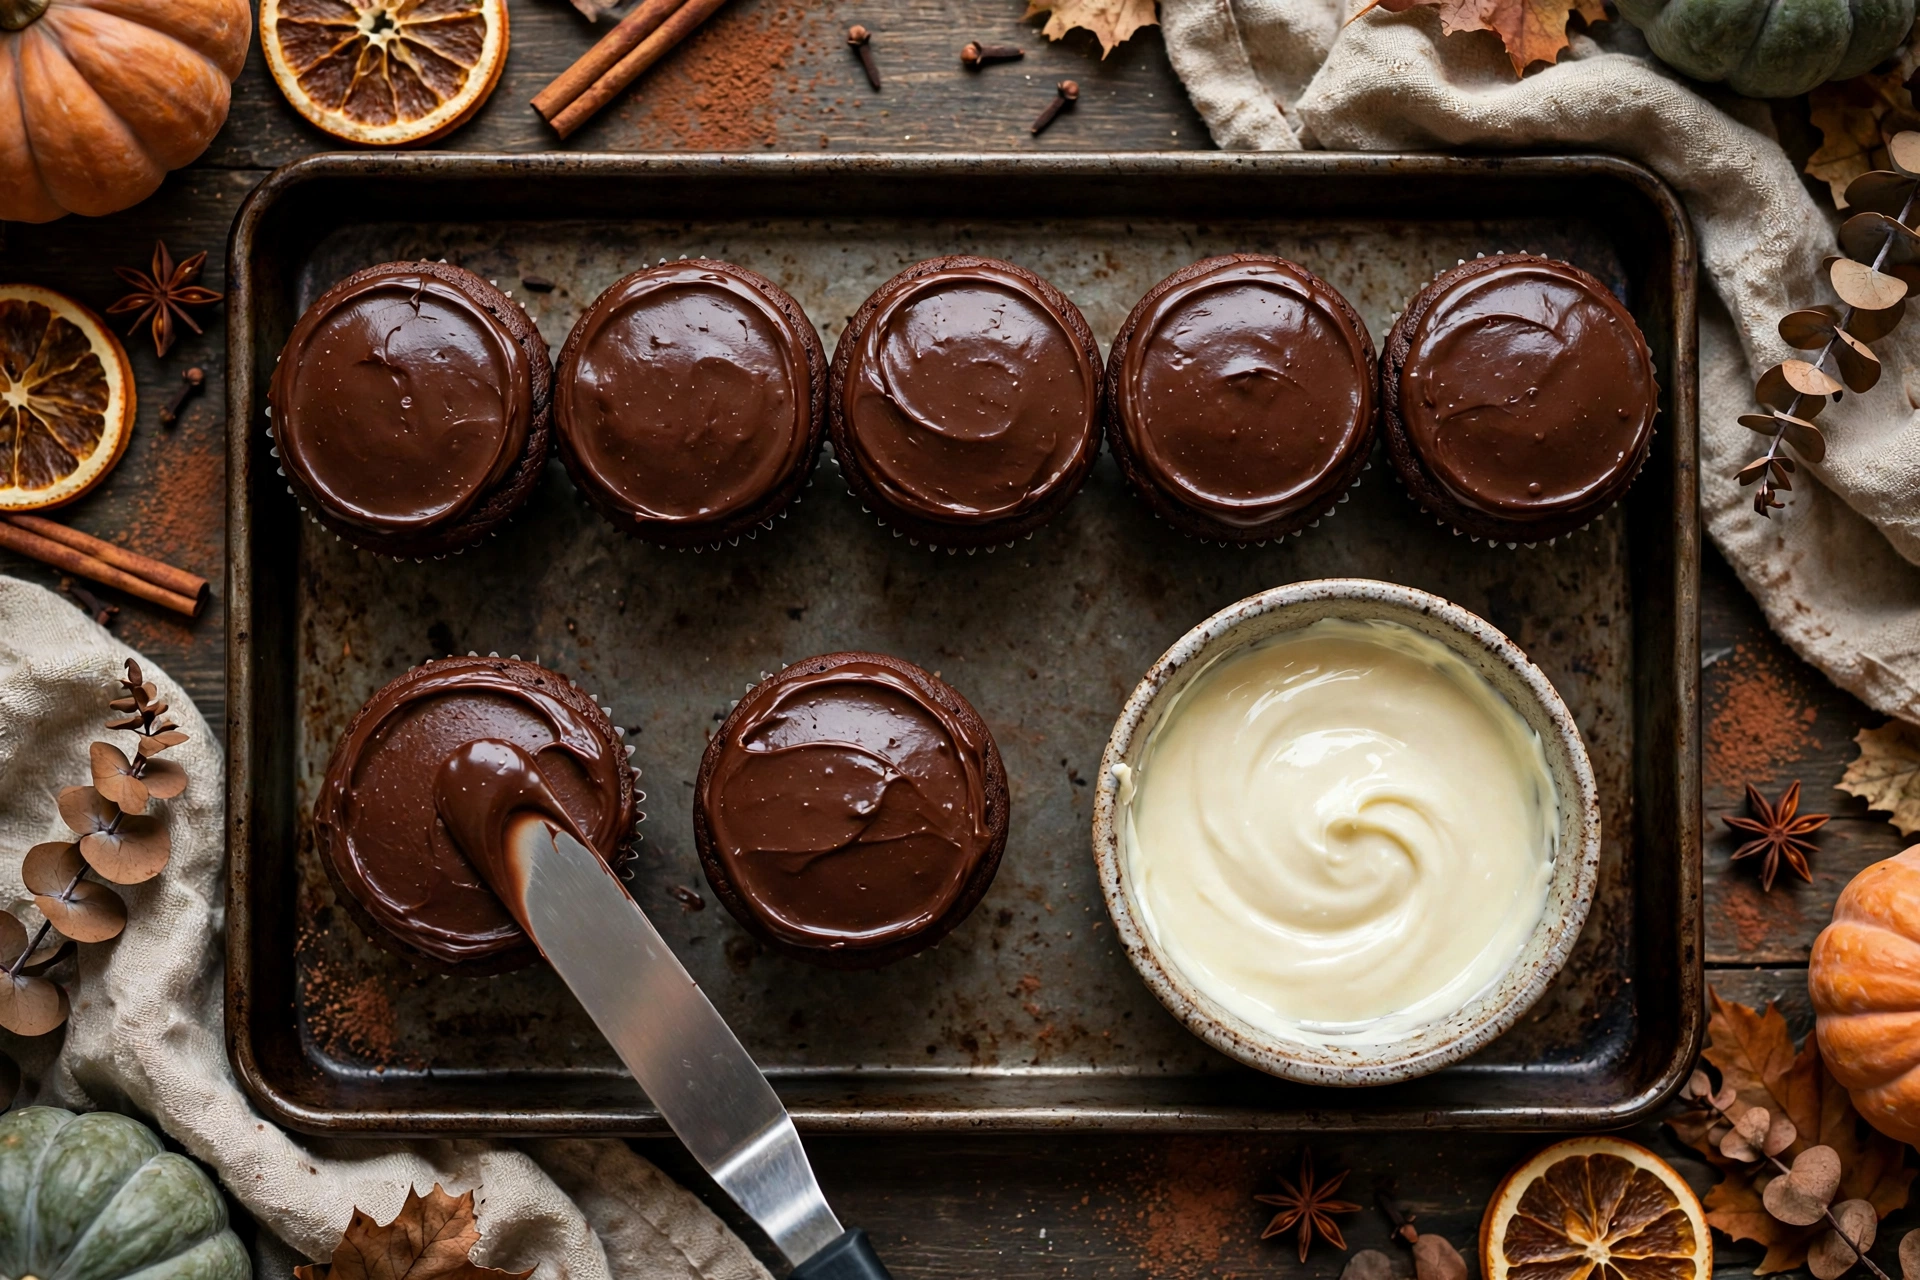
For spiderweb cupcakes, a smooth dome of frosting works far better than a tall swirl — the web needs a relatively flat, even canvas. Use the back of a spoon or a small palette knife to spread a generous dome over each filled cupcake, smoothing the top as much as possible. Small imperfections are fine; the piped web will disguise minor bumps. Once frosted, chill the cupcakes in the fridge for at least 15 minutes until the buttercream is firm to the touch. This chilling step is non-negotiable: piping warm, fluid chocolate onto soft frosting causes the web to sink, blur and lose definition.
Mastering the spiderweb piping technique
The spiderweb is the defining feature of these cupcakes, and it is far simpler than it appears. The entire technique comes down to two motions: piping concentric circles, then dragging a cocktail stick through them. Here is how to get flawless webs every time.
Step 9: Melt the white chocolate
Break the white chocolate into small, even pieces and melt it gently — either in short 20-second bursts in the microwave, stirring between each, or in a heatproof bowl set over a pan of barely simmering water. White chocolate is far more heat-sensitive than dark chocolate and can seize into a grainy mass if overheated, so stop heating when a few small lumps remain and stir until they dissolve in the residual heat. The melted chocolate should be fluid and pourable but not hot. If it is steaming, let it cool for a few minutes; chocolate that is too hot will melt the chilled buttercream beneath it.
Transfer the melted chocolate to a piping bag fitted with a fine round tip (2–3mm). Twist the top of the bag firmly to seal it — white chocolate on your hands at this stage will end up everywhere. If you do not own piping tips, a sturdy sandwich bag with the tiniest corner snipped off works well; cut less than you think you need, as you can always enlarge the hole but never shrink it.
Step 10: Pipe the webs
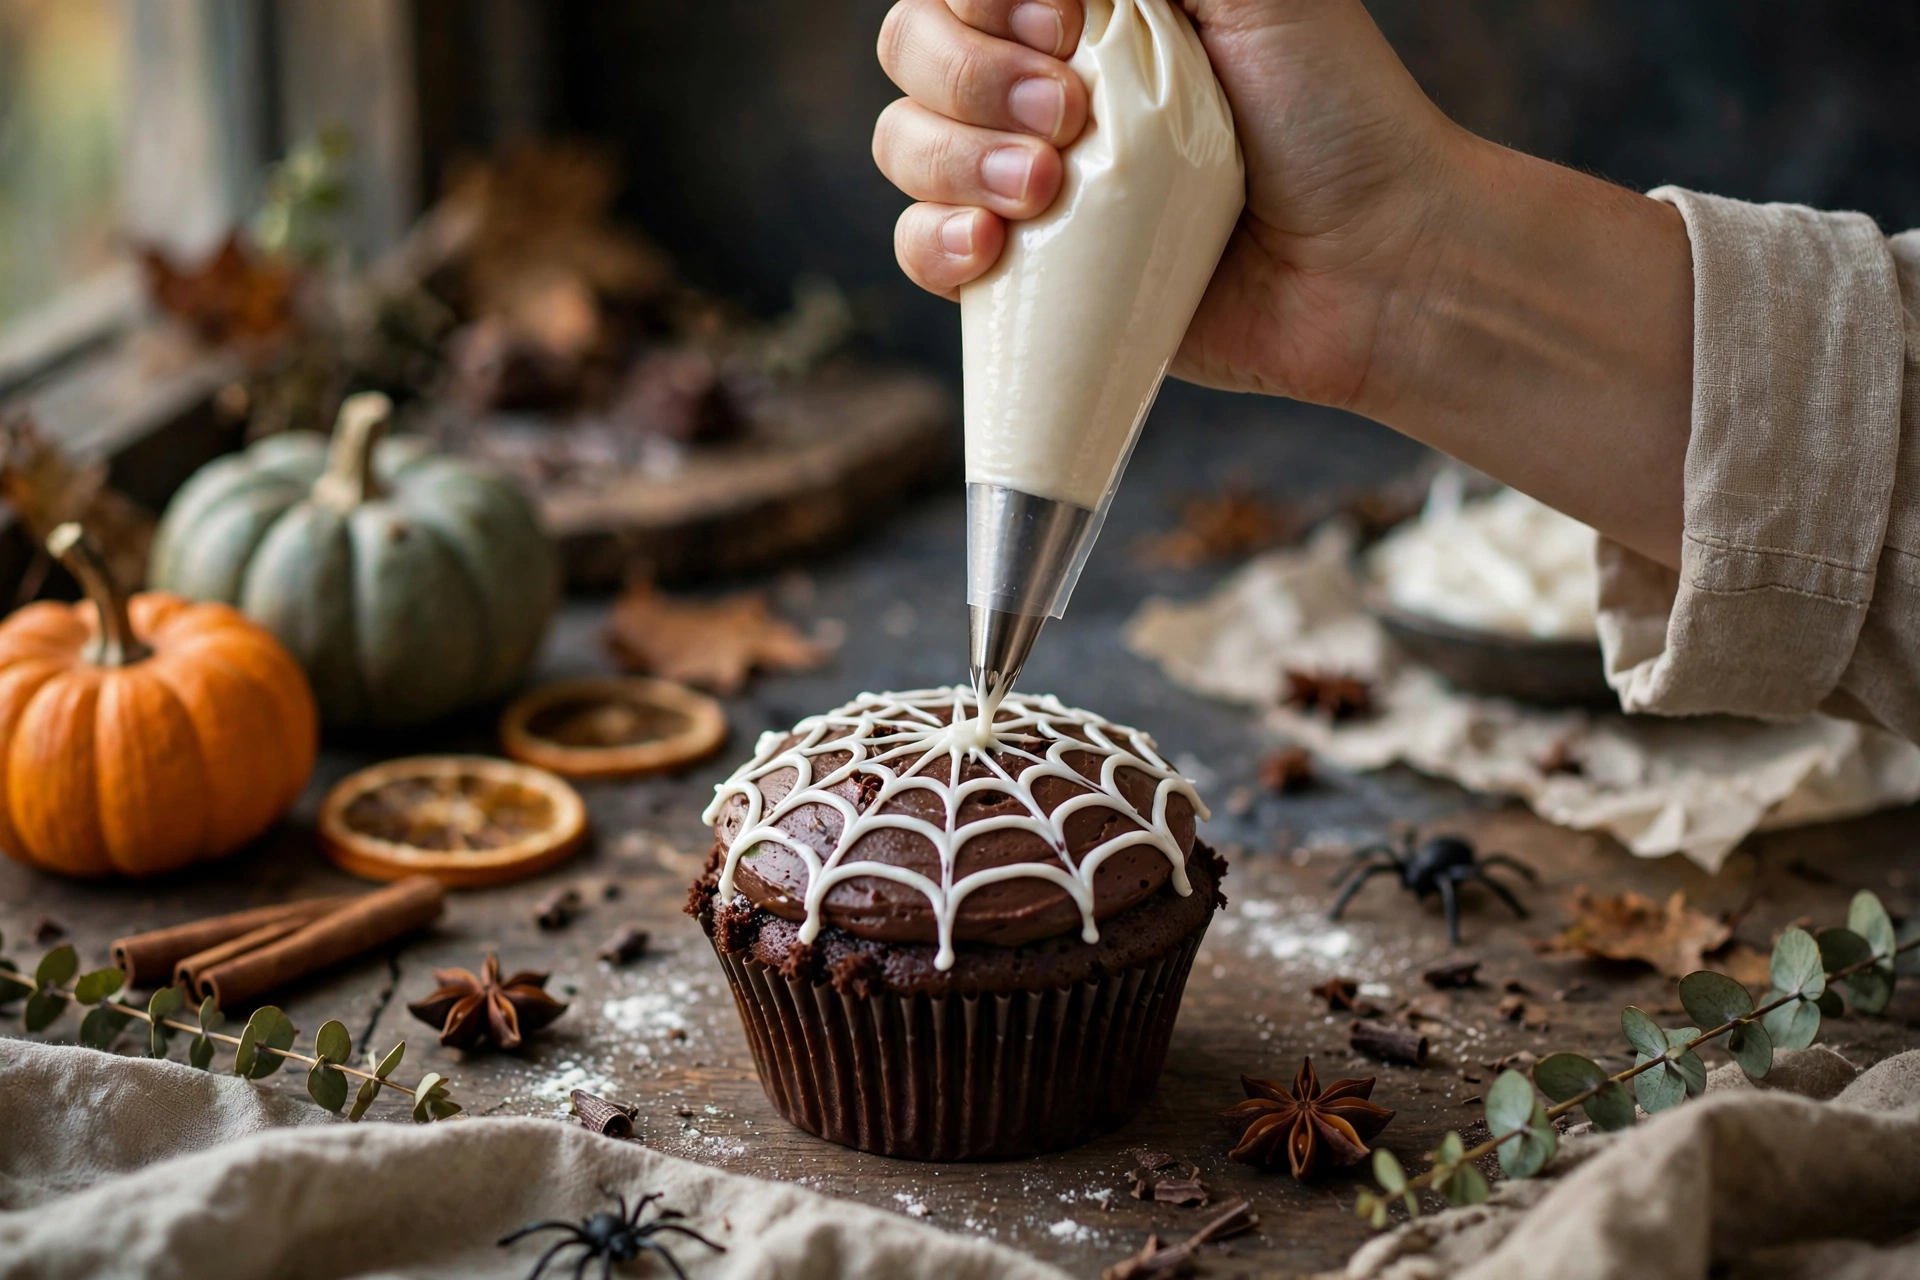
Working one cupcake at a time, pipe 3–4 concentric circles of white chocolate onto the chilled frosting, starting from the centre and working outwards. The innermost circle should be a small dot or tight ring in the very centre; each subsequent ring should be spaced roughly evenly, with the outermost ring sitting just inside the edge of the frosting dome. Keep the pressure steady and the bag at a consistent height for lines of even thickness.
Immediately — before the chocolate begins to set — take a cocktail stick and drag it from the centre of the cupcake outwards to the edge, pulling the chocolate rings into the classic web pattern. Wipe the cocktail stick clean, then repeat: 8 evenly spaced drags around the cupcake creates the most authentic web, dividing it into 8 segments like a real spider’s web. Each drag should start at the very centre and pull straight out to the edge in one smooth motion. The chocolate rings stretch into elegant curved spokes, and the gaps between the drags form the web’s distinctive triangular cells.
Speed matters here. White chocolate begins to set within a couple of minutes at room temperature, and once it firms up, dragging the cocktail stick will crack the lines rather than pulling them smoothly. If you are new to the technique, pipe and drag one cupcake completely before moving to the next, rather than piping all twelve and then dragging. After two or three cupcakes, the rhythm becomes second nature.
Tips for perfect spiderwebs
- Chill the frosting first. Firm, cold buttercream is the ideal canvas. If the frosting is soft, the warm chocolate melts into it instead of sitting crisply on top.
- Keep the chocolate fluid. If the white chocolate in the piping bag starts to thicken, warm the bag briefly in your hands or microwave it for 5 seconds. Do not let it get hot.
- Practise on baking paper. Before touching the cupcakes, pipe a few trial webs on a sheet of baking paper. It takes only a minute and builds confidence enormously.
- Embrace imperfection. Real spiderwebs are irregular, so slightly wobbly lines look authentic rather than wrong. No two webs need to match.
- Work in a cool kitchen. A warm kitchen softens both the buttercream and the chocolate, making everything harder. If your kitchen is hot, chill the frosted cupcakes for longer and work in batches, keeping the undecorated ones in the fridge.
- Fix mistakes immediately. If a web goes wrong, scrape the chocolate off with a palette knife while it is still wet, smooth the frosting and start again. Once set, mistakes are much harder to correct.
Must Read : Banana Nut Muffin Recipe: Bakery-Style, Moist and Fluffy in 40 Minutes
Adding the spider decorations
Step 11: Crown each cupcake with a spider
Once the white chocolate webs have set — about 10 minutes at room temperature, or 5 minutes in the fridge — place a candy spider on each one. Position it slightly off-centre for the most natural look, as though the spider has just crawled onto its web. Press it very gently into the web so it adheres; a tiny dot of leftover melted white chocolate on the spider’s underside acts as edible glue if needed.

If candy spiders are unavailable, there are several excellent homemade alternatives. Pipe simple spiders directly onto the web using melted dark chocolate: a small round body, a smaller head and eight thin legs dragged out with a cocktail stick. Liquorice spiders can be crafted from liquorice laces — a short piece for the body with thin strands for legs. For a less sweet option, black olive spiders (a halved olive for the body, thin slices for legs) are a classic savoury garnish that works surprisingly well against the sweet cupcake for guests who enjoy contrast. Gummy spiders, chocolate truffles decorated with pretzel legs and even small plastic spider rings (removed before eating, and only for older children) are all popular choices.
Serve the finished spiderweb cupcakes at room temperature, when the buttercream is silky and the flavours are at their best. Arrange them on a dark platter or cake stand for maximum drama — the white webs positively glow against a black background.
Spiderweb cupcake variations
Once you have mastered the basic spiderweb cupcakes, the recipe is wonderfully adaptable. These variations keep the signature web decoration while ringing the changes on flavour, dietary needs and presentation.
Different fillings
The raspberry ‘bloody’ filling can be swapped for any number of alternatives. A cherry compote made the same way gives a darker, more gothic red centre. Salted caramel sauce creates a completely different — but equally delicious — surprise, oozing golden rather than red. For a tangy twist, passion fruit curd or lemon curd provides bright acidity against the rich chocolate. Shop-bought raspberry or cherry jam, warmed gently to loosen it, works as a quick substitute when time is short, though the flavour will be sweeter and less fresh than the homemade compote.
Different webs
White chocolate is classic, but the web can be piped in other colours for different effects. Orange candy melts create a pumpkin-hued web that looks striking on chocolate frosting instead of white. Dark chocolate webs piped onto orange-tinted buttercream reverse the colour scheme dramatically. For a spooky shimmer, brush the set white chocolate web very lightly with edible lustre dust. Royal icing can replace white chocolate for the webs — it pipes beautifully and sets hard — though it lacks the creamy flavour of chocolate.
Gluten-free spiderweb cupcakes
Replace the plain flour with a good-quality gluten-free plain flour blend that contains xanthan gum, using the same 190g weight. Gluten-free batters benefit from resting for 20–30 minutes before baking, which hydrates the starches and improves the texture. The cupcakes may dome slightly less than the wheat version, but the flavour is just as good. Ensure your baking powder, cocoa powder and candy spiders are certified gluten-free, as some brands contain hidden gluten.
Dairy-free and vegan spiderweb cupcakes
For a dairy-free version, replace the milk with an unsweetened plant milk such as oat or soya, use a dairy-free white chocolate for the webs, and make the buttercream with a plant-based butter alternative plus a splash of plant milk instead of double cream. Replace the two eggs with two flax eggs (2 tablespoons ground flaxseed mixed with 5 tablespoons water, rested for 5 minutes). The texture will be slightly denser but still delicious. Check that your candy spiders are vegan, as many contain gelatine.
Mini spiderweb cupcakes
This recipe makes around 30 mini cupcakes baked in a mini muffin tin for 10–12 minutes. Minis are perfect for children’s parties and bake sales — guests can never resist taking ‘just one more’. Pipe smaller webs with 2–3 concentric circles and use mini candy spiders or piped chocolate spiders to suit the scale. Reduce the filling to half a teaspoon per mini cupcake.
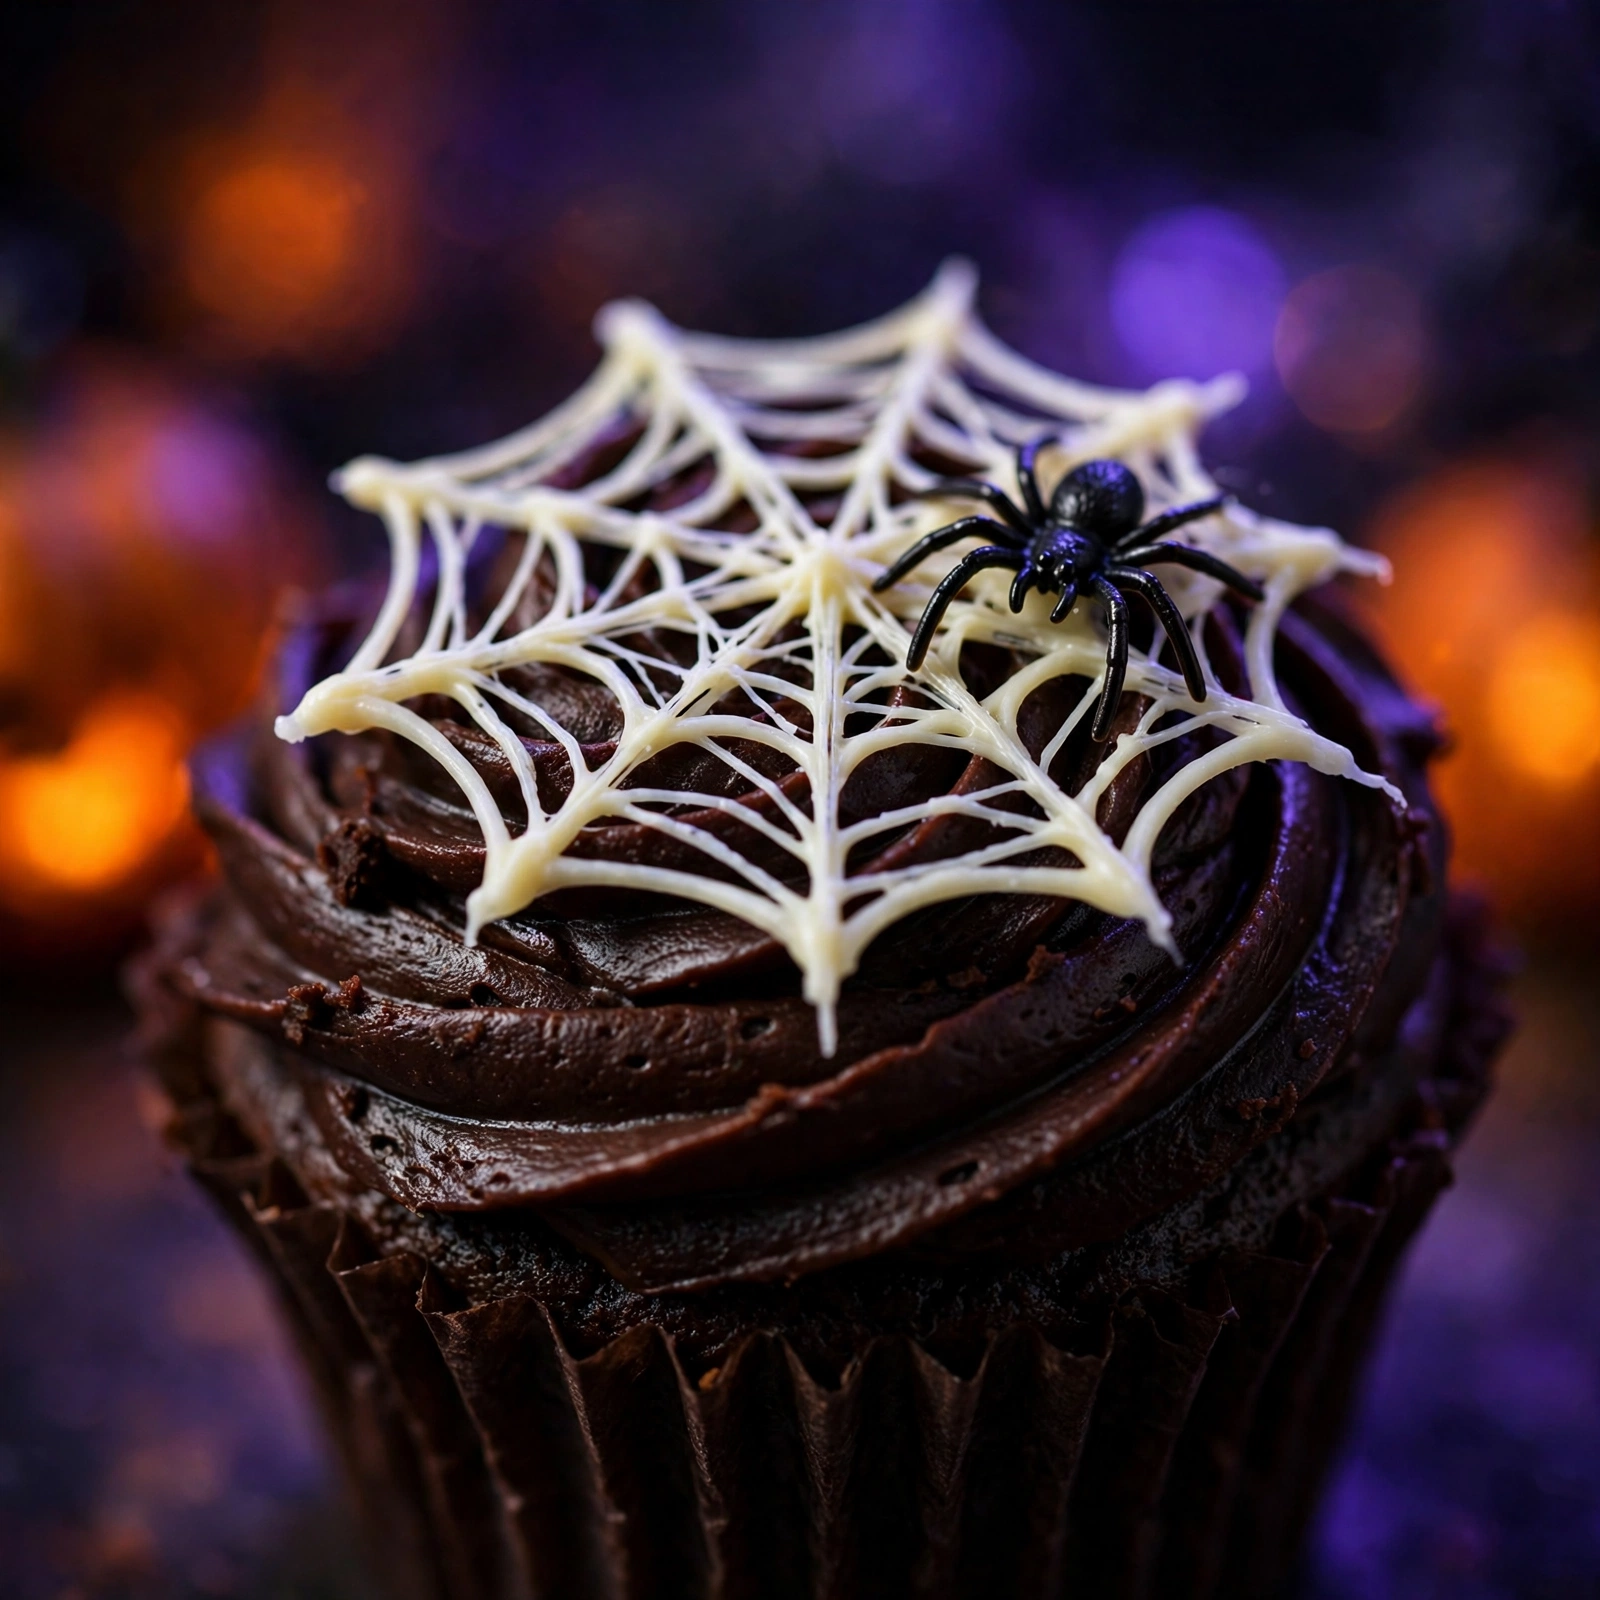
Up close, the contrast that makes spiderweb cupcakes so striking is clear: the crisp white chocolate web against the dark frosting, with the candy spider adding the final touch of Halloween mischief.
Also Read : Easy Peach Cobbler Recipe (Juicy, Golden, Foolproof)
Make-ahead, storage and freezing
Spiderweb cupcakes are excellent for planning ahead, which is a blessing when preparing for a Halloween party alongside costumes, decorations and a dozen other tasks. Each component can be made in advance.
Unfrosted cupcakes keep beautifully. Once completely cool, store them in an airtight container at room temperature for up to 2 days. The oil-based sponge stays moist far longer than butter-based cakes. Do not refrigerate unfrosted cupcakes, as the cold air dries them out.
The raspberry filling can be made up to a week ahead and kept in a sealed jar in the fridge. Let it come to room temperature before filling the cupcakes so it spoons easily.
Buttercream can be made 2–3 days ahead and stored in an airtight container in the fridge. Bring it back to room temperature and re-whip briefly before using to restore its silky texture.
Fully decorated spiderweb cupcakes are best served within 24 hours, but they keep well in an airtight container in the fridge for up to 3 days. The white chocolate webs actually protect the buttercream beneath. Bring them to room temperature for 30–45 minutes before serving — cold buttercream tastes dull and waxy, while room-temperature buttercream is silky and flavourful.
Freezing: Unfrosted, unfilled cupcakes freeze excellently for up to 3 months. Wrap each one individually in cling film, then place in a freezer bag. Thaw at room temperature for 1–2 hours before filling and decorating. The raspberry filling also freezes well for up to 3 months in a sealed container. Fully decorated cupcakes do not freeze well — the webs can crack and the buttercream texture suffers — so always freeze the components separately and decorate after thawing.
Serving tips for Halloween parties
Presentation turns great cupcakes into an unforgettable party centrepiece. Arrange the spiderweb cupcakes on a black or dark grey cake stand — the white webs seem to glow against the dark background. Scatter plastic spiders, autumn leaves or LED fairy lights around the base for atmosphere. A light dusting of cocoa powder on the stand mimics ‘dirt’ and adds to the spooky effect.
For maximum drama, cut one cupcake in half and display it cut-side up at the front of the arrangement, showing off the red ‘bloody’ filling. Guests who have not yet tried one will immediately understand the surprise inside and will be queuing up. Serve with hot apple cider, pumpkin spiced lattes or a dark berry punch to complete the Halloween spread.
If serving to young children, mention the raspberry centre to parents in case of berry allergies, and ensure any non-edible decorations (such as plastic spider rings, if used) are removed before little hands grab them.

Troubleshooting spiderweb cupcakes
Cupcakes sank in the middle. The most common causes are opening the oven door too early, underbaking or too much leavener. Check your oven temperature with a thermometer and make sure the cupcakes are fully baked — the skewer should come out clean.
Cupcakes are dry. Overbaking is almost always the culprit. Start checking at 18 minutes, and remember that cupcakes continue cooking from residual heat for a few minutes after leaving the oven. Measuring the flour accurately also matters enormously.
Filling leaked out. The filling was probably too thin or the cupcakes were overfilled. Make sure the compote bubbles for the full 1–2 minutes after adding the cornflour slurry, and let it cool completely — it thickens considerably as it cools. Fill each hollow only to just below the top.
Buttercream is lumpy. The icing sugar was not sifted, or the butter was too cold. Sift the icing sugar without exception, ensure the butter is properly softened, and beat for the full 2–3 minutes. If lumps persist, a brief 10-second blast with the mixer on high speed usually smooths them out.
White chocolate seized. White chocolate seizes when overheated or when even a drop of water touches it. Melt it very gently, keep all utensils completely dry, and if it does seize, stir in a teaspoon of neutral oil or warm cream — this will not restore perfect piping consistency, but it rescues the chocolate for drizzling. For a detailed walkthrough, see this guide to melting chocolate.
Webs blurred or sank. The buttercream was too soft or the chocolate too hot. Chill the frosted cupcakes until the buttercream is properly firm, and let the melted chocolate cool until it is fluid but not warm to the touch before piping.
More Halloween treats to try
Spiderweb Cupcakes recipe card
Here is the condensed, printable version of the recipe with all quantities, times and steps in one place:
Spiderweb Cupcakes
Ingredients
Equipment
Method
- Preheat the oven to 175°C (350°F). Line a 12-hole muffin tin with cupcake cases.
- Whisk the flour, sugar, cocoa, baking powder, bicarbonate of soda and salt together in a large bowl.
- In a separate jug, whisk the eggs, milk, oil and vanilla. Pour into the dry ingredients and mix until just combined.
- Stir in the boiling water. The batter will be thin — this is correct.
- Divide the batter between the cases, filling each two-thirds full. Bake for 18–20 minutes, until a skewer inserted into the centre comes out clean. Cool for 5 minutes in the tin, then transfer to a wire rack to cool completely.
- For the filling: simmer the raspberries, sugar and lemon juice for 5 minutes until broken down. Stir in the cornflour slurry and bubble for 1–2 minutes until thick and glossy. Leave to cool completely.
- Cut a small cone from the centre of each cooled cupcake and spoon in 1–2 teaspoons of the raspberry filling. Replace a thin lid of cake if you like.
- Beat the butter until pale and fluffy, then beat in the icing sugar, double cream, vanilla and salt until smooth. Spread or pipe a smooth dome of frosting over each cupcake and chill for 15 minutes until firm.
- Melt the white chocolate and transfer it to a piping bag fitted with a fine round tip (or a sandwich bag with the corner snipped).
- Pipe 3–4 concentric circles of white chocolate over the frosting, then drag a cocktail stick from the centre outwards 8 times to create the web effect. Work quickly before the chocolate sets.
- Place a candy spider on each web. Serve at room temperature.
Can I make spiderweb cupcakes ahead of time?
Yes. Bake the cupcakes a day ahead and store them unfrosted in an airtight container at room temperature. The raspberry filling can be made up to a week in advance and kept in a sealed jar in the fridge. Pipe the spiderwebs and add the spiders on the day of serving for the freshest, crispest finish.
How should I store spiderweb cupcakes?
Store fully decorated spiderweb cupcakes in an airtight container in the fridge for up to 3 days. Bring them to room temperature for 20-30 minutes before serving so the buttercream softens. Unfrosted cupcakes keep in an airtight container at room temperature for up to 2 days.
Can I freeze spiderweb cupcakes?
Yes. Freeze unfrosted, unfilled cupcakes for up to 3 months: wrap each one individually in cling film, then place them in a freezer bag. Defrost at room temperature for 1-2 hours before filling and frosting. Do not freeze fully decorated cupcakes, as the webs and spiders lose their crisp finish.
What can I use instead of candy spiders?
Pipe small spiders with melted dark chocolate, using a round body and eight legs, and place them on the webs once set. Small plastic spider rings or toys (pushed in just before serving and removed before eating) also work for party display.
Can I make spiderweb cupcakes gluten-free?
Yes. Replace the plain flour with a good-quality gluten-free plain flour blend that contains xanthan gum, keeping all other quantities the same. Bake and check as normal – the batter behaves the same way and the decoration is unchanged.
Can I make these cupcakes dairy-free or vegan?
Yes. Replace the milk with an unsweetened plant milk such as oat or soya, use a dairy-free butter alternative for the buttercream, choose dairy-free white chocolate for the webs, and check that your candy spiders are vegan. The recipe already uses oil instead of butter in the sponge, which helps.
Why did my white chocolate seize or set too fast?
White chocolate seizes when overheated or when even a drop of water touches it. Melt it very gently in short 20-second microwave bursts, stirring between each, or over a low bain-marie. Keep water and steam away from the bowl. If it begins to thicken in the piping bag, warm the bag briefly in your hands.
Can I use shop-bought frosting or jam instead?
Yes. A shop-bought vanilla frosting works as a time-saver, though homemade buttercream gives a smoother, firmer canvas for the webs. For the filling, a good raspberry jam thinned with a little lemon juice can replace the homemade compote – use a seedless jam if you prefer a smooth centre.
How do I get the raspberry filling really red and glossy?
Simmer the raspberries, sugar and lemon juice until broken down, then stir in the cornflour slurry and bubble for 1-2 minutes until thick and glossy. The lemon juice preserves the vivid red colour. For the most dramatic ‘bloody’ effect, press the compote through a fine sieve for a smooth, seedless finish.
Can I make mini spiderweb cupcakes?
Yes. This recipe makes around 30 mini cupcakes baked in a mini muffin tin for 10-12 minutes. Fill each with a little less raspberry compote and pipe smaller webs with 2-3 concentric circles. Minis are perfect for parties and bake sales.
What piping tip is best for the spiderweb?
A small round tip, around 2-3mm, gives the best control for the concentric circles. In a pinch, a sturdy sandwich bag with a tiny corner snipped off works well – cut the hole smaller than you think you need, as you can always enlarge it.
How long do the decorated cupcakes last at a party?
Fully decorated spiderweb cupcakes keep well at cool room temperature for up to 8 hours, making them ideal for parties. Beyond that, refrigerate them in an airtight container. Avoid warm rooms and direct sunlight, which soften the buttercream and the chocolate webs.

Hi, I’m Angela. I cook the way busy people actually cook — simple, tasty food with ingredients you already have. On CookBookBite I share easy recipes, honest kitchen tips, and dishes my family asks for again and again.
Pingback: Easy No-Yeast Flatbread Recipe – Soft & Fluffy in 30 Minutes
Pingback: Mummy Hot Dogs: Fun, Easy Halloween Dinner for 8