
Remember restaurant potato skins? That appetizer you’d fight your siblings over — crispy potato shells loaded with cheddar and bacon, cool sour cream on top, gone in about ninety seconds? I have great news: this potato skins recipe is incredibly easy to make at home, and homemade ones are better. Crispier shells, more filling, zero wait for a table, and you control exactly what goes in them.
The trick to this potato skins recipe is the double-bake: first you bake the potatoes whole until perfectly tender, then you scoop out the flesh, brush the shells with butter, and bake them again until they’re shatteringly crisp. That second bake is what separates restaurant-quality skins from sad, soggy imitations. Then you load them up with cheese and bacon and give them one final blast to get everything hot and melty.
These are game-day royalty, party heroes, and dangerously good late-night snacks. They’re the appetizer that disappears first from every spread. Fair warning: when you make this potato skins recipe, make more than you think you need. They vanish — I’ve never once had leftovers when I thought I’d made “plenty.”
Also Read : Ghost Meringue Cookies Recipe — Spooky Easy Halloween Treats
What makes potato skins so universally loved? It’s the contrast. The shell is crispy and salty, almost like a thick potato chip shaped into a boat. The filling is rich and melty. The sour cream on top is cool and tangy. Every bite hits multiple textures and temperatures at once — and our brains are wired to find that irresistible. It’s the same reason loaded nachos and twice-baked potatoes are so popular. Potato skins just do it in the most fun, hand-held package.

Why You’ll Love These Potato Skins
First, they’re crispier than the restaurant’s. Most restaurant skins are good but not great — they often sit under heat lamps getting soggy. Yours come straight from your oven. The double-bake method with a generous butter brush gives you shells that actually crunch audibly — and the textural contrast between that crispy shell and the molten cheese is everything.
Second, they’re endlessly customizable. Classic cheddar-bacon is just the starting point. I’ll give you variations from buffalo chicken to taco-style to breakfast skins that’ll keep these in rotation all year. Once you master the shell technique, the fillings are limited only by your imagination.
Third, they’re perfect party food. Make-ahead friendly (you can prep the crisped shells hours or even a day early), hand-held (no utensils needed), universally loved (I’ve never met anyone who doesn’t like potato skins). They disappear from every platter — which means less cleanup and more compliments.
Fourth, they use the whole potato. The scooped flesh doesn’t go to waste — it becomes mashed potatoes, soup thickener, breakfast hash, or gnocchi. Zero waste, all delicious. You’re essentially getting two dishes from one bag of potatoes.
Fifth, they’re budget-friendly. Potatoes are one of the cheapest ingredients in the grocery store. Even loaded with cheese and bacon, a full batch costs a fraction of what you’d pay for a single appetizer order at a restaurant. Feeding a crowd? This is how you do it without breaking the bank.
Sixth, they’re naturally gluten-free. No flour, no breading, no hidden gluten — just potato, cheese, bacon, and toppings. In a world where accommodating dietary restrictions can be stressful, it’s nice to have a crowd-pleaser that works for gluten-free guests without any modifications.
Finally, they’re fun to make. There’s something deeply satisfying about the process — baking, scooping, crisping, loading. It’s hands-on cooking that’s hard to mess up and easy to enjoy. Kids love helping with the scooping and loading (supervised, of course).
Ingredients for Potato Skins — And Why Each One Matters
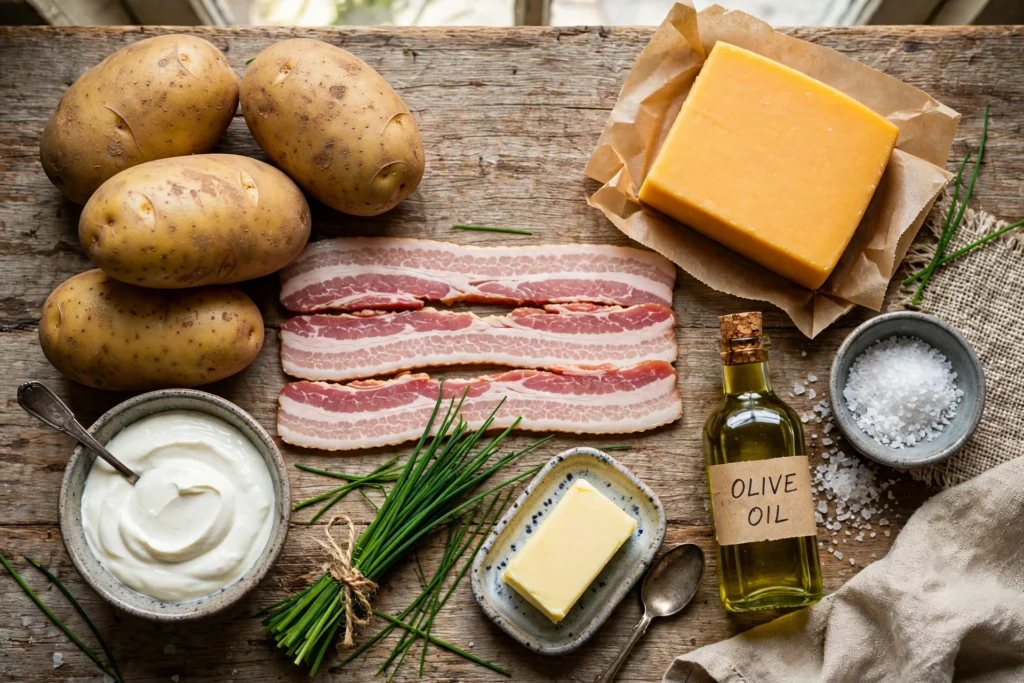
Russet potatoes (6 large) — Russets are non-negotiable here. Their thick, sturdy skins crisp beautifully and hold their boat shape. Their high starch content means fluffy interiors and crispy exteriors. Waxy potatoes (like red or Yukon Gold) have thinner skins that don’t crisp as well and tend to fall apart. Choose potatoes that are uniform in size and shape — oval, medium-large — so they bake evenly and make consistent boats. Avoid any with green spots (solanine — bitter and mildly toxic) or deep eyes.
Olive oil (2 tablespoons) — For rubbing on the skins before the first bake. The oil helps the skin crisp and brown, and helps the salt adhere. It also prevents the skin from drying out and becoming leathery during the long initial bake. Any neutral oil works, but olive oil adds a subtle flavor.
Melted butter (4 tablespoons) — Brushed inside AND outside the shells before the crisping bake. This is the crispiness secret weapon. Butter’s milk solids brown beautifully, adding flavor and color that oil alone can’t match. Be generous — brush it on thick. This is not the time for restraint or calorie-counting. The butter also helps the salt and pepper stick to the shells.
Coarse salt — Used twice: on the skins before the first bake (for crispy, seasoned, edible skin) and on the shells before crisping. Coarse salt (kosher or sea salt) gives you better texture and more even seasoning than fine table salt. The salted skin is delicious — don’t throw it away or peel it off. Eat it.
Sharp cheddar (2 cups, freshly shredded) — Freshly shredded melts significantly better than pre-shredded bagged cheese. Bagged cheese is coated with anti-caking agents (cellulose powder, essentially) that inhibit smooth melting — you get a slightly grainy, less gooey result. It takes 2 minutes to shred a block on a box grater, and the difference in meltability is dramatic. Sharp cheddar gives you real cheese flavor that stands up to the potato; mild cheddar gets lost.
Bacon (8 slices, cooked and crumbled) — Cook it crispy — floppy bacon gets lost in the skins. Thick-cut bacon gives you meatier bites. Cook it in the oven (400°F on a sheet pan for 15–20 minutes) for the crispiest, most even result with zero splatter. (Vegetarian? Skip it entirely — the skins are still fantastic with just cheese and toppings. Or use vegetarian bacon bits.)
Sour cream (for serving) — The cool, tangy contrast to the hot, rich, salty skins. It’s not optional — it’s structural. The temperature contrast (cold cream, hot potato) and flavor contrast (tangy vs. rich) are what make each bite balanced instead of heavy. Full-fat, obviously — this is not the place for light sour cream. Greek yogurt works as a tangier, higher-protein substitute.
Green onions or chives (¼ cup, sliced) — Fresh, sharp bite and vibrant color on top. They cut through the richness and make the skins look as good as they taste. Slice them thin on a diagonal for the prettiest presentation. Chives are milder; green onions are punchier. Both work.
Black pepper (freshly ground) — On the finished skins, not just in the prep. Freshly ground pepper has a floral, pungent quality that pre-ground lacks. A few grinds over the top just before serving adds a final layer of flavor.
Equipment You’ll Need
A rimmed sheet pan (for baking the potatoes and crisping the shells — rimmed so nothing slides off), a spoon for scooping (a grapefruit spoon with its serrated edge is ideal, but a regular tablespoon works), a pastry brush for the butter (silicone brushes are easiest to clean), and an oven. A wire rack that fits inside the sheet pan is helpful for the crisping stage (elevating the shells allows hot air to circulate underneath for extra crispiness), but not essential. That’s it — beautifully simple equipment for a spectacular result.
Must Read : Braised Short Ribs Recipe (Fall-Off-the-Bone Tender)
How to Make Potato Skins (Step by Step)
Step 1 — Bake the potatoes. Heat your oven to 400°F. Scrub the potatoes thoroughly under running water — you’re eating the skins, so get them clean. Pat dry, prick each potato several times with a fork (this lets steam escape and prevents potato explosions), then rub all over with olive oil and sprinkle generously with coarse salt. Place directly on the oven rack (for the crispiest skins all around) or on a sheet pan (easier cleanup). Bake for 50–60 minutes until completely tender — a knife or skewer should slide into the center with zero resistance. If there’s any firmness, give them more time. Underbaked potatoes are hard to scoop and won’t crisp properly.
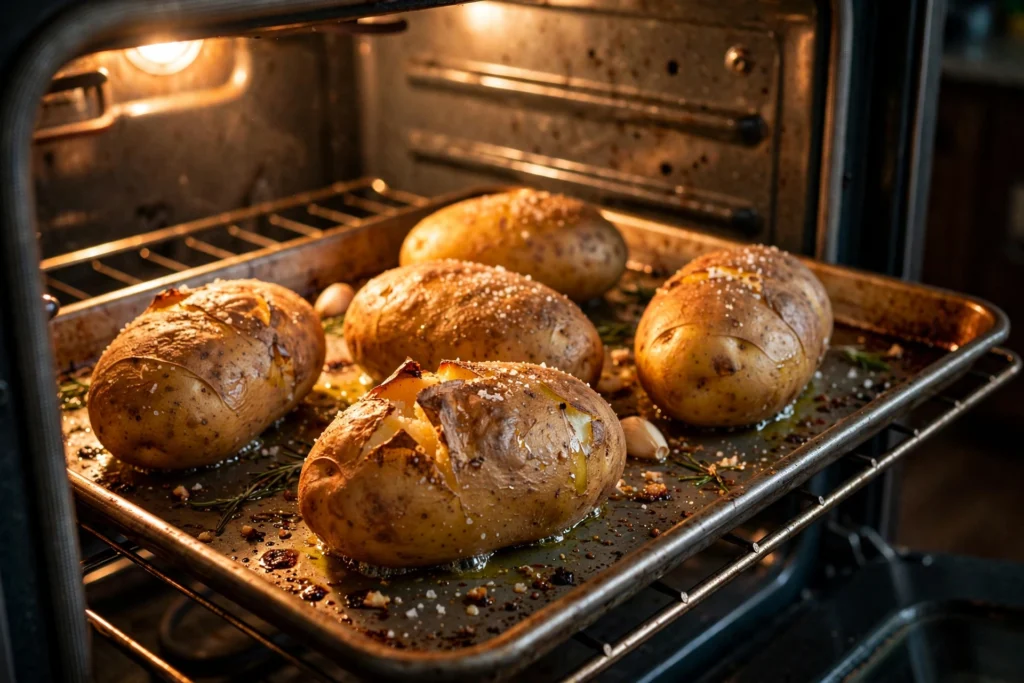
Step 2 — Cool and halve. Remove from the oven and let them cool for 10–15 minutes until you can handle them comfortably. They should still be warm (warm potatoes scoop more easily than cold ones) but not so hot they burn you. Cut each potato in half lengthwise with a sharp knife. Try to make the halves as even as possible — lopsided halves make lopsided boats.
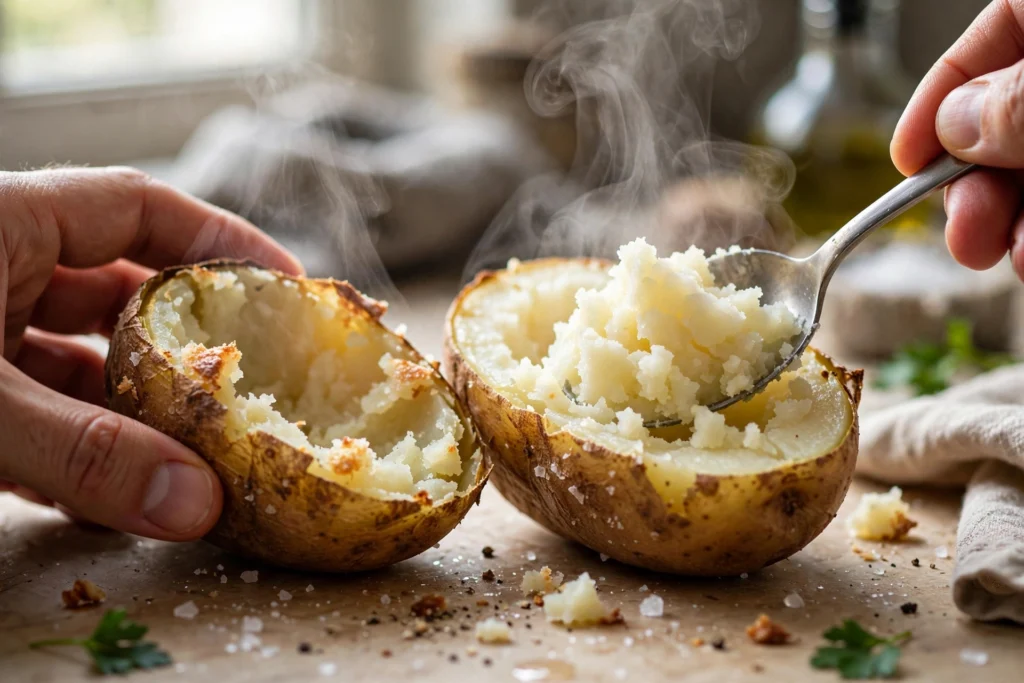
Step 3 — Scoop the flesh. Using a spoon (grapefruit spoon if you have one), scoop out the flesh from each half, leaving a ¼-inch thick shell. This is the most technique-sensitive step. Too thin and the shells are fragile and collapse; too thick and they won’t get crispy (the interior stays soft and steamy). A quarter inch is the sweet spot — enough structure to hold together, thin enough to crisp through. Work gently — the shells are most fragile when warm. Save every bit of the scooped flesh! Put it in a bowl — it becomes mashed potatoes, potato soup, breakfast hash, or gnocchi. Do not throw it away.
Step 4 — Crisp the shells (the magic step). Increase the oven to 425°F. Brush the shells generously inside and out with melted butter — don’t be shy. Season the insides with salt and freshly ground pepper. Arrange them cut-side up on your sheet pan (on a wire rack if you have one). Bake for 10 minutes, then carefully flip them over (tongs work best) and bake 10 more minutes. This double-sided crisping is the key to shatteringly crispy shells — the first side crisps the interior, the flip crisps the exterior skin. They should be golden brown and feel firm and rigid when done. If they’re still flexible, give them a few more minutes.

Step 5 — Load them up. Flip the shells back to cut-side up. Fill each one generously with shredded cheddar — really pile it in, mounding it slightly above the rim. Sprinkle the crumbled bacon over the cheese. Return to the 425°F oven for 5–7 minutes, until the cheese is completely melted, bubbly, and just starting to brown in spots. Watch closely — there’s a fine line between perfectly melted and overdone.
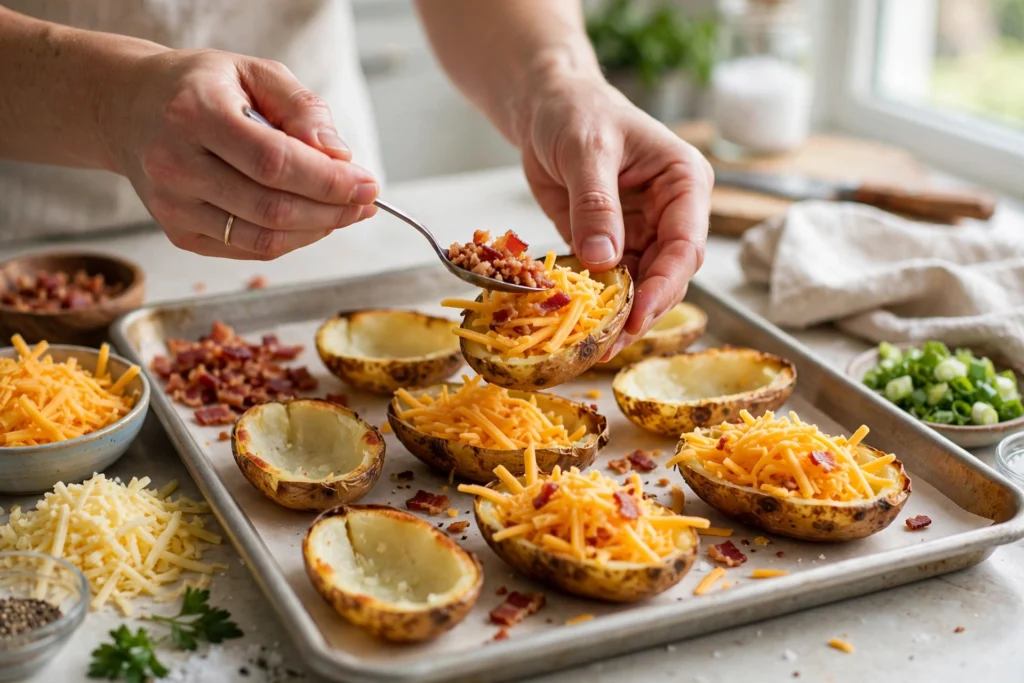
Step 6 — Top and serve immediately. Remove from the oven and let cool for exactly 1–2 minutes (long enough to not burn mouths, short enough that the cheese is still molten). Dollop each skin with sour cream, sprinkle with sliced green onions or chives, add a grind of black pepper, and serve immediately. Potato skins wait for no one — the crisp shell begins softening the moment it leaves the oven’s dry heat. Get them from oven to table in minutes, and watch them disappear.
Also Read: Bechamel Sauce Recipe (Silky, Lump-Free & Foolproof)
My Best Tips for the Crispiest Skins
The double-bake is non-negotiable. Skins that only get baked once (with the filling already in) steam from the inside instead of crisping. The dedicated crisping bake — empty shells, high heat, butter-brushed, both sides — is what creates that shattering crunch. Don’t try to shortcut this. It’s the entire difference between great and mediocre potato skins.
Butter, not oil, for the shells. Butter’s milk solids brown and caramelize, adding nutty flavor and gorgeous color that oil can’t match. Brush it on thick — inside and out. If you’re dairy-free, a high-quality vegan butter works; plain oil is a distant third choice.
Leave exactly ¼ inch of flesh. Too thin and the shells are fragile and collapse under the filling. Too thick and the interior stays soft and steamy instead of crisping. A quarter inch gives you structural integrity while still allowing heat to crisp through. When in doubt, err slightly thicker — a sturdy skin beats a broken one.
Salt the skins before the first bake. Oiled, salted skins become crispy, seasoned, and genuinely delicious — not just an edible container but part of the flavor. Don’t peel them, don’t discard them. The salt also draws out surface moisture, promoting crispness.
Shred your own cheese. Always. Bagged pre-shredded cheese contains cellulose and other anti-caking agents that prevent smooth melting. You’ll get a grainy, less gooey result. Shredding a block takes two minutes and the melt is dramatically better — smooth, stretchy, glorious.
Serve immediately — no exceptions. The crisp shell begins absorbing moisture the moment it leaves the oven. Within 15–20 minutes, you’ll notice softening. Within 30, they’re noticeably less crispy. Time your final bake to finish 5 minutes before you want to serve. Your guests can wait; the potato skins cannot.
Don’t overcrowd the pan. The shells need space for hot air to circulate. If they’re touching, the sides steam instead of crisp. Use two sheet pans if needed — it’s worth the extra dish.
Uniform potatoes = uniform results. If your potatoes are wildly different sizes, the small ones will overcook while the large ones are still raw inside. Take 30 seconds at the store to pick 6 that are roughly the same size and shape. Your future self will thank you.
Save the scooped flesh immediately. Don’t let it sit out. Transfer to a container and refrigerate if you’re not using it right away. It makes incredible mashed potatoes (just add butter, milk, salt), and it’s already cooked — you’re halfway done.
Crisp from frozen. If you prepped shells ahead and froze them, don’t thaw — go straight from freezer to 425°F oven for 10–12 minutes. They actually crisp up beautifully from frozen, sometimes even better than fresh.
Season in layers. Salt on the skin before baking, salt and pepper on the shell before crisping, then toppings after. Each layer builds flavor. Underseasoned potato skins taste flat no matter how good the toppings are.
Use a wire rack for maximum crisp. Elevating the shells on a wire rack inside the sheet pan allows hot air to circulate underneath, crisping the bottoms instead of letting them sit in their own moisture. It’s a small thing that makes a noticeable difference.
Troubleshooting: When Skins Go Wrong
Shells won’t get crispy: Oven not hot enough (verify with a thermometer — use 425°F, not 400°F, for the crisping stage), shells too thick (scoop closer to ¼ inch), not enough butter (be generous), or overcrowded pan (give them space). Also — did you flip them? Both sides need direct heat.
Shells fall apart: Scooped too thin, potatoes were overbaked (mushy and fragile), or handled too roughly while warm. Next time, leave a bit more flesh and let them cool slightly more before scooping. For now — serve them as “deconstructed” skins in a bowl. Still delicious.
Cheese didn’t melt properly: Used bagged pre-shredded cheese (anti-caking agents), oven wasn’t hot enough, or didn’t bake long enough. Switch to freshly shredded, make sure the oven is fully preheated, and give them the full 5–7 minutes.
Soggy bottoms: Didn’t use a wire rack, pan was overcrowded, or they sat too long before serving. Elevate on a rack, space them out, and serve immediately.
Bland flavor: Under-seasoned. Salt at every stage — on the skin, on the shell, and don’t forget the pepper on top. Also, make sure your cheddar is sharp, not mild. Mild cheddar disappears against the potato.
Delicious Variations to Try
Buffalo chicken: Fill with shredded rotisserie chicken tossed in buffalo sauce, top with cheddar. After baking, drizzle with blue cheese dressing and sprinkle with diced celery. Game-day legend status achieved.
Taco-style: Fill with seasoned ground beef (or turkey), cheddar, and pickled jalapeños. After baking, top with sour cream, fresh salsa, diced avocado, and cilantro. Serve with lime wedges.
Broccoli-cheddar: Fill with small steamed broccoli florets and extra-sharp cheddar. The vegetarian classic that converts even committed carnivores. Add a pinch of nutmeg to the broccoli for a subtle warmth.
Pizza skins: Spread a thin layer of marinara in each shell, fill with shredded mozzarella, top with mini pepperoni. After baking, sprinkle with grated parmesan and dried oregano. Kid-approved, adult-adored.
Breakfast skins: Fill with soft-scrambled eggs, cheddar, and crumbled breakfast sausage. Top with hot sauce and chives. Weekend mornings will never be the same. (Prep the shells the night before for a fast morning.)
Fully loaded: The works — cheddar, bacon, sour cream, chives, AND spoon some of the reserved mashed flesh back in before the cheese. Maximum potato. No regrets.
BBQ pulled pork: Fill with warm pulled pork tossed in BBQ sauce, top with cheddar and coleslaw after baking. Sweet, smoky, tangy, crispy — all the good things.
Mediterranean: Fill with feta, diced tomatoes, Kalamata olives, and red onion. After baking, top with tzatziki instead of sour cream and fresh dill. A completely different (and delicious) direction.
Chili cheese: Fill with warm chili (homemade or good canned), top with cheddar. After baking, add sour cream, jalapeños, and green onions. The ultimate comfort food mashup.
Sweet potato version: Use sweet potatoes instead of russets. The shells are slightly less crispy but the sweet-savory combination with bacon and cheddar is incredible. Add a drizzle of maple syrup before serving for the full experience.
Also Read : Perfect Pan-Seared Scallops Recipe (Golden Crust Every Time)
Storing, Freezing & Reheating
Make-ahead (the party trick): Bake, scoop, and crisp the empty shells up to a day ahead. Cool completely, then store at room temperature in an airtight container (don’t refrigerate — the moisture makes them soggy). When guests are 15 minutes away, load with cheese and bacon and do the final bake. You’ll look like a magician.
Refrigerator: Loaded leftover skins keep 3 days in an airtight container. They’ll lose crispness but still taste good reheated. (They’ll never last 3 days, but theoretically.)
Freezer: Freeze the crisped EMPTY shells (not loaded) for up to 3 months. Arrange in a single layer on a sheet pan, freeze solid, then transfer to a freezer bag. This prevents them from sticking together. Loaded skins don’t freeze well — the toppings get soggy and the cheese texture suffers.
Reheating for maximum crisp: Oven or air fryer at 400°F for 8–10 minutes. They re-crisp beautifully — almost as good as fresh. The microwave is forbidden — it steams them into soggy sadness. If you only have a microwave, I’d honestly rather eat them cold.
From frozen: Don’t thaw the empty shells — go straight from freezer to 425°F oven for 10–12 minutes to re-crisp, then load and bake as normal. Add 2–3 minutes to each stage.
The scooped flesh: Refrigerate up to 4 days. Beyond mashed potatoes, use it for: potato soup (it’s already cooked — just add broth and blend), shepherd’s pie topping, breakfast hash (crisp it in a skillet with onions), potato pancakes, or gnocchi (the drier baked-potato flesh actually makes better gnocchi than boiled).
What to Serve with Potato Skins
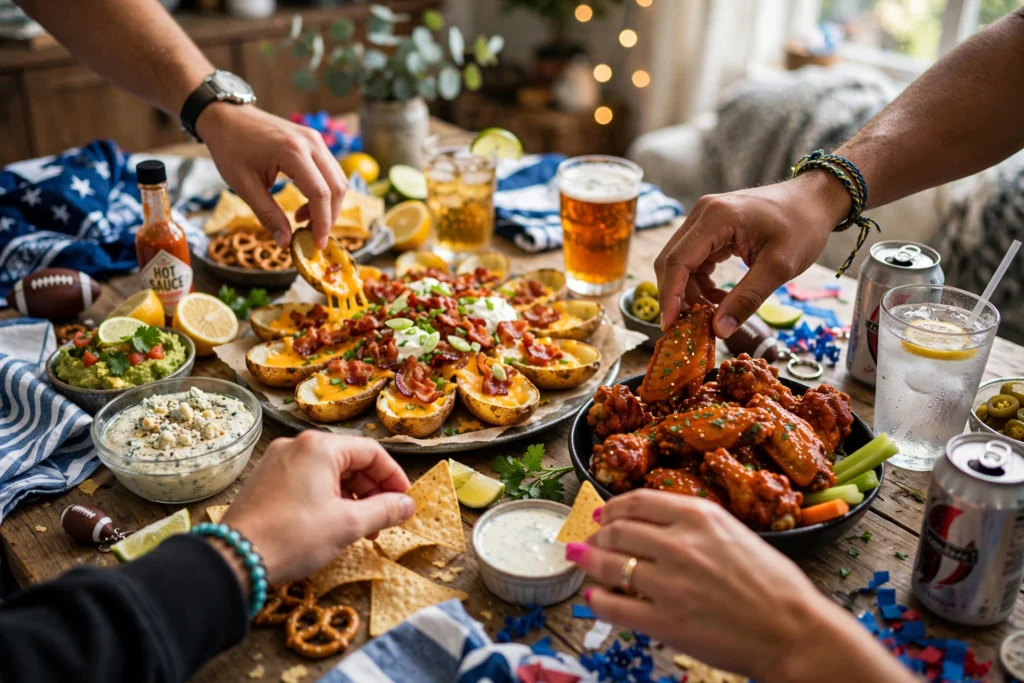
They’re an appetizer, so think party spread: buffalo wings (the classic companion), nachos, sliders, chex mix, a veggie platter with ranch dip for balance, and plenty of cold drinks. For dipping sauces beyond sour cream: ranch dressing, BBQ sauce, chipotle mayo, blue cheese dressing, or queso. My ideal game-day table has potato skins front and center, flanked by at least two dips and something fresh (veggies or a simple salad) to cut the richness. For drinks: cold beer is traditional, but a crisp cider or sparkling water with lime works too.
Chicken tinga tostadas make another great party platter, and a classic paloma is my cocktail pick for game day
Potato Selection: A Deeper Dive
Not all russets are created equal, and choosing the right potatoes makes a measurable difference. Here’s what to look for:
Size matters: Aim for medium-large potatoes, roughly 8–10 ounces each — about the size of your fist. Too small and you get fiddly, bite-sized skins that are annoying to fill. Too large (those giant baking potatoes) and the shells are unwieldy, the ratio of skin to filling gets off, and they take forever to bake through. Medium-large gives you a boat that’s substantial enough to hold a generous filling but still easy to pick up and eat in 2–3 bites.
Shape matters more than you think: Look for oval, uniformly shaped potatoes rather than round or irregular ones. Oval potatoes halve into even boats; round ones give you awkward, uneven halves. Avoid potatoes with deep eyes, knobby protrusions, or weird curves — they’re harder to scoop evenly and look less appealing. Take the extra 60 seconds at the store to hand-select. Your future self, scooping neat boats, will thank you.
Freshness indicators: The potato should feel firm and heavy for its size — no soft spots, no wrinkling, no sprouts. The skin should be intact and relatively smooth (russets are naturally rough, but avoid any with cuts or blemishes). Give it a sniff — fresh potatoes smell earthy and clean. Any musty or off smell means they’re past prime. Store potatoes in a cool, dark, well-ventilated spot (not the refrigerator — cold converts starches to sugars, giving you sweet, oddly-textured potatoes). A paper bag in a pantry is ideal. They’ll keep 2–3 weeks easily.
Organic vs. conventional: Since you’re eating the skin — the part most exposed to pesticides — organic is worth considering if it’s within your budget. Potatoes are on the Environmental Working Group’s “Dirty Dozen” list for pesticide residue. That said, thorough scrubbing removes significant surface residue, and conventional potatoes are perfectly fine if organic isn’t available or affordable. Don’t let perfection be the enemy of delicious potato skins.
The Science of Maximum Crispiness
Why do these skins get so crispy while a regular baked potato skin stays chewy? It’s all about moisture management and heat transfer.
Surface moisture is the enemy: Crispiness is fundamentally about dehydration — you want the exterior to lose moisture faster than the interior can replenish it. That’s why we pat the potatoes dry before the first bake, oil and salt the skins (salt draws out surface moisture through osmosis), and bake at high heat. The scooped shell has even less interior moisture to contend with, which is why the second bake achieves that shattering crunch.
Starch gelatinization and retrogradation: When the potato bakes, its starches gelatinize — they absorb water and swell, creating the fluffy interior. As the scooped shell cools slightly before the crisping bake, some of that starch retrogrades (recrystallizes), which actually helps crisping — retrograded starch forms a firmer structure that crisps rather than steams. This is the same principle behind why twice-cooked french fries (blanched, cooled, then fried) are crispier than once-cooked.
The Maillard reaction and butter: That gorgeous golden-brown color isn’t just pretty — it’s flavor. The Maillard reaction (between amino acids and sugars at high heat) creates hundreds of new flavor compounds. Butter accelerates this because its milk solids contain both proteins and sugars — more reactants, more browning, more flavor. Oil alone gives you crispness but less color and complexity. This is the scientific reason butter beats oil for the shells.
Why flipping matters: Heat in an oven is not uniform — the top element radiates down, the bottom element radiates up, and convection currents circulate. By flipping the shells halfway, you ensure both the interior (cut side) and exterior (skin side) get direct exposure to the most intense heat. The cut side needs crisping to prevent sogginess under the filling; the skin side needs it for that signature crunch. Skip the flip and one side will always be inferior.
Party Planning: Quantities and Timeline
How many to make: The rule of thumb is 2–3 skins per person as an appetizer (alongside other food), or 4–5 per person if they’re a main feature. For a party of 10 with a full spread, make 24–30 skins (12–15 potatoes). For a game-day crowd of 15 where skins are the star, make 60–75 (30–38 potatoes). When in doubt, make more — leftovers reheat well, but running out is a tragedy. I’ve never once heard someone complain about too many potato skins.
The day-before timeline: Morning: bake the whole potatoes (1 hour, mostly hands-off). Scoop and crisp the shells (30 minutes active). Cool completely and store at room temperature in airtight containers. You’re done for the day — total active time under an hour. Day of: 20 minutes before guests arrive, load with cheese and bacon, do the final bake. Top and serve. You look effortlessly competent.
The morning-of timeline: If you prefer everything fresh: 3 hours before serving, start baking the whole potatoes. 2 hours before, scoop and crisp. 30 minutes before, load and do the final bake. 5 minutes before, top and serve. The key is working backward from serving time — potato skins wait for no one, so the final bake should finish just as guests are ready to eat.
Transporting to a potluck: Crisp the shells at home and transport them empty (they travel well). Bring shredded cheese, cooked bacon, sour cream, and green onions separately. Use the host’s oven for the 5-minute final bake. You’ll arrive with components and leave as a hero. If the host’s oven is occupied, an air fryer works for small batches.
Also Read : Creamy Potato Soup Recipe (The Best You’ll Ever Make)
Even More Variations
Philly cheesesteak: Fill with thinly sliced sautéed steak, caramelized onions, and provolone. After baking, top with Cheese Whiz (authentic!) or extra provolone. It’s a cheesesteak you can eat with your hands — no drippy sandwich required.
Reuben: Fill with chopped corned beef, sauerkraut (squeezed very dry), and Swiss cheese. After baking, drizzle with Thousand Island dressing. All the Reuben flavors in a crispy potato boat.
Greek: Fill with feta, diced cucumber, tomatoes, red onion, and Kalamata olives. After baking, top with tzatziki and fresh dill. Light, bright, and completely different from the usual heavy versions.
Thanksgiving leftovers: The day after Thanksgiving, fill with shredded turkey, stuffing, and cheddar. After baking, top with a spoonful of warmed cranberry sauce and gravy. It’s Thanksgiving dinner in appetizer form — and it might be better than the original meal.
Dessert skins (yes, really): For a sweet twist, brush the shells with melted butter and cinnamon sugar before crisping. Fill with Nutella and mini marshmallows, bake until melty, top with sliced bananas. It’s unconventional, it’s indulgent, and it’s surprisingly delicious.
Loaded baked potato soup skins: Fill with extra-sharp cheddar and chives, then after baking, top each with a spoonful of creamy potato soup (made from your reserved scooped flesh!). It’s meta, it’s delicious, and it uses every part of the potato in one glorious bite.
Final Thoughts
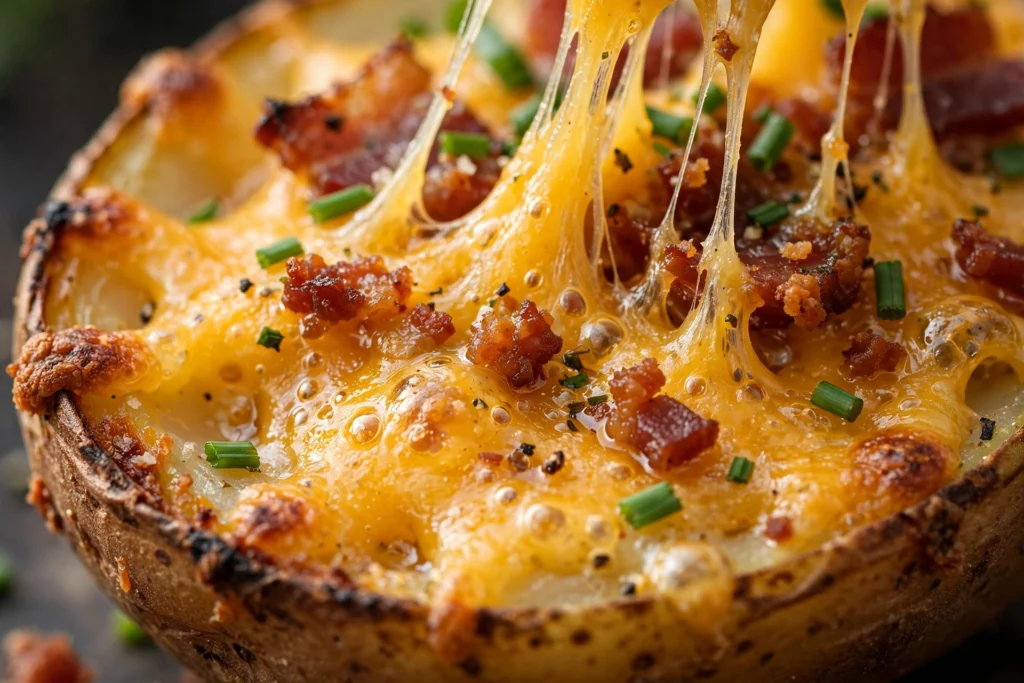
Potato skins are proof that the best appetizers are simple ones executed perfectly. Potato, cheese, bacon, heat — there’s nothing fancy here, no exotic ingredients, no complicated technique. Just perfect execution of a perfect idea. The crispy-creamy-salty-tangy combination hits every pleasure center simultaneously, which is why a platter of potato skins empties faster than anything else on the table.
What I love most is the transformation. A humble russet potato — the cheapest, most ordinary vegetable in the store — becomes the thing everyone reaches for first, the appetizer people talk about after the party. It’s kitchen alchemy of the most democratic kind: cheap ingredients, simple technique, extraordinary result. You don’t need culinary school. You need an oven and 20 minutes of active time.
So next time you’re at the store, grab a few extra russets. Bake them, scoop them, crisp them, load them. And make a double batch — because I’m telling you, they will vanish, and someone will ask you for the recipe, and you’ll smile knowing it’s just potatoes done right.
One last thing: teach someone else to make these. Show a kid how to scoop, let a friend handle the loading, pass the recipe along. The best recipes are the ones that get shared, and potato skins are meant to bring people together around a table, reaching for the same
Frequently Asked Questions
What exactly are potato skins?
Potato skins are halved baked potatoes with most of the soft flesh scooped out, leaving a sturdy shell. The shells are brushed with butter, baked a second time until shatteringly crisp, then loaded with cheese, bacon and toppings.
Which potatoes make the best potato skins?
Large russet potatoes are the best choice. Their thick, sturdy skins crisp beautifully and hold their boat shape, while the fluffy, high-starch flesh scoops out cleanly.
How do you get potato skins extra crispy?
The secret is the double bake. Bake the potatoes whole first, then scoop, brush the shells generously with melted butter inside and out, and bake again at 425°F until deeply golden. A wire rack underneath lets hot air circulate for all-over crispness.
Can I make potato skins ahead of time?
Yes. Bake, scoop and crisp the empty shells up to a day ahead, then cool completely and keep them at room temperature. Load with cheese and bacon and give them their final bake just before serving so they stay crisp.
How do you reheat potato skins so they stay crisp?
Reheat in the oven or air fryer at 400°F for 8 to 10 minutes; they re-crisp beautifully. Avoid the microwave, which turns the shells soft and steamy.
Can you freeze potato skins?
Freeze the crisped empty shells (not loaded) for up to 3 months. Arrange in a single layer on a sheet pan until solid, then transfer to a freezer bag. Re-crisp straight from frozen at 425°F for 10 to 12 minutes before loading.
What can I do with the scooped-out potato flesh?
Nothing goes to waste. Use it for mashed potatoes, potato soup, shepherd’s pie topping, potato cakes or gnocchi. It keeps refrigerated for up to 4 days.
Are potato skins gluten-free?
Yes, this recipe is naturally gluten-free: just potato, cheese, bacon and seasonings, with no flour or breading. If cooking for someone with coeliac disease, double-check your bacon and topping labels.
What is the best cheese for potato skins?
Sharp cheddar, freshly shredded from a block, melts the smoothest and gives the best flavour. Pre-shredded bagged cheese is coated with anti-caking agents that stop it melting properly.
How long do leftover potato skins keep?
Loaded leftover skins keep for up to 3 days in an airtight container in the fridge. They lose some crispness but still taste good reheated in the oven or air fryer.
Can I make potato skins in the air fryer?
Yes. After the first bake and scoop, brush the shells with butter and air-fry at 400°F for 6 to 8 minutes until crisp, turning once. Load with cheese and bacon, then air-fry 3 to 4 minutes more until melted.
What should I serve with potato skins?
They are a party appetiser, so think game-day spread: buffalo wings, sliders, nachos, a veggie platter with ranch dip and plenty of cold drinks. Sour cream, guacamole and salsa all work as dips.

Hi, I’m Angela. I cook the way busy people actually cook — simple, tasty food with ingredients you already have. On CookBookBite I share easy recipes, honest kitchen tips, and dishes my family asks for again and again.
Pingback: Homemade Tortilla Chips: Crispy, Easy & Better Than Store