
There is a particular kind of crunch that only homemade tortilla chips deliver. The chips are warm, deeply golden, salted at exactly the right moment, and crisp all the way through, from the first bite to the last crumb at the bottom of the bowl. Store-bought chips can be good, but they are often uneven: some are pale and soft, others are over-browned, and many taste more of the bag than of corn. When you make homemade tortilla chips yourself, you control every variable that matters, including the tortilla, the oil, the heat, the thickness of the cut, the seasoning, and the moment the salt goes on.
The appeal of homemade tortilla chips goes far beyond freshness. Corn tortillas are inexpensive, widely available, and naturally full of flavour. A stack of twelve tortillas becomes a generous bowl of chips in about twenty-two minutes, which makes this recipe ideal for a weeknight snack, a last-minute gathering, a taco night, a game-day spread, or a quiet evening when something salty and crunchy sounds exactly right. You do not need special equipment, and you do not need to be an experienced cook. If you can cut a tortilla into wedges and heat oil or an oven, you can make chips that rival any restaurant basket.
What makes these homemade tortilla chips especially good is the balance of texture and flavour. The best chips are not merely hard; they are crisp, light, and shatteringly crunchy without being tough or greasy. That texture comes from drying the surface of the tortilla, cooking at a steady, correct temperature, and draining and salting immediately. The flavour comes from real corn tortillas, good oil, and flaky salt, with optional lime or seasoning layered on top. Nothing is hidden under a heavy coating, and nothing needs to be masked. The corn flavour shines through, which is why the choice of tortilla matters so much.
Also Read : Cream Cheese Wontons Recipe (Crispy, Golden, and Better Than Takeout)
Another advantage is flexibility. The same basic method produces classic salted chips for salsa and guacamole, sturdy chips that can hold up under nachos, lighter baked chips for everyday snacking, and even sweet cinnamon-sugar chips for dessert. You can cut the tortillas into triangles, strips, or small squares, depending on how you plan to serve them. You can season them simply or boldly. You can fry a batch for maximum crunch or bake a batch for a lighter result. Once you understand the core technique, the recipe adapts to almost any occasion.
This guide covers everything you need to know to make homemade tortilla chips with confidence. You will learn why the recipe works, how to choose each ingredient, which equipment helps, and how to follow both a fried method and a baked method step by step. You will also find detailed tips for crispness, a full set of flavour variations, serving ideas for dips, nachos, soups, and salads, storage and make-ahead advice, answers to twelve common questions, and a complete recipe card at the end. Read through the method once before you start, gather your ingredients, and give yourself a little extra time on the first batch. After that, the process becomes quick, intuitive, and very rewarding.
Why This Recipe Works: The Technique Behind Truly Crisp Chips
Great homemade tortilla chips are not an accident. They are the result of four factors working together: the right tortilla, a dry surface, steady heat, and salt applied at the right time. Understanding each factor helps you troubleshoot any batch and repeat your best results every time.
First, tortilla choice sets the foundation. Corn tortillas are the classic choice for homemade tortilla chips because they are made primarily from corn, water, and lime, and they develop a deep, toasted corn flavour when cooked. Their texture is also ideal: they are thin enough to become crisp, yet sturdy enough to hold a dip without breaking immediately. Flour tortillas can be turned into chips, and the frequently asked questions at the end of this article explain how, but they produce a lighter, puffier, more bread-like chip with a different flavour. For the classic restaurant-style crunch and the most pronounced corn taste, corn tortillas are the clear winner.
Second, surface moisture is the enemy of crispness. A tortilla straight from the packet often carries a little surface moisture, and any extra water on the surface must evaporate before the tortilla can crisp. That is why this recipe includes a short drying step. Letting the cut wedges sit in a single layer for ten to fifteen minutes, or warming them very briefly, helps the surface dry out. Dry tortillas fry and bake more evenly, absorb less oil, and finish crisper. This step is especially important if the tortillas feel damp, flexible, or slightly sticky, and it is one of the easiest ways to improve a batch that previously turned out soft.
Third, steady heat does the real cooking work. When tortillas enter hot oil or a hot oven, the heat drives moisture out of the tortilla from the inside as well as the outside. As that moisture escapes, the starches in the corn set into a rigid, crunchy structure. If the heat is too low, the tortilla absorbs oil before it crisps, and the result is greasy and limp. If the heat is too high, the outside browns before the inside has dried, and the chip can taste bitter or burn quickly. A moderate, steady temperature allows moisture to leave at the right pace while the surface turns golden. That is why an oil temperature of around 175 to 180 degrees Celsius, or 350 to 360 degrees Fahrenheit, works so well for frying, and why an oven temperature of 190 degrees Celsius, or 375 degrees Fahrenheit, works so well for baking. Consistency matters more than extreme heat.
Fourth, salt timing makes a surprising difference. Salt sticks best when the chip surface is still slightly oily and warm from cooking. If you wait until the chips have cooled completely, the salt tends to bounce off and collect at the bottom of the bowl. If you salt while the chips are still hot and just drained, the salt clings evenly and seasons every bite. Flaky salt is recommended because the larger flakes give a pleasant crunch and a clean salty flavour, and they are easier to distribute evenly than very fine salt, which can clump or over-salt some chips while leaving others plain. For flavoured chips, the same principle applies: toss or sprinkle seasoning over hot chips so that it adheres properly.
A fifth factor, often overlooked, is space. Chips need room to cook. When too many wedges crowd a pan or a baking tray, steam gets trapped between them, temperatures drop, and the chips cook unevenly. Some stay pale while others brown, and the pale ones often turn soft as they cool. Cooking in batches, spreading wedges in a single layer, and giving each chip a little breathing room solves most unevenness problems. It may take a few extra minutes, but the difference in texture is dramatic.
Finally, cooling matters. Chips continue to crisp as they cool, because residual moisture keeps escaping while the starch structure firms up. A chip that feels slightly flexible when it first leaves the oil or oven will often become fully crisp within a few minutes on a wire rack. That is why draining on a rack, rather than on a flat plate or paper towel alone, is so helpful: air circulates underneath as well as on top, so steam does not get trapped and soften the underside. Resist the urge to judge a batch too early, and let the chips cool for at least five minutes before deciding whether they need more time.
Together, these principles explain why this recipe is reliable. Choose corn tortillas, dry the surface, cook at a steady temperature, leave space, salt while hot, and cool on a rack. Each step is simple on its own, and together they produce homemade tortilla chips that are golden, crisp, flavourful, and sturdy enough for dipping.
Ingredients Explained: Every Ingredient, Its Role and How to Choose It
Corn Tortillas
Corn tortillas are the heart of this recipe, and the quantity in the recipe card is twelve corn tortillas. Look for tortillas that list corn and lime-treated water among the first ingredients, with as few additives as possible. Fresh tortillas from a bakery or a refrigerated section often have the best flavour, but good shelf-stable tortillas work well too, provided they are not cracked, dry, or stale in a brittle, crumbly way. Slightly older tortillas, sometimes called day-old tortillas, can actually be an advantage, because they have already lost some moisture and crisp up more readily. Very fresh, very soft tortillas benefit most from the drying step in the method.
Thickness matters as well. Standard thin to medium corn tortillas, roughly fifteen centimetres or six inches across, are ideal. Very thick tortillas take longer to crisp and can stay chewy in the centre, while extremely thin tortillas can become fragile and break during frying. If your tortillas are on the thicker side, add a minute or two of cooking time and watch the colour rather than the clock. If they are very thin, shorten the time slightly and check early.
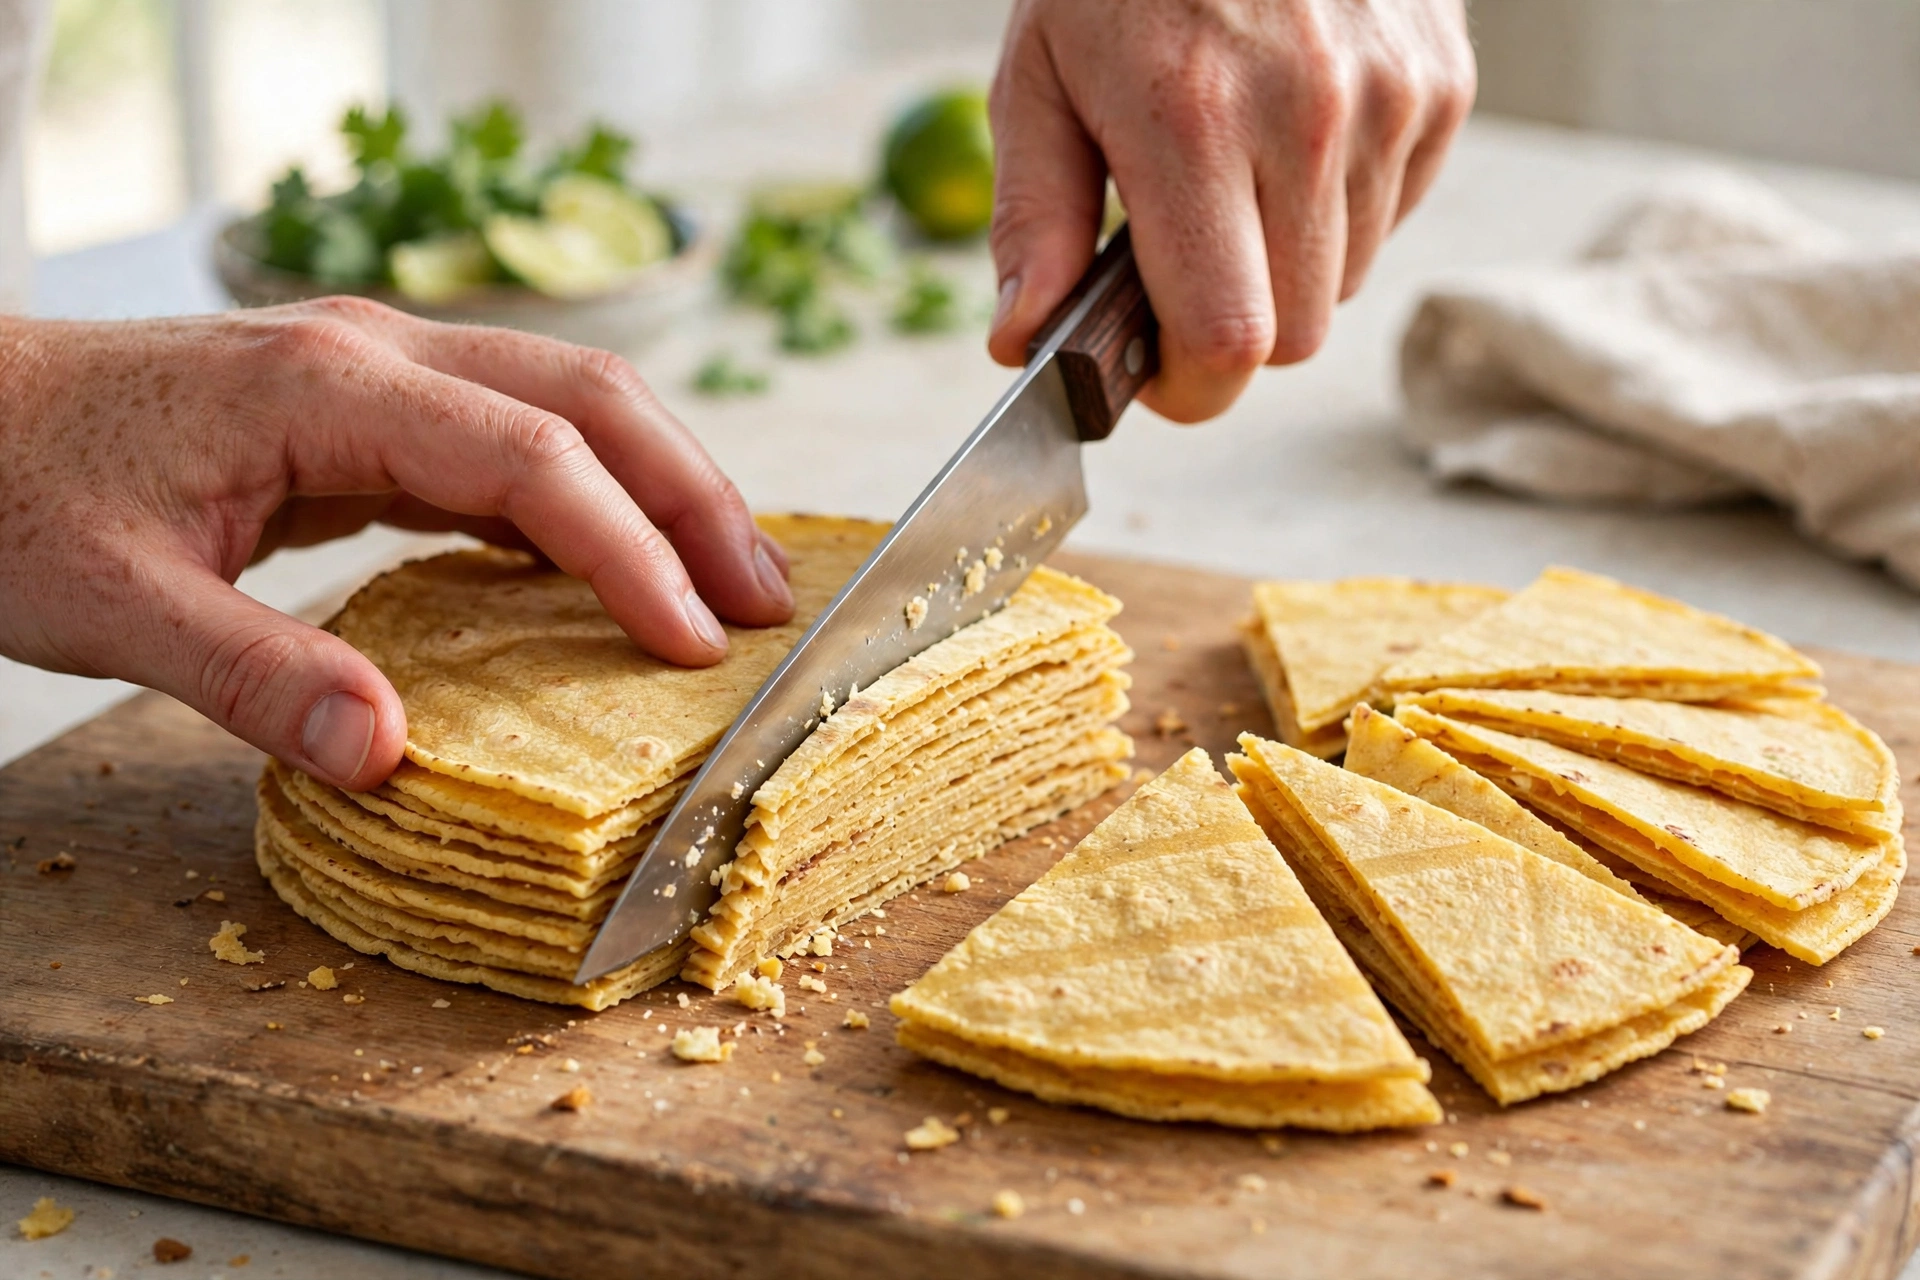
Size also affects the final chip. Six-inch tortillas cut into six wedges produce classic dipping triangles. Larger tortillas can be cut into eight wedges for a similar size, while smaller tortillas can be cut into four wedges. The exact number is less important than consistency: cut the wedges as evenly as you can, so that they cook at the same rate and finish at the same time.
Must Read : Spinach Dip Toast Recipe (Creamy, Cheesy, and Golden from the Oven)
Oil
Oil plays two roles in homemade tortilla chips: it carries heat to the tortilla, and it contributes flavour and richness. For frying, you need a neutral oil with a high smoke point, such as sunflower oil, vegetable oil, canola oil, or refined peanut oil. These oils can hold a steady frying temperature without smoking or imparting a strong flavour of their own. Extra virgin olive oil is not recommended for deep frying here, because its smoke point is lower and its flavour can dominate the delicate corn taste. For baking, you need only two tablespoons of oil, brushed or sprayed lightly over the wedges. A neutral oil works well for baking too, although a light olive oil can be used for baked chips if you enjoy its flavour, since the oven temperature is lower and the oil quantity is small.
For frying, use enough oil to reach a depth of about two to three centimetres, or roughly one inch, in a deep, heavy pan. You do not need to fill the pan to the brim, and you should never fill it more than halfway, for safety. The oil should be fresh or only lightly used. Oil that has been used many times, or that smells stale, will transfer off-flavours to the chips. Guidance on reusing oil safely appears in the tips section.
Salt
Salt is a small ingredient with a large impact. The recipe card calls for one teaspoon of flaky salt, which is a starting point rather than a rigid rule. Taste a chip from the first batch and adjust the next batch up or down according to your preference and the saltiness of your dips. Flaky sea salt is preferred because it adheres well to warm chips, distributes evenly, and adds a subtle crunch. Kosher salt is a good alternative. Fine table salt can be used, but use a little less, because its small grains pack more densely into a teaspoon and can over-salt quickly. If you plan to serve the chips with very salty dips, such as a salty queso or heavily seasoned salsa, you may want to salt the chips a little more lightly.
Salt should be added immediately after cooking, while the chips are still hot and just drained. If you are making a flavoured variation, mix the salt into the seasoning blend, or sprinkle the salt first and then add the seasoning, so that both layers stick while the surface is still warm.
Lime Wedges (Optional)
Lime wedges are optional, but they add a bright, fresh note that lifts the whole bowl. A squeeze of lime over hot chips, or lime wedges served alongside for squeezing at the table, pairs especially well with the chilli-lime variation and with guacamole and salsa. Choose limes that feel heavy for their size and give slightly when squeezed, which usually means they are juicy. Cut each lime into four to six wedges. If you squeeze lime over the chips, do so lightly and just before serving, because too much juice can soften the chips if they sit for a long time. For the best balance, season the chips first, then add a light squeeze, then serve promptly.
Seasonings (Optional)
Seasonings turn a basic chip into a flavoured chip, and the options are wide. The recipe card lists seasonings as optional, which means the classic salted version needs nothing else. For variations, you can use chilli powder, smoked paprika, garlic powder, onion powder, ground cumin, dried herbs, nutritional yeast for a cheesy flavour, or cinnamon and sugar for dessert chips. Use ground spices rather than large dried flakes where possible, because fine powders coat the chips more evenly. Dried herbs should be crushed lightly between your fingers before sprinkling, so that they distribute rather than sitting in clumps. Always add seasonings to hot chips, and toss gently, so that every chip gets some seasoning without breaking.
When choosing seasonings, think about the dip or dish the chips will accompany. Mildly seasoned chips are the most versatile, because they pair with any dip. Boldly seasoned chips are best served on their own or with a simple, cooling dip such as guacamole or sour cream, so that the flavours do not compete. The variations section gives measured suggestions for each flavour profile.
Equipment Needed
You do not need specialist equipment to make homemade tortilla chips, and most kitchens already contain everything required. Gathering the equipment before you start makes the process smoother, especially for frying, where timing matters.
For both methods, you will need a sharp knife or kitchen scissors for cutting the tortillas, a chopping board, a large bowl for tossing and seasoning, a wire cooling rack set over a baking tray for draining and cooling, and tongs or a slotted spoon for handling hot chips. A baking tray lined with baking paper is essential for the baked version and useful for the cooling rack setup in both versions.
For the fried version, you will need a deep, heavy-based pan or pot, such as a Dutch oven or a deep frying pan, with enough depth to hold the oil safely. A thermometer is highly recommended for frying, whether a dedicated deep-fry thermometer or a heatproof probe thermometer, because guessing oil temperature is the most common cause of greasy or burnt chips. If you do not have a thermometer, the method includes a simple test using a small piece of tortilla. You will also need paper towels or a clean kitchen towel for the initial draining, although the wire rack does most of the work.
For the baked version, you will need one or two large baking trays, baking paper, and either a pastry brush or an oil spray bottle for applying the two tablespoons of oil evenly. An oil spray bottle gives the lightest, most even coating, while a brush gives more control and works well for small batches.
Optional but helpful items include a pair of heatproof gloves or oven mitts, a splatter guard for the pan, and a small bowl for holding the salt and seasoning within easy reach of the stove. If you plan to make chips often, a mandoline-style tortilla cutter or a pizza wheel can speed up cutting, but a simple knife works perfectly well. Keep a timer nearby, because fried chips can go from golden to dark in less than a minute.
Detailed Step-by-Step Method
Read the whole method once before you begin, then choose the fried version, the baked version, or a combination of both. The preparation steps are the same for either method, and the recipe card at the end summarises the full sequence. Prep time is ten minutes, cook time is twelve minutes, and total time is twenty-two minutes for a typical batch, although frying in batches may extend the total time slightly if you are making a large quantity.
Preparation (Both Methods)
Start by stacking the twelve corn tortillas neatly and cutting the stack into wedges. For six-inch tortillas, cut each tortilla into six equal triangles, like cutting a pizza. Use a sharp knife and press down firmly, or use kitchen scissors for a cleaner cut through a stack. Try to keep the wedges a similar size so that they cook evenly. If a tortilla tears slightly, do not worry; smaller pieces still make excellent chips, and they are useful for scooping dips or topping salads and soups.
Next, dry the wedges briefly. Spread them in a single layer on a baking tray or a clean work surface, overlapping as little as possible, and leave them for ten to fifteen minutes at room temperature. If you are short on time, warm the wedges in a low oven at about 120 degrees Celsius, or 250 degrees Fahrenheit, for five minutes, then let them cool for a couple of minutes. The wedges should feel dry to the touch and slightly firmer than before, but not brittle or cracked. This drying step is the single easiest way to guarantee crispness, especially for very fresh tortillas.
While the wedges dry, prepare your cooking station. For frying, set the wire rack over a baking tray near the stove, place the salt and any seasonings within reach, and have tongs and a slotted spoon ready. For baking, preheat the oven to 190 degrees Celsius, or 375 degrees Fahrenheit, and line one or two large baking trays with baking paper. Having everything ready before the cooking starts matters, because chips cook quickly and salting must happen while they are hot.
Fried Version: Classic Restaurant-Style Chips
Pour neutral oil into a deep, heavy-based pan to a depth of about two to three centimetres, or roughly one inch. Do not fill the pan more than halfway. Heat the oil over medium-high heat until it reaches 175 to 180 degrees Celsius, or 350 to 360 degrees Fahrenheit, on a thermometer. If you do not have a thermometer, test the oil by dropping in one small piece of tortilla: it should sizzle vigorously at once, rise to the surface, and turn lightly golden within thirty to sixty seconds. If it browns instantly, the oil is too hot, so lower the heat and wait a minute before testing again. If it sinks and bubbles only weakly, the oil is too cool, so wait a little longer.
Read Must : Crispy Potato Skins Recipe (Better Than the Restaurant)
Working in batches, carefully lower a single layer of tortilla wedges into the hot oil, using tongs and keeping your hand and face away from the pan. Do not crowd the pan; the wedges should have room to float freely and should not be stacked on top of each other. A typical batch is about eight to twelve wedges, depending on the size of your pan. Fry for two to three minutes, turning the wedges once or twice with tongs, until they are golden and crisp. Watch the colour closely: the chips will continue to darken slightly after they leave the oil, so remove them when they are a warm golden colour, not deep brown. Deep brown chips often taste bitter.
Lift the chips out with a slotted spoon or tongs, allowing excess oil to drip back into the pan for a few seconds. Transfer them immediately to the wire rack set over a baking tray, spreading them in a single layer. Sprinkle with flaky salt at once, while the chips are still hot and slightly oily, so that the salt adheres. If you are adding a seasoning blend, sprinkle or toss it on now as well, while the chips are still warm. Let the batch cool on the rack for a few minutes while you fry the next batch.
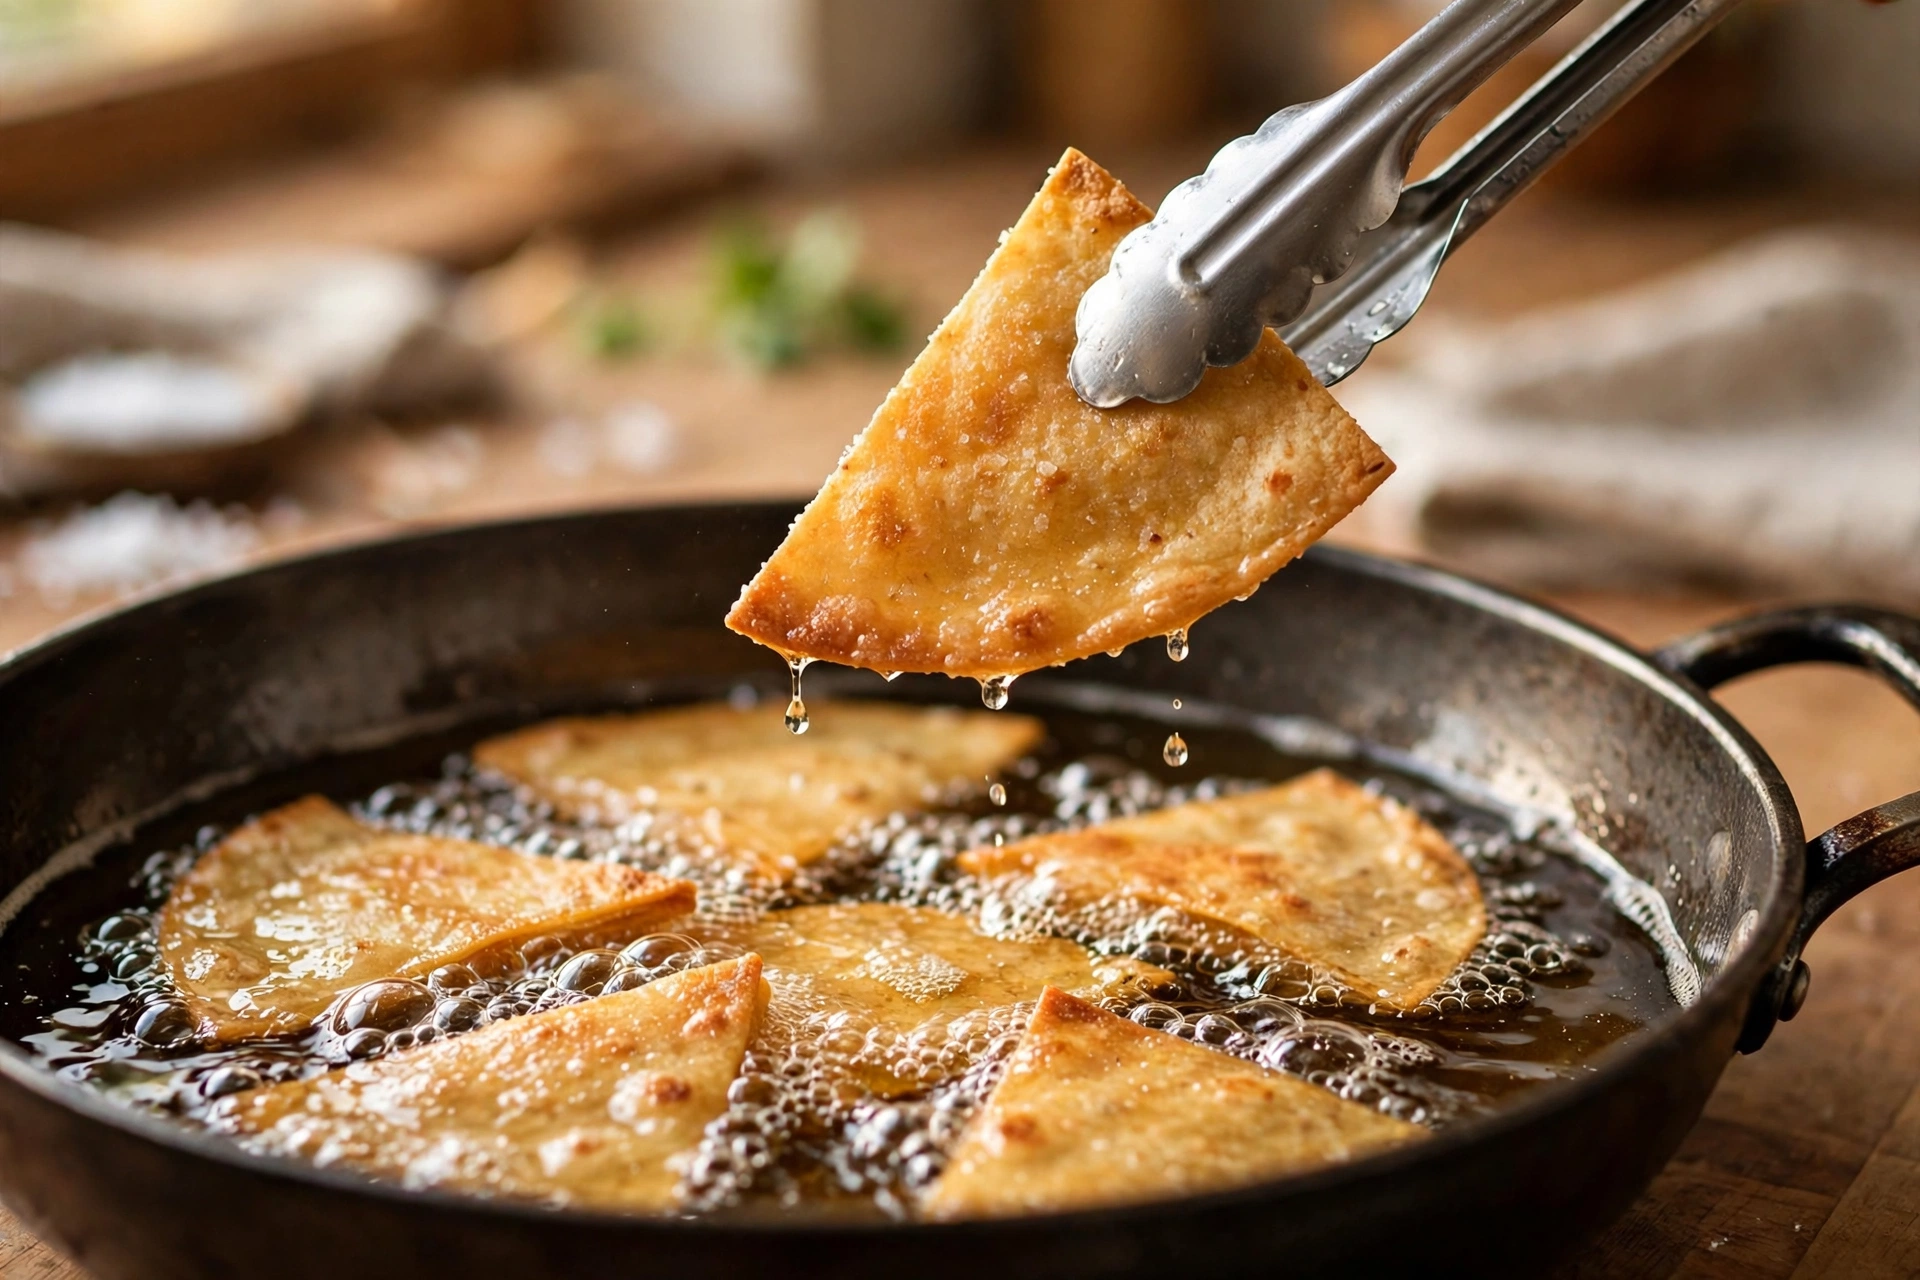
Between batches, check the oil temperature and let it return to 175 to 180 degrees Celsius before adding more wedges. Adding a new batch always cools the oil slightly, and frying in cool oil produces greasy chips. Skim out any small browned bits between batches with a slotted spoon, because those bits can burn and darken later batches. Repeat until all the wedges are fried. The total frying time for twelve tortillas is usually about ten to twelve minutes of active cooking, plus the preparation time, which matches the twelve-minute cook time in the recipe card.
Taste one chip from the first batch after it has cooled for two or three minutes. It should be crisp all the way through, lightly salty, and full of toasted corn flavour. If it is still a little soft in the centre, the next batch needs a few extra seconds in the oil. If it tastes greasy, the oil was probably too cool, so let it heat fully before the next batch. Adjusting after the first batch is normal and is the fastest way to learn your stove and pan.
Baked Version: Lighter, Everyday Chips
Preheat the oven to 190 degrees Celsius, or 375 degrees Fahrenheit. Line one or two large baking trays with baking paper. Arrange the dried tortilla wedges in a single layer on the trays, leaving a small gap between each wedge. Do not overlap them, because overlapping areas steam rather than crisp, and those spots will stay soft.
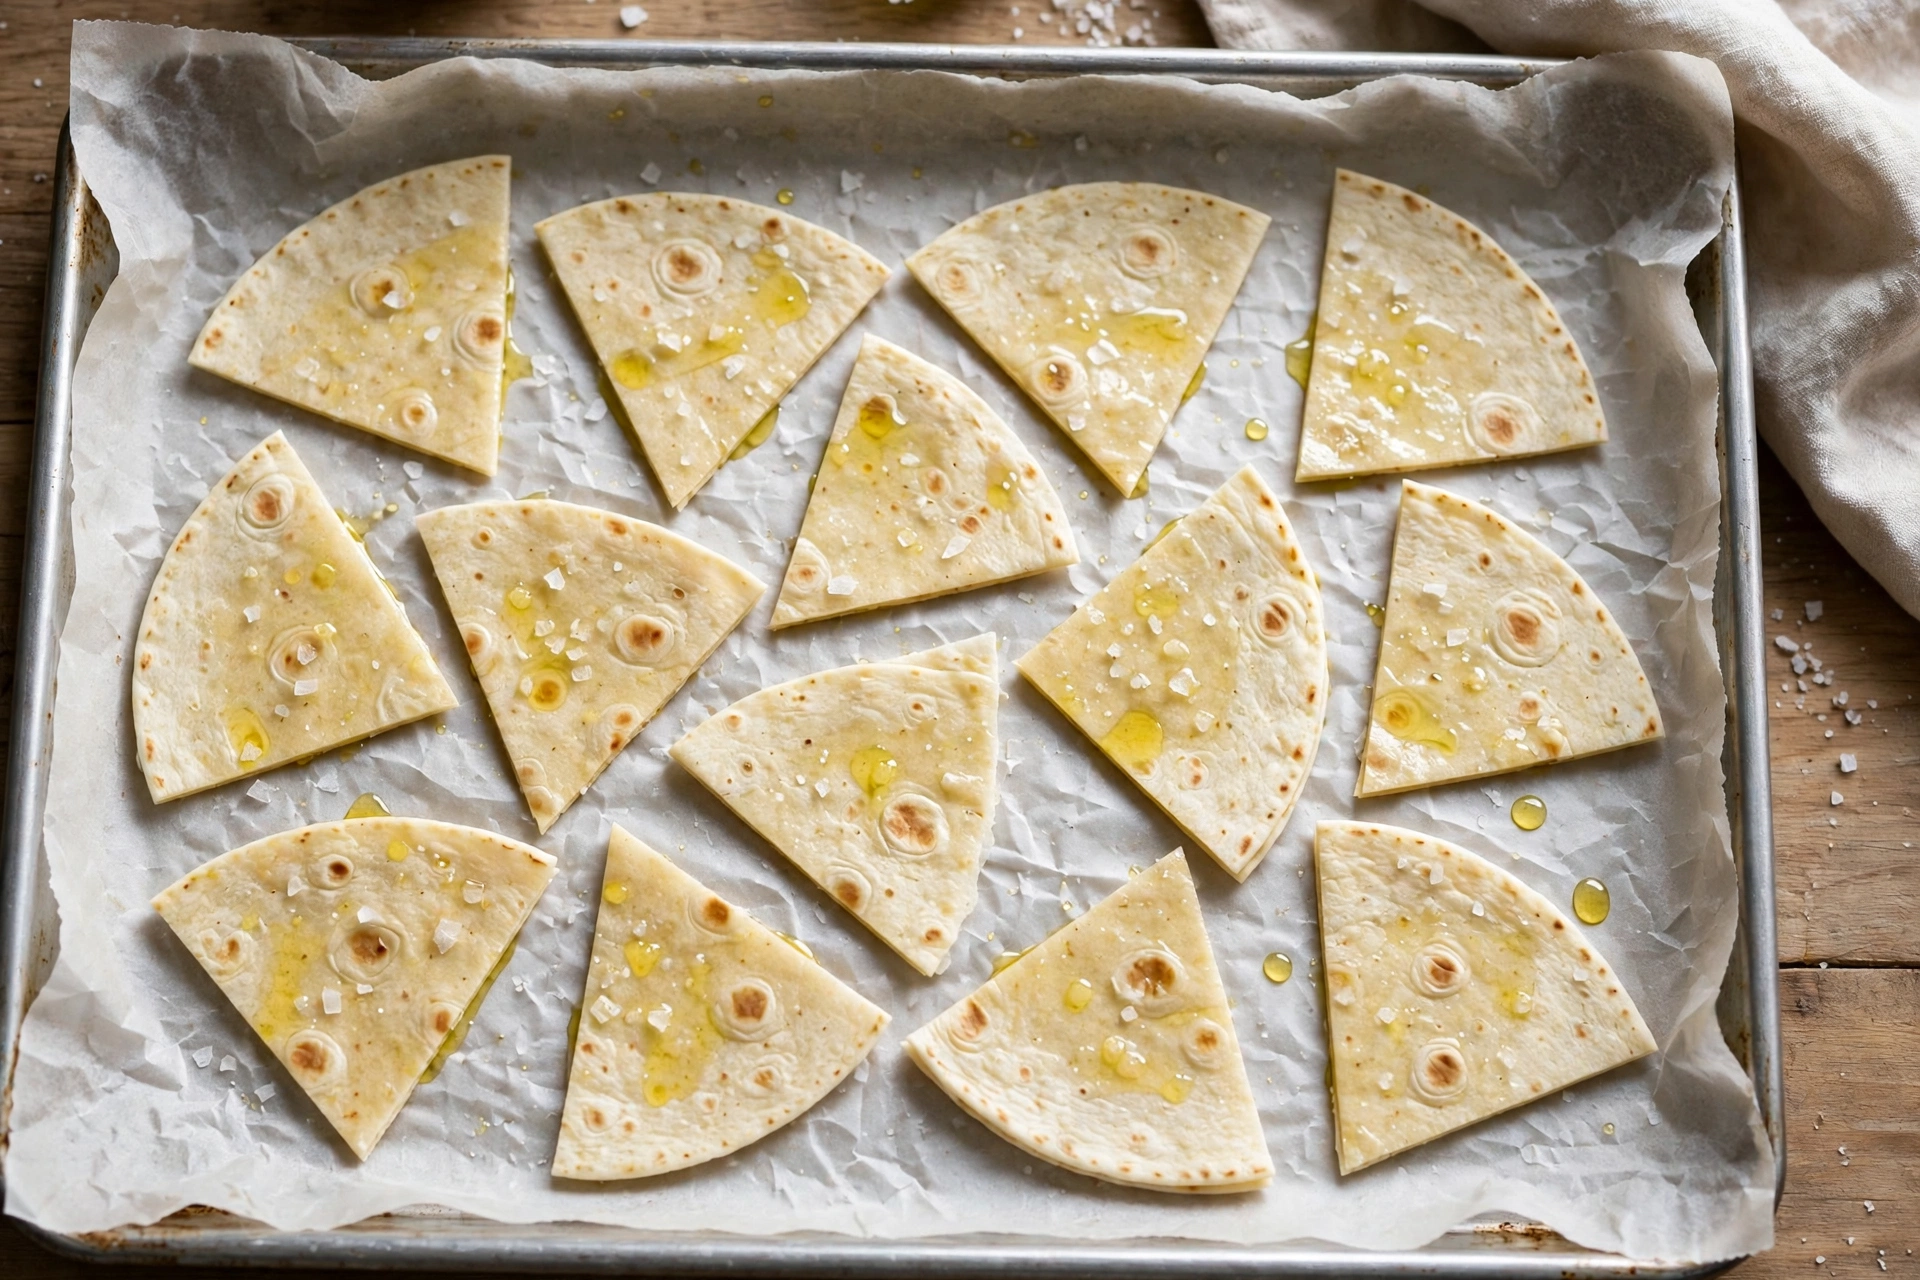
Brush or spray both sides of the wedges lightly with the two tablespoons of oil. A pastry brush gives good control: dip the brush lightly, brush one side, flip the wedges, and brush the other side. An oil spray bottle is faster and uses the oil very evenly. You want a light, even sheen, not pools of oil. Too much oil on baked chips can make them greasy, while too little can leave dry patches that do not brown evenly. Two tablespoons is enough for twelve tortillas when applied evenly.
Sprinkle the wedges very lightly with a pinch of salt before baking if you prefer, but save the main salting for after baking, when the salt will stick better to the warm, lightly oiled surface. If you are making a flavoured baked version, you can mix the seasoning with the oil before brushing, or sprinkle the seasoning over the oiled wedges before they go into the oven. Spices baked onto the chip develop a deeper, toasted flavour, but watch them carefully, because ground spices can darken faster than the tortilla itself.
Bake for ten to twelve minutes, flipping the wedges halfway through, until they are golden and crisp at the edges. Start checking at eight minutes, because oven temperatures vary and thin tortillas can brown quickly. The chips are done when they are evenly golden, feel firm when lifted with tongs, and make a crisp sound when tapped. Remember that they will crisp further as they cool, so remove them when they are golden rather than waiting for a deep brown colour.
Remove the trays from the oven and transfer the chips immediately to a wire rack, or leave them on the tray for one minute and then move them to the rack. Sprinkle with the one teaspoon of flaky salt, or your chosen seasoning, while the chips are still warm. Spread them in a single layer on the rack and let them cool for at least five minutes. Taste one chip after cooling: it should be light, crisp, and satisfying, though slightly less rich than a fried chip. That lighter quality is exactly what makes baked chips ideal for everyday snacking.
Choosing Between Fried and Baked
Fried chips are the closest to restaurant chips: richer, more deeply golden, and unmistakably crisp, with a slightly more indulgent flavour. They are the best choice for a party, for nachos, and for occasions when texture is the priority. Baked chips are lighter, use far less oil, and are easier to make in large quantities at once, because you can bake two trays simultaneously. They are the best choice for a quick snack, for children, for a lighter everyday option, and for topping salads and soups, where a delicate chip works better than a very rich one. Many cooks make fried chips for guests and baked chips for the week, and both versions come from the same preparation steps.
Also Read: Chicken Tinga Recipe (Smoky, Saucy & Weeknight-Fast)

Tips for Success
Crispness is the goal, and most problems have a simple fix. Start with the drying step every time, especially for fresh tortillas. Even ten minutes of air-drying makes a measurable difference. If your kitchen is humid, give the wedges a few extra minutes, or use the low-oven drying method described above. Dry wedges absorb less oil, brown more evenly, and stay crisp longer after cooking.
Control your temperature carefully. For frying, a thermometer removes the guesswork, and checking the temperature between batches prevents the slow slide into greasy chips that happens when batch after batch cools the oil. For baking, an oven thermometer is helpful if your oven runs hot or cool, but simply checking the chips a couple of minutes early and flipping them halfway through will handle most variation. In both methods, colour is your best guide: golden means done, pale means more time, and deep brown means the batch has gone too far.
Do not crowd the pan or the tray. This tip is repeated because it matters so much. A single layer with space between wedges allows hot oil or hot air to reach every surface and allows steam to escape. Crowded chips steam each other, cook unevenly, and soften as they cool. Cooking in smaller batches takes a few minutes longer, but the texture reward is worth it.
Salt and season while the chips are hot. Keep the salt bowl beside the stove or oven, not across the kitchen, so that you can season immediately. Toss flavoured chips very gently in a large bowl while they are still warm, using a light hand so that you do not break them. If a batch cools before you season it, you can revive the surface by warming the chips briefly in a low oven, then seasoning at once, although seasoning hot from the start is always better.
Cool on a wire rack, not on a flat plate. Air circulation underneath the chips prevents steam from softening the underside. If you do not have a wire rack, prop a baking tray on its side, or use an upturned cooling rack substitute such as a clean oven rack set over a tray. Paper towels can be used for the first few seconds of draining fried chips, but move the chips to a rack promptly, because paper towels trap steam if the chips sit on them for long.
Batching for a party requires a little planning. Fried chips are best made in the hours just before serving, because they are at their crispest within the first few hours. You can fry several batches ahead and store them as described in the storage section, but for the very best texture, fry the last batch close to serving time. Baked chips hold their texture slightly longer and are easier to scale up, because you can bake tray after tray while earlier batches cool. If you are making chips for a large group, consider doubling the recipe and using the baked method for volume, plus one fried batch for a showpiece bowl.
Oil reuse and safety deserve attention. For frying, never leave hot oil unattended, keep children and pets away from the stove, and keep the pan handle turned inward so that it cannot be knocked. If oil starts to smoke heavily, remove the pan from the heat carefully and let it cool; do not add water to hot oil under any circumstances. After cooking, let the oil cool completely, then strain it through a fine sieve lined with a coffee filter or cheesecloth into a clean, dry container. Oil used once for tortilla chips, and strained well, can usually be reused once or twice more for similar frying, provided it still smells fresh and has not darkened significantly. Discard oil that smells stale, looks very dark, foams excessively, or smokes at a much lower temperature than before. Never pour used oil down the sink; let it cool, seal it in a container, and dispose of it according to your local waste guidance.
A few more practical tips help every batch. Cut the wedges evenly, because uneven pieces cook unevenly and the smallest pieces burn while the largest stay soft. If some pieces are much smaller than others, cook them separately for a shorter time. Turn fried chips gently, because vigorous stirring breaks them. For baked chips, flip once, halfway through, rather than constantly moving them. Store any uncooked cut wedges covered in the refrigerator for up to a day if you want to prep ahead, but bring them to room temperature and dry them briefly before cooking. Finally, taste and adjust after the first batch, every time. Stoves, ovens, pans, and tortilla brands all vary slightly, and a quick taste test is the most reliable calibration tool you have.
Variations: Five Flavour Directions From One Base Recipe
Once the basic technique is secure, variations are easy and fun. Each variation below starts from the same base: twelve corn tortillas, cooked by the fried or baked method, salted while hot. The seasoning quantities are for one full batch, and you can scale them up or down to taste. Add seasonings to hot chips and toss gently, unless the variation notes say to season before baking.
Chilli-Lime Chips
Chilli-lime chips are bright, tangy, and lightly spicy, and they pair beautifully with guacamole, salsa, and grilled dishes. Mix one teaspoon of chilli powder, half a teaspoon of ground cumin, half a teaspoon of garlic powder, and the finely grated zest of one lime with the one teaspoon of flaky salt. Sprinkle the blend over hot chips and toss gently, then serve with lime wedges for squeezing. For extra heat, add a pinch of cayenne pepper or a pinch of crushed chilli flakes. For a milder version, use a sweet or mild chilli powder and skip the cayenne. The lime zest adds aroma without adding moisture, which is important, because liquid lime juice added too early can soften the chips. If you want a stronger lime flavour, add a very light squeeze of lime just before serving, and serve the chips immediately.
Nacho Cheese Seasoning Chips
Nacho cheese seasoning chips deliver the savoury, cheesy flavour of nachos without needing a cheese sauce. Mix two tablespoons of nutritional yeast, half a teaspoon of garlic powder, half a teaspoon of onion powder, half a teaspoon of smoked paprika, a quarter teaspoon of ground turmeric for colour, and the one teaspoon of flaky salt. Nutritional yeast gives a naturally cheesy, savoury flavour and a fine, powdery texture that coats chips evenly. Toss the blend over hot chips and shake the bowl gently so that the powder reaches every chip. For a richer flavour, add a pinch of mustard powder. These chips are excellent on their own, with salsa, or crumbled over a salad for a cheesy crunch. If you prefer a dairy-based version, finely grated hard cheese can be sprinkled over baked chips during the last two minutes of baking, but watch carefully, because cheese browns quickly.
Cinnamon-Sugar Dessert Chips
Cinnamon-sugar dessert chips turn the same base recipe into a sweet treat, perfect with chocolate dip, fruit salsa, or a bowl of ice cream. Mix two tablespoons of granulated sugar, one teaspoon of ground cinnamon, and a pinch of flaky salt. For the fried version, fry the wedges as usual, drain briefly, and toss immediately in the cinnamon-sugar mixture while the chips are still warm and slightly oily, so that the sugar adheres. For the baked version, brush the wedges lightly with oil, sprinkle with the cinnamon-sugar mixture before baking, and bake as usual, checking early, because sugar browns faster than plain tortilla. Serve the dessert chips warm or at room temperature with a chocolate dipping sauce, a sweetened cream cheese dip, or fresh fruit. A pinch of cocoa powder in the sugar mixture creates a chocolate-cinnamon variation, and a little vanilla sugar adds a warm, bakery-like aroma.
Herb Chips
Herb chips are fragrant, savoury, and versatile, and they work especially well with soups, salads, and Mediterranean-style dips. Mix one teaspoon of dried oregano, one teaspoon of dried thyme or dried rosemary, half a teaspoon of garlic powder, and the one teaspoon of flaky salt, crushing the dried herbs lightly between your fingers before mixing. Toss over hot chips and serve promptly. For a fresher flavour, sprinkle very finely chopped fresh parsley or fresh coriander over the hot chips just before serving, although fresh herbs should be used sparingly, because their moisture can soften the chips if they sit for a long time. Herb chips are a good choice when you want a chip that complements, rather than competes with, a strongly flavoured dip such as a roasted red pepper dip or a herbed yoghurt dip.
Smoky Paprika Chips
Smoky paprika chips have a deep, warm, barbecue-like flavour that suits hearty dips and grilled food. Mix one and a half teaspoons of smoked paprika, half a teaspoon of garlic powder, half a teaspoon of onion powder, a quarter teaspoon of ground cumin, and the one teaspoon of flaky salt. For the baked version, you can mix the spices into the brushing oil for an even coating and a deeper toasted flavour. For the fried version, toss the spices over hot chips. Smoked paprika comes in sweet and hot varieties; sweet smoked paprika gives warmth without heat, while hot smoked paprika adds a noticeable kick. Taste the blend before you commit to a full batch, and adjust the heat to your preference. These chips are outstanding with queso, with a smoky bean dip, or alongside grilled vegetables and meats.
A final note on variations: keep the seasoning layer light. A heavy coating can make chips soggy, overpower the corn flavour, and leave a dusty residue in the bowl. Start with the quantities above, taste, and add a little more if needed. You can always add more seasoning, but you cannot easily remove it once it is on. When making more than one flavour for a party, cook the plain salted batch first, then divide it while hot and season each portion separately. That way, every flavour is fresh, and no batch cools before seasoning.
Also Read: Chimichurri Sauce Recipe (Bright, Bold & 10 Minutes)
Serving Ideas: Dips, Nachos, Soups and Salads
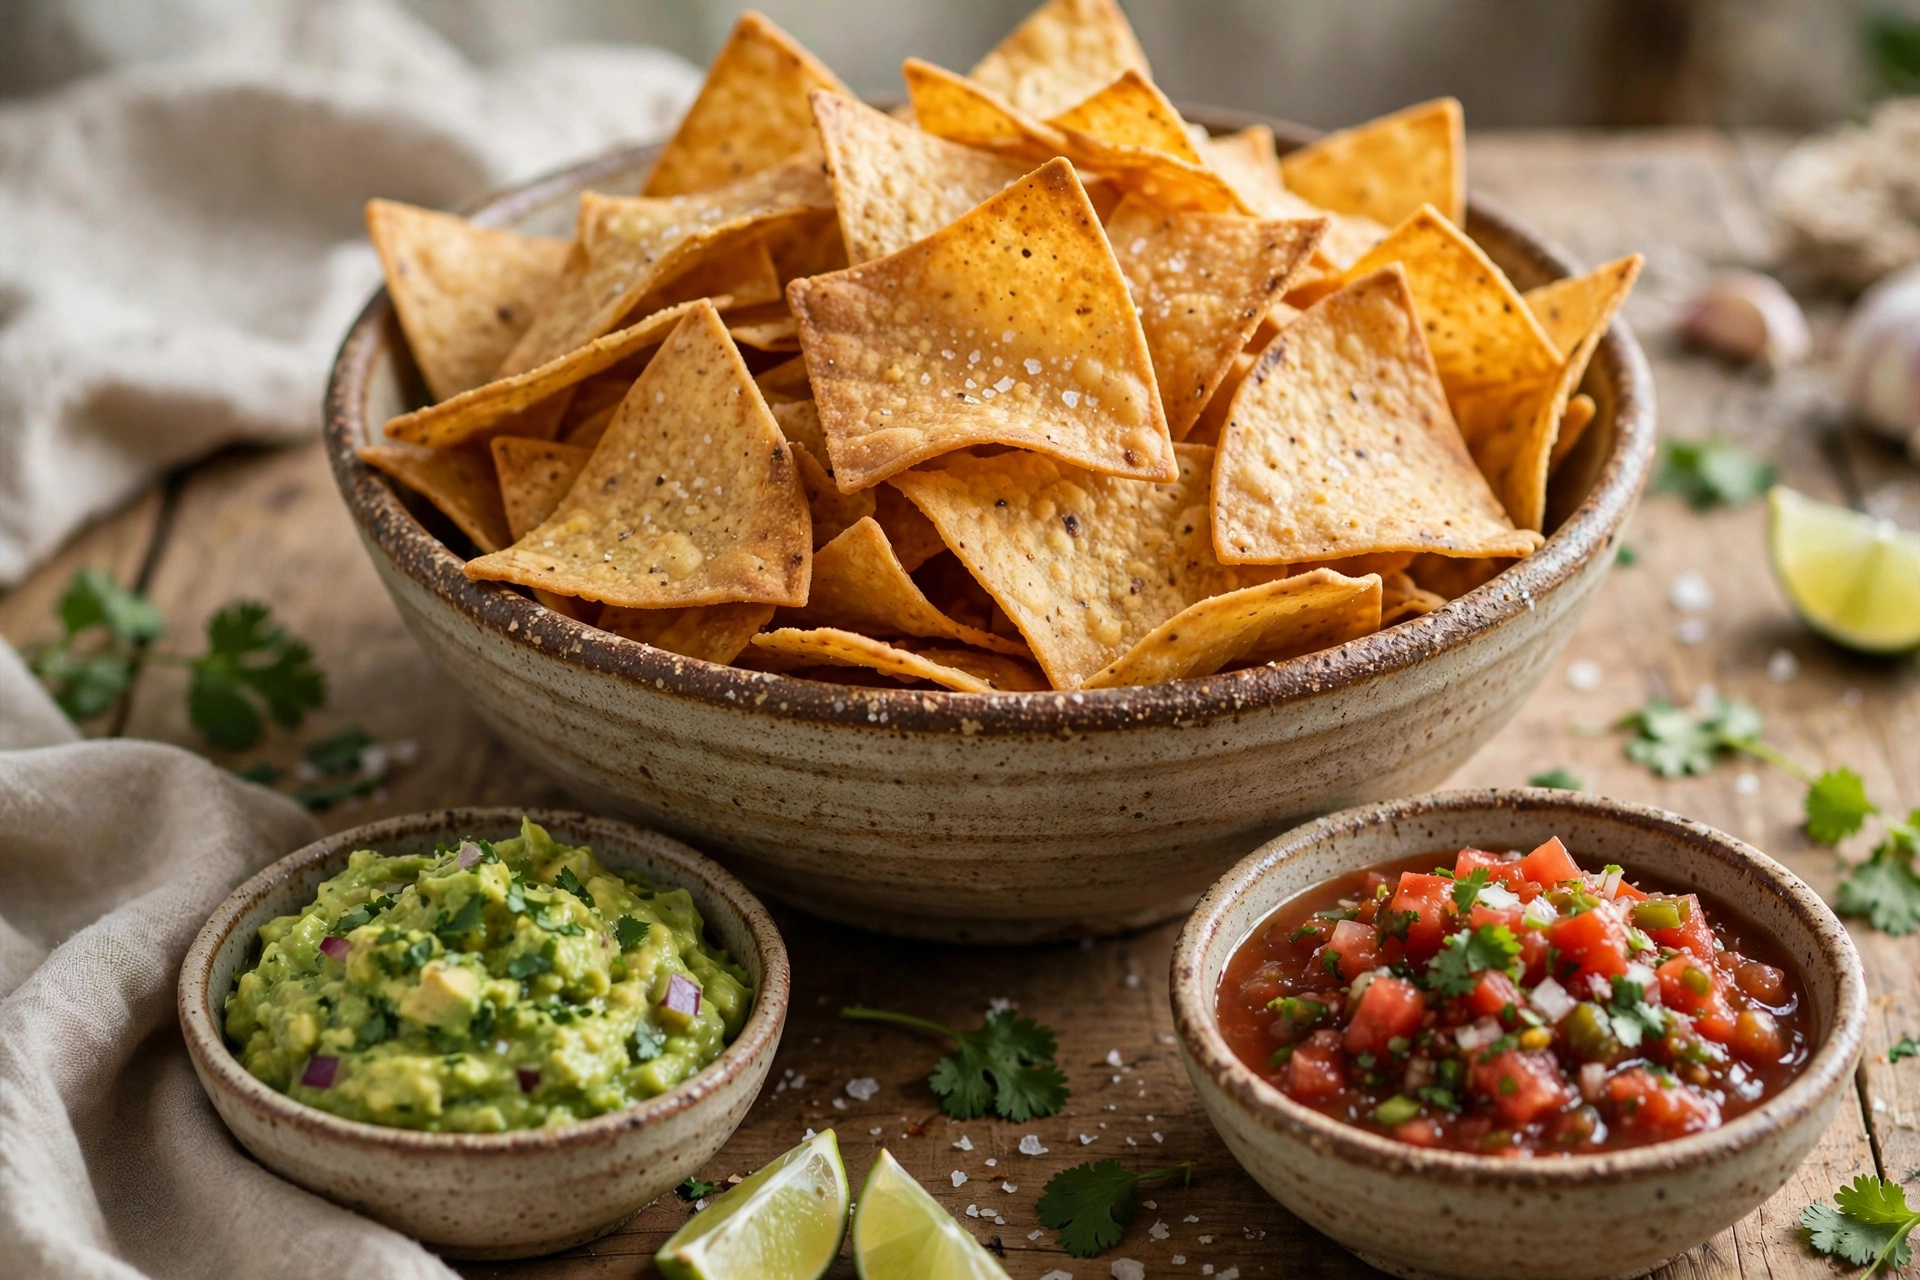
Homemade tortilla chips are at their best when served with something to scoop, top, or crumble over. The classic pairing is a trio of dips, and a well-chosen trio covers every taste: something fresh, something creamy, and something rich.
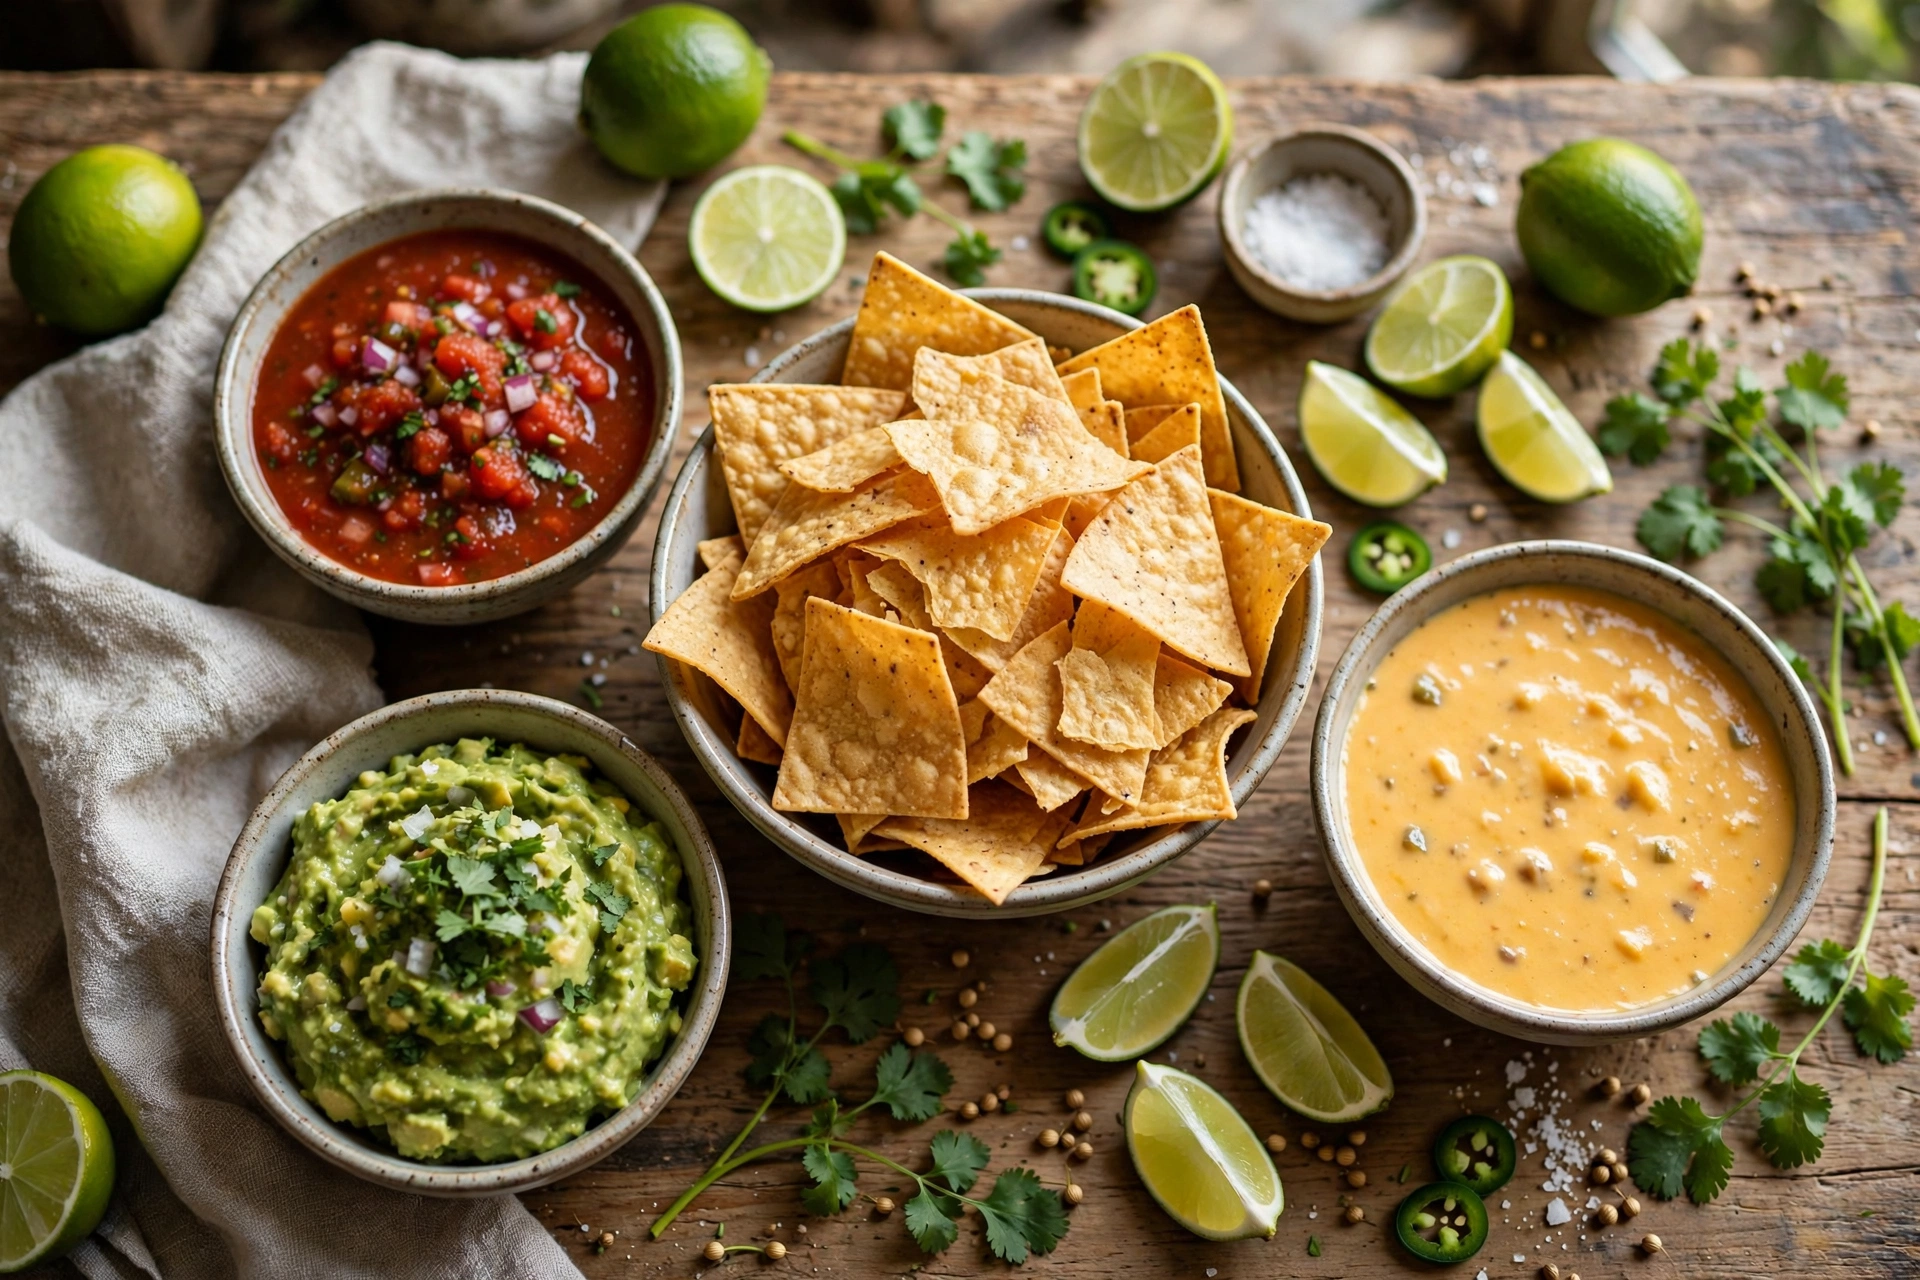
Salsa is the most traditional partner. A fresh tomato salsa, with diced tomatoes, onion, coriander, lime juice, and a little chilli, brings brightness and acidity that cut through the richness of fried chips. A roasted tomato salsa brings deeper, smokier notes that suit smoky paprika chips especially well. A fruit salsa, made with mango, pineapple, or peach, pairs beautifully with plain salted chips and with cinnamon-sugar chips in a dessert setting. Serve salsa in a separate bowl, rather than pouring it over the chips, so that the chips stay crisp until the moment they are dipped.
Guacamole is the creamy counterpart. Its smooth, rich texture and fresh lime flavour complement the crunch of the chip perfectly. For the best experience, make guacamole close to serving time, season it well, and serve it in a wide, shallow bowl that makes scooping easy. A sturdy fried chip is ideal for guacamole, because it can scoop a generous amount without breaking. Baked chips also work, but choose the thickest, most evenly cooked chips from the batch for the guacamole bowl, and save any thinner chips for lighter dips.
Queso, a warm cheese dip, is the indulgent option. A smooth queso made with melted cheese, milk or cream, and mild chillies turns a bowl of chips into a comfort-food event. Serve queso warm in a heatproof bowl, and replenish it in small amounts so that it stays warm and smooth rather than cooling into a thick skin. Nacho cheese seasoning chips pair naturally with queso, but plain salted chips are also excellent, because they let the cheese flavour take centre stage. Add toppings for the queso bowl, such as diced tomatoes, sliced spring onions, or pickled jalapeños, on the side, so that guests can customise their servings.
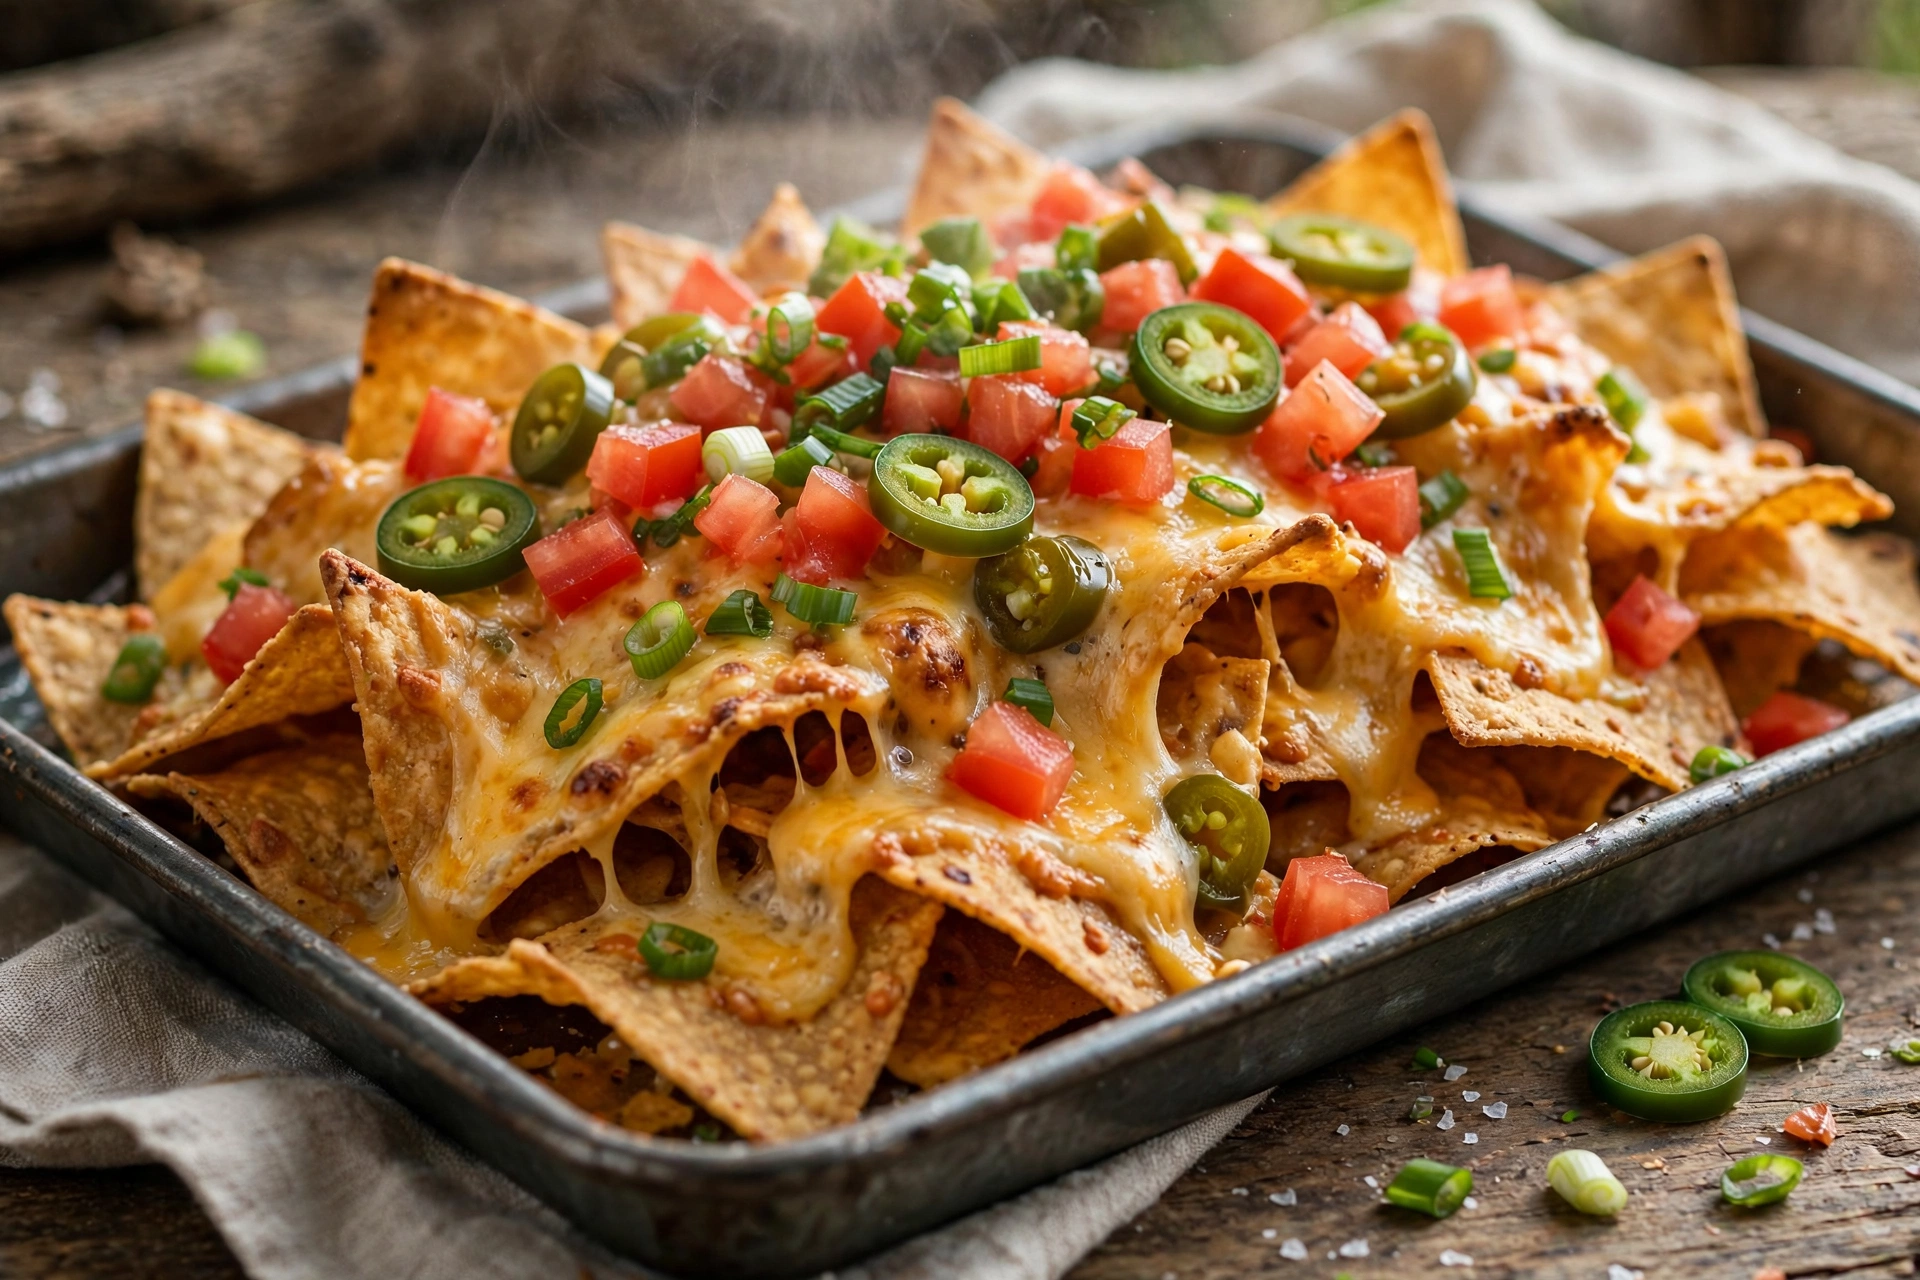
Nachos are the most generous way to serve homemade tortilla chips. Spread a single layer of sturdy fried chips on a large baking tray or ovenproof platter, sprinkle generously with shredded cheese, and add toppings such as cooked seasoned beans, diced tomatoes, sliced olives, pickled jalapeños, and spring onions. Bake at 190 degrees Celsius, or 375 degrees Fahrenheit, for five to eight minutes, until the cheese melts and bubbles. Finish with spoonfuls of salsa, guacamole, and sour cream, plus fresh coriander and a squeeze of lime. The key to great nachos is layering: a single thick pile of chips leads to soggy chips in the middle and bare chips on top, while two thinner layers, each with cheese and toppings, give every chip something delicious. Use the sturdiest chips from the batch for nachos, and serve immediately, because nachos wait for no one.
Soups and salads benefit from tortilla chips in a different way. Crumbled or broken chips add crunch to a bowl of tortilla soup, tomato soup, black bean soup, or a hearty vegetable soup, much like croutons, but with a corn flavour that suits Mexican and Southwestern-style soups particularly well. For salads, cut the tortillas into strips rather than triangles, cook them by the baked method until crisp, and scatter the strips over a taco salad, a Southwestern chopped salad, or a simple green salad with lime dressing. The strips add texture and a savoury, toasted note that elevates even a simple salad. In both cases, add the chips at the last moment before serving, so that they stay crisp against the moisture of the soup or dressing.
For a party spread, think in terms of variety and replenishment. Offer one bowl of plain salted chips, one bowl of a flavoured variation, and two or three dips. Keep extra chips in reserve and refill the bowls in small amounts, rather than putting out the entire batch at once, so that the chips on display always taste fresh. Provide small bowls and spoons for dips, plenty of napkins, and a separate bowl for broken chip pieces, which guests often enjoy as a crunchy topping for dips. A simple garnish, such as lime wedges and fresh coriander sprigs beside the bowls, makes the spread look inviting without adding work.
Storage and Make-Ahead: How Long They Stay Crisp and How to Re-Crisp Them
Homemade tortilla chips taste best on the day they are made, ideally within a few hours of cooking, when the crunch is at its peak. With proper storage, however, they can stay enjoyably crisp for several days, and a quick re-crisping step can revive chips that have softened slightly.

For short-term storage, let the chips cool completely on a wire rack before packing them away. Any residual warmth trapped in a container creates steam, and steam is the fastest route to soft chips. Once completely cool, place the chips in an airtight container or a resealable bag, with a layer of paper towel at the bottom to absorb any trace moisture. Handle the container gently, because homemade chips are more fragile than thick commercial chips. Store the container at room temperature, in a cool, dry place, away from direct sunlight and away from the stove or kettle, where steam and heat can soften them. Do not refrigerate chips, because refrigeration introduces moisture and makes them go soft faster. Under these conditions, fried chips usually stay crisp for two to three days, and baked chips for three to four days, although the exact time depends on humidity, tortilla thickness, and how completely the chips were dried before cooking.
For make-ahead party planning, chips can be made one day ahead with good results, provided they are stored as described above and re-crisped briefly before serving. Make the chips in the afternoon or evening before the event, cool them completely, store them airtight, and re-crisp them on the day. This approach frees up valuable time on the day of the party, when the stove and oven are often busy with other dishes. Do not make chips more than two days ahead for an important occasion, because even well-stored chips gradually lose their brightest crunch after the second day.
To re-crisp softened chips, spread them in a single layer on a baking tray and warm them in an oven preheated to 160 degrees Celsius, or 325 degrees Fahrenheit, for three to five minutes. Watch them closely, because already-cooked chips can go from crisp to dark quickly. Remove the tray when the chips feel firm and sound crisp when tapped, let them cool for two or three minutes on the tray, and taste one before serving. Re-crisping works best for chips that are only slightly soft; chips that have become damp from contact with dip, or that have been stored in a humid environment for many days, may not fully recover, and in that case, crumbling them as a topping for soups, salads, or casseroles is a delicious way to use them rather than discarding them.
Seasoned chips need a little extra care in storage. Sugar-based coatings, such as cinnamon-sugar, can absorb moisture from the air more readily than plain salt, so dessert chips should be stored in the most airtight container available and eaten within one to two days for the best texture. Spiced chips store similarly to plain chips, but strong seasonings can transfer aroma to other foods if stored nearby, so keep flavoured chips in their own sealed container. Lime juice should never be added before storage; squeeze lime over chips only at serving time.
Freezing is not recommended for homemade tortilla chips. Freezing and thawing introduces moisture, damages the crisp starch structure, and usually produces soft, disappointing chips even after re-crisping. If you have a large surplus, a better use is to crumble the chips and store the crumbs in an airtight container for up to a week, for use as a crunchy topping for casseroles, baked pasta, salads, and soups. The crumbs keep their flavour even when they lose their original chip shape, and they add a welcome texture to many dishes.
A final storage tip concerns batch size. It is tempting to make a very large batch at once, but chips are best when they are fresh, and the recipe scales easily. Twelve tortillas make six generous servings, which is enough for a family snack or a small gathering. For a larger party, make a fresh batch closer to serving time rather than storing a huge quantity for days. The process is quick once you know it, and fresh chips are always worth the extra few minutes.
Ingredients
Method
- Stack the 12 corn tortillas and cut each one into 6 equal triangles.
- Spread the wedges in a single layer and leave to dry for 10 to 15 minutes, until dry to the touch.
- For frying, heat oil to a depth of 2 to 3 centimetres in a deep pan until it reaches 175 to 180 degrees Celsius. For baking, preheat the oven to 190 degrees Celsius and line baking trays with baking paper.
- For frying, fry the wedges in single-layer batches for 2 to 3 minutes, turning once or twice, until golden and crisp. For baking, arrange the wedges in a single layer, brush or spray with 2 tablespoons oil, and bake for 10 to 12 minutes, flipping halfway through, until golden and crisp.
- Lift the chips onto a wire rack set over a baking tray, in a single layer.
- Sprinkle immediately with 1 teaspoon flaky salt and any optional seasonings, while the chips are still hot.
- Cool for at least 5 minutes, then serve with lime wedges and dips, or store as described above.
Frequently Asked Questions
Can you use flour tortillas instead of corn tortillas for homemade tortilla chips?
Yes, flour tortillas can be used, but the result is different from classic homemade tortilla chips. Flour tortilla chips are lighter, puffier, and more bread-like, with a milder flavour and a softer crunch. They also tend to bubble and puff during frying, which some people enjoy and others find less suitable for heavy dips
Are baked homemade tortilla chips as crisp as fried chips?
Baked chips can be very crisp, but they are usually slightly lighter and less rich than fried chips. The difference comes from the amount of oil and the way heat reaches the tortilla. Frying surrounds the wedge with hot oil, which drives moisture out quickly and evenly, producing a deep, uniform crunch.
Which oil is best for making homemade tortilla chips?
For frying, a neutral oil with a high smoke point is best, such as sunflower oil, vegetable oil, canola oil, or refined peanut oil. These oils handle frying temperatures of 175 to 180 degrees Celsius without smoking and without adding a strong flavour of their own, so the corn flavour stays front and centre.
Why did the homemade tortilla chips turn out soggy or soft?
Sogginess usually comes from one of four causes: surface moisture before cooking, oil or oven temperature that is too low, crowding, or cooling on a flat surface. If the tortillas were very fresh and damp, the drying step may have been skipped or shortened. If the oil was not hot enough, the wedges absorbed oil before they crisped.
How should you store homemade tortilla chips, and how long do they last?
Let the chips cool completely on a wire rack, then store them in an airtight container or resealable bag at room temperature, in a cool, dry place, with a paper towel at the bottom of the container to absorb trace moisture.
How do you reheat or re-crisp homemade tortilla chips?
Spread the chips in a single layer on a baking tray and warm them in an oven preheated to 160 degrees Celsius, or 325 degrees Fahrenheit, for three to five minutes, watching closely. Remove them when they feel firm and sound crisp when tapped, then let them cool for two or three minutes before serving, because chips crisp further as they cool.
When is the best time to season homemade tortilla chips?
Season homemade tortilla chips immediately after cooking, while they are still hot and just drained or just out of the oven. At that moment, the surface is slightly oily and warm, so salt and ground spices cling evenly instead of falling to the bottom of the bowl.
How should you cut tortillas for homemade tortilla chips, and what shapes work best?
For classic dipping chips, stack the tortillas and cut each one into six equal triangles, like cutting a pizza, using a sharp knife or kitchen scissors. Six wedges from a six-inch tortilla give a good dipping size that is sturdy enough for salsa and guacamole. For larger tortillas, cut into eight wedges for a similar size.
Can you make homemade tortilla chips in an air fryer?
Yes, an air fryer makes excellent homemade tortilla chips, and the method is very similar to baking, with hot circulating air doing the cooking. Cut the tortillas into wedges and dry them briefly, then spray or brush both sides very lightly with oil.
Are homemade tortilla chips gluten-free?
Homemade tortilla chips made from one hundred percent corn tortillas are naturally gluten-free, provided the tortillas themselves are certified gluten-free or labelled as made only from corn, water, and lime, with no wheat ingredients.
Can you make homemade tortilla chips ahead of time for a party?
Yes, homemade tortilla chips can be made a day ahead for a party with excellent results. Cook the chips, cool them completely on a wire rack, and store them in an airtight container at room temperature, with a paper towel inside to absorb moisture.
Can you use stale tortillas for homemade tortilla chips?
Yes, slightly stale tortillas are often ideal for homemade tortilla chips. Tortillas that are a day or two old, or that feel a little dry and firm rather than soft and pliable, have already lost some moisture, which means they crisp faster and more evenly, and absorb less oil. This makes stale tortillas a smart, waste-reducing choice.

Hi, I’m Angela. I cook the way busy people actually cook — simple, tasty food with ingredients you already have. On CookBookBite I share easy recipes, honest kitchen tips, and dishes my family asks for again and again.