

We’ve all been there: three bananas on the counter, going from yellow to spotted to full-on black, silently judging us. Throwing them away feels wrong — wasting food AND wasting potential. Because those ugly, overripe bananas aren’t garbage. They’re banana bread waiting to happen. In fact, the uglier the banana, the better the bread.
This simple banana bread recipe is the simplest I know: one bowl, no mixer, pantry staples, and about 10 minutes of actual work. The result is everything banana bread should be — deeply moist, tender-crumbed, rich with banana flavor, with that signature cracked golden top. It’s the recipe I give to beginning bakers, busy parents, and anyone who just wants really good banana bread without a fuss.
No buttermilk, no sour cream, no obscure ingredients. Just bananas, flour, sugar, eggs, butter, and a few supporting players. Let’s rescue those bananas.
Here’s something most people don’t realize: this simple banana bread recipe is a quick bread, which means it uses chemical leavening (baking soda) instead of yeast. That changes everything about how you handle it. There’s no kneading, no rising, no waiting — just mix and bake. But it also means the rules are different. Overmixing, which you’d never worry about with yeast bread, is the enemy here. Every stir develops gluten, and in a quick bread, too much gluten means tough, rubbery texture instead of tender crumb. That’s why every good banana bread recipe says “mix just until combined” — it’s not being precious, it’s chemistry.
The other thing that makes banana bread special is how it improves with time. Most baked goods are best fresh from the oven, but banana bread actually gets better on day two. The banana flavor deepens and permeates the crumb, the texture settles into perfect moistness, and the whole loaf just tastes more like itself. If you can resist cutting into it on day one (good luck), you’ll be rewarded.
Why You’ll Love This Banana Bread
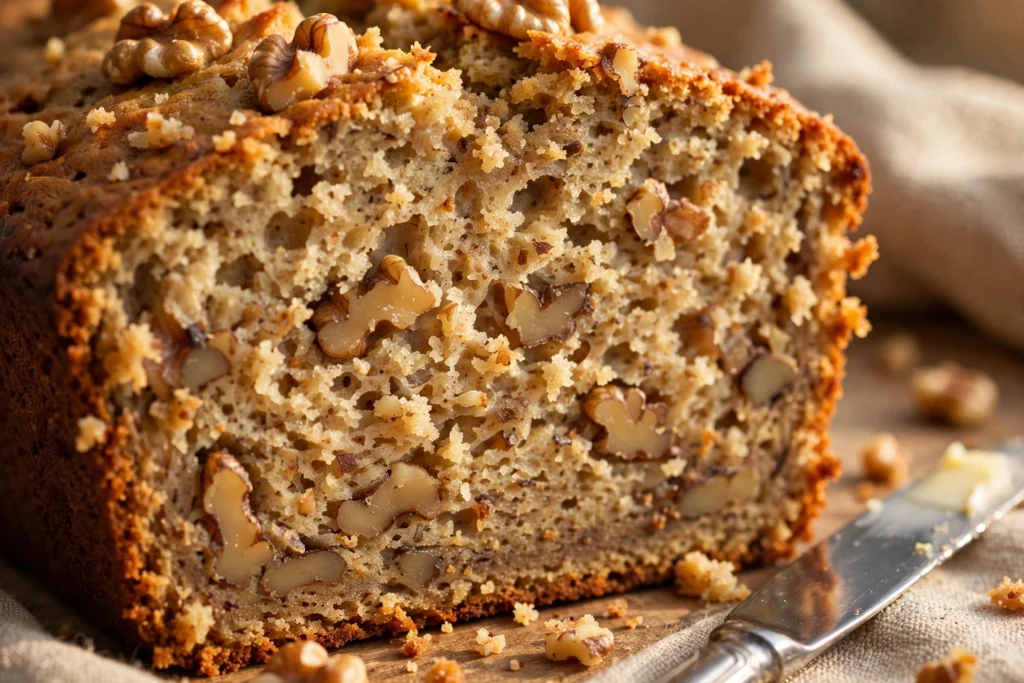
First, it’s genuinely simple. One bowl, one fork, one loaf pan. Mix wet, add dry, bake. If you can stir, you can make this — it’s the ideal first baking project, the recipe that convinces people they can bake. I’ve taught kids to make this. I’ve talked nervous first-timers through it over the phone. It works.
Second, it’s incredibly moist — and stays moist. The ratio of banana to flour is generous (a full 1½ cups of mashed banana), melted butter keeps the crumb tender, and the sugar content helps retain moisture. This isn’t banana bread that’s good for an hour and then dries out. It’s still moist on day three.
Third, it uses up those bananas. Overripe bananas that nobody will eat — the ones you’d feel guilty throwing away — become the star ingredient. It’s kitchen economy at its most delicious. In fact, I now buy extra bananas on purpose, just to let them go black for bread.
Fourth, it’s versatile without being fussy. Add walnuts, chocolate chips, peanut butter swirls, or nothing at all — the base recipe handles it all. Toast it, butter it, eat it plain at midnight standing in front of the fridge. All valid. All delicious.
Fifth, it’s a crowd-pleaser across ages. Toddlers love it, teenagers demolish it, grandparents request it. It’s one of those rare recipes that works for bake sales, breakfast, lunchboxes, and late-night snacks equally well. If you need to bring something somewhere, bring this.
Sixth, it freezes beautifully. Bake two loaves, freeze one (or freeze in slices), and you’ve got homemade banana bread on demand for weeks. It thaws perfectly and toasts like a dream from frozen.
Finally, it’s forgiving. Forgot the vanilla? Still good. Used salted butter? Still good. Bananas not quite black enough? Still good (just slightly less intense). This recipe has wide margins — it’s hard to truly ruin, which makes it perfect for real life.
Ingredients for Simple Banana Bread — And Why Each One Matters
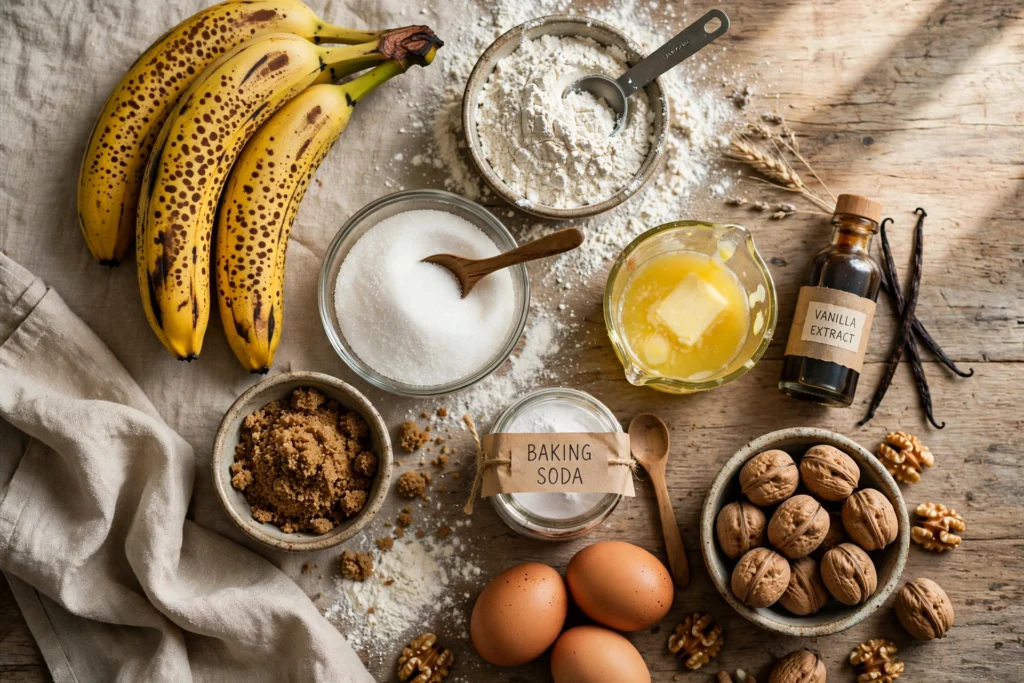
Very ripe bananas (3–4 large, 1½ cups mashed) — The blacker, the better. This isn’t aesthetic preference — it’s chemistry. As bananas ripen, their starches convert to sugars, making them sweeter and more flavorful. A yellow banana is mostly starch; a black banana is mostly sugar. That sugar means more banana flavor, more moisture, and better browning. Deeply spotted at minimum, fully black at best. No ripe bananas and can’t wait? Roast yellow ones (unpeeled) at 300°F for 15–20 minutes until the skins blacken — it jump-starts the sugar conversion and works surprisingly well.
All-purpose flour (2 cups, spooned and leveled) — The structure. How you measure matters enormously: spoon flour into the measuring cup and level it off with a knife. Scooping directly from the bag packs in up to 25% extra flour — that’s the difference between moist and dry, tender and tough. Too much flour is the #1 cause of dry banana bread, and it’s almost always a measuring problem, not a recipe problem. If you have a kitchen scale, 2 cups is 250 grams — weighing eliminates the guesswork entirely.
Granulated sugar (¾ cup) + brown sugar (¼ cup) — The combination gives you sweetness plus caramel depth from the brown sugar’s molasses. All white sugar works fine; all brown sugar is richer and moister. Sugar does more than sweeten — it tenderizes (by interfering with gluten formation), retains moisture, and promotes browning. You can reduce to ¾ cup total if your bananas are extremely ripe, but don’t eliminate it — the texture will suffer.
Melted butter (½ cup / 1 stick) — Melted (not creamed) is the quick-bread method — no creaming butter and sugar, just stir everything together. Melted butter gives a denser, moister crumb than creamed butter (which incorporates air for a cakier texture). For banana bread, dense and moist is exactly what you want. Let the melted butter cool slightly before adding — piping hot butter can cook the eggs.
Eggs (2 large, room temperature) — They bind the batter, add richness, and contribute to structure and browning. Room temperature eggs mix more evenly into the batter (cold eggs can cause the melted butter to re-solidify into little lumps). If you forgot to take them out, put them in warm (not hot) water for 10 minutes.
Vanilla extract (1 teaspoon) — It doesn’t make the bread taste like vanilla — it rounds out and deepens the banana flavor, making it taste more like itself. It’s a background player that makes the star shine brighter. Use real vanilla extract, not imitation, if you can — the flavor difference is noticeable in simple recipes like this.
Baking soda (1 teaspoon) — The leavening. Baking soda reacts with the bananas’ natural acidity to create lift. Make sure it’s fresh — baking soda loses potency after about 6 months once opened. To test: drop a pinch in vinegar. If it fizzes vigorously, it’s good. If it barely bubbles, replace it. Dead baking soda = flat, dense bread.
Salt (½ teaspoon) — Balances the sweetness and enhances all the other flavors. In sweet baking, salt doesn’t make things taste salty — it makes them taste more like themselves. Don’t skip it, even in sweet recipes.
Cinnamon (½ teaspoon, optional) — A warm background note that pairs beautifully with banana. It’s optional but lovely — it adds complexity without being identifiable. If you’re a cinnamon skeptic, try it once; you might be converted.
Chopped walnuts (¾ cup, optional) — The classic add-in. Toasting them first (350°F for 8 minutes) dramatically improves their flavor — raw walnuts can taste slightly bitter, toasted ones are rich and buttery. Or swap for chocolate chips, pecans, or nothing at all. The bread is excellent plain.
Equipment You’ll Need
One large mixing bowl (big enough to hold everything comfortably — you’ll thank yourself when stirring), a fork (for mashing the bananas right in the bowl — fewer dishes), a whisk or wooden spoon for mixing, and a 9×5-inch loaf pan. A parchment paper sling (a strip of parchment laid across the pan with overhang on two sides) makes lifting the finished loaf out effortless and guarantees clean slices. A wire cooling rack for proper cooling. That’s everything — no mixer, no special tools, no excuses.
How to Make Banana Bread (Step by Step)

Step 1 — Prep your pan and oven. Position a rack in the center of the oven and heat to 350°F. Line your 9×5-inch loaf pan with parchment paper, leaving overhang on the two long sides for lifting (the “sling”). Alternatively, grease the pan thoroughly with butter and dust with flour. The parchment sling is superior — it guarantees the loaf releases cleanly and makes slicing easier. While the oven heats, gather and measure all your ingredients (mise en place — it prevents the frantic mid-recipe realization that you’re out of eggs).
Step 2 — Mash the bananas. Peel your overripe bananas directly into the large mixing bowl and mash with a fork until mostly smooth. Leave some small lumps — those little pockets of banana become delicious surprises in the finished bread. You’re aiming for about 1½ cups of mashed banana. If you’re short, one extra banana (even if less ripe) won’t hurt; if you have extra, freeze it for smoothies.
Step 3 — Mix the wet ingredients. To the mashed bananas, add the melted butter (cooled slightly — you should be able to hold your finger in it comfortably), both sugars, eggs, and vanilla. Whisk until well combined and slightly glossy. The mixture should look smooth and homogeneous, with the sugar mostly dissolved. Take a moment to appreciate the smell — banana, vanilla, butter. This is happiness in a bowl.
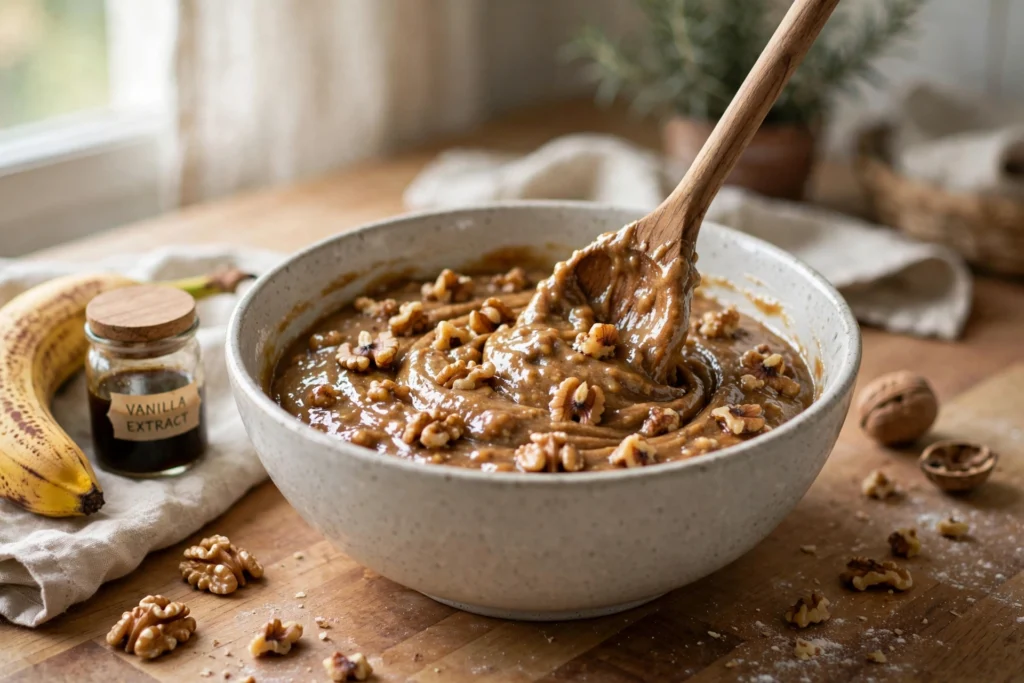
Step 4 — Add the dry ingredients. Sprinkle the flour, baking soda, salt, and cinnamon (if using) evenly over the wet mixture. Using a wooden spoon or spatula, stir gently just until no flour streaks remain. This is the critical moment — stop the instant the flour disappears. The batter will look lumpy and slightly rough. That’s correct. That’s perfect. Every extra stir develops more gluten, and more gluten means tougher bread. I know it’s tempting to keep stirring until smooth. Don’t.
Step 5 — Fold in add-ins. If using walnuts, chocolate chips, or other add-ins, scatter them over the batter and fold gently — three or four folds, that’s it. You’re just distributing them, not mixing further. Over-folding at this stage undoes all your careful gentle mixing.
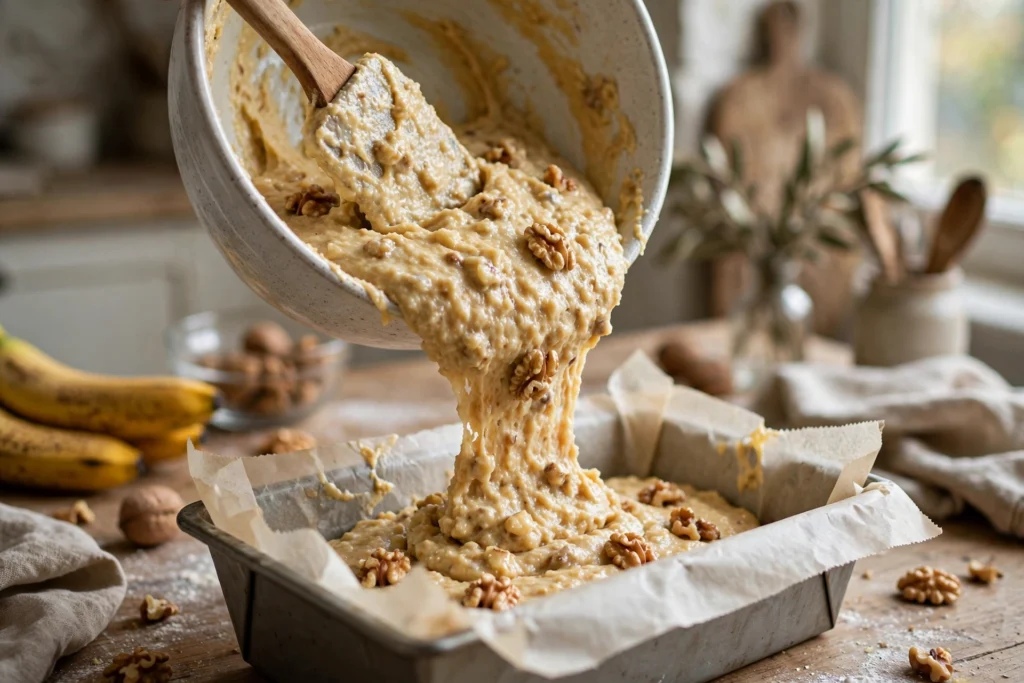
Step 6 — Pan and top. Pour (or scrape — it’s thick) the batter into your prepared loaf pan and smooth the top gently with the spatula. Optional but beautiful: lay 3–4 thin lengthwise banana slices on top of the batter. They caramelize as the bread bakes, creating a stunning presentation that looks like you went to pastry school. A sprinkle of coarse sugar on top also creates a lovely crunchy crust.
Step 7 — Bake. Bake for 55–65 minutes, until deep golden brown and a toothpick inserted in the center comes out with a few moist crumbs clinging to it (not wet batter, not completely clean). Start checking at 50 minutes — ovens vary. If the top is browning too fast after 40 minutes (common — the sugars caramelize quickly), tent loosely with aluminum foil for the remaining time. The bread is done when it springs back lightly when pressed in the center and starts pulling away from the pan edges.
Step 8 — Cool (the hard part). Cool in the pan on a wire rack for 15 minutes — this lets the structure set enough to handle. Then use the parchment sling to lift it out and cool on the rack for at least 30 more minutes before slicing. I know. The smell is incredible. Your kitchen smells like a bakery and you want to cut into it RIGHT NOW. But warm quick bread hasn’t finished setting — the crumb is still fragile and will compress into gumminess if sliced too soon. Thirty minutes. Make coffee. It’ll still be warm when you slice it, and the texture will be perfect.
My Best Tips for Perfect Banana Bread
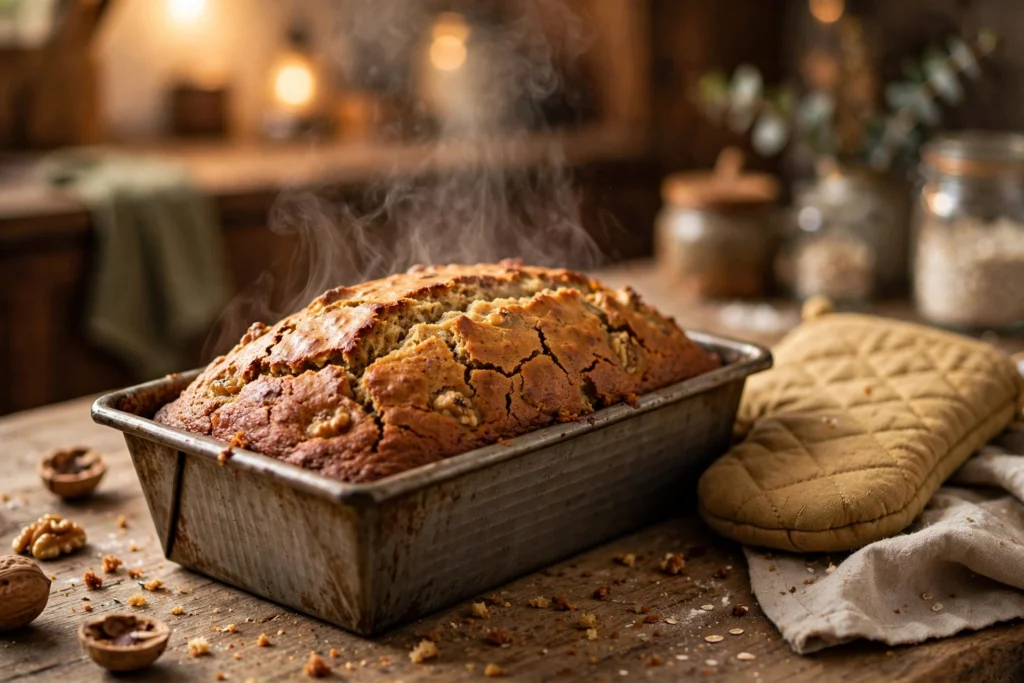
The bananas must be truly ripe. I can’t stress this enough. Yellow bananas make bland, pale bread. You want heavy brown spotting at minimum, fully black and soft at best. The starches have converted to sugars — that’s where the deep banana flavor lives. When people say “my banana bread doesn’t taste very banana-y,” underripe bananas are almost always the cause.
Don’t overmix. Seriously. I say this about every quick bread because it’s the #1 mistake home bakers make. Stir just until the flour disappears — a few lumps are not just okay, they’re desirable. Think of it this way: every stir is a tiny workout for the gluten, and you want your gluten relaxed, not pumped up. Lumpy batter = tender bread. Smooth batter = tough bread.
Measure flour correctly. Spoon flour into the measuring cup and level it off with a straight edge. Scooping directly from the bag compacts the flour and can add 25% more than the recipe intends. That extra flour absorbs moisture meant for tenderness, giving you dry bread. A kitchen scale (250g for 2 cups) eliminates this variable entirely.
Learn the toothpick test. Wet batter clinging to the toothpick = keep baking. A few moist crumbs = perfect, pull it now (it’ll finish from residual heat). Completely clean toothpick = slightly overbaked (still good, just less moist). You’re aiming for that sweet spot of moist crumbs. Check in the center — the edges always cook faster.
Cool before slicing — really. Cutting hot quick bread compresses the delicate crumb into a gummy, dense layer. The bread is still setting as it cools — starches are firming up, moisture is redistributing. Thirty minutes minimum on a wire rack. Use the time productively: make coffee, set the table, take a photo for social media.
Freeze overripe bananas for later. Can’t bake today but your bananas are perfect? Peel them (important — frozen unpeeled bananas are nearly impossible to peel), put in a freezer bag, and freeze. Thaw at room temperature when ready to bake. Frozen-then-thawed bananas are actually IDEAL for banana bread — freezing ruptures the cell walls, making them extra juicy and easy to mash. I keep a “banana bag” in my freezer at all times.
Toast your nuts. If using walnuts or pecans, spread them on a sheet pan and toast at 350°F for 7–8 minutes until fragrant. Raw nuts can taste slightly bitter and waxy; toasted nuts are rich, buttery, and aromatic. It’s 8 minutes that makes a noticeable difference. Let them cool before adding to the batter.
Don’t open the oven door early. Every time you open the oven, the temperature drops 25–50°F. In the first 30 minutes, when the bread is rising and setting its structure, that temperature drop can cause it to fall or bake unevenly. Use the oven light and window to check. Trust the process.
Room temperature ingredients mix better. Cold eggs don’t incorporate as smoothly into the batter. If you forgot to take them out, submerge them in warm (not hot) water for 10 minutes. Same principle applies to any dairy — though this recipe is simple enough that it’s less critical than in cakes.
Line the pan, don’t just grease it. A parchment sling guarantees clean removal and perfect slices. Greasing alone works, but the bread can still stick in spots, especially with the high sugar content. Parchment is insurance — and it makes cleanup trivial.
Adjust for your oven. All ovens lie about their temperature. If your banana bread consistently overbakes or underbakes, get an oven thermometer ($10) and check. You might discover your “350°F” is actually 325°F or 375°F. Knowing your oven’s true temperature is a baking superpower.
Make it your own. Once you’ve made the basic recipe, experiment. The structure is forgiving enough to handle variations — different add-ins, spice blends, even flour swaps. Keep notes on what you try. The best banana bread is the one customized to your taste.
Troubleshooting: When Banana Bread Goes Wrong
Dry, crumbly texture: Too much flour (measure by spooning and leveling, or weigh it), overbaking (check 5 minutes early), or not enough banana (use the full 1½ cups). Also — if you used all white sugar instead of the brown sugar blend, you’ll lose some moisture retention.
Sunk in the middle: Underbaked (the center wasn’t set when you pulled it), too much leavening (measure baking soda carefully — don’t eyeball it), or the oven door was opened too early (causing a temperature crash). Also check: did you use baking POWDER instead of baking SODA? They’re not interchangeable here.
Tough, rubbery texture: Overmixed. This is the classic quick-bread error. Next time, count your stirs — you should be able to count them on two hands. If the batter looks smooth and elastic, you’ve gone too far.
Raw or gummy center: Oven too hot (outside cooked before inside), pan too small (batter too deep), or not baked long enough. Use the correct 9×5 pan size, verify your oven temperature, and trust the toothpick test over the timer.
Bland flavor: Underripe bananas. There’s no fix after baking, but next time, wait for those bananas to go properly black. You can also boost flavor with an extra ½ teaspoon of vanilla or a pinch more cinnamon.
Burnt top, raw inside: Oven runs hot, or the rack is too high. Move to the center rack, tent with foil after 40 minutes, and consider reducing to 325°F if your oven runs hot.
Delicious Variations to Try
Chocolate chip: Swap the walnuts for ¾ cup of chocolate chips (dark, milk, or a mix). The melty chocolate pockets against the banana crumb are irresistible. Toss the chips in a tablespoon of flour before adding — it prevents them from sinking to the bottom.
Peanut butter swirl: Drop ⅓ cup of creamy peanut butter in spoonfuls over the batter in the pan, then swirl with a knife in figure-eight motions. Don’t over-swirl — you want distinct ribbons, not fully incorporated. Banana + peanut butter is an elite combination.
Double banana: Add one extra mashed banana (reduce flour by 2 tablespoons to compensate for the extra moisture). Intensely banana-y, extra moist, slightly denser — for the true banana fanatic.
Cinnamon streusel top: Mix ¼ cup flour, ¼ cup brown sugar, ½ teaspoon cinnamon, and 2 tablespoons of cold butter (cut in with a fork until crumbly). Sprinkle over the batter before baking. Adds a sweet, crunchy lid that’s absolutely divine.
Healthier version: Replace half the butter with plain Greek yogurt, use white whole wheat flour for half the all-purpose, and reduce sugar to ¾ cup total. It’s not health food, but it’s better-for-you and still genuinely delicious — the banana flavor actually shines more with less sugar competing.
Banana muffins: Same batter, standard muffin tin lined with papers, 20–25 minutes at 350°F. Makes 12. Perfect for lunchboxes, grab-and-go breakfasts, and portion control (if you have more willpower than I do).
Cream cheese filled: Beat 8 oz of softened cream cheese with ¼ cup sugar and 1 egg. Pour half the banana batter in the pan, spread the cream cheese mixture over it, then top with remaining batter. Swirl slightly. Bake as directed (may need 5–10 extra minutes). Decadent doesn’t begin to describe it.
Coconut: Add ½ cup of sweetened shredded coconut to the batter and sprinkle more on top before baking. The coconut toasts to golden perfection and adds a tropical note that pairs beautifully with banana.
Espresso: Add 1 tablespoon of instant espresso powder to the dry ingredients. You won’t taste coffee — it just deepens and intensifies the banana and chocolate notes (if using chips). It’s a background magic trick.
Maple-pecan: Replace the granulated sugar with maple sugar (or use maple syrup and reduce butter by 2 tablespoons), swap walnuts for toasted pecans. The maple-banana-pecan combination tastes like autumn in the best possible way.
Storing, Freezing & Making Ahead
Room temperature: 3–4 days, tightly wrapped in plastic wrap or in an airtight container. The flavor actually improves on day 2 as the banana permeates the crumb more fully. Keep it away from heat and sunlight.
Refrigerator: Up to 1 week, well wrapped. Bring to room temperature before eating — or better yet, toast it. Cold banana bread is dense and the flavors are muted; room temp or warmed is transformative.
Freezer: 3 months. Wrap the whole loaf tightly in plastic wrap, then foil (or a freezer bag with air pressed out). For maximum convenience, slice first and wrap individual slices — then you can pull out exactly what you need. Thaw at room temperature, still wrapped.
From frozen: Toast slices directly from frozen — no thawing needed. The toaster handles it perfectly, giving you crispy edges and a warm, soft center. It’s arguably better than fresh.
Best leftover move: Thick slices, toasted in a buttered skillet until golden and caramelized on both sides. The exterior gets crispy and buttery while the interior stays soft. Life-changing. (Banana bread French toast — dipped in egg custard and griddled — is also transcendent.)
Gifting: Banana bread makes an excellent gift. Bake in disposable mini loaf pans, wrap in parchment and twine, add a handwritten tag. It’s personal, delicious, and universally appreciated — better than anything store-bought.
What to Serve with Banana Bread
Salted butter on a warm slice (the simplest perfection — the butter melts into the crumb), cream cheese (the tangy contrast is wonderful), peanut butter (protein-packed breakfast), Nutella (for the kids, or the kid in you), or a drizzle of honey. With coffee or tea for breakfast; with a scoop of vanilla ice cream for dessert (warm bread + cold ice cream = magic). My family’s favorite: toasted thick slices with a smear of cream cheese and sliced fresh strawberries on top. For brunch spreads, serve alongside fresh fruit, yogurt, and granola — the banana bread is always the first thing to disappear. For more baking, try our whole wheat bread, fudgy brownies, and French toast.
The Science of Banana Bread: What’s Actually Happening
Understanding the chemistry makes you a more intuitive baker. Here’s what’s going on inside that loaf pan:
Starch-to-sugar conversion: An unripe banana is about 80% starch. As it ripens, enzymes convert that starch into sugars — first sucrose, then glucose and fructose. By the time a banana is fully black, it’s almost entirely sugar. This matters for three reasons: sugar means more sweetness (obviously), but it also means more moisture (sugars are hygroscopic — they attract and hold water) and better browning (sugars caramelize and participate in Maillard reactions). That’s why black bananas don’t just taste better — they fundamentally change the bread’s texture and color. A loaf made with yellow bananas will be paler, drier, and blander, even with identical measurements.
Baking soda and acidity: Baking soda (sodium bicarbonate) is a base. It needs an acid to react and produce CO2 bubbles for lift. Bananas are mildly acidic (pH around 4.5–5.0 when ripe), and brown sugar adds more acidity via molasses. This acid-base reaction starts the moment wet meets dry — which is why you should get the batter in the oven promptly after mixing. Let it sit too long and the reaction exhausts itself, giving you a dense loaf. This is also why you can’t substitute baking powder 1:1 here — baking powder contains its own acid and would over-leaven, creating a soapy taste and coarse texture.
Gluten and tenderness: Every stir develops gluten — the protein network that gives bread chew. In yeast bread, you want lots of gluten. In quick bread, you want minimal gluten for tenderness. Melted butter (rather than creamed) helps here: fat coats flour particles, physically blocking gluten formation. Sugar does the same by competing for water. That’s why this recipe is so tender despite having 2 cups of flour — the fat and sugar are actively preventing toughness. Overmixing overwhelms these protections, which is why “just until combined” is the most important instruction in the recipe.
The day-two phenomenon: Banana bread genuinely improves overnight, and it’s not your imagination. As the loaf rests, moisture migrates from wetter areas (the banana pockets) to drier areas (the crumb), evening out the texture. Simultaneously, volatile flavor compounds continue to develop and permeate — the banana essence that was concentrated in pockets distributes throughout. Starch retrogradation (the firming process) also tightens the crumb slightly, making it slice cleaner. The result: more uniform moisture, deeper flavor, better texture. If you can wait, do.
Make-Ahead & Batch Strategy
The freezer banana system: Stop throwing away black bananas and stop feeling guilty about it. Instead, build a system: keep a large freezer bag labeled “BANANA BREAD” in your freezer. Every time a banana goes black, peel it (critical — peel before freezing), break it in half, and toss it in the bag. When the bag has 6–8 halves (3–4 whole bananas), you have enough for a loaf. Thaw the needed amount at room temperature for 30 minutes, or microwave in 20-second bursts. The thawed bananas will be liquidy — that’s perfect, don’t drain them. That liquid is pure banana essence.
Double-batch Sundays: This recipe doubles perfectly — just use a very large bowl (the batter gets voluminous). Bake in two loaf pans; rotate them halfway for even browning. One for now, one for the freezer. Or bake one as a loaf and one as 12 muffins (different bake times, so stagger them). Two hours of weekend baking = breakfasts for a month.
The gift loaf pipeline: Banana bread is the ultimate “I was thinking of you” gift — personal, delicious, and inexpensive. Keep disposable mini loaf pans on hand (they’re cheap in bulk). A full recipe makes 3–4 mini loaves. Bake, cool completely, wrap in parchment and twine with a handwritten tag. New neighbors, thank-you gifts, bake sales, “just because” — you’ll never be caught without something wonderful to give.
Mise en place for busy mornings: If you want warm banana bread for a weekend breakfast without the morning fuss, mix the dry ingredients the night before (flour, baking soda, salt, cinnamon, sugar in a covered bowl). In the morning, mash bananas, add wet ingredients to the dry mix, and bake. You’ll go from “I want banana bread” to “it’s in the oven” in under 10 minutes.
Advanced Troubleshooting
White spots on the crust: Undissolved flour or sugar. Make sure you’re stirring just enough to eliminate flour streaks — but no less. If you see white patches after baking, it’s flour that never got hydrated. Next time, make sure your initial mix is thorough (but still gentle).
Wet, gummy streak at the bottom: Too much banana, or bananas that were excessively liquidy (common with frozen-thawed bananas if you added all the liquid plus extra bananas). Stick to 1½ cups measured — don’t eyeball “3–4 bananas” because banana sizes vary enormously. If using very juicy thawed bananas, you can drain off a tablespoon or two of excess liquid.
Bread sticks to the pan despite greasing: The high sugar content makes this bread prone to sticking. Parchment paper is the reliable solution — the sling method described in the recipe works every time. If you must go without parchment, grease AND flour the pan (the flour creates a barrier), and don’t skip the 15-minute cooling period before attempting removal.
Uneven baking — done on edges, raw in middle: Your pan might be too small (batter too deep), or your oven has significant hot spots. Use the correct 9×5 size — an 8×4 pan will overflow and bake unevenly. Rotate the pan 180 degrees at the 30-minute mark for more even results. And always use the center rack.
Final Thoughts
Banana bread is the most forgiving, most rewarding baking project there is. It asks almost nothing — a bowl, some dying bananas, an hour of your time — and gives back so much: a golden, fragrant loaf, a cozy kitchen, breakfast for days, and the quiet satisfaction of transforming waste into wonder.
It’s also a small lesson in seeing potential where others see garbage. Those black, spotty bananas looked like they belonged in the compost. They became the best thing in the kitchen — moist, sweet, deeply flavored bread that nobody would guess started as “ugly” fruit. There’s something quietly beautiful about that transformation, something that applies well beyond baking.
So the next time your bananas go spotty, don’t feel guilty. Don’t throw them away. Feel excited — because banana bread time is the best time, and those black bananas are a gift, not a problem. Preheat the oven. Get out the bowl. Let’s rescue those bananas.
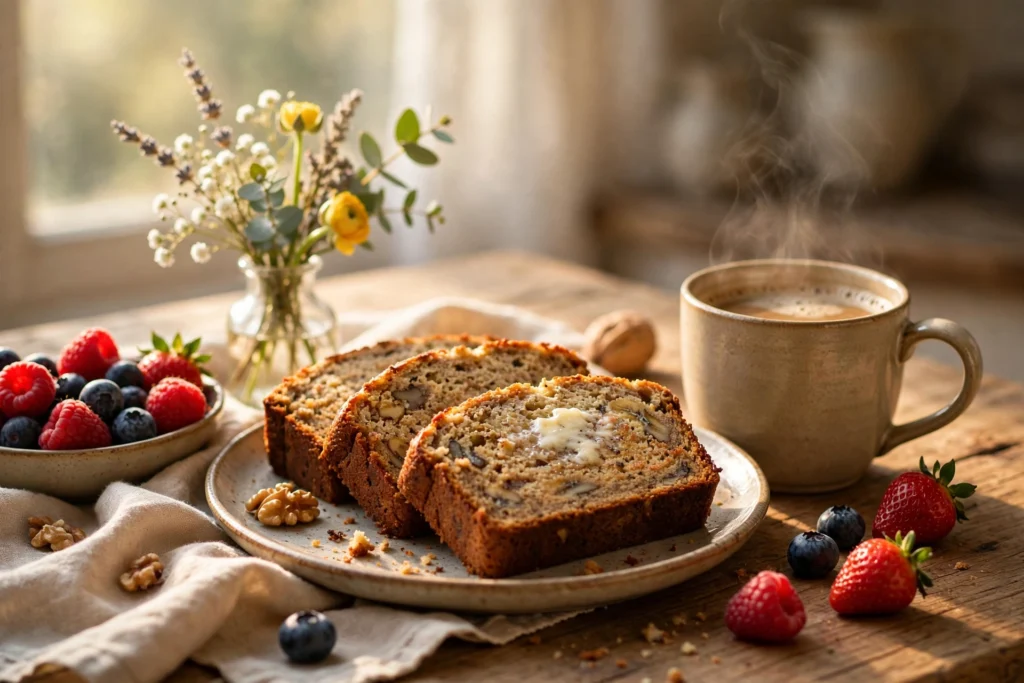
Simple Banana Bread
Ingredients
Equipment
Method
- Heat oven to 350F. Line 9×5 loaf pan with parchment. Mash bananas with fork (leave some lumps).
- Whisk in melted butter, both sugars, eggs, vanilla.
- Sprinkle flour, baking soda, salt, cinnamon over top; stir just until no flour streaks remain.
- Fold in walnuts if using.
- Pour into pan; smooth top. Bake 55-65 min until toothpick shows moist crumbs.
- Cool in pan 15 min, then on rack 30+ min before slicing.
Frequently Asked Questions
Can I use yellow (not overripe) bananas?
You can, but the bread will be less sweet and less flavorful. Quick fix: roast yellow bananas at 300°F for 15–20 minutes until the skins blacken — it concentrates the sugars and mimics overripe flavor.
Why did my banana bread sink in the middle?
Usually underbaking (the center wasn’t set) or too much banana/leavening. Make sure the toothpick shows moist crumbs (not wet batter), measure ingredients accurately, and don’t open the oven door in the first 30 minutes.
Can I reduce the sugar?
Yes — down to ¾ cup total works if your bananas are very ripe. The bananas provide significant sweetness. Don’t eliminate it entirely; sugar affects texture and moisture retention, not just taste.
Why is my banana bread dry?
Too much flour (the #1 cause — spoon and level, don’t scoop), overbaking (check 5 minutes early), or not enough banana. Use the full 1½ cups of mashed banana and pull it when the toothpick shows moist crumbs.
Can I make it without eggs?
Yes — replace each egg with ¼ cup of unsweetened applesauce or a flax egg (1 tablespoon ground flaxseed + 3 tablespoons water, rested 5 minutes). Slightly denser but still good.
Can I make banana bread gluten-free?
A 1:1 gluten-free flour blend works well in this recipe. Add ½ teaspoon of xanthan gum if your blend doesn’t already include it. The high moisture content is forgiving.
How do I store it to keep it moist?
Wrap tightly in plastic wrap or store in an airtight container at room temperature for 3–4 days. Avoid the fridge for short-term storage — cold accelerates staling.
Can I add chocolate chips AND nuts?
Absolutely — use ½ cup of each. Toss chips in a tablespoon of flour first to prevent sinking. This is your bread; live your best life.
Why did the top crack?
Completely normal and desirable! The crack forms as the crust sets before the center finishes rising. A cracked top is the signature look of great banana bread — embrace it.
Can I freeze the batter?
Not recommended — the baking soda activates when mixed with acid and loses power over time. The baked loaf freezes perfectly for 3 months; the raw batter does not.
Can I make this as muffins instead?
Yes — same batter in a lined muffin tin, 20–25 minutes at 350°F. Makes 12 muffins. Check with a toothpick a few minutes early since they bake faster.
My bread is browning too fast but isn’t done inside. Help?
Tent loosely with aluminum foil and continue baking. Your oven may run hot — consider an oven thermometer. Also make sure you’re using the center rack, not the top.

Hi, I’m Angela. I cook the way busy people actually cook — simple, tasty food with ingredients you already have. On CookBookBite I share easy recipes, honest kitchen tips, and dishes my family asks for again and again.
Pingback: Easy Tzatziki Sauce Recipe (10-Minute) – Perfect for Gyros