

This braised short ribs recipe is made for Sunday afternoons. There’s a particular kind of happiness that comes from a Dutch oven quietly bubbling away in a low oven for three hours while the whole house fills with the smell of red wine, beef, and herbs. It’s the smell of patience being rewarded. It’s the smell of a dinner people will talk about.
Braised short ribs are the ultimate low-and-slow triumph: a tough, beefy cut transformed by time into something spoon-tender, wrapped in a glossy, deeply savory sauce that tastes like it took all day (because it did but you barely lifted a finger). This is restaurant food the kind that costs $38 a plate made with one pot and mostly hands-off time.
If you’ve been intimidated by short ribs, don’t be. The technique is simple: sear, build the braising liquid, and let time do the magic. I’ll walk you through every step, including the sauce-finishing trick that separates good short ribs from unforgettable ones.
Also Read : Bechamel Sauce Recipe (Silky, Lump-Free & Foolproof)
Why You’ll Love This Braised Short Ribs Recipe
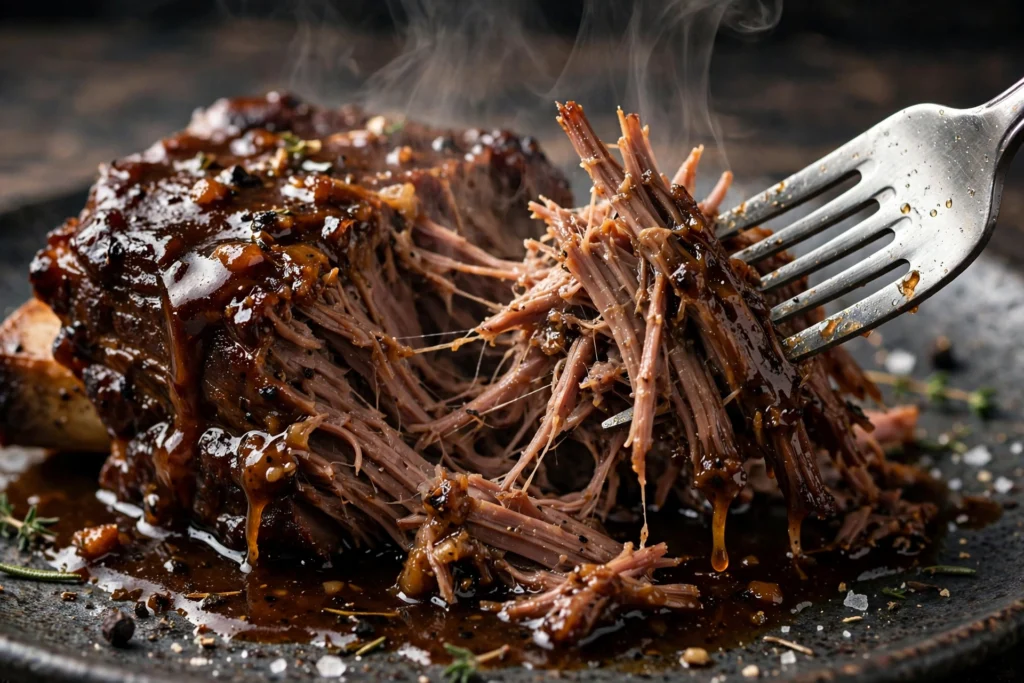
First, the texture is unreal. Three hours of gentle braising melts the connective tissue into gelatin, turning a tough cut into meat so tender it surrenders at the touch of a fork. It’s the kind of tenderness you can’t rush — and can’t fake. No shortcut, no pressure cooker hack, produces quite the same silkiness.
Second, the sauce. Oh, the sauce. Red wine, beef broth, and all those rendered drippings reduce into a glossy, mahogany gravy that’s rich without being heavy. It’s the kind of sauce you want to put on everything — and you will. Mashed potatoes become a vehicle. Bread becomes a mop. You’ll find yourself making extra just for the leftovers.
Third, it’s mostly hands-off. Twenty minutes of active searing and sautéing, then the oven takes over for three hours. It’s the perfect Sunday project — impressive results from minimal effort. Start it after lunch, and dinner essentially makes itself while you do literally anything else.
Finally, it’s a guaranteed showstopper. Serve these to guests and watch the reaction. Short ribs have a “wow” factor that few home-cooked dishes match, and nobody needs to know how easy they were. This is the dish that makes people think you’re a much more serious cook than you are.
Understanding Braising: Why This Technique Works
Braising is one of humanity’s oldest cooking techniques, and it exists for exactly this purpose: transforming tough, collagen-rich cuts into tender, luxurious eating. Understanding the science helps you nail it every time.
Short ribs are loaded with connective tissue — primarily collagen, the protein that makes raw meat tough and chewy. Collagen doesn’t break down at low temperatures; it needs sustained heat above about 160°F (71°C) to begin converting into gelatin. That conversion is slow — it takes hours — but gelatin is the magic ingredient that gives braised meat its silky, spoon-tender texture and gives the sauce its luxurious body.
This is why you can’t rush braising and why higher heat doesn’t help. Cranking the oven to 400°F doesn’t speed up collagen conversion — it just tightens the muscle fibers, squeezing out moisture before the collagen has time to melt. The result is dry, tough meat sitting in thin liquid. Low and slow (325°F) keeps the muscle fibers relaxed while giving collagen the hours it needs. Patience isn’t just a virtue here; it’s the entire technique.
The sear at the beginning serves a different purpose: the Maillard reaction. When meat surfaces hit high heat, amino acids and sugars undergo complex browning reactions that create hundreds of new flavor compounds. That deep brown crust isn’t just color — it’s flavor that dissolves into the braising liquid and becomes the foundation of your sauce. Skip the sear and your sauce will taste flat no matter how long you braise.
Ingredients for Braised Short Ribs Recipe

Beef short ribs (4 lbs, bone-in, English-cut) — Bone-in is essential, not optional. The bones contribute flavor, gelatin (for sauce body), and insulation that helps the meat cook gently. English-cut means thick, individual ribs (as opposed to flanken-style, which are cut thin across the bone). Look for well-marbled ribs with a good meat-to-bone ratio — you’re paying by the pound, and bone is heavy. A good butcher can help you select; ask for ribs with even thickness so they cook uniformly. If bone-in isn’t available, boneless works but reduce braising time by about 30 minutes.
Salt + black pepper — Season aggressively. Large, thick cuts need bold seasoning — significantly more than you think. The salt needs to penetrate deep into the meat, and much of what you apply to the surface stays there. Under-seasoned short ribs taste bland no matter how good the sauce is. Use kosher salt (not fine table salt) for better control and distribution.
Flour (¼ cup, for dredging) — A light coating serves two purposes: it helps develop a deeper brown crust during searing (the starches brown beautifully), and it slightly thickens the braising liquid as it cooks. Shake off the excess thoroughly — too much flour makes the sauce gummy rather than glossy. This is a classic French technique that works.
Neutral oil (3 tablespoons) — For searing. Use something with a high smoke point like avocado oil, grapeseed, or vegetable oil. Don’t use extra-virgin olive oil for the sear — its smoke point is too low and it will burn, adding bitter flavors. Save the good olive oil for finishing.
Yellow onion (1 large, chopped) + carrots (3, chopped) + celery (3 stalks, chopped) — The aromatic base, known in French cooking as mirepoix. Rough chop is fine — these vegetables are getting strained out later, so precision doesn’t matter. They contribute sweetness and depth to the braising liquid during the long cook. Don’t skip or skimp; they’re doing important background work.
Garlic (6 cloves, smashed) — Smashed, not minced. Whole smashed cloves release their flavor slowly over the long braise and melt into the sauce. Minced garlic would burn during the initial sauté and turn bitter. Six cloves sounds like a lot, but the long cooking mellows garlic dramatically.
Tomato paste (3 tablespoons) — Adds depth, color, umami, and a touch of acidity. The key step: cook it until it darkens from bright red to a deep brick color (2–3 minutes). This caramelizes the paste’s natural sugars and cooks off the raw, tinny flavor. Uncooked tomato paste tastes noticeably metallic; properly caramelized, it’s rich and complex.
Dry red wine (2 cups) — Something you’d actually drink — Cabernet Sauvignon, Merlot, or Côtes du Rhône all work beautifully. The wine’s acidity helps tenderize, its tannins add structure to the sauce, and its fruit complements the beef. The old rule “don’t cook with wine you wouldn’t drink” exists for a reason — if it tastes bad in the glass, it won’t improve in the pot. Absolutely do not use “cooking wine” (it’s salted, oxidized, and unpleasant). The alcohol cooks off during braising, leaving only flavor.
Beef broth (3 cups) — Good-quality broth matters here since it becomes your sauce. Homemade is ideal; if using store-bought, choose low-sodium so you control the salt. The combination of wine and broth creates the braising liquid — the wine provides acidity and complexity, the broth provides savory body.
Fresh thyme (6 sprigs) + rosemary (2 sprigs) + bay leaves (2) — The classic braising herb bundle. Tie them together with kitchen twine for easy removal — fishing individual herb stems out of a pot of braising liquid is nobody’s idea of fun. Fresh herbs are worth it here; dried work in a pinch but use half the amount.
Balsamic vinegar (1 tablespoon, for finishing) — A secret weapon. After hours of rich, savory cooking, the sauce needs a bright note to keep it from tasting flat or one-dimensional. The balsamic goes in at the very end, off the heat. It doesn’t make the sauce taste like vinegar it just lifts everything.
Must Read : Juicy Turkey Meatballs Recipe (Never Dry, Always Tender)
Equipment You’ll Need
How to Make This Braised Short Ribs Recipe (Step by Step)
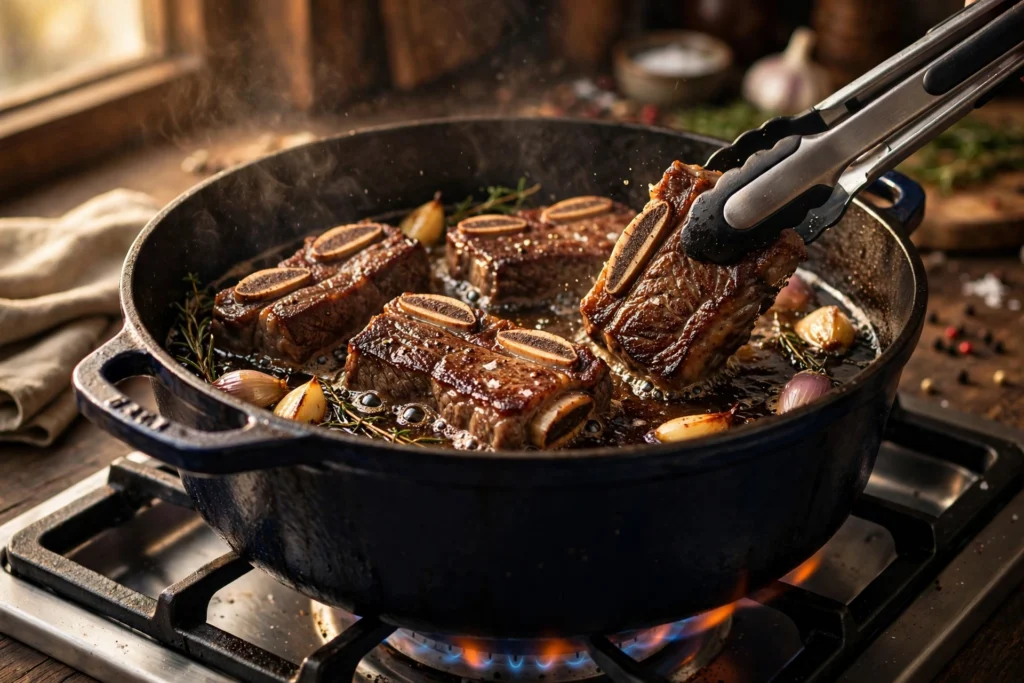


Step 1 — Prep and season. Take the ribs out of the fridge 45 minutes before cooking. Cold meat sears poorly — the surface temperature drops the pan temperature, and you get steaming instead of browning. Pat them very dry with paper towels on all sides. Moisture is the enemy of browning; this step is the most-skipped and most-important in the entire recipe. Season generously on all sides with salt and pepper — more than feels reasonable. Then dredge lightly in flour, shaking off every bit of excess. You want the faintest coating, not a batter.
Step 2 — Sear deeply. Heat the oil in your Dutch oven over medium-high heat until it’s shimmering and just starting to smoke. Sear the ribs in batches — never crowd the pot — on all sides until deeply, darkly browned, 3–4 minutes per side. We’re talking mahogany, not golden. This crust is where an enormous amount of the final flavor comes from; don’t rush it and don’t settle for pale. Remove each batch to a plate as it finishes. If the pot gets too dark or bits start burning (not browning — burning), wipe it out and add fresh oil before continuing.
Step 3 — Build the base. Reduce heat to medium. In the same pot (with all those beautiful browned bits), sauté the onion, carrots, and celery for 8 minutes, stirring occasionally, until softened and starting to brown at the edges. Add the smashed garlic and tomato paste; cook 2–3 minutes, stirring constantly, until the paste darkens to brick-red and smells sweet rather than raw.
Step 4 — Deglaze with wine. Pour in the red wine all at once — it will steam and sizzle dramatically. Using a wooden spoon, scrape up every browned bit from the bottom of the pot. That’s fond, and it’s pure concentrated flavor. Let the wine simmer 3–4 minutes until reduced by about a third. This cooks off the harsh alcohol and concentrates the wine’s fruit.
Step 5 — Braise low and slow. Return the ribs to the pot, arranging them bone-side up (the bones act as a natural rack, keeping the meat slightly elevated). Add the beef broth — the liquid should come about ⅔ of the way up the ribs, not submerge them. This is braising, not boiling; the exposed tops will brown slightly and the concentrated liquid becomes your sauce. Tuck in the herb bundle. Cover with the lid and transfer to a 325°F (165°C) oven. Braise 3–3½ hours, turning the ribs once halfway through, until the meat is fork-tender and starting to pull away from the bone. Start checking at 3 hours — every oven is different.
Step 6 — Finish the sauce. This step separates good short ribs from unforgettable ones. Remove the ribs to a plate and tent with foil. Strain the braising liquid through a fine-mesh strainer into a saucepan, pressing firmly on the solids to extract every drop. Discard the solids. Let the liquid sit for a few minutes, then skim the fat from the surface (or chill it and lift off the solidified fat — even cleaner). Simmer the defatted liquid over medium heat for 10–15 minutes until it reduces and coats the back of a spoon — you’re looking for a glossy, syrupy consistency, not watery. Stir in the balsamic vinegar. Taste and adjust salt. This concentrated sauce is liquid gold.
Step 7 — Serve. You have two options: nestle the ribs back into the sauce in the Dutch oven for a rustic family-style presentation, or plate individually with sauce spooned over. Either way, serve over something that catches the sauce — creamy mashed potatoes (the classic), Parmesan polenta, buttery egg noodles, or crusty bread. Garnish with fresh thyme leaves or chopped parsley for color.
Troubleshooting: Common Short Rib Problems
The meat is tough. It’s undercooked — always. Tough braised meat means the collagen hasn’t finished converting to gelatin. This is the most misunderstood aspect of braising: if it’s tough at 3 hours, it needs MORE time, not less. Give it another 30–45 minutes and check again. Every cut is different; some need 4 hours.
The meat is dry despite being tender. The braising temperature was too high, or the liquid level was too low. High heat tightens muscle fibers and squeezes out moisture faster than collagen can melt. Next time, verify your oven temperature with a thermometer (many ovens run hot) and make sure the liquid comes ⅔ up the ribs.
The sauce is thin and watery. You didn’t reduce it enough in step 6, or you skipped the straining. The reduction is essential — it’s what transforms braising liquid into sauce. Simmer until it coats a spoon. If you’re in a hurry, a cornstarch slurry (1 tablespoon cornstarch whisked with 2 tablespoons cold water, stirred in at the end) works, but reduction tastes better.
The sauce is greasy. You didn’t skim enough fat. Short ribs release a significant amount of fat during braising. Skim thoroughly, or chill the strained liquid the fat solidifies on top and lifts right off. This is actually easier than skimming hot liquid.
The flavor is flat. Three likely causes: under-seasoning (beef needs assertive salt), missing the balsamic finish (that bright note is crucial), or wine that was too cheap/thin. Taste the sauce before serving and adjust — more salt, a squeeze of lemon, or another splash of balsamic can all help.
Read Also: Homemade Chex Mix Recipe (Bold, Buttery & Dangerously Snackable)
My Best Tips for Perfect Short Ribs
Dry meat sears; wet meat steams. Patting the ribs dry is the most-skipped, most-important prep step. Take the time — it’s the difference between a gray, sad exterior and a deep mahogany crust that becomes the foundation of your sauce.
Don’t crowd the sear. Sear in batches with space between ribs. Crowding drops the pan temperature dramatically, and you get steamed gray meat instead of browned. This patience in step 2 pays off in the final sauce — those browned bits are flavor gold.
Low and slow wins. 325°F is the sweet spot — hot enough to break down collagen over hours, gentle enough to keep the meat juicy. Higher heat tightens the meat and squeezes out moisture. Trust the time. If your schedule allows, 300°F for 4 hours is even more forgiving.
The sauce makes the dish. Don’t skip the straining, skimming, and reducing. The difference between thin braising liquid and a glossy, spoon-coating sauce is 15 minutes of simmering — and it’s what makes this taste like a restaurant dish rather than a home stew.
Skim the fat. Short ribs are fatty — that’s what makes them delicious, but the rendered fat needs to be removed from the sauce. Skimming (or the chill-and-lift method) keeps the sauce rich without being greasy.
Better the next day. Like all braises, short ribs improve overnight in the fridge. The flavors meld and deepen, the fat solidifies on top for easy removal, and reheating is gentle. If you can, make them a day ahead — your future self will thank you.
Invest in a Dutch oven. If you cook braises more than twice a year, a good Dutch oven is worth every penny. It lasts decades, goes from stovetop to oven, and the even heat makes every braise better. This is the single most useful pot in my kitchen.
Delicious Variations to Try
Asian-style: Swap the red wine for 1 cup soy sauce + 1 cup mirin (keep the broth). Add 3 star anise, a 2-inch piece of ginger (sliced), and 4 scallions (cut in large pieces). Serve over steamed rice with the reduced sauce. The sweet-salty profile is completely different and wonderful.
Guinness-braised: Replace the red wine with a full stout (Guinness or similar). The malt adds deep, roasty complexity. Incredible with mashed potatoes and a pint of the same stout alongside.
Italian-style: Add a Parmesan rind to the braise (it melts into the sauce adding incredible umami) and serve over creamy polenta with gremolata (lemon zest, garlic, parsley) on top. Bellissimo — the bright gremolata cuts the richness perfectly.
BBQ short ribs: Braise in broth with 2 tablespoons smoked paprika and 1 teaspoon liquid smoke instead of wine. After braising, brush with your favorite BBQ sauce and broil 5 minutes until caramelized. Backyard meets braise.
Mushroom and thyme: Add 1 lb of browned cremini or mixed mushrooms to the braise for an earthy, forest-floor depth. Brown them separately first for the best flavor.
Pressure cooker / Instant Pot: 45 minutes at high pressure + full natural release. Not quite as nuanced as the oven version (less evaporation = less concentrated flavor), but excellent when time is short. Reduce the sauce after as usual.
Boneless version: Use boneless short ribs or chuck cut into large chunks. Reduce braising time by 30 minutes. Slightly less rich (no bone gelatin) but easier to eat and often cheaper.
Storing, Freezing & Make-Ahead
Refrigerator: 4 days in the sauce. In fact, make them ahead on purpose — they’re objectively better on day 2. The overnight rest lets flavors meld, and the chilled fat lifts right off the top for a cleaner sauce.
Freezer: 3 months. Freeze the ribs IN the sauce — the liquid protects the meat from freezer burn and keeps it moist. Use freezer-safe containers or heavy-duty bags with air pressed out. Thaw overnight in the fridge, never on the counter.
Reheating: Gentle is the rule. Oven: 300°F, covered, 30–40 minutes until heated through. Stovetop: low heat, covered, stirring occasionally. Never microwave — the intense, uneven heat toughens the meat and can make the sauce separate.
Make-ahead strategy: This is the ideal dinner-party dish because it’s actually better made ahead. Braise on Saturday, refrigerate overnight, skim the fat easily on Sunday morning, and reheat gently before guests arrive. You’ll be relaxed instead of stressed, and the food will be better.
Leftover ideas: Shredded short rib makes incredible tacos, ragu for pasta (toss with pappardelle), French dip sandwiches (with the sauce as au jus), shepherd’s pie topping, or hash with potatoes and fried eggs for brunch.
Read Must: Perfect Pan-Seared Scallops Recipe (Golden Crust Every Time)
What to Serve with Braised Short Ribs
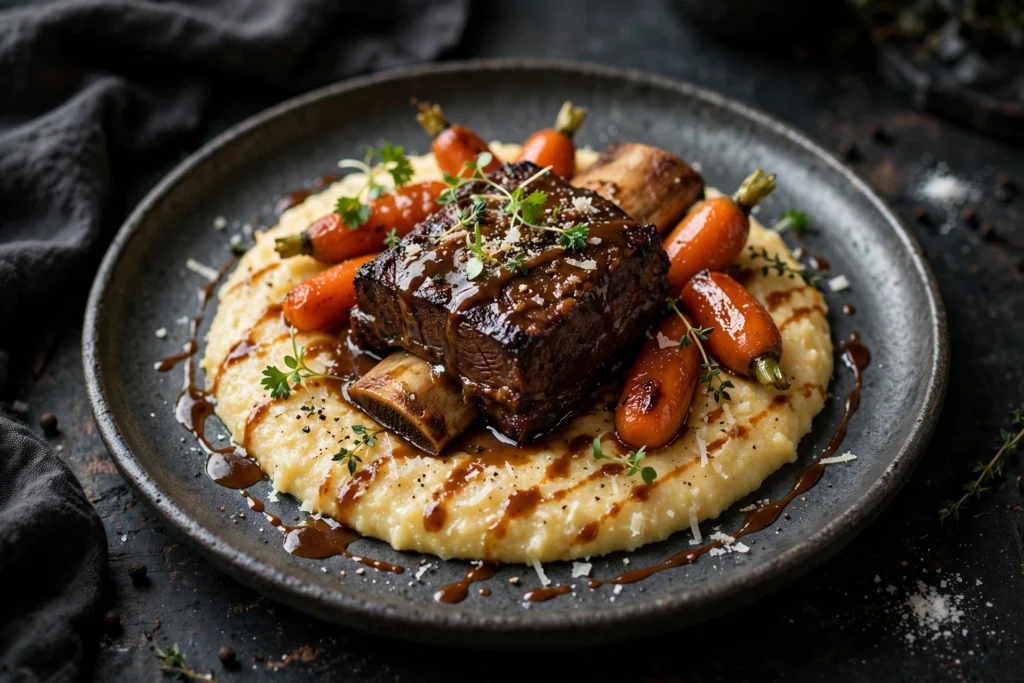
The sauce demands a starch — something to catch every precious drop. Creamy mashed potatoes are the classic pairing (use Yukon Golds, plenty of butter, warm cream). Parmesan polenta is arguably even better — the creamy cornmeal is a perfect canvas. Buttery egg noodles, crusty sourdough bread, or even creamy grits all work beautifully.
For vegetables, you want contrast to the richness: glazed carrots, roasted Brussels sprouts with balsamic, braised greens, or a simple bitter-green salad (arugula, frisée) with sharp vinaigrette to cut through the fat. Avoid heavy, rich sides — the ribs are already decadent.
Wine: pour the same red you cooked with — that’s the traditional rule and it works. A Cabernet, Merlot, or Côtes du Rhône that stood up to braising will stand up to the finished dish. For beer lovers, a brown ale or porter complements the malty depth.
Troubleshooting: Fixing Tough, Dry, or Bland Short Ribs
Braising is forgiving, but it’s a long cook with several places where things can go sideways. Here’s how to diagnose and rescue.
Problem: The ribs are tough after the full braise time. They’re undercooked, not overcooked — this is the most misunderstood thing about braising. Tough braised meat always needs MORE time, not less. The collagen in the connective tissue hasn’t finished converting to gelatin yet. Give them another 45-60 minutes at a gentle simmer and check again. The meat is done when a fork slides in with almost no resistance and the meat barely holds onto the bone. If you’re at 3 hours and they’re still tough, your simmer was too low (below 180°F, collagen barely converts) or the ribs are unusually thick. Patience is the fix; there’s no shortcut. Never crank the heat to speed it up — boiling toughens the exterior while the interior stays tight.
Problem: The meat is dry despite the long braise. Two likely causes. First, the braising liquid didn’t come at least halfway up the ribs — exposed meat steams rather than braises, and steamed meat dries out. The liquid should reach 1/2 to 2/3 up the sides. Second, the pot wasn’t tightly covered, so too much liquid evaporated and the ribs cooked in dry heat for the last hour. Use a tight-fitting lid, or cover with parchment directly on the surface plus the lid. If they’re already dry: shred the meat, discard any truly desiccated bits, and simmer the shredded meat in the strained braising liquid for 15 minutes — it will reabsorb moisture remarkably well. Serve as ragu over pasta rather than as whole ribs.
Problem: The sauce is thin and watery. Too much braising liquid, lid too tight (no evaporation), or not enough reduction at the end. Fix it by removing the ribs (keep them warm, tented with foil), then reducing the braising liquid over medium-high heat until it coats the back of a spoon — typically 10-15 minutes. For a silkier sauce, whisk in 1-2 tablespoons of cold butter at the end (off the heat), which emulsifies and adds gloss. For future batches, remember: you can always add liquid, but reducing takes time. Start with less.
Problem: The sauce is greasy. Short ribs are fatty — that’s what makes them delicious, but the rendered fat needs management. The easiest method: braise a day ahead, refrigerate overnight, and lift off the solidified fat cap in the morning. It’s clean, fast, and removes 90% of the excess fat. Same-day method: tilt the pot and spoon off the surface fat, or drag a slice of bread across the surface (it absorbs fat remarkably well). A fat separator (gravy separator pitcher) also works if you have one. Don’t skip this step — a greasy sauce coats the palate and mutes all the other flavors.
Problem: It tastes flat despite hours of cooking. Under-seasoned at the start, or missing acid at the end. Braising mellows flavors, so you need to season assertively at every stage: salt the ribs generously before searing (at least 1 teaspoon per pound, all sides), salt the vegetables, and taste the braising liquid before it goes in the oven. At the end, the sauce almost always needs a splash of acid — red wine vinegar, balsamic, or lemon juice — to brighten the deep, rich flavors. Taste, add a teaspoon, taste again. The difference between flat and extraordinary is often just acid and salt.
Choosing Short Ribs: What to Buy and What to Avoid
English cut vs. flanken cut: For braising, you want English-cut short ribs — thick, meaty squares cut parallel to the bone, typically 2-3 inches thick with one bone section each. Flanken-cut (thin strips cut across the bones, common in Korean cooking) are for grilling, not braising — they’re too thin and will overcook. If the butcher case only has flanken, ask them to cut English-style; any real butcher will do it.
Bone-in vs. boneless: Bone-in, always, for braising. The bones contribute gelatin and flavor to the sauce, they help the meat hold its shape during the long cook, and they make for a dramatically better presentation. Boneless short ribs are fine for quick cooking methods, but for a 3-hour braise, the bone is doing real work. Plus, the moment when the meat slides off the bone at the table is pure theater.
What to look for: Well-marbled meat with a good cap of fat on top, deep red color, and a fresh (not sour) smell. The ribs should be roughly uniform in size so they cook evenly — ask the butcher to cut them to match if they’re wildly different. About 3/4 pound per person for bone-in (the bone is heavy), so 3 pounds serves four generously.
What to avoid: Gray or brownish meat (old), ribs with very little marbling (they’ll be dry no matter what you do), or packages with excessive liquid in the tray (the meat has been sitting too long). And don’t buy “short ribs” that are actually just beef chuck cut into strips real short ribs come from the plate/brisket area and have the characteristic bone-and-marble structure.
Must Read: Homemade Pasta Recipe (Easy From-Scratch Pasta Dough)
Make-Ahead & Entertaining: The Perfect Dinner Party Main
Here’s the secret that makes short ribs the ultimate dinner party dish: they’re BETTER made ahead. This isn’t a compromise it’s an upgrade.
The two-day method (best results): Day 1: Sear, braise, and cool. Refrigerate the ribs IN their braising liquid overnight. The flavours meld and deepen, the fat rises and solidifies for easy removal, and the meat firms up, making it easier to handle. Day 2: Lift off the fat cap, gently reheat the ribs in the liquid over low heat (about 30 minutes), remove the ribs, reduce the sauce, and serve. Your guests get restaurant-quality short ribs, and you spent the party day doing almost nothing. This is how restaurants do it almost no professional kitchen braises to order.
Timing for guests: Short ribs hold beautifully. Once braised, they can rest in their warm liquid (off heat, covered) for up to an hour with no quality loss. The sauce can be reduced ahead and reheated. This means you can have everything done before guests arrive, then plate in 10 minutes. No stress, no timing anxiety, no one eating at different times.
Scaling for a crowd: The recipe scales linearly double everything for 8, triple for 12. Use a larger pot or two pots; the key constraint is that the ribs should fit in a single layer with the liquid coming halfway up. If they’re stacked, the ones on top steam instead of braise. For very large groups, a deep roasting pan covered tightly with foil works as well as a Dutch oven.
Leftover Magic: What to Do with Extra Short Ribs
If you have leftovers (and you should make extra on purpose), here’s how to turn them into entirely new meals.
Short rib ragu: Shred the meat, simmer in the reduced braising sauce for 15 minutes, and toss with pappardelle or rigatoni. Top with pecorino and gremolata. This is arguably better than the original — the shredded meat distributes through every bite of pasta.
Short rib sandwiches: Pile shredded meat on crusty rolls with the reduced sauce, pickled red onions, and arugula. Press in a panini maker or hot skillet. The crispy bread against the rich meat is incredible.
Short rib tacos: Warm corn tortillas, shredded short rib, diced white onion, cilantro, a squeeze of lime, and a drizzle of the braising sauce. The rich beef against bright toppings is a perfect contrast.
Short rib shepherd’s pie: Shredded meat and sauce on the bottom of a baking dish, topped with mashed potatoes, baked until golden. Ultimate comfort food from leftovers.
Storage: Leftover braised short ribs keep 4 days refrigerated (in their liquid) or 3 months frozen. The ragu version freezes especially well portion into containers for instant luxury pasta nights.
Final Thoughts
There’s something deeply satisfying about braising about taking a tough, humble cut and, with nothing but heat, time, and care, turning it into the most luxurious thing on the table. It’s alchemy. It’s also one of the oldest cooking techniques in the world, and it still works perfectly thousands of years later.
These short ribs are the dish I make when I want to show love through food for holidays, for guests, for Sundays when the house is full and the table is loud. The active work is minimal; the reward is enormous. And that moment when the fork slides through the meat with zero resistance, when the glossy sauce pools around creamy potatoes? That’s the whole point of cooking, right there.
So clear a Sunday afternoon, open a bottle of red (one cup for the pot, the rest for you), and let the oven do the work. Dinner will take care of itself — and your guests will talk about it for weeks.
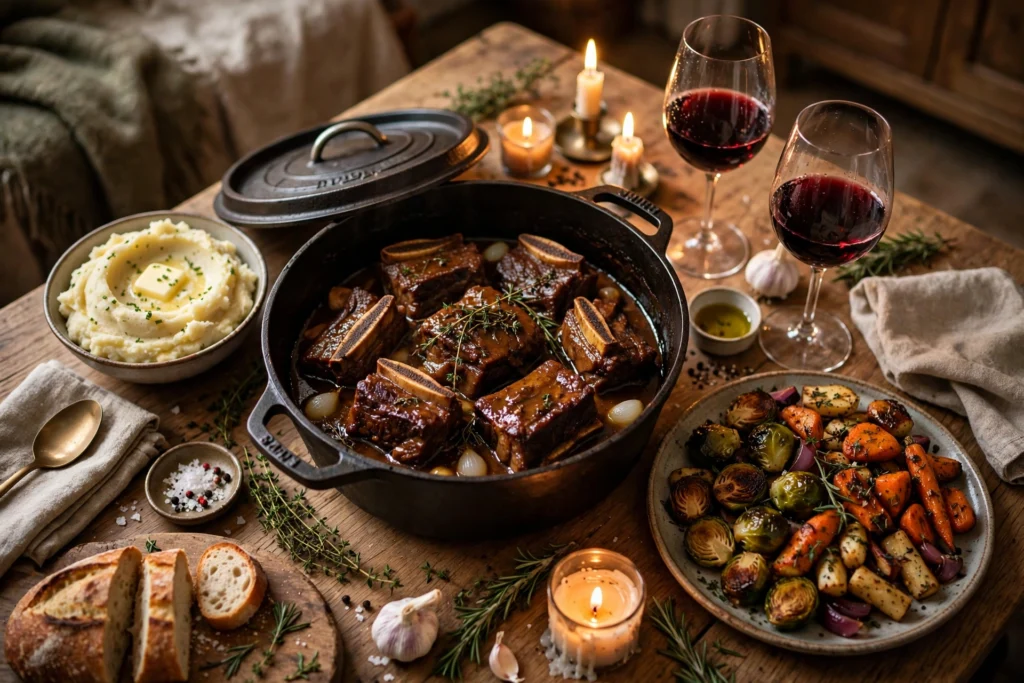
Equipment
What is the best cut of short ribs for braising?
English-cut, bone-in short ribs. The bones contribute flavour and gelatine to the sauce, and the thick, meaty squares hold up to the long braise.
Can I make braised short ribs ahead of time?
Yes! They are better on day two. Braise, cool, and refrigerate in the liquid overnight. Reheat gently at 300F, covered, for 30 to 40 minutes.
How do I know when short ribs are done?
The meat is fork-tender and pulls easily from the bone with gentle pressure. If it resists, they need more time — tough braised meat is always undercooked, not overcooked.
Can I make this in a slow cooker?
Yes, with a tweak. Sear the ribs and saute the vegetables on the stovetop first for flavour, then transfer everything to the slow cooker. Cook on low for 8 to 10 hours until fork-tender. Finish the sauce on the stovetop as directed.
What red wine should I use?
A dry red you would happily drink — Cabernet Sauvignon, Merlot, or Cotes du Rhone. Avoid cooking wine, which is salty and harsh. The wine’s flavour concentrates during the braise, so choose something decent.
Can I use boneless short ribs?
Yes, but bone-in is better for flavour and sauce body. If using boneless, reduce the braising time by 30 minutes and watch closely — they can overcook faster without the bone’s insulation.
Why are my short ribs tough?
They’re undercooked. Tough braised meat means the collagen hasn’t finished converting to gelatine — keep cooking. This is the most misunderstood thing about braising: tough does not mean overcooked, it means not cooked long enough.
How do I thicken the braising sauce?
Strain the liquid, skim the fat, then simmer to reduce until it coats the back of a spoon. The flour dredge on the ribs also helps. For a thicker gravy, whisk in a beurre manie (equal parts soft butter and flour) at the end.
Can I freeze braised short ribs?
Yes, up to 3 months. Freeze the ribs IN the sauce — the liquid protects the meat from freezer burn and keeps it moist. Thaw overnight in the fridge, then reheat gently at 300F, covered.
What should I serve with short ribs?
Creamy mashed potatoes or parmesan polenta to catch the sauce, plus something bright for contrast — glazed carrots, roasted Brussels sprouts, or a simple green salad. Crusty bread is non-negotiable for mopping.
Do I really need to sear the ribs first?
Yes — don’t skip it. Searing triggers the Maillard reaction, creating deep, complex flavours that braising alone cannot produce. Those browned bits (fond) dissolve into the sauce and become its flavour foundation. It’s the difference between good and unforgettable.
How should I store leftovers?
Refrigerate in the sauce for up to 4 days, or freeze for 3 months. The sauce protects the meat and the flavours improve overnight. Reheat gently — never boil — to keep the meat tender.

Hi, I’m Angela. I cook the way busy people actually cook — simple, tasty food with ingredients you already have. On CookBookBite I share easy recipes, honest kitchen tips, and dishes my family asks for again and again.
Pingback: Crispy Potato Skins Recipe- 12 Better Than Restaurant cooks
Pingback: Texas Style Barbecue Sauce Recipe (Smoky & Tangy)