
Listen. Put your ear close to the pan — that fierce, crackling sizzle when a scallop hits properly hot oil is the sound of dinner going right. It’s violent and brief and beautiful, and thirty seconds later you’re looking at something extraordinary: a pan-seared scallop with a deep mahogany crust giving way to a center that’s barely opaque, sweet as lobster, tender as custard.
For years I was terrified of scallops. They felt like restaurant food — expensive, unforgiving, the kind of thing where one wrong move turns a $25 bag of seafood into rubbery disappointment. I’d order them out and pay the markup, convinced the sear was some kind of professional sorcery. Then a fishmonger friend told me the truth over the counter one Saturday morning — and this pan-seared scallops recipe is exactly what he taught me: the sorcery is just three things. Dry scallops. A screaming-hot pan. And leaving them the hell alone.
He was right. The first time I followed his advice, I stood at my stove and watched that crust form like a magic trick — and I’ve never paid restaurant prices for scallops since. This recipe is everything he taught me, plus everything I’ve learned in the hundred batches since. If you’ve ever wanted restaurant pan-seared scallops at home, this is the whole playbook.
Also Read : Creamy Cheeseburger Soup Recipe (All the Flavor, One Pot)
Before we dive in, let’s understand what makes scallops special — and why they’re worth the effort. Sea scallops are the adductor muscle of a bivalve mollusk, the part that opens and closes the shell. It’s a muscle that’s used constantly but gently, which gives it a unique texture: firm enough to sear, tender enough to melt. The flavor is sweet and briny, more delicate than shrimp, richer than most white fish. When seared properly, the exterior undergoes the Maillard reaction — the same browning that makes seared steak and toasted bread delicious — creating hundreds of new flavor compounds. The interior, protected by the quick cooking time, stays silky. That contrast is the entire point of a pan-seared scallops recipe.

Table of Contents
Why You’ll Love This Pan-Seared Scallops Recipe
First, the crust. A properly seared scallop develops a caramelized exterior that’s deeply savory and almost nutty — the Maillard reaction doing its delicious work. Inside, the flesh stays silky and sweet. That contrast, crisp outside and molten inside, is what makes scallops worth every penny.
Second, it’s shockingly fast. Six minutes of cooking. That’s it. The whole dish goes from fridge to plate in under 15 minutes, which makes it both the ultimate date-night flex and a totally reasonable Tuesday dinner.
Third, the technique is simple once you understand it. There’s no complicated sauce, no fussy timing, no special equipment beyond a heavy skillet. Dry, hot, undisturbed — that’s the entire religion. I’ll explain exactly what each of those means below.
Finally, it tastes like luxury without the luxury price tag of dining out. A bag of good dry-packed scallops costs a fraction of what restaurants charge for the same six scallops. Learn this once and you own it forever.
There’s also the impressiveness factor, which is real even if it’s not the primary reason to cook. Serving perfectly seared scallops signals a level of cooking confidence that few home dishes match. Guests assume it’s difficult. You’ll know it’s three rules and six minutes. That gap between perception and reality is one of cooking’s great pleasures — and scallops might be the best example of it.
Buying Guide: How to Choose the Best Scallops
This section could save you more money and disappointment than any other part of this pan-seared scallops recipe. Not all scallops are equal, and the differences matter enormously for searing.
Dry-packed vs. wet-packed: This is the single most important distinction. Dry-packed scallops are shucked and shipped with no additives — what you see is pure scallop. Wet-packed scallops are soaked in a solution of water and sodium tripolyphosphate (STP), which plumps them up and extends shelf life. The problem: that absorbed water (up to 30% of the weight you’re paying for) releases in the pan, creating steam that prevents searing. Wet scallops also have a slightly soapy, chemical taste that careful cooks can detect. Always ask your fishmonger. If the scallops are sitting in milky white liquid, they’re wet. Dry-packed scallops look slightly ivory or beige and feel tacky to the touch, not slippery.
Size designations: Scallops are sold by count per pound. U-10 means under 10 per pound (huge); U-12 means 10-12 per pound; 10/20 and 20/30 are smaller. For searing, bigger is better — U-10 or U-12 gives you a thick scallop that can develop a deep crust while the center stays translucent. Smaller scallops overcook before they brown. Expect to pay $25-35 per pound for good dry-packed U-12s. That sounds expensive until you realize a pound gives you 10-12 scallops, enough for 3-4 as a starter or 2 as a luxurious main.
Fresh vs. frozen: Don’t fear frozen scallops. Most “fresh” scallops at the counter were previously frozen anyway (unless you live near the coast). High-quality frozen dry-packed scallops, thawed properly overnight in the refrigerator, sear beautifully. The key is buying from a reputable source and thawing slowly — never at room temperature, never in the microwave. Look for IQF (individually quick frozen) scallops, which freeze faster and maintain better texture.
What to avoid: Scallops that smell strongly fishy (they should smell sweet and briny, like the ocean), scallops that are pure white (may be over-treated), and any scallops sold at a suspiciously low price. Good scallops cost money; cheap scallops will cost you the dish.
Must Read: Homemade Pasta Recipe (Easy From-Scratch Pasta Dough)
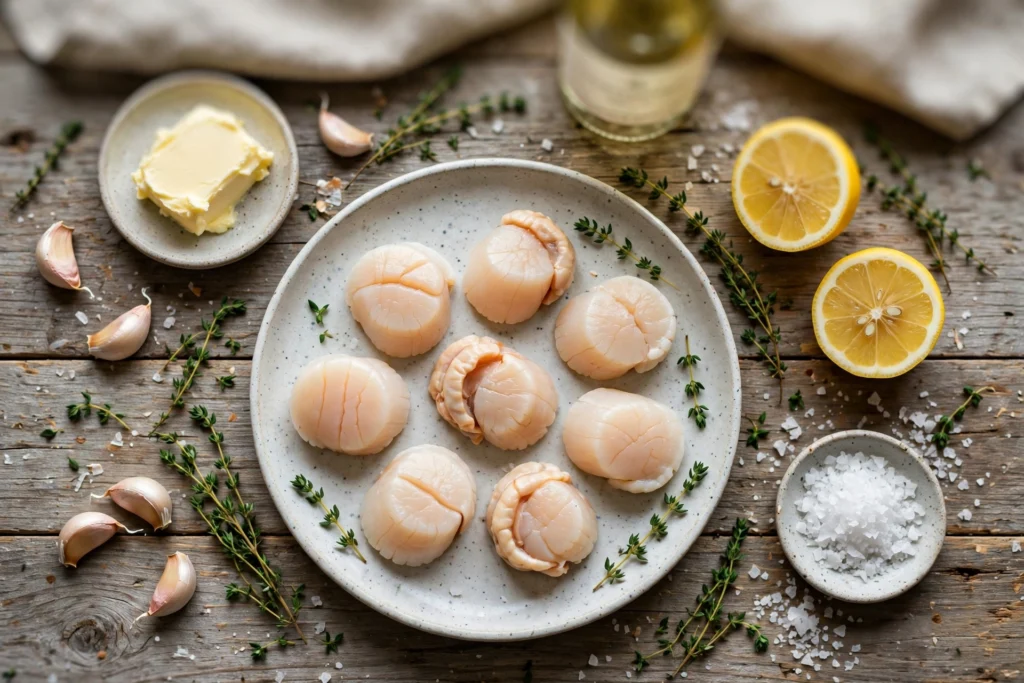
Ingredients for Perfect Pan-Seared Scallops
Short list. Every item earns its place in this pan-seared scallops recipe.
Dry-packed sea scallops (1 lb, about 12–16 large) — This is the single most important choice. “Dry-packed” means no chemical additives or absorbed water — the scallop is just scallop. “Wet-packed” scallops are soaked in phosphates, which makes them plump with water that steams out in the pan, preventing any crust. Ask your fishmonger; if the scallops sit in milky liquid, they’re wet. Dry scallops look slightly ivory and feel tacky. Worth every extra dollar — this is the whole game.
Neutral high-heat oil (2 tbsp) — Avocado oil or grapeseed. You need an oil that won’t smoke itself into bitterness at searing temperature. Save the olive oil for finishing. Avocado oil has a smoke point around 520°F, grapeseed around 420°F — both handle searing heat. Don’t use butter for the initial sear; its milk solids burn at high heat. The two-stage fat approach (oil for searing, butter for basting) gives you the best of both.
Unsalted butter (3 tbsp) — Added after the sear for basting. Butter brings flavor the neutral oil can’t, but it would burn if added at the start. Two-stage fat is the pro move. Unsalted lets you control the seasoning precisely. European-style butter (higher fat content) gives an even richer baste if you want to splurge.
Garlic (2 cloves, smashed) — Smashed, not minced — you want perfume, not bits that burn. It goes in with the butter during basting. Smashing releases the garlic’s aromatic compounds without creating small pieces that would scorch in the hot butter. You’ll remove the cloves before serving or leave them as a rustic garnish.
Fresh thyme (4–5 sprigs) — Thyme’s earthy aroma blooms in hot butter beautifully. Rosemary works too but can dominate; thyme is the classic partner. Fresh is essential — dried thyme doesn’t release its oils the same way in a quick baste. If you don’t have thyme, fresh sage (3-4 leaves) is a wonderful alternative.
Lemon (half, for serving) — A squeeze of acid at the end wakes everything up. Non-negotiable. The brightness cuts through the richness of the butter and highlights the scallop’s natural sweetness. Use a fresh lemon, not bottled juice. Meyer lemons, when in season, add a lovely floral note.
Flaky sea salt and cracked black pepper — Season right before searing. Salt draws moisture, so salting early works against your crust — season the moment before they hit the pan. Flaky salt (like Maldon) gives you better texture and more even distribution than fine salt for this application.
Equipment You’ll Need
A heavy stainless steel or cast iron skillet (12-inch) — nonstick can’t get hot enough for a real crust, so leave it in the cabinet. Tongs, paper towels (lots), and a splatter screen if you have one. That’s the full kit for pan-seared scallops. No thermometer needed; your eyes and ears are the instruments.
The skillet choice deserves emphasis. Stainless steel is the professional choice for scallops because you can see the fond (browned bits) developing, and it responds quickly to heat changes. Cast iron works beautifully too and retains heat exceptionally well — ideal if your stovetop runs cool. What you absolutely cannot use: nonstick. Most nonstick coatings break down above 500°F, and you need that heat for a proper sear. Even if your nonstick claims to be high-heat safe, it won’t give you the same crust because the slick surface prevents the intimate contact needed for Maillard browning. Size: 12 inches minimum. You need space between scallops — crowding is the enemy. If you only have a 10-inch skillet, cook in two batches.
How to Cook Pan-Seared Scallops (Step by Step)
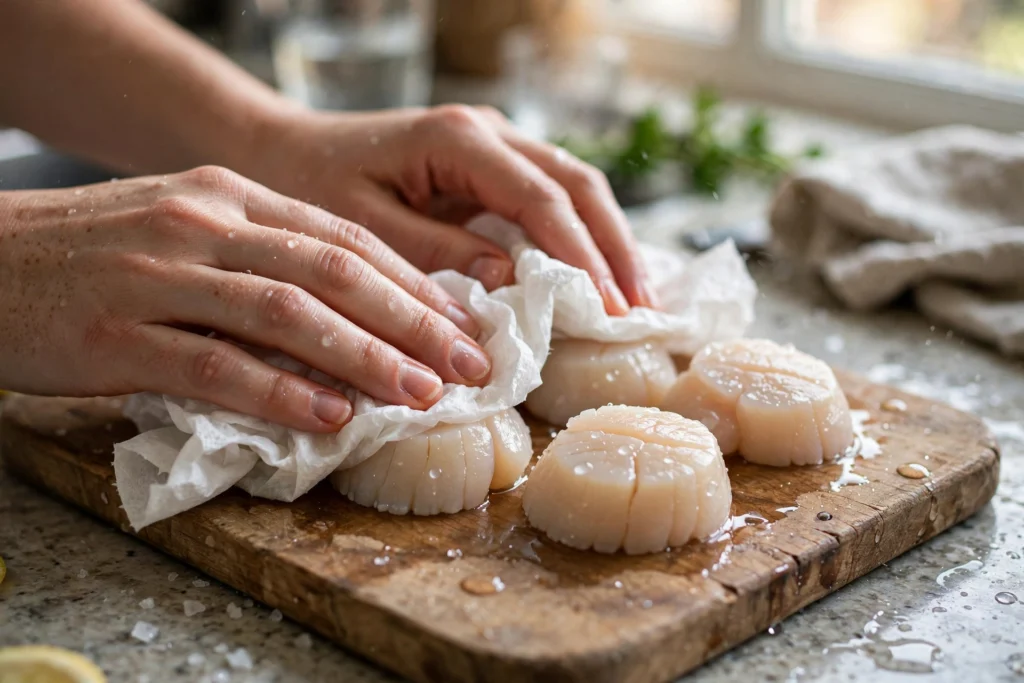
Step 1 — Dry them obsessively. Remove the small side muscle (the little rectangular tag on the side — it pulls off easily and stays chewy if left on). Line a plate with paper towels, arrange the scallops in a single layer, and pat the tops dry with more paper towels. Then pat them again. Then, if you have 15 minutes, leave them uncovered in the fridge on the towels — the cold dry air does extra work. A dry surface is what sears; a wet surface steams. This step IS the recipe. I want to underscore this: if you do everything else right but skip thorough drying, you’ll get steamed, pale scallops. If you dry obsessively but make small errors elsewhere, you’ll still get a decent sear. Drying is the highest-leverage step in the entire process.
Step 2 — Get the pan ripping hot. Set your skillet over high heat for a full 2–3 minutes. Add the oil — it should shimmer immediately and flow like water. If it smokes violently, it’s too hot; pull back for 30 seconds. You’re looking for just-below-smoking. The shimmer test: tilt the pan and watch the oil. When it’s hot enough, the oil moves quickly and almost looks like it’s rippling. If it just sits there, keep heating. This preheating step is not optional — a pan that’s still climbing in temperature when the scallops go in will never recover in time.
Step 3 — Season and place. Season the top sides with salt and pepper. Using tongs, place scallops clockwise starting at 12 o’clock (so you remember which went in first), leaving at least an inch between each. They should sizzle aggressively on contact — if they don’t, your pan wasn’t hot enough. Press each one down gently for 3 seconds to ensure full contact. That initial press is important; scallops can have slightly uneven bottoms, and full contact means even browning. Don’t press again after the initial placement — just that first 3 seconds.
Step 4 — Don’t touch them. This is the hard part. Leave them completely undisturbed for 2 to 2½ minutes. Don’t peek, don’t nudge, don’t rearrange. The crust is forming through sustained contact. You’ll see the opaque cooked portion creeping up the sides — when it’s about a third of the way up, they’re ready to flip. I know the urge to check is powerful. Resist it. Every time you lift a scallop to peek, you break the contact that’s building the crust, and it has to start over. Trust the timing and the visual cue of the opaque creep.
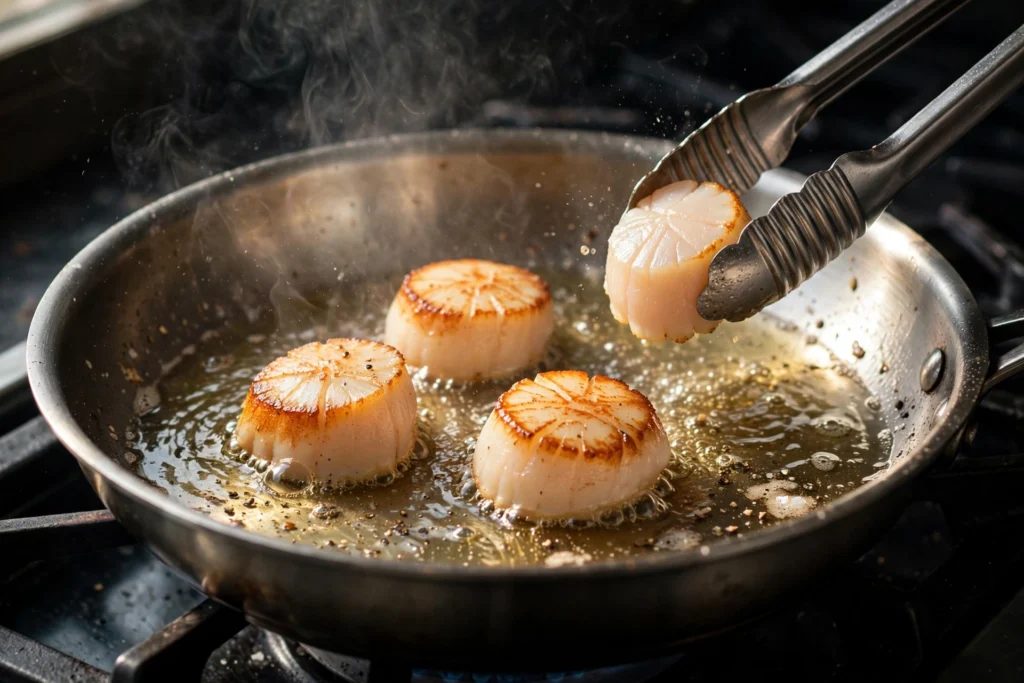
Step 5 — Flip once. Flip each scallop (in the same order you placed them). You should see a deep golden-brown crust — mahogany in spots. Cook 60–90 seconds on the second side. The second side never crusts as deeply; that’s fine, it’s the presentation side that matters. If your crust is pale, your pan wasn’t hot enough or your scallops weren’t dry enough — note it for next time, but serve them anyway; they’ll still taste good. The second side cooks faster because the scallop is already partially heated through.
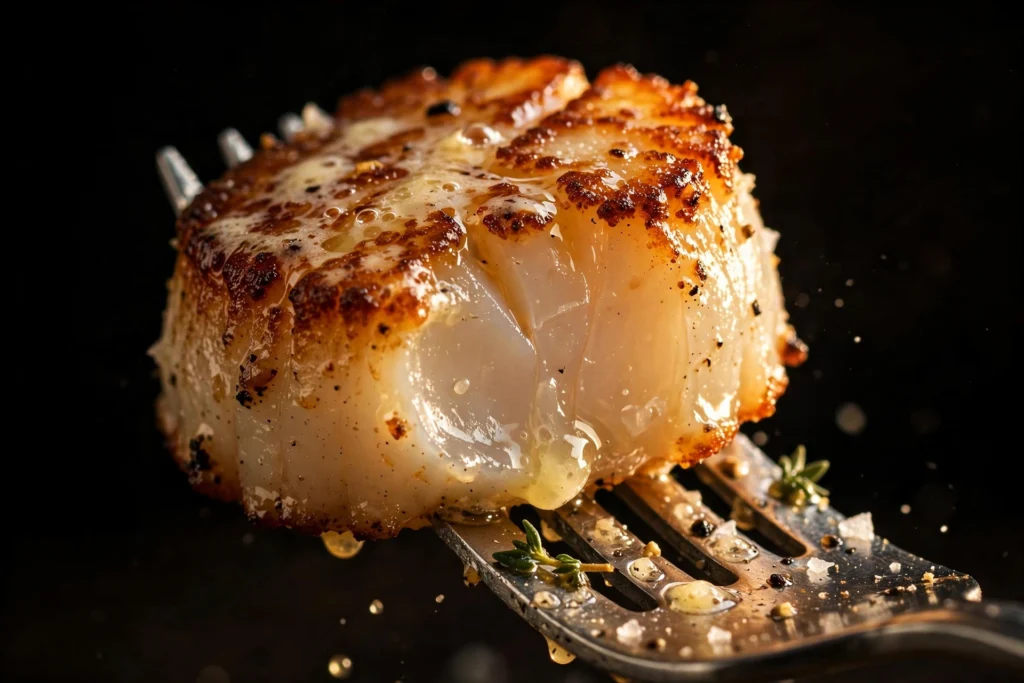
Step 6 — Butter baste. Reduce heat to medium. Add butter, smashed garlic, and thyme. When the butter foams, tilt the pan and spoon the fragrant butter over the scallops for 30 seconds. This finishes the cooking and lacquers them in flavor. The tilting technique: grab the pan handle with an oven mitt, tilt it toward you so the butter pools, then spoon it over each scallop repeatedly. The butter should be foaming but not browning — if it starts to darken too much, pull the pan off the heat for 10 seconds. This basting step adds a layer of flavor that dry-searing alone can’t achieve.
Step 7 — Rest and serve. Transfer to a warm plate, spoon over a little of the garlic-thyme butter, squeeze lemon over everything, and serve immediately. Scallops wait for no one — have your plates and sides ready before you start searing. Warm your serving plates in a low oven (200°F) while you prep — cold plates suck heat from the scallops instantly. The lemon should be squeezed at the table or just before serving; the acid brightens the dish but will start to “cook” the surface if left too long.
Also Read : Creamy Potato Soup Recipe (The Best You’ll Ever Make)
Troubleshooting: When Scallops Go Wrong
No crust, just pale and steamy: The holy trinity failed — scallops weren’t dry enough, pan wasn’t hot enough, or they were wet-packed. There’s no rescue mid-cook; note the cause and fix it next time. You can still serve them — they’ll taste fine, just not transcendent. Crust on one side only: Normal. The second side always browns less. If the first side didn’t brown either, see above. Rubbery texture: Overcooked. Scallops go from perfect to rubber in about 60 seconds. Pull them when the center is barely translucent. Use a timer if you’re unsure. Scallops stuck to the pan: They weren’t ready to release. A proper crust releases naturally; if they’re sticking, give them 30 more seconds. Forcing them tears the crust off. Butter burned during basting: Heat was too high when you added the butter. The pan retains significant heat from searing — reduce to medium or even medium-low before adding butter. Too salty: You seasoned both sides heavily. Season only the top before searing; the bottom gets seasoned from the butter baste.
My Best Tips for Perfect Pan-Seared Scallops
Buy dry-packed or don’t bother. I cannot stress this enough. Wet scallops will never sear properly no matter what you do. If dry-packed aren’t available, it’s better to make something else that night.
The paper towel budget is real. Use more than you think. Then use more. Every drop of surface moisture is the enemy of crust.
Room temperature helps. Cold scallops straight from the fridge drop the pan temperature. Fifteen minutes on the counter while the pan heats is perfect.
Don’t crowd the pan. Cook in two batches rather than cramming. Crowding drops the temperature and creates steam — the two things that kill a sear. The first batch stays warm in a low oven.
The clock method for flipping. Placing scallops clockwise from 12 o’clock means you always know which one went in first. Flip in the same order. Simple, foolproof.
Undercook slightly. Scallops continue cooking off the heat. Pull them when the center is just barely translucent — by the time they reach the table, carryover heat finishes them to silky perfection. Overcooked scallops bounce like rubber balls; properly cooked ones yield like custard.
Prep everything before you start. This is a 6-minute cook with no pauses. Have your butter measured, garlic smashed, thyme ready, lemon cut, plates warmed, and sides finished before the first scallop hits the pan. Mise en place isn’t just for restaurants.
Don’t wash the pan between batches. If cooking in two batches, the fond from the first batch adds flavor to the second. Just add a bit more oil and proceed.
Delicious Variations to Try
Lemon-caper brown butter: After basting, add a tablespoon of capers and let the butter go a shade darker. Briny, nutty, incredible. The capers crisp slightly in the hot butter — textural contrast against the silky scallop.
Bacon-wrapped: Partially cook bacon first (it needs longer than the scallop), then wrap and sear. The smoky-sweet contrast is a steakhouse classic. Secure with toothpicks and remove before serving.
Asian-inspired: Swap thyme for ginger slices, finish with soy sauce, sesame oil, and scallions instead of lemon. The umami-sweet combination is outstanding. Add a pinch of sugar to balance the soy.
Scallop crudo: If your scallops are sushi-grade, slice thin and serve raw with olive oil, lemon, flaky salt, and chives. Completely different experience, equally luxurious. This requires truly sushi-grade scallops — ask your fishmonger specifically.
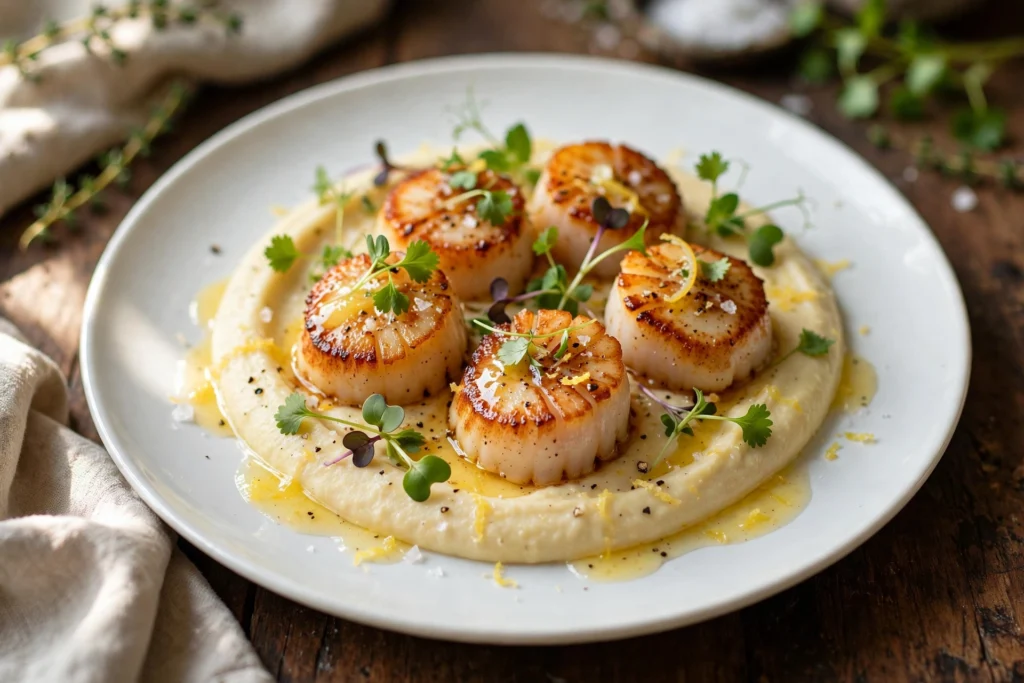
Over risotto or puree: The classic restaurant presentation — seared scallops over saffron risotto, cauliflower puree, or parsnip silk. The creamy base catches all that butter. Make the base first and keep it warm; the scallops take minutes.
With brown butter and sage: Crisp sage leaves in the butter during basting. Earthy, autumnal, wonderful. The sage goes crackly-crisp in about 20 seconds — don’t walk away.
Provençal style: Add diced tomatoes, olives, and herbes de Provence to the butter baste. Serve over white beans. Rustic French bistro vibes.
Storing & Leftovers
Refrigerator: Honestly? Scallops are a cook-and-eat-immediately food. Leftovers keep one day refrigerated but lose their magic — the crust softens and reheating overcooks them. If you must store them, place in an airtight container with as little air as possible.
Reheating (if you must): 30 seconds per side in a hot oiled pan, just to warm through. Accept that it won’t be the same. The microwave is not an option — it will turn them to rubber in seconds.
Freezer: Freeze raw scallops (not cooked) up to 3 months. Thaw overnight in the fridge, then dry obsessively — thawed scallops release extra water, so the paper towel step matters even more. Pat, rest on towels in the fridge for 30 minutes, pat again.
Make-ahead: You can do everything up to the sear in advance — dry the scallops, prep the butter and herbs, warm the plates. But the actual cooking must happen à la minute. Plan your sides to be ready and waiting. If you’re hosting, do the searing as a bit of tableside theater — guests love watching.
Also Read : Authentic Greek Salad Recipe (Horiatiki)
What to Serve with Scallops
Scallops are rich, so pairings should be bright or earthy, never heavy. My favorites: lemon risotto, cauliflower or parsnip puree, wilted spinach with garlic, asparagus, my Greek salad, or a simple arugula salad with lemon vinaigrette. Crusty bread for the butter is mandatory.

For wine, a crisp white is the classic match — Muscadet, unoaked Chardonnay, or Pinot Grigio. The wine should be bright and clean, with enough acidity to cut through the butter. Avoid oaky or buttery wines; they’ll compete rather than complement. If you prefer red, a very light Pinot Noir can work, but white is the safer choice.
As a starter, 3 scallops per person; as a main, 5–6 with a substantial side. For a dinner party, consider serving them as a first course — they’re impressive, quick, and don’t fill people up before the main. The puree or risotto base can be made ahead and reheated, so the only last-minute work is the 6-minute sear.
The Maillard Reaction: What’s Actually Happening in Your Pan
That golden-brown crust on a perfect scallop isn’t just color — it’s flavor being created in real time through one of the most important chemical reactions in all of cooking. Understanding it will make you better at searing everything, not just pan-seared scallops.
The Maillard reaction is a cascade of chemical reactions between amino acids (proteins) and reducing sugars, triggered by high heat (above about 280°F/140°C). It creates hundreds of new flavor compounds — nutty, savory, complex, deeply browned flavors that don’t exist in the raw ingredient. It’s the reason seared meat tastes different from boiled meat, why toast tastes different from bread, why roasted coffee tastes different from green coffee beans. And it’s the entire reason we sear scallops instead of just warming them through.
Why scallops are Maillard superstars: Scallops are unusually well-suited to Maillard browning because they’re high in both protein and natural sugars (particularly glycogen, the energy-storage molecule). That combination means more raw material for the reaction — more flavor created per second of searing. This is also why dry-packed scallops sear so much better than wet-packed: the wet-packed ones have absorbed water (and sometimes phosphates) that must steam off before browning can begin, and by the time the surface is dry enough to brown, the interior is already overcooked.
The moisture barrier: Here’s the critical insight — the Maillard reaction cannot happen in the presence of significant moisture, because water caps the surface temperature at 212°F (100°C), well below the 280°F threshold. This is why patting scallops dry is the single most important prep step. Every drop of surface moisture must evaporate before browning begins, and that evaporation time is time your scallop is cooking without browning — pushing the interior toward overdone before the exterior is done. A wet scallop steams; a dry scallop sears. Same pan, same heat, completely different result.
Heat management: You need the pan hot enough that the scallop’s surface blasts past 280°F immediately on contact, but not so hot that the exterior burns before the interior cooks. For scallops, that sweet spot is a heavy pan (cast iron or stainless steel) preheated until the oil just begins to smoke, then the scallops go in and don’t move for 90 seconds. Moving them interrupts the contact that drives heat transfer. Leaving them alone isn’t laziness — it’s physics.
The fond bonus: Those browned bits stuck to the pan after searing? That’s concentrated Maillard flavor. When you add butter for basting, it dissolves those bits into the butter, creating a pan sauce that’s essentially liquid gold. Don’t wipe the pan clean between searing and basting — that fond is the best part.
Sourcing Smarter: A Guide to Sustainable Scallops
Scallops are one of the more sustainable seafood choices, but not all scallops are equal — how they’re harvested matters enormously for ocean health. Here’s what to know. For the latest ratings, check the Monterey Bay Aquarium Seafood Watch guide.
Diver-caught vs. dredged: The gold standard is diver-caught (hand-harvested by divers), which has zero bycatch and zero habitat damage. It’s also the most expensive and hardest to find. Next best is day-boat scallops, caught on short trips and shucked fresh. Most common are dredged scallops, harvested by dragging a chain bag across the seafloor — this can damage habitat and catches other species as bycatch. If you see “diver scallops” on a menu or at a fish counter, that’s worth paying extra for, both for quality and for environmental reasons.
What to ask your fishmonger: “Are these dry-packed?” (essential for searing), “When were they harvested?” (fresher is better; scallops degrade quickly), “Where are they from?” (US Atlantic sea scallops from Georges Bank and the Mid-Atlantic are among the best-managed fisheries in the world). A good fishmonger will know the answers. If they don’t, that’s information too.
Farmed scallops: An increasingly good option. Farmed scallops (grown on ropes or in lantern nets) have minimal environmental impact — they’re filter feeders that actually clean the water. They’re typically smaller than wild sea scallops but sweet and excellent for quick searing. If you see farmed scallops at a good price, don’t hesitate.
The “wet” problem: Many scallops are treated with sodium tripolyphosphate (STP), which makes them absorb water — increasing their weight (and price per actual scallop) while making them nearly impossible to sear properly. These are the “wet-packed” scallops to avoid. They’ll look unnaturally plump and exude milky liquid in the pan. Dry-packed scallops may cost more per pound, but you’re paying for scallop, not water — and they’ll actually sear.
Seasonality: US Atlantic sea scallops are harvested year-round, but the best quality tends to come in late fall through spring, when the scallops have built up glycogen reserves (which means more sweetness and better browning). If you’re planning a special scallop dinner, winter is prime time.
The Date Night Menu: Building a Full Scallop Dinner
Scallops deserve a proper setting — not just as a dish, but as the centerpiece of a meal designed around them. Here’s a complete date-night menu that lets the scallops shine, with timing so everything lands at once.
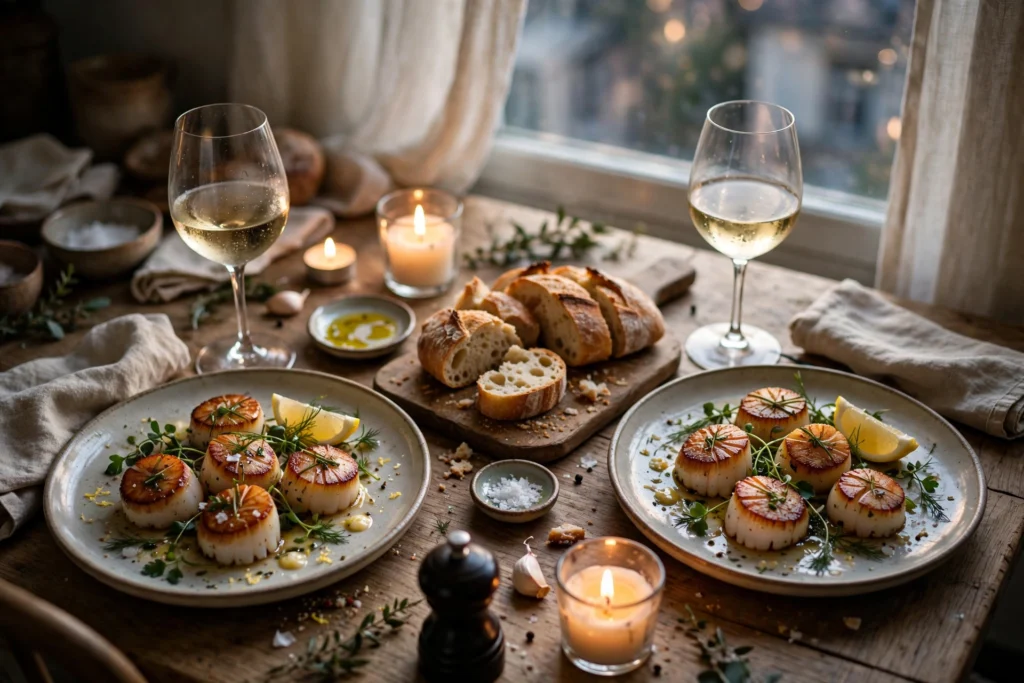
The approach: Scallops cook in 6 minutes and wait for no one, so everything else must be ready before they hit the pan. This menu is designed backward from that constraint: the sides are either make-ahead or hands-off, so the only active cooking in the last 15 minutes is the scallops themselves.
First course — Burrata with prosciutto and figs (10 min, no cooking): Creamy burrata, ribbons of prosciutto, fresh figs (or roasted grapes in winter), a drizzle of aged balsamic, flaky salt, good olive oil. Serve with grilled bread. This is luxurious but effortless, and it sets a tone without filling anyone up. Make it 30 minutes before dinner and let it sit at room temperature — cheese should never be served fridge-cold.
Main — Pan-seared scallops over cauliflower puree (the star): Make the cauliflower puree ahead (it holds beautifully for an hour in a warm pot, or reheat gently). The puree should be silky-smooth — the secret is cooking the cauliflower until completely tender, then blending with butter and a splash of cream while it’s still hot, and passing it through a fine sieve if you’re feeling fancy. Keep it warm. When you’re ready, sear the scallops (6 minutes), plate immediately over the puree, spoon over the garlic-brown-butter from the pan, and finish with microgreens or chives.
Side — Simple arugula salad: Peppery arugula, shaved Parmesan, lemon vinaigrette. That’s it. The salad’s acidity and bite cut through the richness of the scallops and puree. Dress it at the very last second — 30 seconds before serving — so it stays crisp.
Wine: A white Burgundy (Chardonnay) is the classic pairing — the wine’s subtle oak and acidity mirror the brown butter beautifully. More budget-friendly: an unoaked Chablis, a white Bordeaux, or a good Muscadet. The rule is crisp, mineral, not too fruity — you want the wine to frame the scallops, not compete with them. If you’d rather open the evening with a cocktail, a Paloma is a bright, citrusy way to start.
Dessert — Keep it simple: After this meal, nobody wants a heavy dessert. Good dark chocolate and fresh raspberries. Or vanilla ice cream with olive oil and flaky salt (trust me). Or just espresso. Or a slice of banana bread with that espresso. The meal is the dessert — end clean.
Timeline: T-60: make cauliflower puree, prep salad (don’t dress). T-30: assemble first course, open wine. T-15: eat first course leisurely. T-5: heat the skillet, pat scallops dry. T-0: sear scallops (6 min), plate, serve immediately. The whole evening feels effortless because the only stressful 6 minutes are the ones where you’re doing the fun part.
What Goes Wrong: The Five Searing Mistakes Everyone Makes
I’ve watched a lot of people sear scallops, and the same five mistakes come up again and again. Here’s each one, why it happens, and exactly how to fix it.
Mistake 1: The pan isn’t hot enough. This is the number one killer of a good sear. People get nervous about high heat and use medium, or they don’t preheat long enough. The result: scallops that steam in their own moisture and turn rubbery without ever browning. Fix: preheat your heaviest skillet over high heat for a full 3-4 minutes, then add oil and wait until it shimmers and just barely begins to smoke. That smoke point is your signal — it means the pan is hot enough for the Maillard reaction to fire immediately on contact.
Mistake 2: Crowding the pan. Putting too many scallops in at once drops the pan temperature dramatically — each cold scallop is a heat sink. The pan can’t recover fast enough, so instead of searing, everything steams. Fix: sear in batches with at least an inch of space between scallops. For a standard 12-inch skillet, that’s 6-8 large scallops max per batch. Yes, it takes two batches. Yes, it’s worth it. Keep the first batch warm on a plate tented with foil while the second sears.
Mistake 3: Moving them too soon. The urge to peek, nudge, or reposition is almost irresistible — but every time you move a scallop, you break the contact that drives heat transfer and interrupt the crust formation. Fix: place them, then walk away (mentally). Set a timer for 90 seconds and don’t touch them until it goes off. When you flip, they should release easily; if they’re sticking, they’re not ready — give them 15 more seconds.
Mistake 4: Using the wrong fat. Butter alone burns at searing temperature (milk solids scorch around 350°F). Olive oil has too low a smoke point for a proper sear. Fix: start with a high-smoke-point neutral oil (avocado, grapeseed, or refined — not extra-virgin — olive oil), then add butter only after the flip, when the pan is slightly cooler and the butter becomes a basting medium rather than a searing medium. Two-stage fat is the professional approach.
Mistake 5: Overcooking by 30 seconds. Scallops go from perfect to rubbery in under a minute. The difference between translucent-opaque (perfect) and fully opaque (overdone) is about 30 seconds of extra heat. Fix: pull them when the center is still slightly translucent — carryover heat will finish the job as they rest. If you cut one open and it’s fully white all the way through with no translucency, it went 30 seconds too long. Next time, trust the timer: 90 seconds first side, 60 seconds second side, then off the heat immediately.
Read Must : Simple Banana Bread Recipe (Moist, Tender & One Bowl)
Final Thoughts
Here’s what I love most about this pan-seared scallops recipe: it’s a magic trick you get to keep. The first time that crust forms — deep golden, crackling, smelling like the best restaurant in town — you’ll feel like you’ve unlocked a secret level of cooking. And in a way, you have. Most home cooks never attempt scallops. You just did.
But the deeper lesson is the one my fishmonger friend gave me that Saturday: great cooking is rarely about complicated technique. It’s about understanding the one or two things that actually matter — dry surface, hot pan, patience — and executing them without compromise. Scallops just happen to teach that lesson deliciously.
So buy the good scallops. Heat the pan until it shimmers. And listen for that sizzle. Pan-seared scallops this good are ready in fifteen minutes.
Perfect Pan-Seared Scallops with Garlic Butter
Ingredients
Equipment
Method
- Pat the scallops extremely dry with paper towels — twice. For the very best crust, rest them uncovered in the fridge for 15 minutes if time allows.
- Heat a heavy skillet over high heat for 2–3 minutes. Add the oil; it should shimmer immediately.
- Season the scallops with flaky salt and cracked pepper. Using tongs, place them in the pan with space between each one.
- Sear undisturbed for 2–2½ minutes, until a deep golden crust forms.
- Flip once and cook for 60–90 seconds on the second side.
- Reduce the heat to medium, add the butter, garlic and thyme, and baste the scallops with the foaming butter for about 30 seconds.
- Transfer to warm plates, spoon over the garlic-thyme butter, squeeze over the lemon and serve immediately.
Notes
Frequently Asked Questions
Why won’t my scallops get a brown crust?
The usual culprits are surface moisture, a pan that isn’t hot enough, or wet-packed scallops. Pat the scallops very dry with paper towels, heat the pan until the oil shimmers, and always buy dry-packed scallops — the phosphate solution in wet-packed ones makes browning almost impossible.
What’s the difference between dry-packed and wet-packed scallops?
Dry-packed scallops are shucked and shipped with nothing added, while wet-packed scallops are soaked in a phosphate solution that plumps them with water. That absorbed water steams in the pan instead of searing, so always ask your fishmonger for dry-packed.
How do I know when scallops are done?
Watch the sides: they’ll turn opaque about a third of the way up after 2–2½ minutes on the first side. Flip once, cook 60–90 seconds more, and pull them when the centre is just barely translucent — total cooking time is only 3–4 minutes.
Can I use frozen scallops for this scallops recipe?
Absolutely — this scallops recipe works beautifully with frozen scallops, and most ‘fresh’ scallops at the fish counter were previously frozen anyway. Thaw them overnight in the fridge, then pat them extremely dry with paper towels before searing, as frozen scallops release extra moisture. Never thaw them in the microwave, which ruins their delicate texture.
Do I really need to remove the side muscle?
Yes — that small, tough rectangular tag on the side of each scallop stays chewy no matter how perfectly you sear the rest. It pulls off easily with your fingers; just pinch and tug. If you buy diver-caught scallops, the muscle is often already removed.
What’s the best pan for searing scallops?
A heavy stainless steel or cast iron skillet is ideal for this scallops recipe because both hold fierce, even heat. Avoid non-stick pans — most can’t safely reach the high temperatures needed for a proper golden crust. Stainless steel also gives you the flavourful fond that makes the garlic butter so good.
How do I make this scallops recipe dairy-free?
Simply replace the butter with 2 extra tablespoons of avocado oil or a good dairy-free butter alternative for the basting step. You’ll still get a gorgeous crust, though you’ll miss a little of the nutty richness. A generous squeeze of lemon at the end becomes even more important for brightness.
How many scallops should I serve per person?
Plan on 3–4 large sea scallops per person as a starter, or 5–6 as a main course with a substantial side like cauliflower puree or risotto. For this scallops recipe, 1 lb (about 12–16 large scallops) comfortably serves four as a starter.
What can I prepare ahead of time?
You can do everything except the actual searing in advance: pat the scallops dry, remove the side muscles, smash the garlic, pick the thyme sprigs and warm your serving plates. The sear itself takes only six minutes and waits for no one, so have every ingredient within arm’s reach before the pan gets hot.
Which wine pairs best with pan-seared scallops?
A crisp, mineral white is the classic match — Muscadet, Pinot Grigio or an unoaked Chardonnay all flatter the sweet scallops and rich garlic butter. Avoid big oaky wines, which overwhelm their delicate flavour. If you’d rather skip wine, sparkling water with citrus and a squeeze of lemon does the job nicely.
Why did my garlic butter burn during basting?
The pan was still too hot from searing — it retains significant heat, so reduce to medium and let it cool for 30 seconds before adding the butter. If the butter foams violently and darkens within seconds, pull the pan off the heat briefly. A little nutty browning is delicious; black and bitter means it went too far.
Hi, I’m Angela. I cook the way busy people actually cook — simple, tasty food with ingredients you already have. On CookBookBite I share easy recipes, honest kitchen tips, and dishes my family asks for again and again.
Pingback: Homemade Chex Mix Recipe – Bold & Buttery Snack