
Here’s a travel truth nobody talks about: the difference between a good trip and a great trip is snacks. I’m serious. Every miserable travel experience I’ve had — the delayed flight, the endless highway stretch, the hangry meltdown at 30,000 feet — was made worse by bad snack options. And every great one had good snacks within arm’s reach.
Airport snacks cost a fortune and taste like cardboard. Gas station options are a sugar crash waiting to happen. The solution? Make your own travel trail mix before you leave. Fifteen minutes, one sheet pan, and you have bags of crunchy, sweet-salty, energy-sustaining goodness that beats anything you’ll find in Terminal C.
Also Read: Chimichurri Sauce Recipe (Bright, Bold & 10 Minutes)
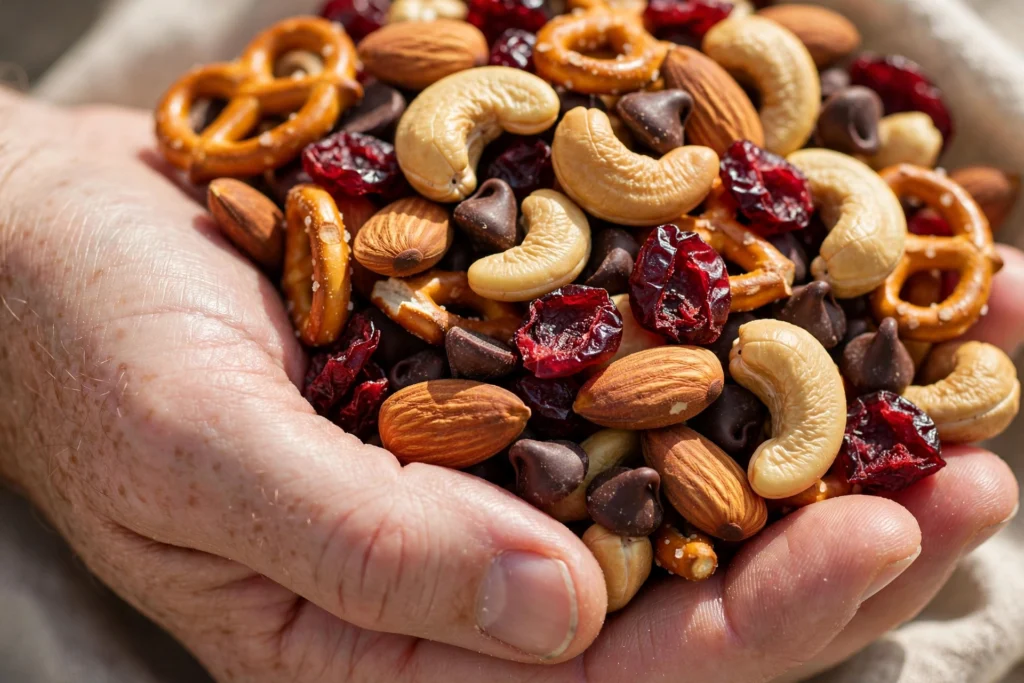
This isn’t just a random handful of nuts — it’s an engineered travel mix: protein and healthy fats for sustained energy, dried fruit for quick fuel, a little chocolate for morale, and seasoned roasted nuts for the savory crunch that makes it addictive. Pack it in portion bags and you’re travel-ready.

Why You’ll Love This Travel Trail Mix
First, it beats every travel snack option. Cheaper than airport prices, healthier than gas station fare, tastier than both. You’ll wonder why you ever paid $8 for a sad bag of pretzels.
Second, it’s built for sustained energy. The protein-fat-fiber combo keeps you full and steady — no sugar spike, no crash, no desperate search for the nearest food court.
Third, it’s endlessly customizable. Nut allergies? Go seed-based. Feeding kids? More chocolate, less spice. The base formula adapts to every traveler in your crew.
Finally, it keeps forever (practically). Weeks at room temperature, months if you’re careful. Make a big batch and you’re set for multiple trips — or just really good desk snacking.
The Travel Snack Problem (and Why Trail Mix Solves It)
Let’s talk about why travel snacking goes wrong. When you’re traveling, your body is under stress — disrupted sleep, irregular meals, dehydration from cabin air, hours of sitting. Your blood sugar swings more dramatically, your patience runs thinner, and your decision-making gets worse. This is the worst possible state in which to be choosing food.
Airports and gas stations exploit this. The options are engineered for shelf life and profit margins, not for your wellbeing: refined carbs, excessive sugar, industrial oils, and salt levels designed to make you thirsty enough to buy a $5 water. A typical airport snack — say, a bag of candy and a soda — spikes your blood sugar, crashes it an hour later, and leaves you feeling worse than before.
Trail mix works because it’s the opposite formula: protein and fat for slow, sustained energy; fiber to keep you full; a little sugar from dried fruit for quick fuel when you need it; and enough flavor complexity to actually satisfy you. It’s not health food theater — it’s functional fuel that happens to taste great.
The economics are compelling too. This recipe makes about 16 servings for roughly the cost of two airport snack bags. And it tastes better. There’s really no contest.
Ingredients for Travel Trail Mix
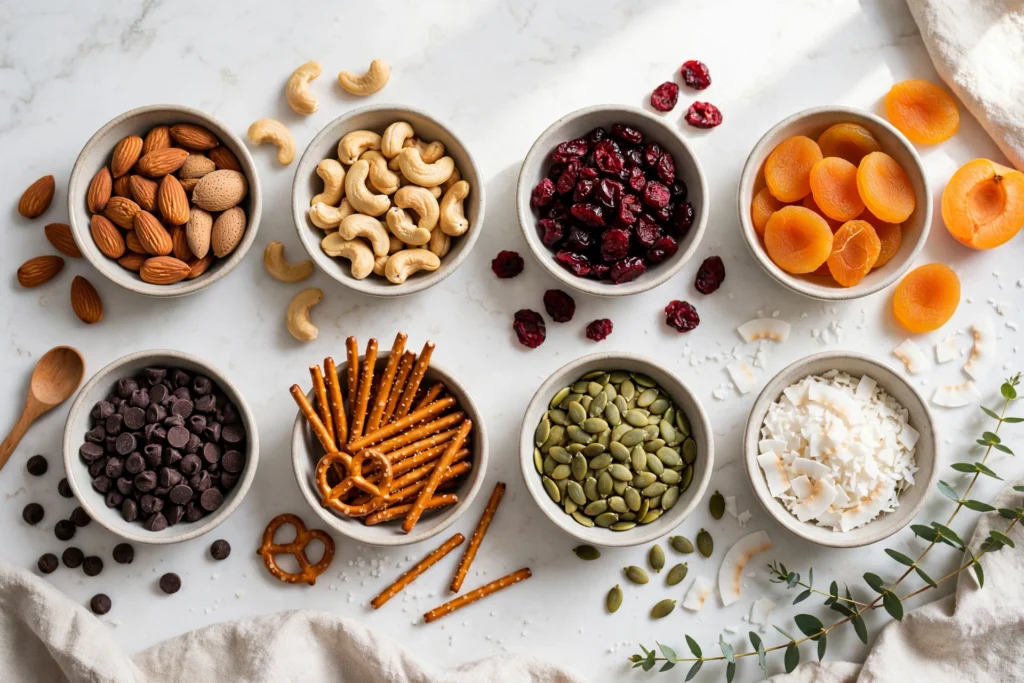
Raw almonds (1½ cups) — The backbone. Roasting them yourself with seasoning beats pre-roasted every time.
Almonds are the workhorse nut: high in protein, vitamin E, and magnesium, with a mild flavor that takes seasoning beautifully. Buy them raw (not roasted, not salted) — you’re going to roast them yourself, and pre-roasted nuts will overcook when you roast them again. Look for uniform size so they roast evenly.
Raw cashews (1 cup) — Creamy, sweet, satisfying. The luxury nut of the mix.
Cashews bring a buttery richness that no other nut quite matches. They’re softer than almonds, which gives the mix textural variety. Like almonds, buy them raw. Cashews burn faster than almonds due to their higher sugar content, so keep an eye on them during roasting — they’re usually the first to go from golden to burnt.
Pumpkin seeds/pepitas (¾ cup) — Nut-free protein and a great crunch. Essential for the seed-based variation.
Don’t skip these even if you have no nut allergies. Pepitas add a distinct crunch and a boost of zinc and iron. They’re also the key to the nut-free version — if you ever need to make this school-safe or for someone with allergies, just scale up the seeds.
Walnuts or pecans (¾ cup) — Rich, buttery depth. Pecans if you’re feeling Southern; walnuts for omega-3s.
Walnuts bring omega-3 fatty acids and a slightly bitter, complex flavor. Pecans are sweeter and more buttery. Either works; pick based on what’s fresh and affordable. Walnuts go rancid faster than other nuts due to their high polyunsaturated fat content — taste one before using. If it tastes bitter or paint-like, the bag is old.
Dried cranberries (1 cup) — Sweet-tart chew. Look for juice-sweetened (less added sugar) if you can find them.
Most dried cranberries are sweetened with a shocking amount of sugar. Juice-sweetened versions (sweetened with apple or grape juice) are better, though still sweet. If you can find unsweetened, they’re intensely tart — delicious in small quantities, overwhelming in large ones. For this mix, juice-sweetened is the sweet spot.
Dried apricots (¾ cup, chopped) — Chewy, sweet, and packed with energy. Chop them so they distribute evenly.
Apricots are potassium powerhouses — great for travelers, since travel (especially flying) can deplete electrolytes. Chop them into raisin-sized pieces; whole dried apricots are too large and create uneven bites. Turkish apricots (the brown, unsulfured kind) have deeper flavor than the bright orange ones, though both work.
Dark chocolate chips (¾ cup) — Morale in chip form. Dark chocolate holds up better in heat than milk chocolate.
This is non-negotiable for travel morale. Dark chocolate (60% cacao or higher) has a higher melting point than milk chocolate, so it survives warm cars and sunny backpacks better. It also has less sugar, which means more sustained energy and less crash. Mini chips distribute more evenly than regular chips.
Mini pretzels (1 cup) — The salty crunch that makes the whole mix addictive. That sweet-salty contrast is everything.
Pretzels are the salty counterpoint that makes the sweet elements pop. Mini twists or sticks both work — sticks are sturdier for travel (less breakage), twists have more surface area for salt. Either way, they’ll soften slightly over time as they absorb ambient moisture, so the mix is crunchiest in the first two weeks.
Must Read : Sourdough Pizza Crust Recipe: Chewy, Blistered and Easy to Make at Home
Coconut flakes (½ cup, unsweetened) — Toasty, chewy, tropical. Large flakes, not shredded.
Large, wide coconut flakes (sometimes labeled “coconut chips”) toast up beautifully and add a distinct chewy-tropical element. Avoid sweetened shredded coconut — it’s too sugary and the fine shred disappears into the mix. Unsweetened flakes let the coconut flavor shine without overwhelming sweetness.
For the seasoning: olive oil (2 tablespoons), maple syrup (1 tablespoon), smoked paprika (1 teaspoon), cinnamon (½ teaspoon), sea salt (1 teaspoon) — This is what makes it taste homemade-in-the-best-way: warm-roasted, lightly sweet, smoky-salty.
This seasoning blend is the difference between “mixed nuts from a bag” and “trail mix.” The olive oil helps the spices adhere and promotes even browning. The maple syrup adds a whisper of sweetness that caramelizes slightly during roasting. Smoked paprika brings gentle smoke without heat. Cinnamon adds warmth. And the salt — don’t skimp — makes everything else pop. It’s a carefully balanced blend; trust the ratios.
Equipment You’ll Need
A large sheet pan, parchment paper, a big mixing bowl, and small bags or jars for portioning. That’s the whole operation.
Use your largest sheet pan — crowding is the enemy of even roasting. If your pan is small, roast in two batches. Parchment paper isn’t just for easy cleanup; it prevents the maple syrup from caramelizing directly onto the pan (which creates a sticky mess and can burn). For portioning, reusable silicone bags are ideal for travel — they’re TSA-friendly, washable, and don’t crush like thin plastic bags.
How to Make Travel Trail Mix (Step by Step)
Step 1 — Season the nuts. Heat oven to 325°F. In your big bowl, toss the almonds, cashews, pumpkin seeds, and walnuts/pecans with the olive oil, maple syrup, smoked paprika, cinnamon, and salt until evenly coated.
Take a full minute to toss thoroughly. Every nut should glisten lightly with oil — dry spots won’t brown evenly, and pooled oil creates soggy patches. Use your hands; they’re the best tool for this. You’ll feel when the coating is even.
Step 2 — Roast. Spread in a single layer on a parchment-lined sheet pan. Roast 12–15 minutes, stirring once halfway, until golden and fragrant. Watch the last few minutes — nuts go from perfect to burnt fast.
Single layer is critical — overlapping nuts steam instead of roast. The stir at the halfway mark ensures even browning; the nuts at the edges brown faster than the ones in the center. Start checking at 10 minutes. You’re looking for golden (not dark brown) and fragrant (you’ll smell the warm spices). They’ll continue to darken slightly as they cool, so pull them when they’re just shy of perfect.
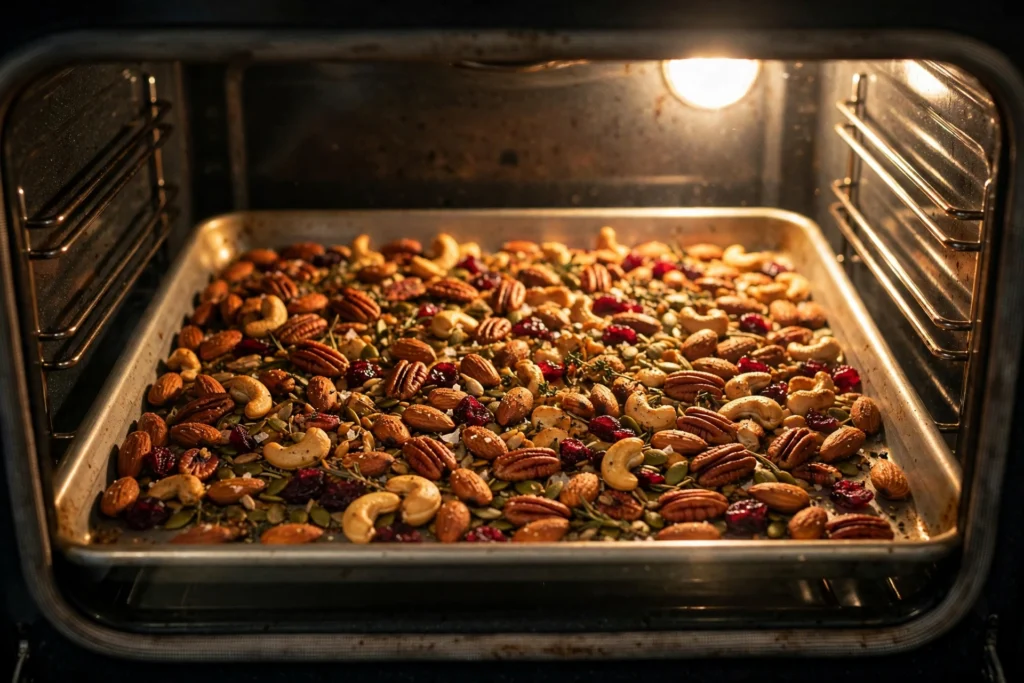
Step 3 — Cool completely. Let the roasted nuts cool on the pan for 20 minutes. They crisp as they cool, and adding the other ingredients while hot would melt the chocolate (tragic).
This is the hardest step because the kitchen smells incredible and you want to dig in. Resist. Hot nuts are soft; cooled nuts are crisp. And melted chocolate distributed throughout the mix (instead of in distinct chips) changes the whole eating experience — and not for the better. Twenty full minutes. Set a timer.
Step 4 — Mix everything. In your big bowl (or right on the cooled sheet pan), combine the roasted nuts with the cranberries, chopped apricots, chocolate chips, pretzels, and coconut flakes. Toss thoroughly — every scoop should have a bit of everything.
Toss for a solid minute. The goal is distribution — you don’t want all the chocolate at the bottom and all the pretzels on top. If you’re making a large batch, mix in two additions to ensure even distribution.

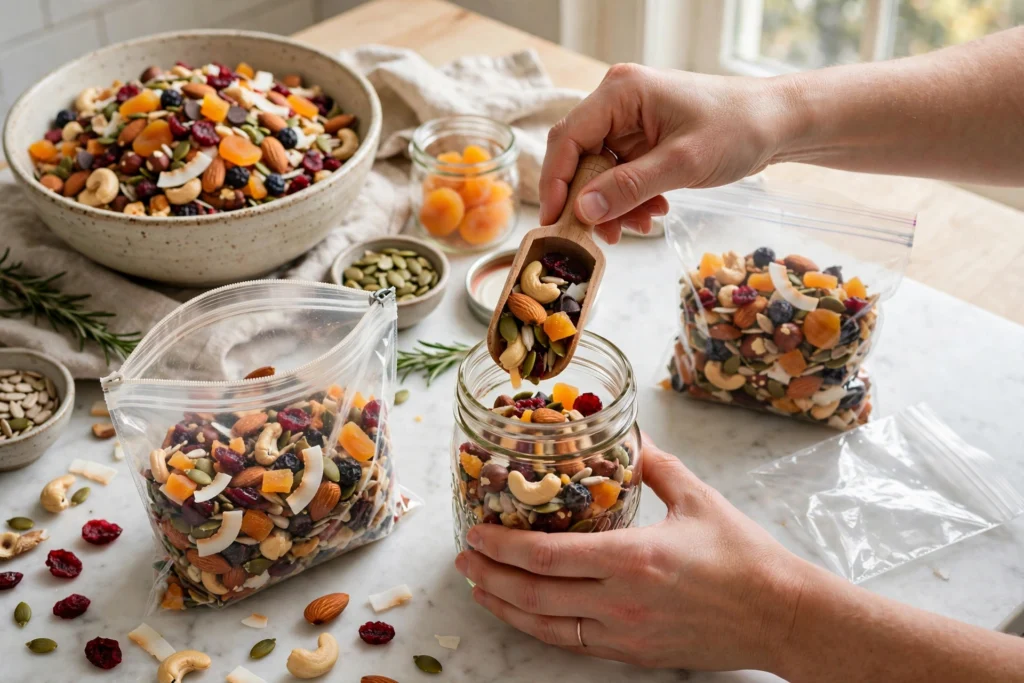
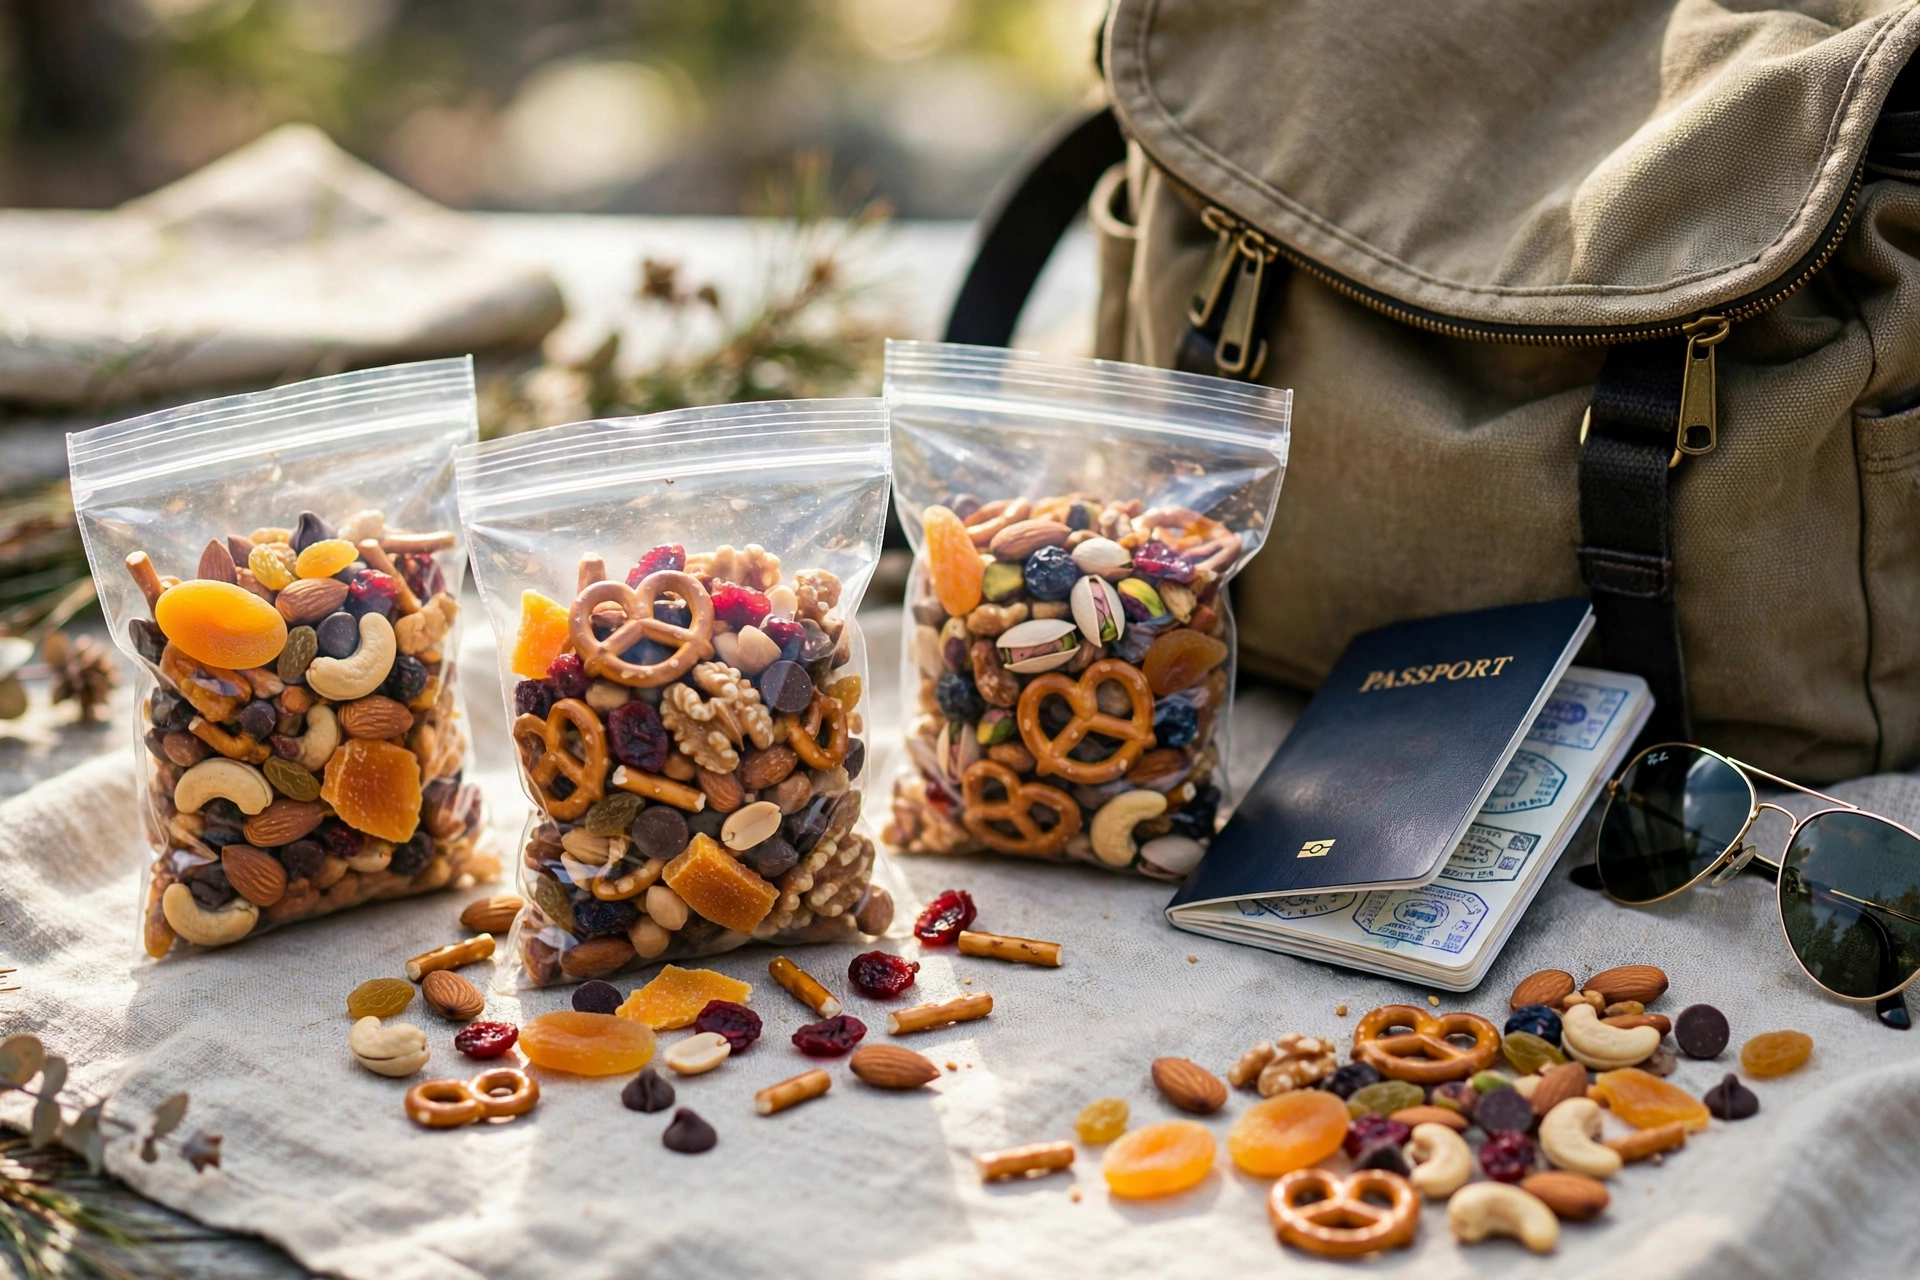
Step 5 — Portion for travel. Divide into individual bags or small jars — about ⅓ cup per portion. Individual portions prevent the “ate the whole batch in the car” phenomenon (mostly) and make airport security and sharing easy.
The ⅓-cup portion is deliberate. Trail mix is calorie-dense (around 220 calories per ⅓ cup) — that’s the point, it’s fuel. But mindless eating from a giant bag turns fuel into a 1,000-calorie accident. Pre-portioning keeps it smart. For kids, use ¼-cup portions.
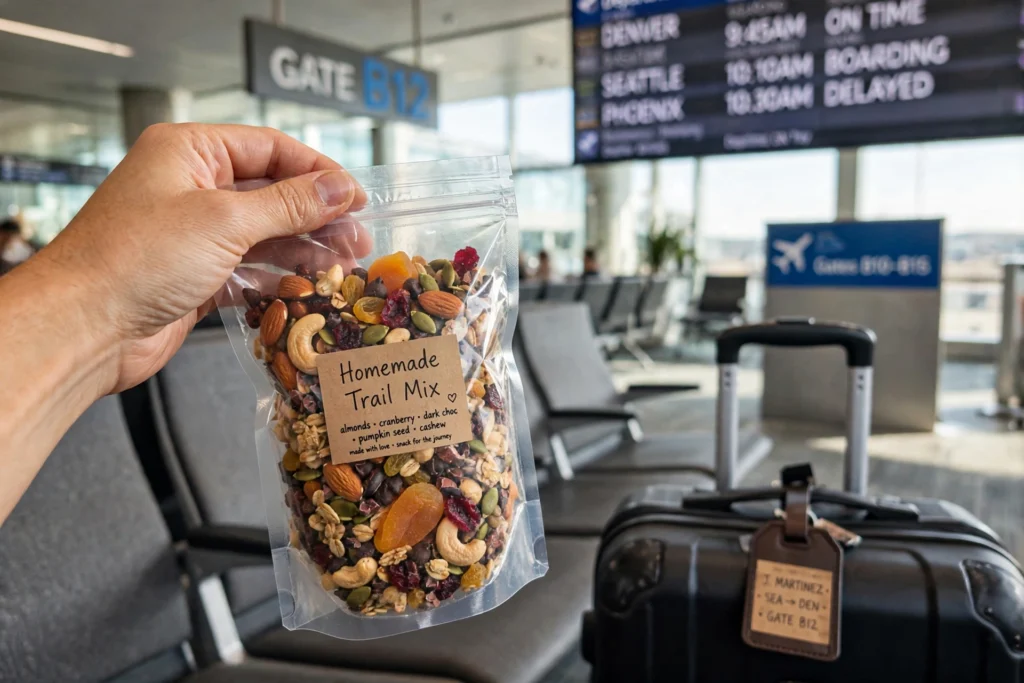
Step 6 — Pack and go. Toss bags in your carry-on, car console, backpack, and desk drawer. You’re now the person with great snacks. People will like you more. (Slight exaggeration. Slight.)
Strategic placement matters. Put a bag in your carry-on (for the airport), one in your personal item (for the flight), one in the car (for the drive to/from the airport), and one in your hotel bag (for the return trip). Future-you will thank present-you at every stage.
My Best Tips for the Best Trail Mix
Roast the nuts yourself. Pre-roasted nuts are fine, but home-roasted with seasoning is transformative — warmer flavor, better crunch, that fresh-roasted aroma. It’s 15 minutes that pays off hugely. Once you’ve had home-roasted, you’ll never go back.
Cool before adding chocolate. I repeat because it matters: hot nuts + chocolate chips = chocolate-coated blob. Patience, friend. This is the most common trail mix mistake and the easiest to avoid.
The ⅓-cup portion rule. Trail mix is calorie-dense (that’s the point — it’s fuel). Pre-portioning keeps it as smart fuel instead of mindless munching. Use a measuring cup, not your eyeball — eyeballs lie.
Chop large pieces. Apricots, big pretzels, large coconut flakes — chop to roughly uniform size so every handful is balanced. The perfect bite has a little of everything. Uniform size also means even distribution when you toss.
Salt matters. Don’t under-salt the nut roast. Salt is what makes the sweet elements pop and keeps you reaching back in. Flaky sea salt on top after roasting is a pro move — the flaky crystals give little bursts of saltiness.
Airtight is everything. Exposure to air makes nuts go stale fast. Seal bags tightly, squeeze out air, and store in a cool, dark place. Oxygen is the enemy of freshness — every bit of air you squeeze out extends the life.
Taste your nuts before roasting. Rancid nuts will ruin the entire batch, and you can’t fix it after roasting. Taste an almond, a cashew, a walnut. They should taste clean and nutty. If any taste bitter, paint-like, or “off,” don’t use them.
Don’t skip the parchment. The maple syrup in the seasoning will caramelize onto a bare pan and create a sticky, hard-to-clean mess. Parchment makes cleanup trivial and prevents burning.
Delicious Variations to Try
Kid-friendly: More chocolate chips and pretzels, add mini marshmallows and banana chips, skip the smoked paprika (use just cinnamon). Kids love the sweet-salty combo; the marshmallows make it feel like a treat rather than “healthy food.”
Nut-free (school-safe): Replace all nuts with extra pumpkin seeds, sunflower seeds, roasted chickpeas, and pretzels. Still crunchy, still delicious. Season the seeds exactly the same way — the spice blend works beautifully on seeds.
Tropical: Macadamia nuts, dried mango, dried pineapple, coconut flakes, white chocolate chips. Vacation in a bag. The macadamias are rich enough that you can reduce the oil slightly.
Spicy-savory: Double the smoked paprika, add ½ teaspoon of cayenne and 1 teaspoon of cumin to the nut roast. Skip the chocolate (or don’t — sweet heat is great). This version is dangerously addictive.
Protein-packed: Add roasted edamame snacks and hemp hearts. For hikers and gym bags. The edamame adds serious protein without much volume.
Holiday: Add candy-coated chocolates, dried cherries, and a pinch of nutmeg. Gift-worthy in a mason jar. Tie with a ribbon and you’ve got a homemade gift people actually want.
Omega-3 boost: Add flax seeds and chia seeds to the mix after roasting (they don’t need roasting). Extra nutrition without changing the flavor profile.
Antioxidant mix: Add dried blueberries, goji berries, and cacao nibs instead of chocolate chips. Slightly more virtuous, still delicious.
Trail Mix for Different Trips: A Packing Guide
Road trips: Pack a large jar or container with a scoop for the car, plus individual bags for each person. The car is more forgiving on packaging — no TSA rules, no crushing concerns. Keep chocolate-containing mix out of direct sunlight (dashboard = melted chocolate).
Flights: Individual ⅓-cup bags only. They’re TSA-compliant (solid food, no restrictions), easy to pull out at security if asked, and don’t take up much space. Pack 2–3 bags per person for a full travel day. Put one in your personal item for easy access during the flight.
Hiking/day trips: Resealable bags in your backpack’s hip belt pocket or top lid for easy access. The protein-packed variation is ideal here. Bring more than you think you need — hiking hunger is real.
International travel: Check your destination’s food import rules. Many countries restrict nuts and seeds. When in doubt, eat it on the plane and don’t bring leftovers through customs. The TSA doesn’t care, but foreign customs might.
Kids’ travel: The kid-friendly variation in small, spill-proof containers (not bags — bags spill). Include a few extra bags for the inevitable “I’m still hungry” 20 minutes later.
Storing & Packing
Room temperature: 3–4 weeks in airtight containers or sealed bags. Cool, dark place. The nuts are the limiting factor — they’re high in oils that go rancid with heat, light, and air exposure.
Refrigerator: 2 months (though the chocolate can bloom — still fine to eat). Bloom is the whitish coating that forms on chocolate when temperature fluctuates. It’s a cosmetic issue, not a safety issue — the chocolate is perfectly fine.
Freezer: 6 months. Thaw at room temperature; the crunch comes right back. Freezing is excellent for long-term storage — the cold dramatically slows the rancidity process.
Travel packing: Individual ⅓-cup bags are TSA-friendly (solid food, no restrictions). For road trips, a big jar with a scoop works. Keep chocolate-containing mixes out of direct sun/heat. In hot climates, consider the chocolate-free variations.
Signs it’s gone stale: Nuts taste soft instead of crisp, flavors seem flat, or there’s an off/paint-like taste (rancidity). Stale mix isn’t dangerous, just disappointing. When in doubt, make a fresh batch — it’s only 15 minutes of active work.
Also Read: Crispy Potato Skins Recipe (Better Than the Restaurant)
Making Trail Mix with Kids: A Fun Kitchen Project
This is an excellent recipe to make with children — it’s safe (no sharp knives required for the basic version), tactile, and the results are immediately rewarding. Here’s how to involve kids of different ages:
Toddlers (2–3): Let them pour pre-measured ingredients into the bowl and do the mixing with their hands. They’ll love the sensory experience. Keep them away from the hot oven, obviously — an adult handles all roasting.
Preschoolers (4–5): They can measure ingredients with help, toss the nut mixture, and portion the finished mix into bags. This is great for practicing counting (“let’s count 10 chocolate chips per bag”).
School-age (6+): They can do almost everything except the oven work. Let them design their own variation — pick the dried fruits, choose the mix-ins. Ownership makes them more likely to actually eat it on the trip.
The educational angle is real too: talk about why protein sustains energy, why portioning matters, and how planning ahead beats impulse buying. It’s nutrition education disguised as fun.
Nutrition Snapshot: What’s Actually In There
Per ⅓-cup serving (approximately): 220 calories, 6g protein, 16g fat (mostly healthy unsaturated fats), 14g carbohydrates, 3g fiber, 8g sugar (mostly from dried fruit and chocolate).
That’s a solid snack profile — the protein and fat provide sustained energy, the fiber aids satiety, and the sugar is moderate enough to avoid a spike-and-crash cycle. Compare to a typical airport candy bar: similar calories, but almost no protein, no fiber, and triple the sugar.
The micronutrients are impressive too: vitamin E from almonds, magnesium from cashews and pumpkin seeds, iron from pumpkin seeds, potassium from apricots, and antioxidants from dark chocolate and cranberries. This isn’t just empty calories — it’s genuinely nutritious fuel.
That said, portion awareness matters. It’s easy to eat 3–4 servings without noticing, which turns a 220-calorie snack into an 800-calorie event. The pre-portioned bags aren’t just convenient — they’re the portion control strategy.
What to Pair with Trail Mix
It’s a standalone snack, but it shines alongside: fresh fruit (apples, bananas — nature’s travel food), cheese sticks or Babybel for protein, and plenty of water (salty snacks demand hydration). For long flights: pair with a sandwich from home and you’ve beaten the airport food game entirely.
Hydration deserves emphasis. The salt in trail mix makes you thirsty, and travel (especially flying) is dehydrating. Bring a refillable water bottle and drink consistently. The combination of trail mix + water is genuinely better travel fuel than 90% of what’s sold in airports.
The Science of Travel Nutrition
Why does trail mix work so well for travel? It’s not accidental — it’s nutritional science.
Blood sugar stability: The combination of protein (nuts, seeds), healthy fats (nuts, coconut), and fiber (dried fruit, nuts) slows digestion and creates a gradual, sustained release of energy. Compare this to a candy bar: pure sugar hits your bloodstream in 15 minutes, spikes insulin, and crashes 45 minutes later. Trail mix gives you 2–3 hours of steady energy from a single serving.
Satiety signals: Protein and fat trigger the release of satiety hormones (CCK and PYY) that tell your brain you’re full. Fiber adds bulk that physically fills your stomach. This triple-action satiety is why a small handful of trail mix satisfies more than a large bag of chips — it’s working with your biology, not against it.
Micronutrients for travelers: Travel depletes specific nutrients. Flying causes mild dehydration and electrolyte loss (potassium from apricots helps). Stress increases magnesium needs (cashews and almonds deliver). Irregular sleep disrupts immune function (vitamin E from almonds and zinc from pumpkin seeds support immunity). Trail mix isn’t just calories — it’s targeted nutritional support for the specific stresses of travel.
The psychology of snacking: Having good snacks available reduces the mental load of travel. Decision fatigue is real — every “where should we eat?” decision depletes willpower. Pre-packed trail mix eliminates dozens of micro-decisions, leaving your mental energy for the actual trip. It’s not just fuel for your body; it’s fuel for your decision-making.
Packing Like a Pro: Containers and Organization
Best containers for different trips: For flights, individual silicone bags (Stasher bags or similar) are ideal — TSA-compliant, reusable, crush-proof, and easy to open with one hand in a cramped seat. For road trips, a large mason jar with a scoop lets everyone serve themselves. For hiking, a bag with a carabiner clipped to your pack’s hip belt keeps snacks accessible without stopping.
The portioning system: Don’t just eyeball it. Use a ⅓-cup measure to portion into bags. Label each bag with the date made. For a family of four on a week-long trip, you’ll need about 28 portions (4 people × 7 days) — that’s roughly two full batches of this recipe. Make them all at once; the assembly line is efficient.
Keeping it fresh on long trips: For trips longer than a week, pack the bulk mix in a large airtight container and portion into daily bags as you go. This minimizes air exposure (which causes staleness) compared to pre-portioning everything on day one. Keep the bulk container in a cool, dark place — hotel room, not hot car.
What not to do: Don’t pack trail mix in thin, cheap sandwich bags for flights — they crush, tear, and spill. Don’t pack chocolate-containing mix in checked luggage on hot days (cargo holds can get warm). Don’t bring nut-containing mix to nut-free environments (schools, some workplaces) — make the seed-based variation instead.

Trail Mix Around the World: Global Inspirations
Every culture has a travel snack. Understanding the global family gives you ideas for variations.
Japanese onigiri: Rice balls with fillings, wrapped in nori. The ultimate portable meal — carbs, protein, and salt in a neat package. Not a trail mix, but the same principle: portable, non-perishable, satisfying.
Indian chivda/bombay mix: Puffed rice, peanuts, fried lentils, curry leaves, and spices. The savory-spicy crunch is addictive. Try adding curry powder and fried curry leaves to your trail mix for an Indian-inspired variation.
Middle Eastern dukkah and nuts: Spiced nut and seed blends (hazelnuts, sesame, coriander, cumin). Eaten with bread and olive oil, but the spiced nut concept translates directly to trail mix. Try a dukkah-spiced nut roast.
Scandinavian trail mix: Often features dried berries (lingonberry, blueberry), hazelnuts, and dark chocolate. The berry-forward profile is less sweet than American trail mix and incredibly good.
Takeaway: The universal principle is portable energy + flavor. Every culture solved it differently based on local ingredients. Your trail mix is part of this worldwide tradition — feel free to borrow ideas from any of them.
Budget Breakdown and Bulk Buying Guide
Cost per batch: This recipe makes about 16 servings (⅓ cup each). Here’s the approximate cost breakdown buying from a regular grocery store: almonds ($4), cashews ($3.50), pumpkin seeds ($2), walnuts ($2.50), cranberries ($2), apricots ($2.50), chocolate chips ($2), pretzels ($1.50), coconut ($1.50), seasonings ($0.50). Total: ~$22 for 16 servings = $1.38 per serving. Compare to $5–8 for an airport snack of similar size.
Bulk buying saves significantly: At warehouse stores (Costco, Sam’s) or bulk bins (Whole Foods, co-ops), the same ingredients cost 30–40% less. Nuts are the biggest expense — buying the 3-pound bags instead of small bags cuts the per-serving cost to under $1. If you travel frequently, bulk buying is a no-brainer.
What’s worth splurging on: Good chocolate (the cheap stuff tastes waxy), fresh nuts (taste before buying — rancid nuts ruin everything), and real maple syrup (the fake stuff is just corn syrup). What’s NOT worth splurging on: fancy dried fruit (store brand is fine), exotic nuts you don’t love (stick to what you’ll actually eat).
The freezer stockpile: When nuts go on sale, buy extra and freeze them (they keep 6+ months frozen). You’ll always have the base ingredients ready. Dried fruit doesn’t need freezing — it keeps for months at room temperature.
Read also : Perfect Pan-Seared Scallops Recipe (Golden Crust Every Time)
Trail Mix for Special Dietary Needs
Diabetic-friendly: Reduce dried fruit by half and increase nuts and seeds. The lower sugar content prevents blood sugar spikes. Add extra cinnamon — some studies suggest it helps with glucose metabolism. Portion carefully (the ⅓-cup rule is even more important here). Dark chocolate (85%+) has minimal sugar impact.
High-protein (athletes, hikers): Double the pumpkin seeds, add roasted edamame and hemp hearts. Each ⅓-cup serving jumps from 6g to 10g+ protein. The extra protein supports muscle recovery during active travel days.
Low-sodium: Use unsalted nuts and seeds, skip the added salt in the seasoning (keep the spices). The mix will taste less addictive (salt is a big part of the craveability) but still good. Add extra smoked paprika to compensate for the flavor loss.
Paleo: Skip the pretzels and chocolate chips (or use paleo-compliant dark chocolate). Increase nuts, seeds, coconut, and dried fruit. The seasoning blend is already paleo-friendly. It’s a natural fit.
Gifting Trail Mix: Homemade Presents People Love
Trail mix makes an excellent gift — it’s personal, delicious, and looks beautiful in a jar.
Packaging: Layer the ingredients in a clear mason jar for a gorgeous striped effect (nuts on bottom, dried fruit in middle, chocolate on top). Tie with twine and add a handwritten tag with the recipe. It looks like a $20 artisan gift and costs $5 to make.
Occasions: Hostess gifts, holiday presents, thank-you gifts, new neighbor welcome, teacher appreciation. It’s universally appropriate — who doesn’t like good snacks?
Customization: Tailor the mix to the recipient. Chocolate lover? Extra chocolate chips. Health nut? Extra seeds and dried berries. Kid? More pretzels and mini marshmallows. The personal touch is what makes it special.
Frequently Asked Questions About Travel Snacks
Can I bring trail mix through TSA? Yes — solid foods including trail mix are allowed in both carry-on and checked bags. There are no quantity limits for solid snacks. Just be prepared to remove it from your bag if asked during screening (rare, but possible).
How long does homemade trail mix actually last? 3–4 weeks at room temperature in airtight containers. The nuts are the limiting factor — their oils go rancid with heat, light, and air exposure. In practice, it never lasts that long because you’ll eat it.
Why do my nuts always burn? You’re either roasting too hot or not stirring. 325°F is the sweet spot — hot enough to brown, cool enough for control. And stir at the halfway mark without exception. Every oven has hot spots; stirring compensates.
Can I make this without an oven? Yes — toast the seasoned nuts in a large dry skillet over medium heat, stirring constantly, for 8–10 minutes. It requires more attention than oven-roasting but works well. The stovetop method actually gives you more control over browning.
Quick Reference Card
Base formula: 3 cups nuts + 1 cup seeds + 2 cups dried fruit + ¾ cup chocolate + 1 cup pretzels + ½ cup coconut. Seasoning: 2 tbsp oil, 1 tbsp maple syrup, 1 tsp smoked paprika, ½ tsp cinnamon, 1 tsp salt. Roast: 325°F, 12–15 min, stir halfway. Cool: 20 min before adding chocolate. Portion: ⅓ cup per bag. Store: 3–4 weeks airtight. Tape this to your fridge — after two batches, you won’t need the full recipe.
Trail Mix and Hydration: The Perfect Pair
Don’t forget water. The salt in trail mix increases thirst, and travel (especially air travel) is dehydrating. A good rule: drink 8 ounces of water for every ⅓-cup serving of trail mix. Bring a refillable bottle and fill it after security. The combination of salty-sweet trail mix and cold water is genuinely satisfying — it’s the travel fuel formula that works. Dehydration causes fatigue and headaches that people blame on travel, but it’s often just lack of water.
Final Thoughts
Ultimate Travel Trail Mix
Ingredients
Equipment
Method
- Heat oven to 325F. In a big mixing bowl, toss the almonds, cashews, pumpkin seeds and walnuts (or pecans) with the olive oil, maple syrup, smoked paprika, cinnamon and sea salt until evenly coated.
- Spread the nut mixture in a single layer on a parchment-lined large sheet pan. Roast for 12-15 minutes, stirring once halfway, until golden and fragrant.
- Remove from the oven and cool completely on the pan, about 20 minutes. The nuts will crisp up as they cool.
- Transfer the cooled nuts to the big mixing bowl. Add the dried cranberries, chopped dried apricots, dark chocolate chips, mini pretzels and coconut flakes. Toss well to combine.
- Portion the trail mix into snack bags or jars, about 1/3 cup per serving. Seal tightly.
- Pack and travel! Keep a bag in your hand luggage, car or day pack for road trips, flights and hiking.
How long does homemade trail mix last?
Stored in an airtight container at room temperature, homemade trail mix keeps for 3–4 weeks. The nuts’ natural oils are the limiting factor – once they start tasting stale or paint-like, the batch is past its best. In the fridge it lasts around 2 months, and in the freezer up to 6 months; thaw at room temperature and the crunch comes straight back.
Can I bring trail mix through airport security?
Yes. Trail mix is solid food, so it is allowed in both hand luggage and checked bags with no quantity limits. For the smoothest trip through security, pack it in individual 1/3-cup bags that are easy to pull out of your carry-on if asked.
Is trail mix healthy?
In sensible portions, yes. Nuts and seeds provide protein, fibre and mostly healthy unsaturated fats, plus vitamin E and magnesium. The catch is energy density – around 220 calories per 1/3 cup – so pre-portioning into individual bags is the key to keeping it a smart snack rather than a calorie trap.
How do I make this trail mix nut-free?
Replace all the nuts with pumpkin seeds, sunflower seeds, roasted chickpeas and extra pretzels, keeping the same olive oil, maple syrup and spice seasoning. The result is crunchy, flavourful and school-safe.
Can I reduce the sugar in this recipe?
Yes. Halve the dried fruit and increase the nuts and seeds, choose juice-sweetened cranberries, use dark chocolate of 70% cacao or higher, and cut the maple syrup back to 1 teaspoon. The smoked paprika and cinnamon keep the flavour interesting without the extra sweetness.
Why roast the nuts myself instead of using pre-roasted nuts?
Home-roasting bakes the olive oil, maple syrup and spice coating right onto the nuts, giving a warmer, deeper flavour than anything from a bag. It takes just 12–15 minutes at 325°F and is the single biggest flavour upgrade you can make to this recipe.
Can I make a big batch of trail mix for gifts?
Absolutely – the recipe doubles and triples well. Roast the nuts in single-layer batches so they brown evenly rather than steam, then layer the finished mix in mason jars for a gorgeous striped effect. Sealed, it keeps for 3–4 weeks at room temperature.
What is the best container for travelling with trail mix?
For flights, individual 1/3-cup reusable silicone bags are ideal – TSA-compliant, crush-proof and easy to pull out at security. For road trips, keep a big jar with a scoop in the car plus individual bags per person. Avoid thin sandwich bags, which tear and spill.
Can I add fresh fruit to trail mix?
Better not. Fresh fruit’s moisture softens the nuts and the shelf life drops to a day or two. Pack fresh fruit alongside the mix instead – apples and bananas are nature’s travel food and pair perfectly with it.
How much trail mix should I pack per person per day?
Plan on 1/3 to 2/3 cup per person per day – that is 1 to 2 pre-portioned bags. It is calorie-dense by design, so this is plenty to bridge the gap between meals without spoiling anyone’s appetite.
Can I take trail mix on international flights?
It is fine to eat on the plane, but many countries restrict importing nuts, seeds and dried fruit. Finish your bags before landing or declare them at customs, and check your destination’s food import rules before you fly.
Why did my chocolate melt into everything?
The nuts were not fully cooled before you added the chocolate – they need the full 20 minutes on the pan. Also keep bags out of direct sun and hot cars, and choose dark chocolate (60% cacao or higher), which holds up better in heat than milk chocolate.

Hi, I’m Angela. I cook the way busy people actually cook — simple, tasty food with ingredients you already have. On CookBookBite I share easy recipes, honest kitchen tips, and dishes my family asks for again and again.